Windows 10 IoT Core Dashboard
Windows 10 IoT Core Dashboard is the best way to download, set up and connect your Windows 10 IoT Core devices, all from your PC.
Important
Windows 10 IoT Core Dashboard has been retired and is no longer available for download.
Note
If you're finding that you're getting a white screen when opening the IoT Dashboard after downloading, it may be due to a driver issue. To overcome this issue, you'll need to download the zip format of the Intel Graphics Driver and install the driver manually.
Set up a new device
Note
Dashboard cannot be used used to setup the Raspberry Pi 3B+. If you have a 3B+ device, you must use the 3B+ technical preview. Please view the known limitations of the technical preview to determine if this is suitable for your development.
Note
There is currently a known issue where the OS goes through the partitions on the SD card and prompts a 'Format ..' message for a specific data partition that does not contain any file system. Please dismiss this prompt by pressing cancel. While we work on a solution, we recommend that if you click on 'Format now,' you reflash the SD card with the FFU image again as the format action impacts the update process and the device will fail to update.
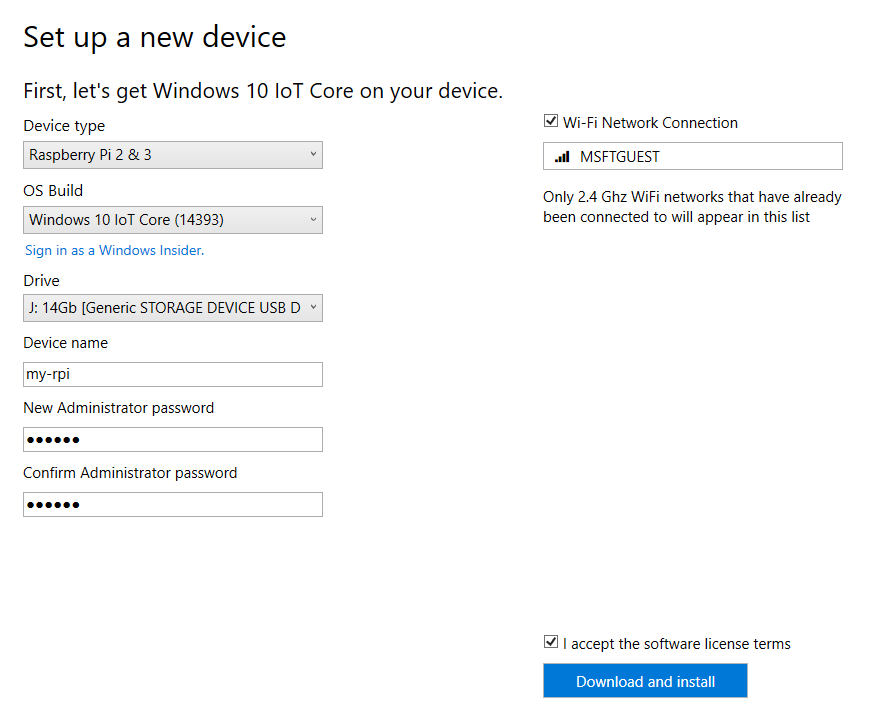
The IoT Dashboard makes it easy to set up a new device. For detailed instructions on how to get started, see the Get Started page.

SD card
The type, make, and model of the SD card greatly affects both the performance and the quality of IoT Core. A slow card can take up to five times longer to boot than our recommended cards. An older, less reliable SD card may not even work. If you continue to run into problems installing, consider replacing the SD card.
Device Name
The default device name is minwinpc. We recommend changing it to something unique as this makes it easier to find the device on the network. The device name can be at most 15 characters long and can include letters, numbers, and the following symbols: @ # $ % ^ & ' ) ( . - _ { } ~ If you change the device name in IoT Dashboard when setting up your device, an automatic reboot will happen the first time when you power on the device.
Password
Password is a mandatory field and must be set. Setting a password in IoT Dashboard modifies the password for Administrator user, which by default is "p@ssw0rd".
Wi-Fi Network connection
IoT Dashboard shows all available networks that your PC has previously connected to. If you don't see the desired Wi-Fi network on the list, ensure you're connected to it on your PC. If you uncheck the box, you must connect an Ethernet cable to your board after flashing.
First boot
The first boot will always take longer than all subsequent boots. The operating system will take some time to install and connect to your network. Boot time can vary greatly based on your SD card. For example, a Raspberry Pi 3 running on our recommended SD card takes 3-4 minutes for first boot. On the same Pi with a poor quality SD card, we have seen boot times longer than 15 minutes.
Connecting to the internet
Having your IoT Core device connect to the internet is essential. Many of the newer boards come with built-in Wi-Fi adapters. If you have trouble getting connected to your network, try the following:
- Rebooting the device
- Plugging in an Ethernet cable
- Plugging in a monitor to the device. This will show you diagnostic information about your device
Note
The official Raspberry Pi 2 Wi-Fi adapter can be unstable when connecting to Wi-Fi.
My Devices
After your device is connected to the internet, the IoT Dashboard will automatically detect your device. To find your device, go to My Devices. If your device is not listed, try rebooting the device. Make sure that if there are more than one device on the network, they each have a unique name. Also make sure that your windows10iotcoredashboard.exe is allowed to communicate through Windows Firewall by following the steps below:
- Open Network and Sharing Center and then find the type of network (Domain/Private/Public) your PC is connected to.
- Open Control Panel and click System and Security.
- Click Allow an app through Windows Firewall under Windows Firewall.
- Click Change settings.
- Find windows10iotcoredashboard.exe in Allowed apps and features and then enable the appropriate network check box (i.e. the network type you found in step 1).
Connect to your device
Note
If you are unable to find your device in the dashboard, try typing your [IP Address] and [:8080] into the browser to get Windows Device Portal up and running. To get your device to show in the dashboard, try rebooting your device.
Right-click and select Open in Device Portal. This will launch the Windows Device Portal page and is the best way to interact and manage your device.

You can also connect to the device using Windows PowerShell.
Connect to Azure
IoT Dashboard lets you provision IoT Core devices with Azure IoT Hub. You can read more about it in this blog post.
Learn how to use the IoT Dashboard with Azure
Quick Run Samples
Quick run samples do not require any code compilation, Visual studio installation, or SDK download. They are great for quickly checking out what IoT Core can do.
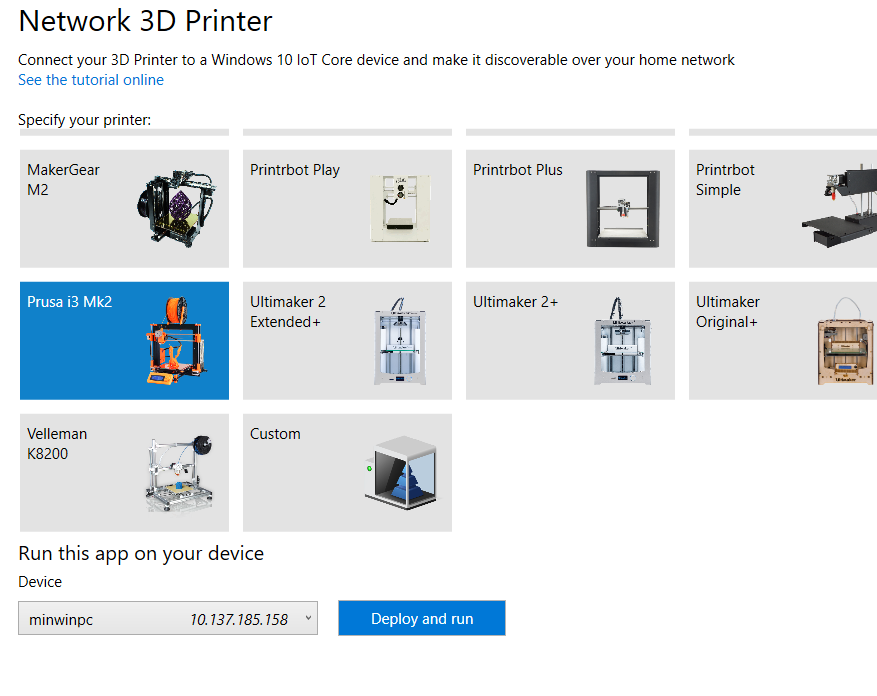
Network 3D Printer
Use the Network 3D Printer sample to connect your 3D Printer to your board can make it discoverable over your home network.

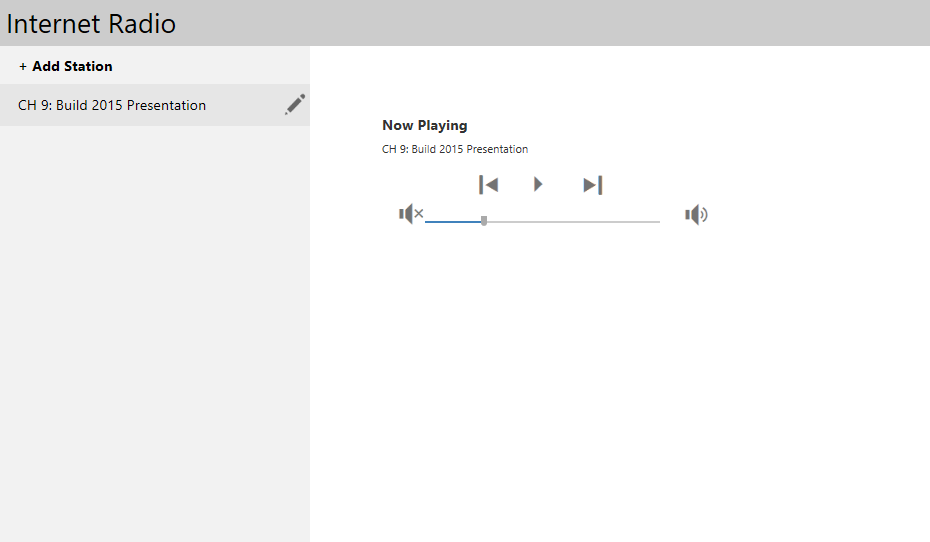
Internet radio
Turn your Windows 10 IoT Core device into an internet radio that can be controlled from anywhere in your home.

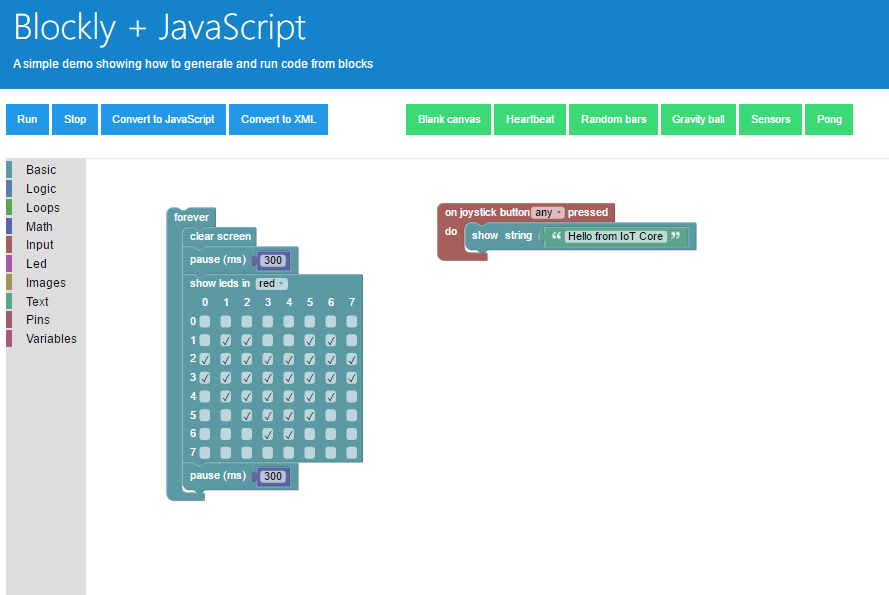
IoT Core Blockly
IoT Core Blockly sample lets your program a Raspberry Pi2 or 3 and a Raspberry Pi Sense hat using a "block" editor from your browser.
