Quickstart: Enable Azure Automanage for virtual machines in the Azure portal
Caution
On 31 August 2024, both Automation Update Management and the Log Analytics agent it uses will be retired. Migrate to Azure Update Manager before that. Refer to guidance on migrating to Azure Update Manager here. Migrate Now.
Get started with Azure Automanage for virtual machines by using the Azure portal to enable automanagement on a new or existing virtual machine.
Prerequisites
If you don't have an Azure subscription, create an account before you begin.
Note
Free trial accounts do not have access to the virtual machines used in this tutorial. Please upgrade to a Pay-As-You-Go subscription.
Important
You need to have the Contributor role on the resource group containing your VMs to enable Automanage. If you are enabling Automanage for the first time on a subscription, you need the following permissions: Owner role or Contributor along with User Access Administrator roles on your subscription.
Sign in to Azure
Sign in to the Azure portal
Enable Automanage on existing machines
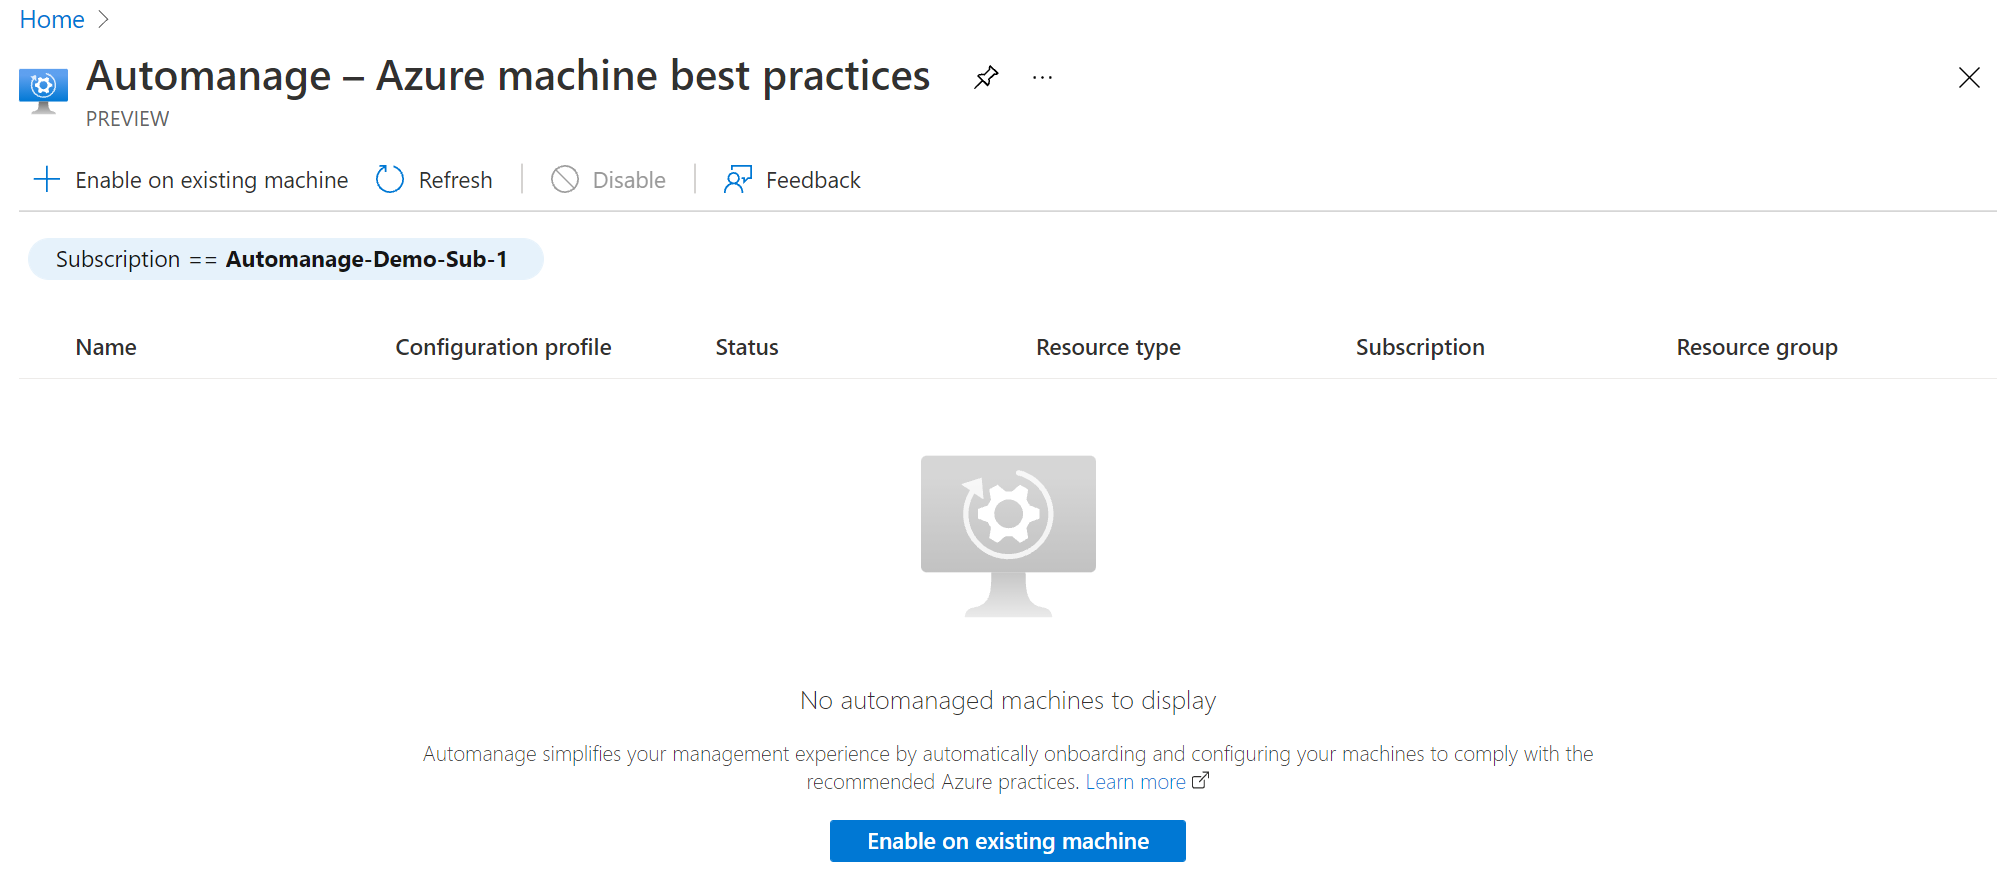
In the search bar, search for and select Automanage – Azure machine best practices.
Select the Enable on existing VM.
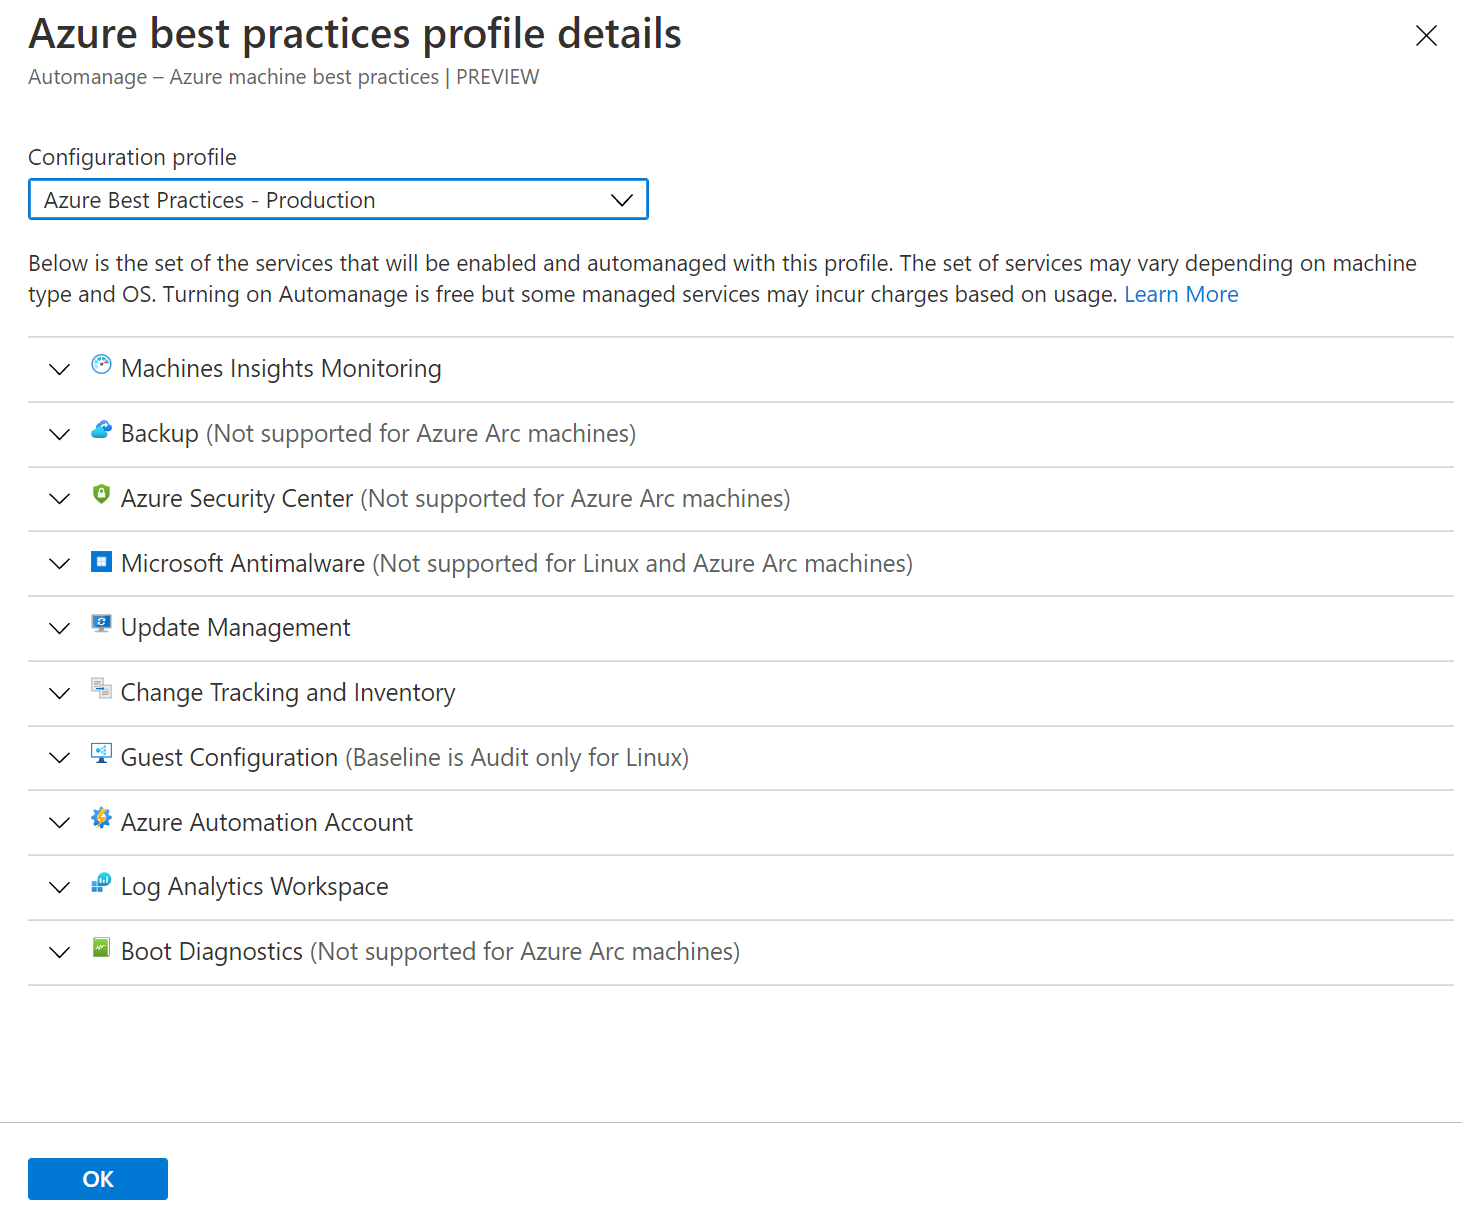
Under Configuration profile, select your profile type: Azure Best Practices - Production or Azure Best Practices - Dev/Test or Custom profile

Click View best practice profiles to see the differences between the environments.
- Select an environment on the dropdown: Dev/Test for testing, Production for production.
- Click the OK button.
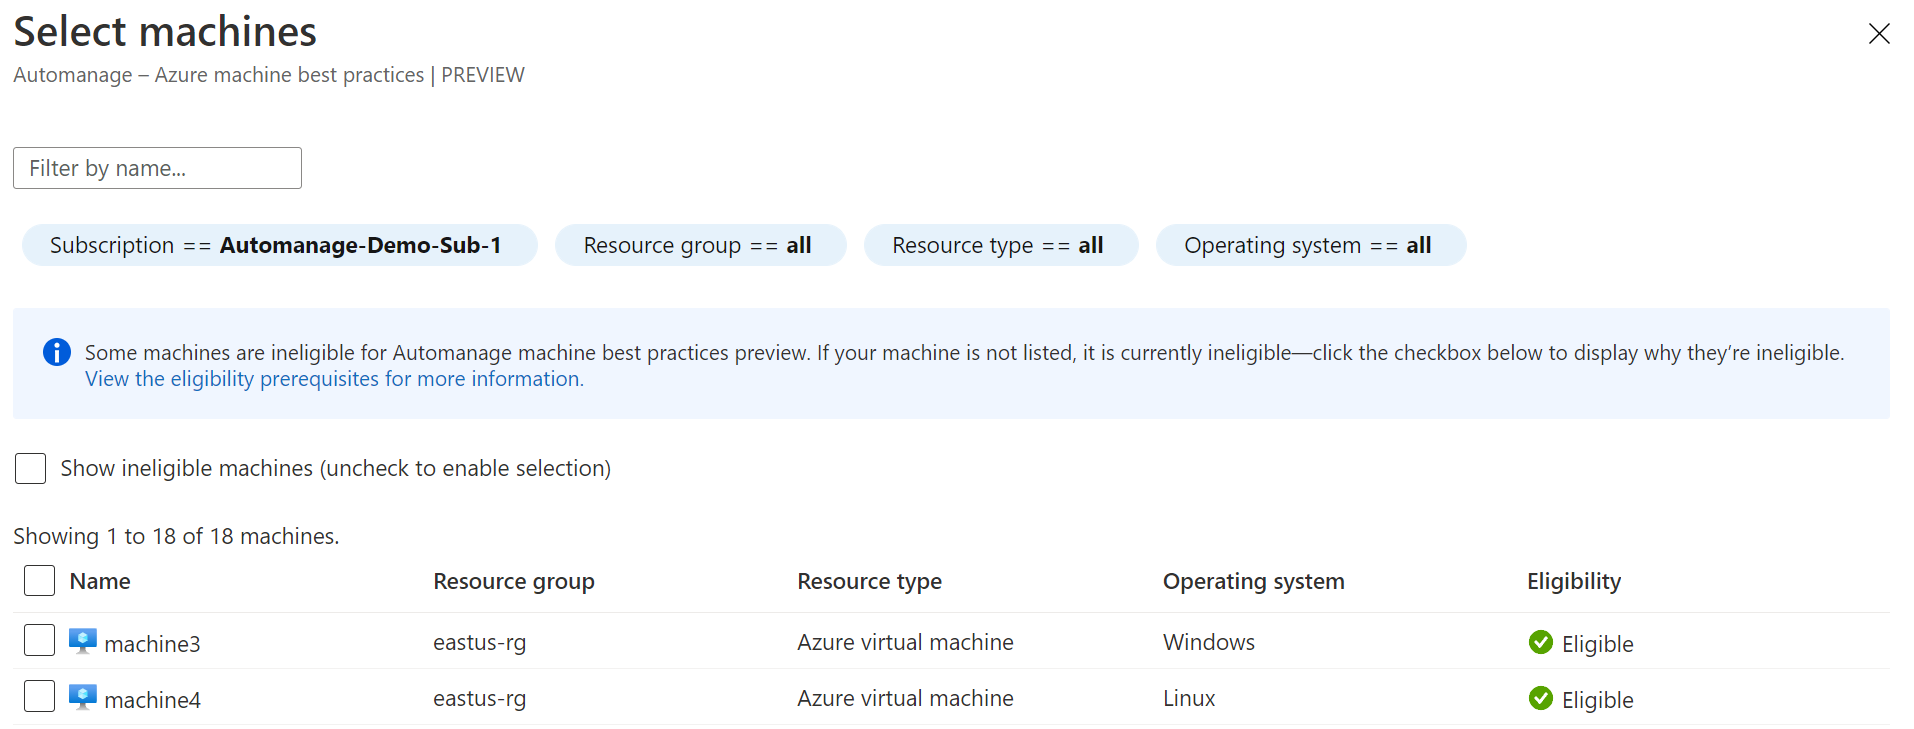
On the Select machines blade:
- Filter the list by your Subscription and Resource group.
- Check the checkbox of each virtual machine you want to onboard.
- Click the Select button.
Note
You may select both Azure VMs and Azure Arc-enabled servers.
Click the Enable button.
Disable Automanage for VMs
Quickly stop using Azure Automanage for virtual machines by disabling automanagement.

- Go to the Automanage – Azure virtual machine best practices page that lists all of your auto-managed VMs.
- Select the checkbox next to the virtual machine you want to disable.
- Click on the Disable automanagent button.
- Read carefully through the messaging in the resulting pop-up before agreeing to Disable.
Clean up resources
If you created a new resource group to try Azure Automanage for virtual machines and no longer need it, you can delete the resource group. Deleting the group also deletes the VM and all of the resources in the resource group.
Azure Automanage creates default resource groups to store resources in. Check resource groups that have the naming convention "DefaultResourceGroupRegionName" and "AzureBackupRGRegionName" to clean up all resources.
- Select the Resource group.
- On the page for the resource group, select Delete.
- When prompted, confirm the name of the resource group and then select Delete.
Next steps
In this quickstart, you enabled Azure Automanage for VMs.
Discover how you can create and apply customize profiles when enabling Automanage on your virtual machine.