Recover Azure App Configuration stores
This article covers the soft delete feature of Azure App Configuration stores. You'll learn about how to set retention policy, enable purge protection, recover and purge a soft-deleted store.
To learn more about the concept of soft delete feature, see Soft-Delete in Azure App Configuration.
Prerequisites
An Azure subscription - create one for free
Refer to the Soft-Delete in Azure App Configuration section for permissions requirements.
Set retention policy and enable purge protection at store creation
To create a new App Configuration store in the Azure portal, follow these steps:
Sign in to the Azure portal. In the upper-left corner of the home page, select Create a resource. In the Search the Marketplace box, type App Configuration and press Enter.
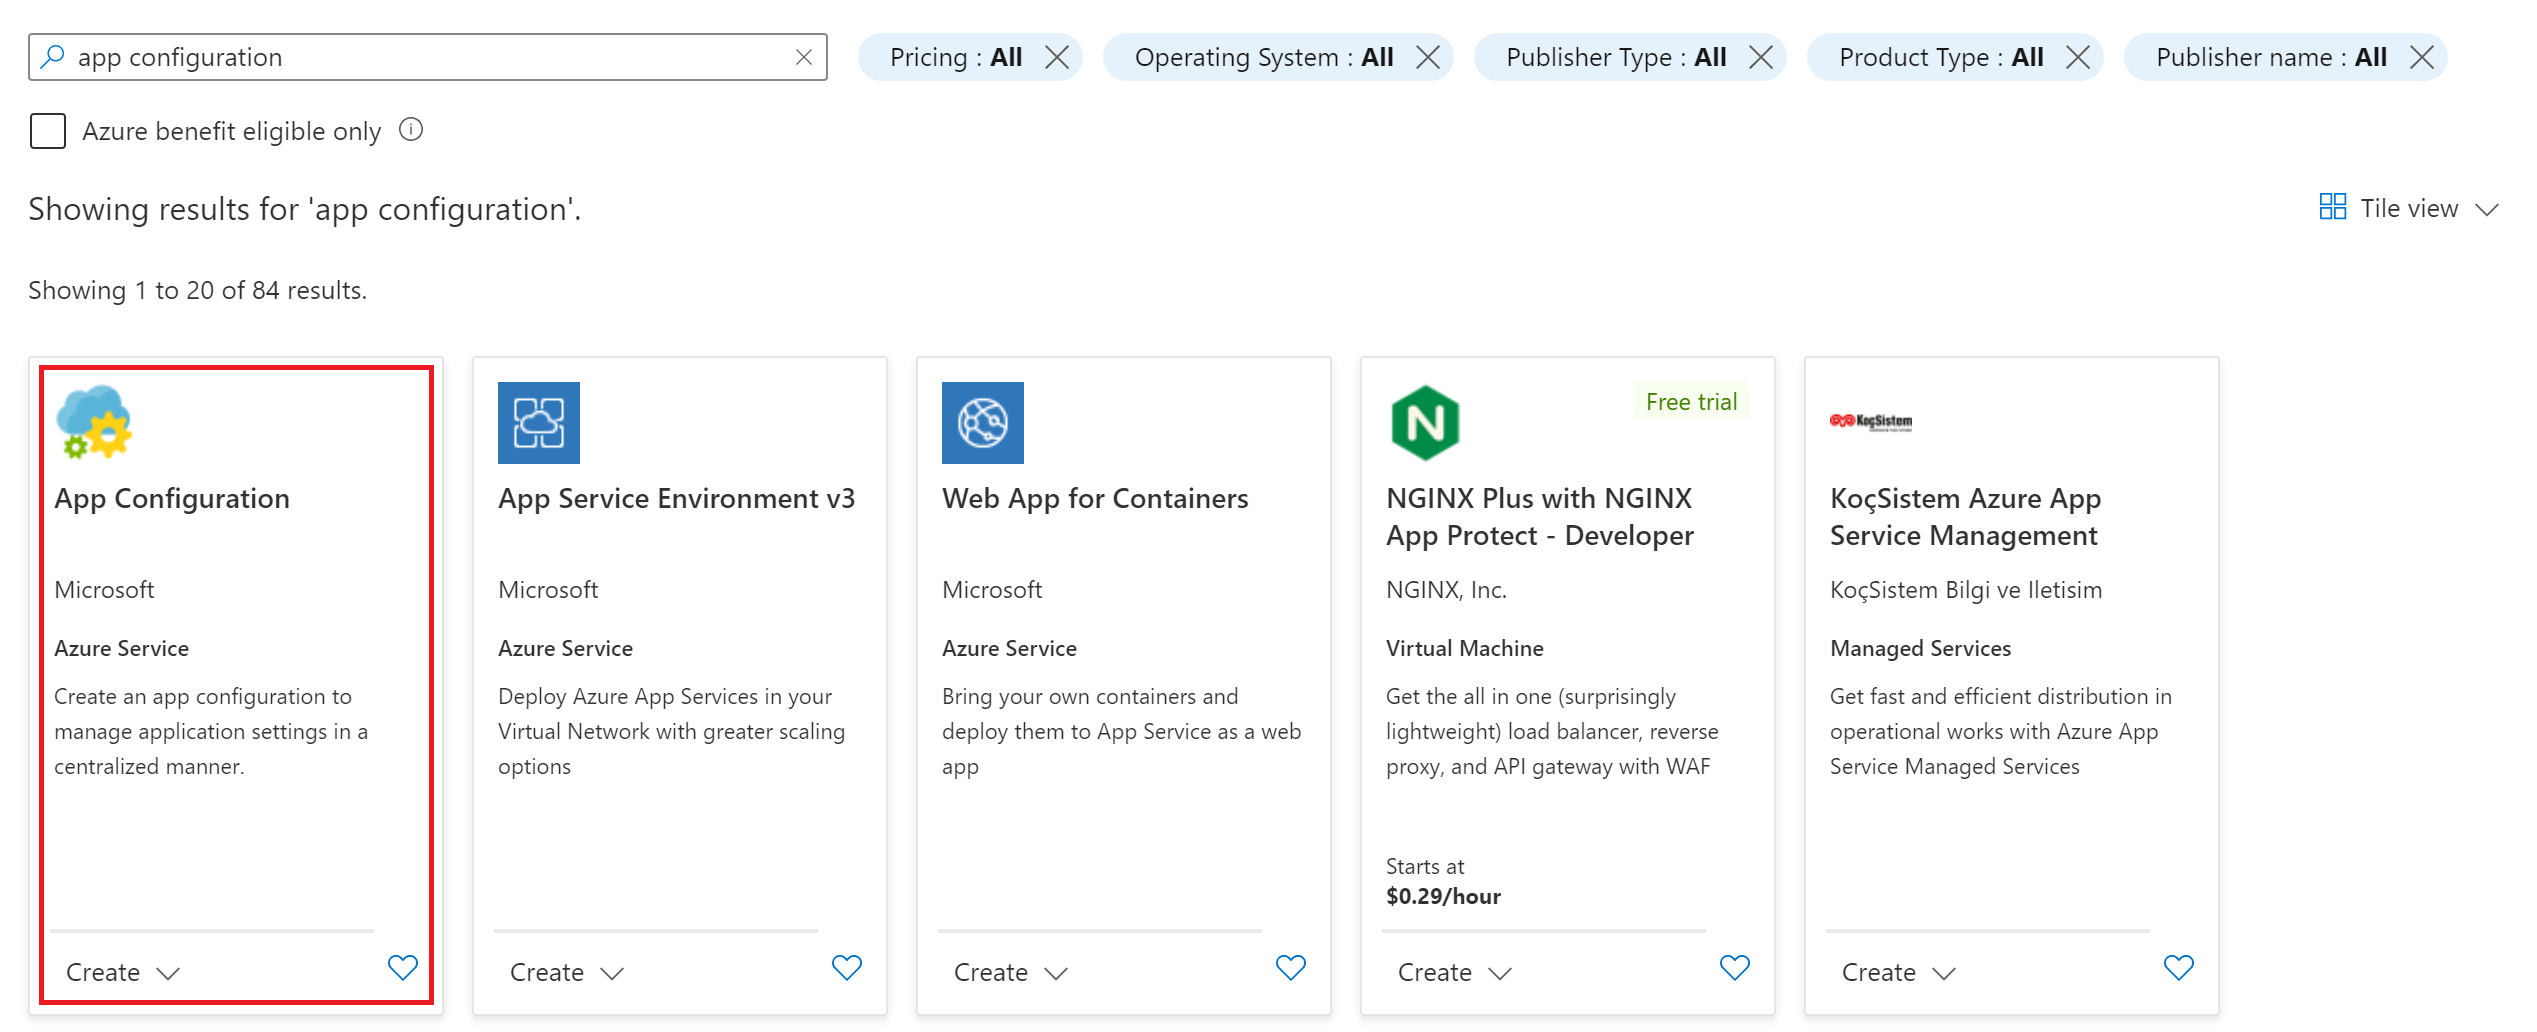
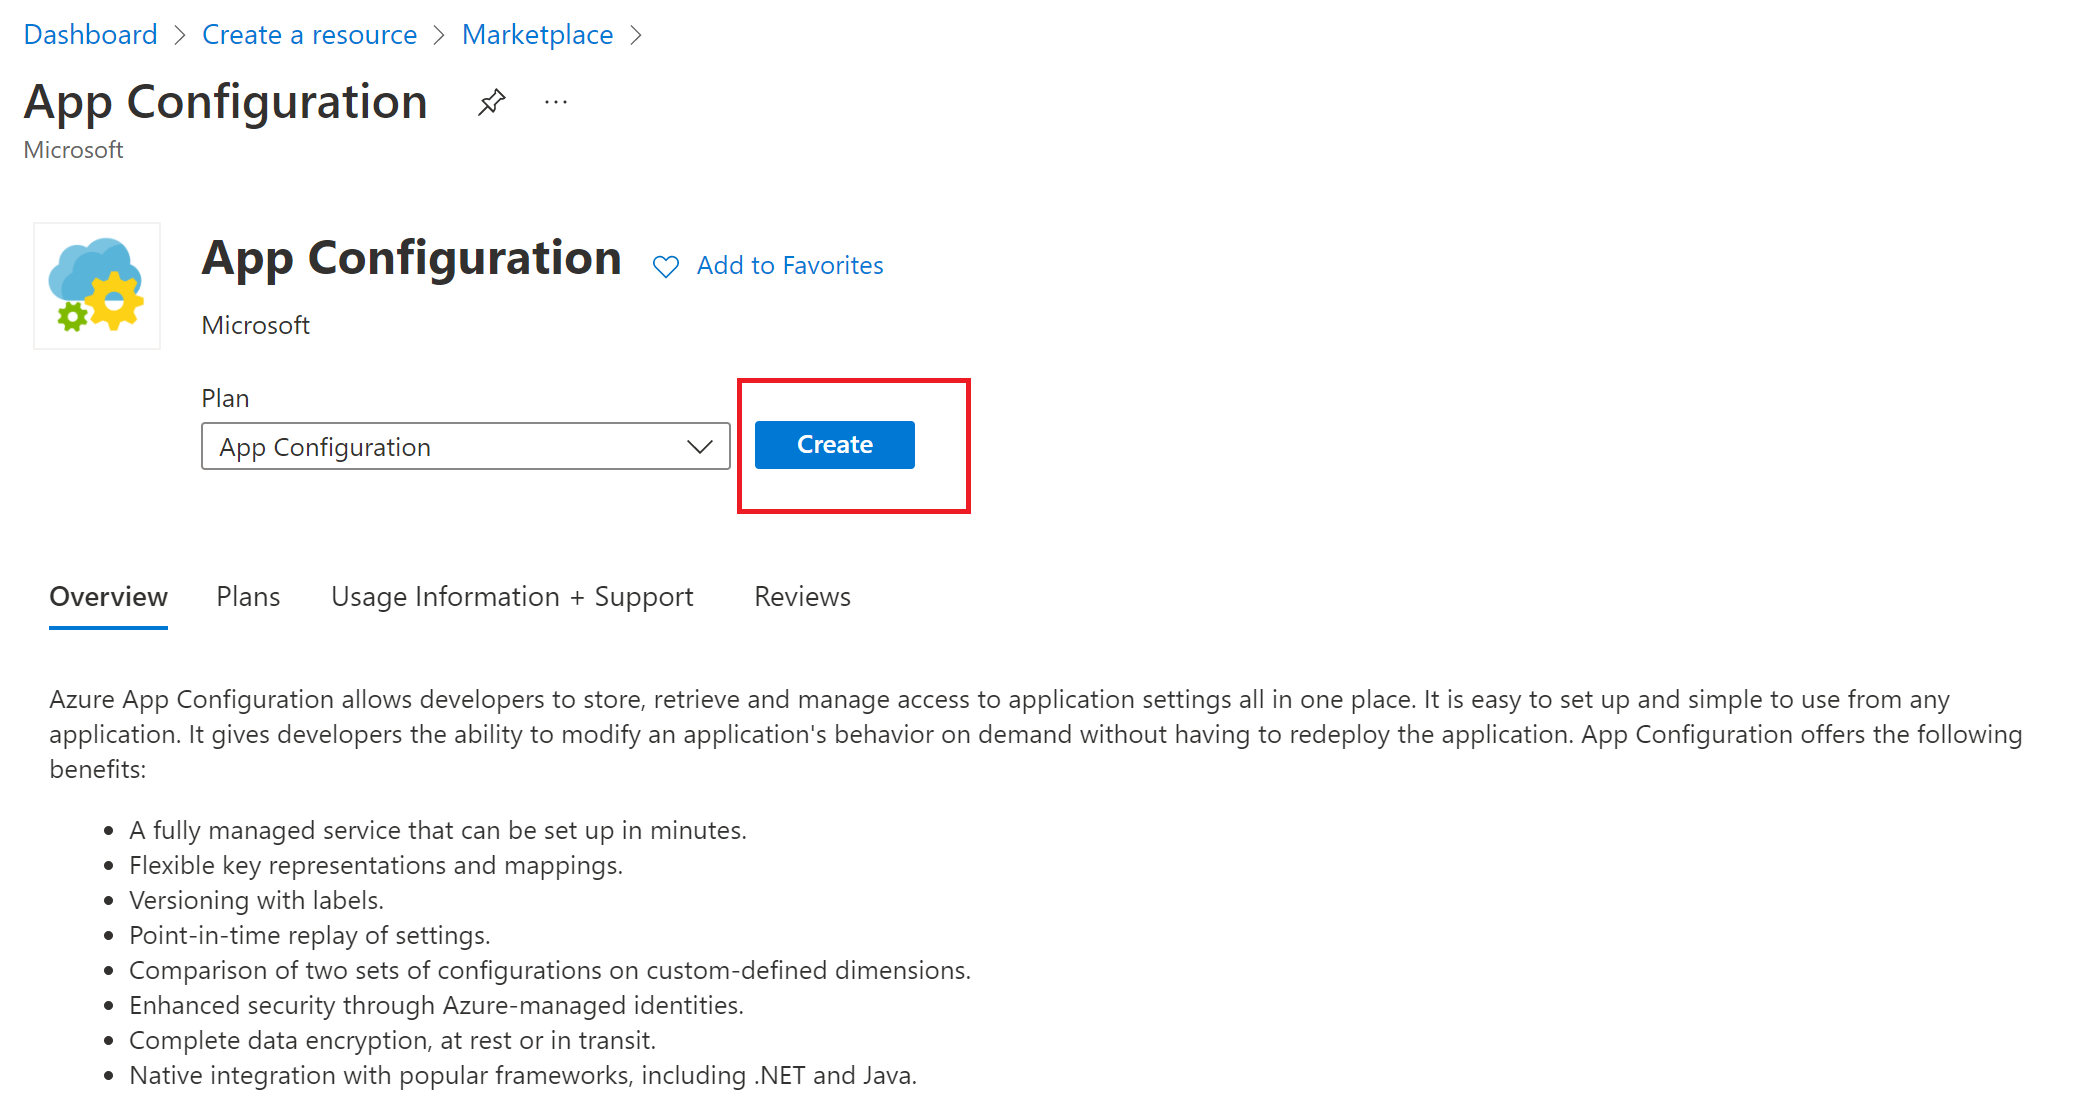
Select App Configuration from the search results, and then select Create.
On the Create App Configuration pane, enter the following settings:
Setting Suggested value Description Subscription Your subscription Select the Azure subscription for your store Resource group Your resource group Select the Azure resource group for your store Resource name Globally unique name Enter a unique resource name to use for the App Configuration store. This name can't be the same name as the previous configuration store. Location Your desired Location Select the region you want to create your configuration store in. Pricing tier Standard or Premium Select the Standard or Premium pricing tier. For more information, see the App Configuration pricing page. Days to retain deleted stores Retention period for soft deleted stores Select the number of days for which you would want the soft deleted stores and their content to be retained. Enable Purge protection Purge protection status Check to enable Purge protection on the store so no one can purge it before the retention period expires. 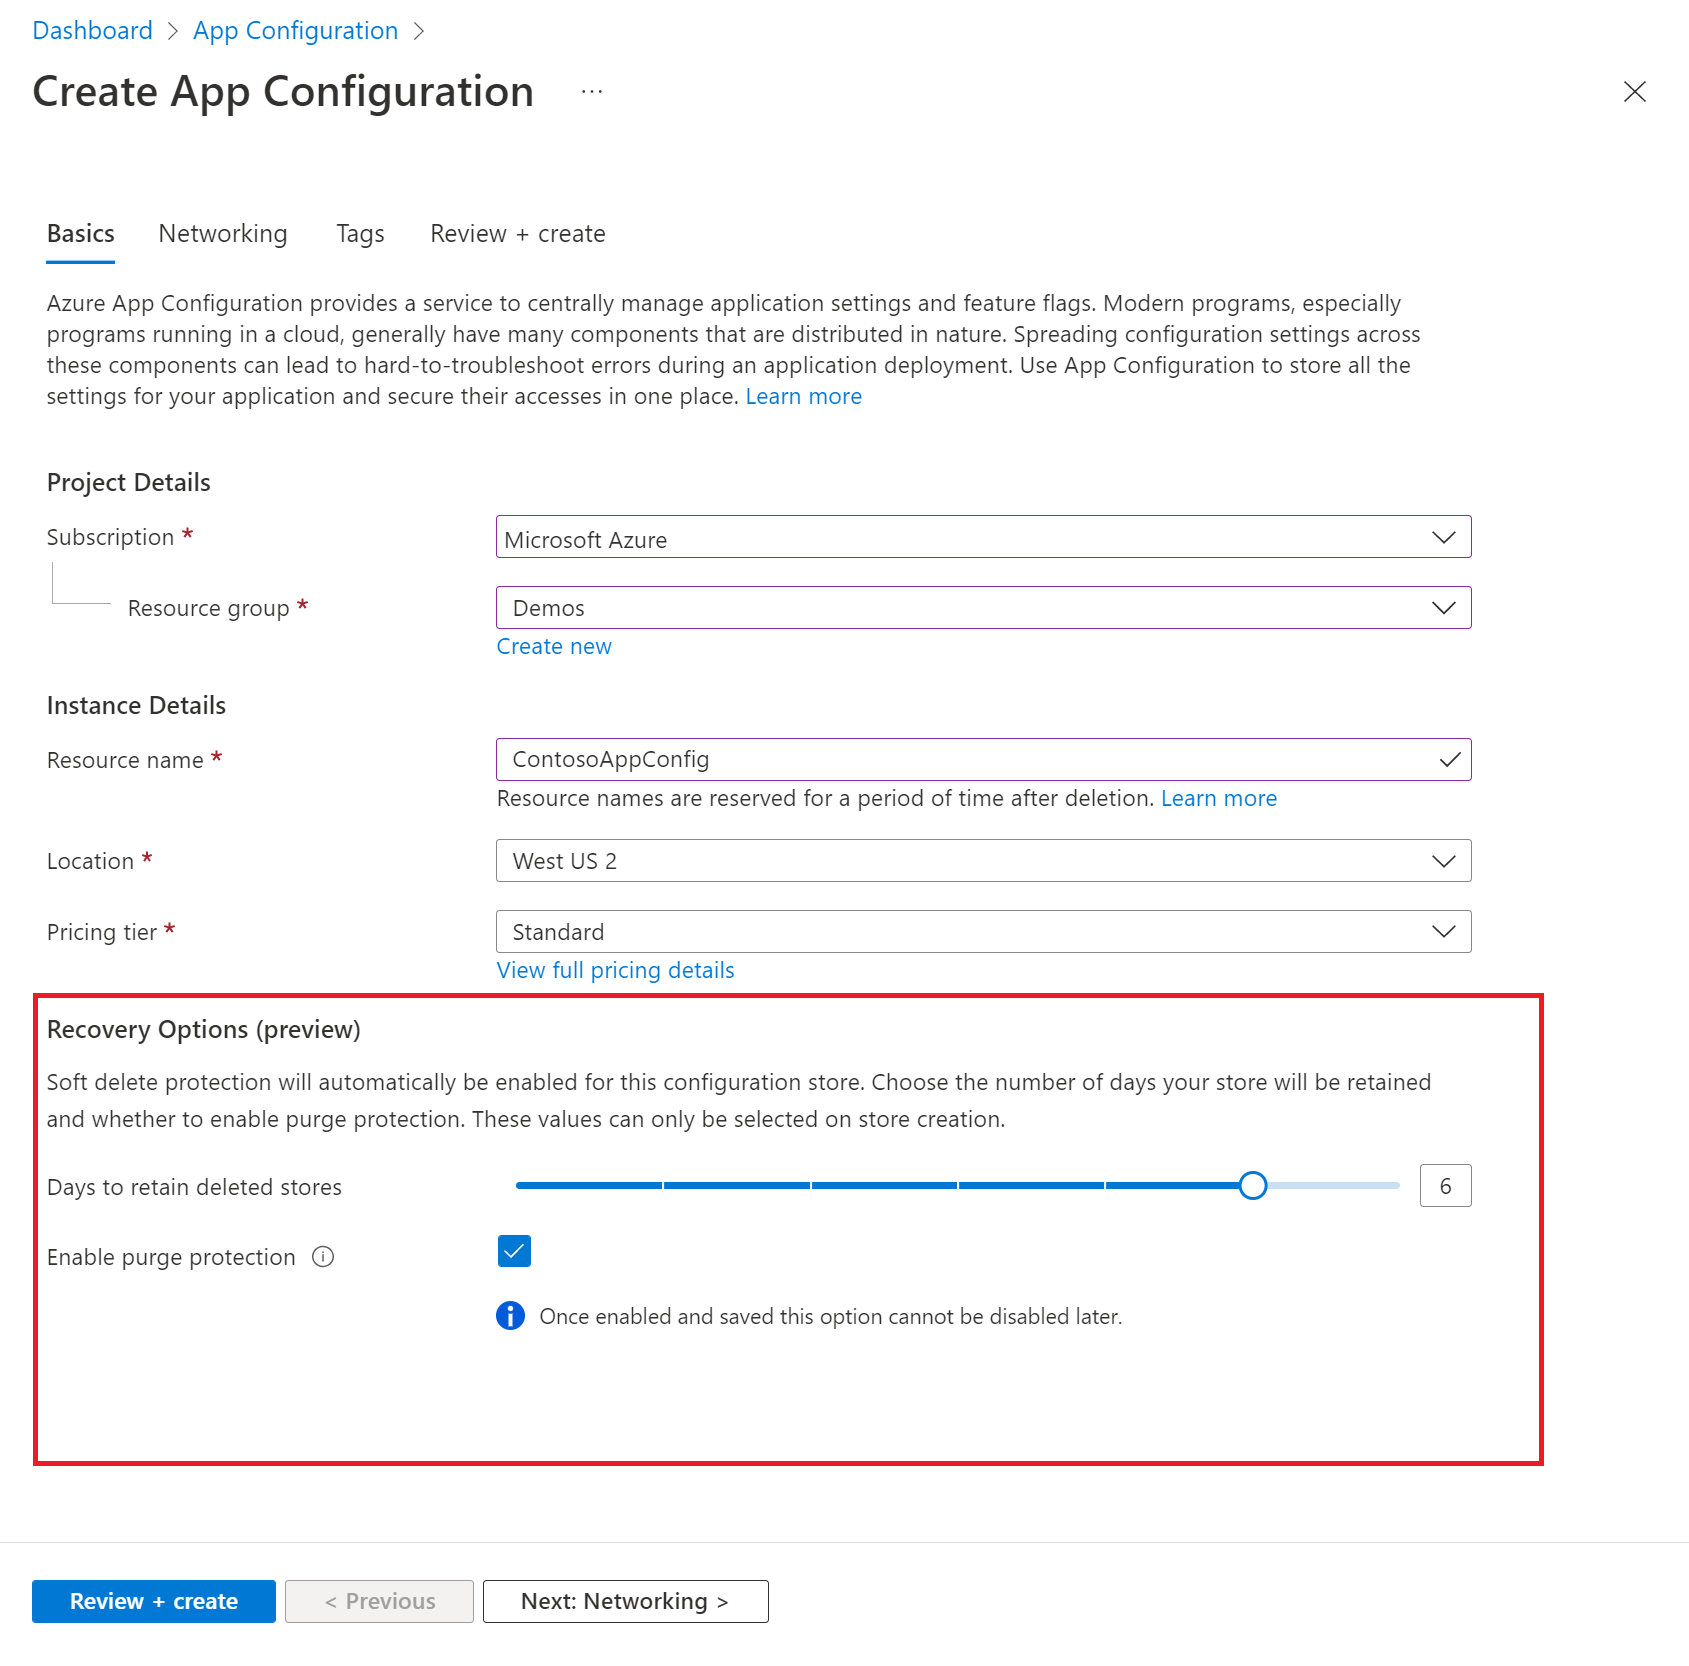
Select Review + create to validate your settings.
Select Create. The deployment might take a few minutes.
Enable Purge Protection in an existing store
Log in to the Azure portal.
Select your standard tier App Configuration store.
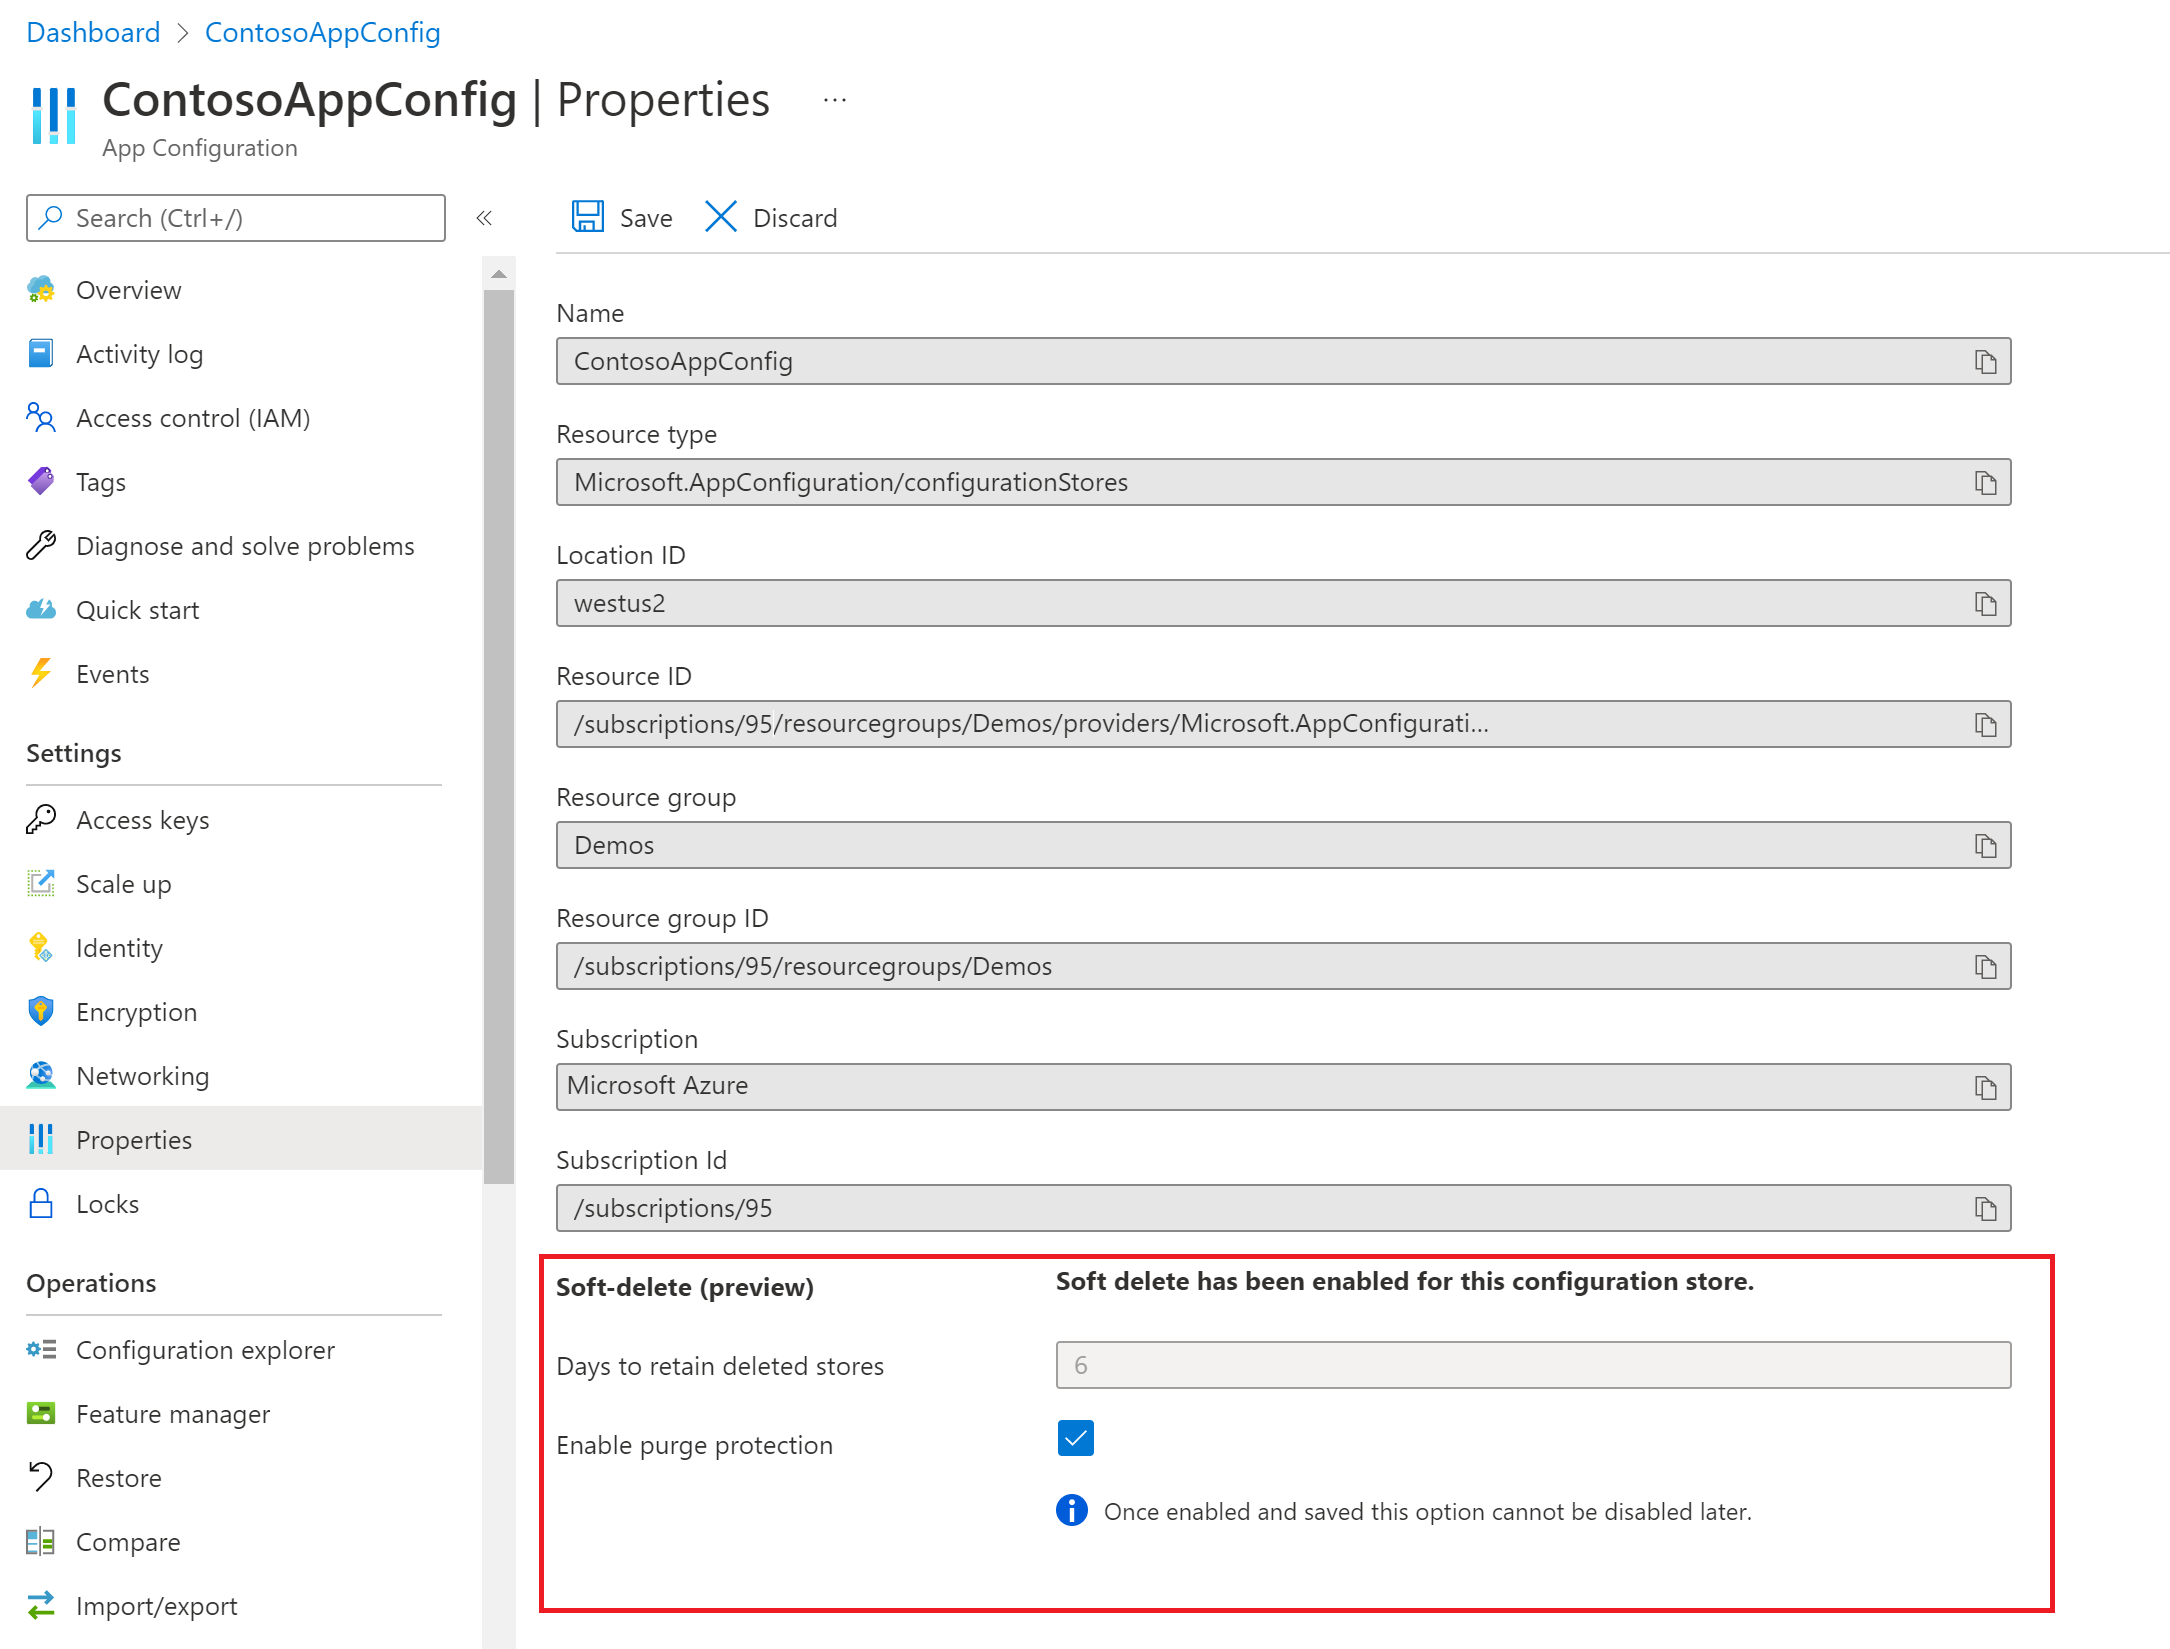
Refer to the screenshot below on where to check for the soft delete status of an existing store.
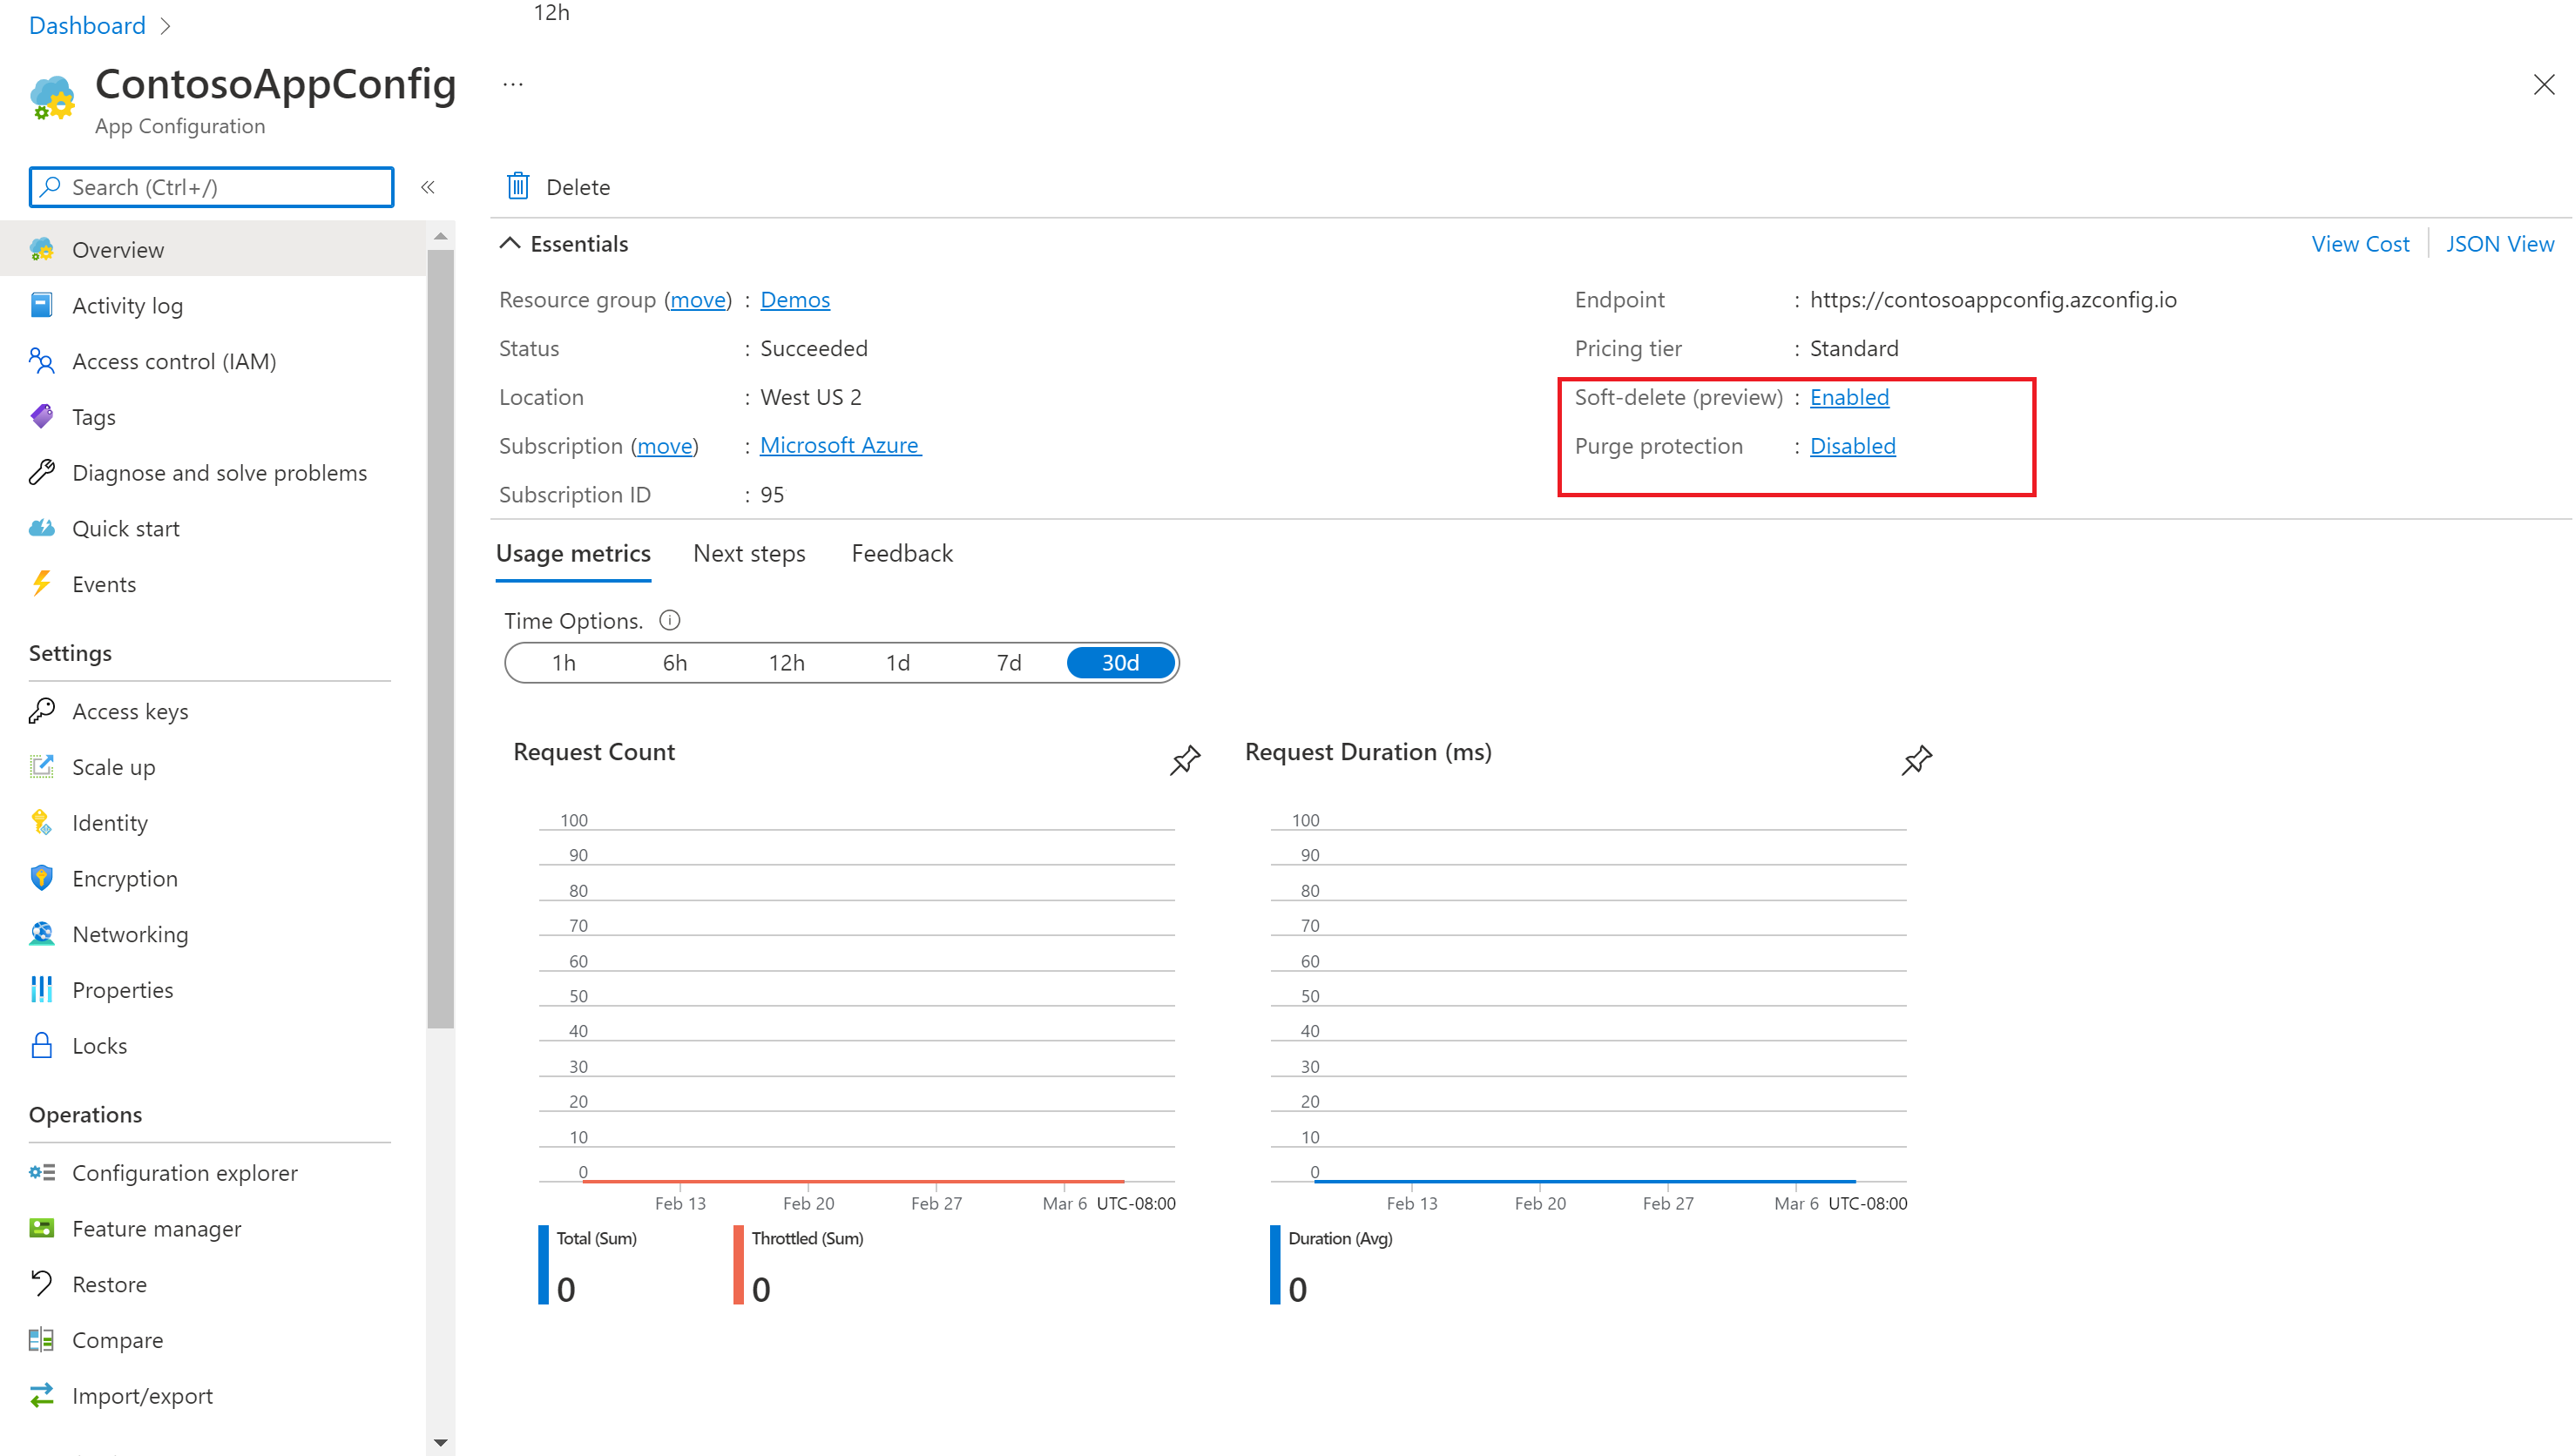
Click on the Enabled value of Soft Delete. You'll be redirected to the properties of your store. At the bottom of the page, you can review the information related to soft delete. The Retention period is shown as "Days to retain deleted stores". You can't change this value once it's set. The Purge protection check box shows whether purge protection is enabled for this particular store or not. Once enabled, purge protection can't be disabled.
List, recover, or purge a soft deleted App Configuration store
Log in to the Azure portal.
Click on the search bar at the top of the page.
Search for "App Configuration" and click on App Configuration under Services. Don't click on an individual App Configuration store.
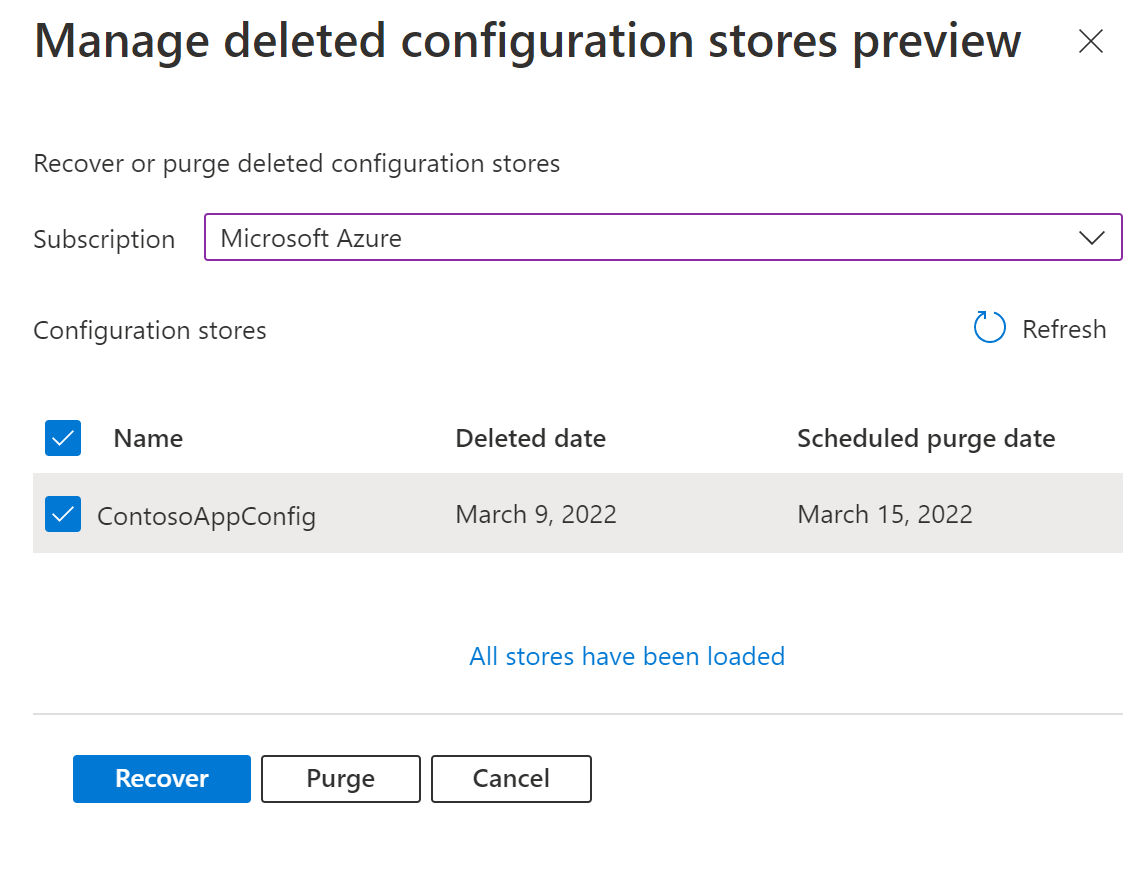
At the top of the screen, click the option to Manage deleted stores. A context pane will open on the right side of your screen.

Select your subscription from the drop box. If you've deleted one or more App Configuration stores, these stores will appear in the context pane on the right. Click "Load More" at the bottom of the context pane if not all deleted stores are loaded.
Once you find the store that you wish to recover or purge, select the checkbox next to it. You can select multiple stores
Please click Recover at the bottom of the context pane to recover the store OR click Purge option to permanently delete the store. Note you won't be able to purge a store when purge protection is enabled.
Recover an App Configuration store with customer-managed key enabled
When recovering stores that use customer-managed keys, there are extra steps that need to be performed to access the recovered data. This is because the recovered store, will no longer have a managed identity assigned that has access to the customer-managed key. A new managed identity should be assigned to the store and the customer managed key settings should be reconfigured to use the newly assigned identity. When updating the managed key settings to use the newly assigned identity, ensure to continue using the same key from the key vault. For more details on how to use customer-managed keys in App Configuration stores, refer to Use customer-managed keys to encrypt your App Configuration data.
Note
The previous section showed you how to recover a deleted store with CMK enabled. If your deleted store had Event Grid subscriptions, private endpoints or Azure RBAC role assignments, you'll need to recreate these services after recovery.