Quickstart: Route Azure Cache for Redis events to web endpoint with the Azure portal
Azure Event Grid is an eventing service for the cloud. In this quickstart, you'll use the Azure portal to create an Azure Cache for Redis instance, subscribe to events for that instance, trigger an event, and view the results. Typically, you send events to an endpoint that processes the event data and takes actions. However, to simplify this quickstart, you'll send events to a web app that will collect and display the messages.
If you don't have an Azure subscription, create an Azure free account before you begin.
When you're finished, you'll see that the event data has been sent to the web app.
Create an Azure Cache for Redis cache instance
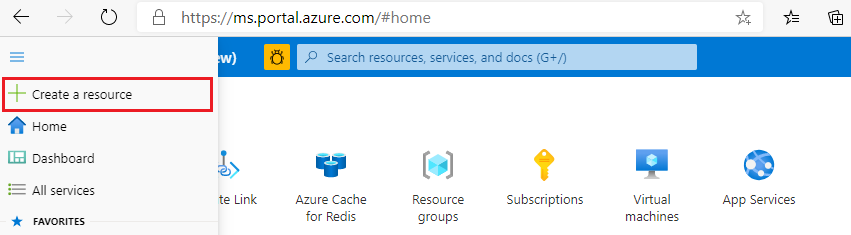
To create a cache, sign in to the Azure portal and select Create a resource.
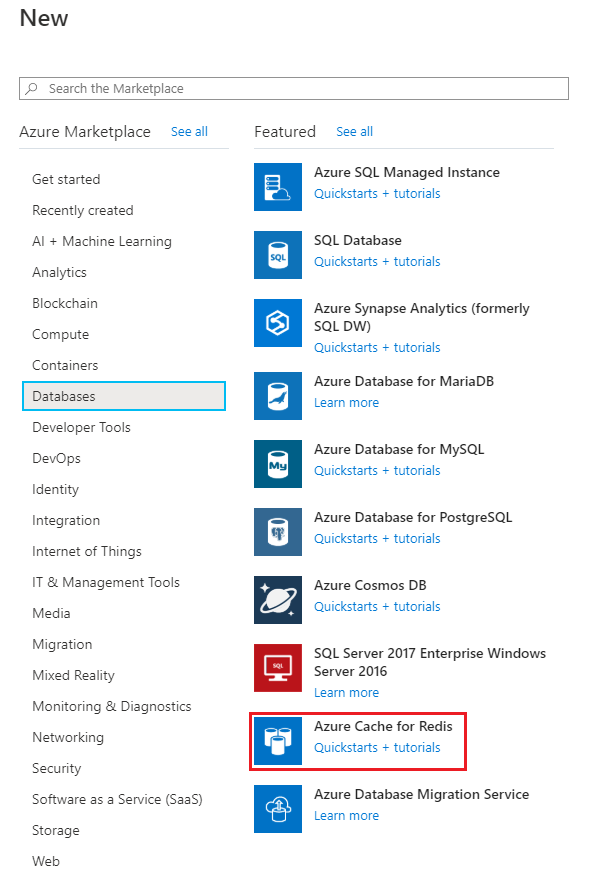
On the New page, select Databases and then select Azure Cache for Redis.
On the New Redis Cache page, configure the settings for your new cache.
Setting Choose a value Description Subscription Drop down and select your subscription. The subscription under which to create this new Azure Cache for Redis instance. Resource group Drop down and select a resource group, or select Create new and enter a new resource group name. Name for the resource group in which to create your cache and other resources. By putting all your app resources in one resource group, you can easily manage or delete them together. DNS name Enter a unique name. The cache name must be a string between 1 and 63 characters that contain only numbers, letters, or hyphens. The name must start and end with a number or letter, and can't contain consecutive hyphens. Your cache instance's host name is <DNS name>.redis.cache.windows.net. Location Drop down and select a location. Select a region near other services that use your cache. Cache type Drop down and select a tier. The tier determines the size, performance, and features that are available for the cache. For more information, see Azure Cache for Redis Overview. Select the Networking tab or select the Networking button at the bottom of the page.
In the Networking tab, select your connectivity method.
Select the Next: Advanced tab or select the Next: Advanced button on the bottom of the page to see the Advanced tab.
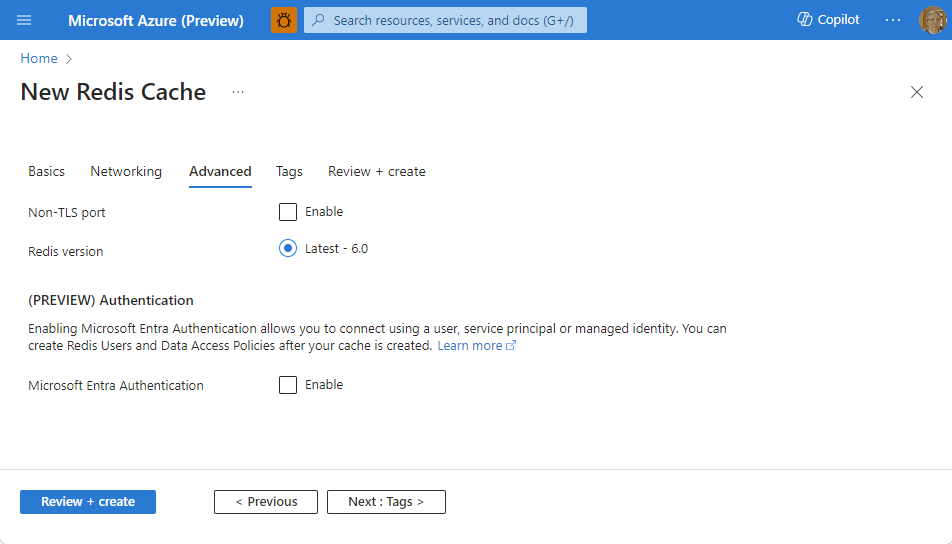
- For Basic or Standard caches, toggle the selection for a non-TLS port. You can also select if you want to enable Microsoft Entra Authentication.
- For a Premium cache, configure the settings for non-TLS port, clustering, managed identity, and data persistence. You can also select if you want to enable Microsoft Entra Authentication.
Select the Next: Tags tab or select the Next: Tags button at the bottom of the page.
Optionally, in the Tags tab, enter the name and value if you wish to categorize the resource.
Select Review + create. You're taken to the Review + create tab where Azure validates your configuration.
After the green Validation passed message appears, select Create.
It takes a while for a cache to create. You can monitor progress on the Azure Cache for Redis Overview page. When Status shows as Running, the cache is ready to use.
Create a message endpoint
Before subscribing to the events for the cache instance, let's create the endpoint for the event message. Typically, the endpoint takes actions based on the event data. To simplify this quickstart, you'll deploy a pre-built web app that displays the event messages. The deployed solution includes an App Service plan, an App Service web app, and source code from GitHub.
Select Deploy to Azure in GitHub README to deploy the solution to your subscription.

On the Custom deployment page, do the following steps:
- For Resource group, select the resource group that you created when creating the cache instance. It will be easier for you to clean up after you're done with the tutorial by deleting the resource group.
- For Site Name, enter a name for the web app.
- For Hosting plan name, enter a name for the App Service plan to use for hosting the web app.
- Select the check box for I agree to the terms and conditions stated above.
- Select Purchase.
Setting Suggested value Description Subscription Drop down and select your subscription. The subscription in which you want to create this web app. Resource group Drop down and select a resource group, or select Create new and enter a new resource group name. By putting all your app resources in one resource group, you can easily manage or delete them together. Site Name Enter a name for your web app. This value can't be empty. Hosting plan name Enter a name for the App Service plan to use for hosting the web app. This value can't be empty. Select Alerts (bell icon) in the portal, and then select Go to resource group.
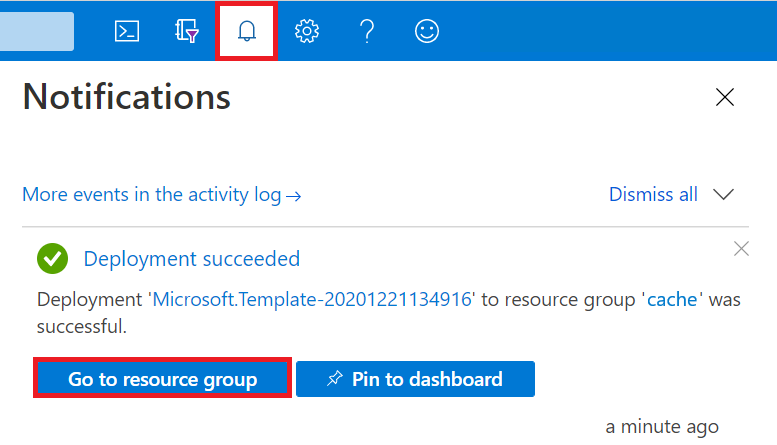
On the Resource group page, in the list of resources, select the web app that you created. You'll also see the App Service plan and the cache instance in this list.
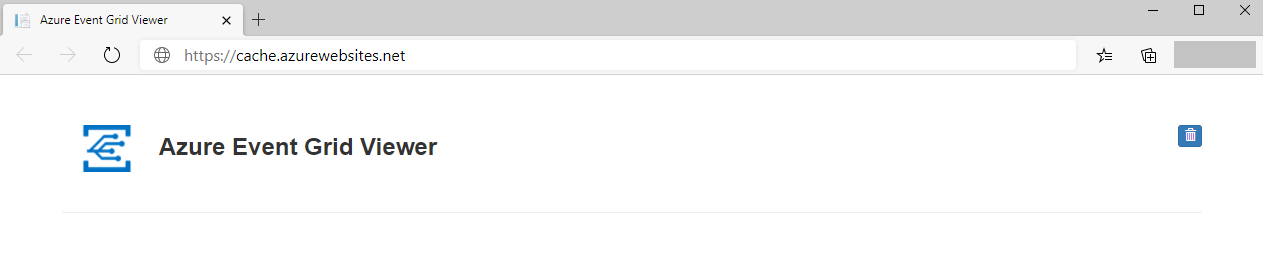
On the App Service page for your web app, select the URL to navigate to the web site. The URL should be in this format:
https://<your-site-name>.azurewebsites.net.Confirm that you see the site but no events have been posted to it yet.
Register the Event Grid resource provider
Unless you've used Event Grid before, you'll need to register the Event Grid resource provider. If you’ve used Event Grid before, skip to the next section.
In the Azure portal, do the following steps:
On the left menu, select Subscriptions.
Select the subscription you want to use for Event Grid from the subscription list.
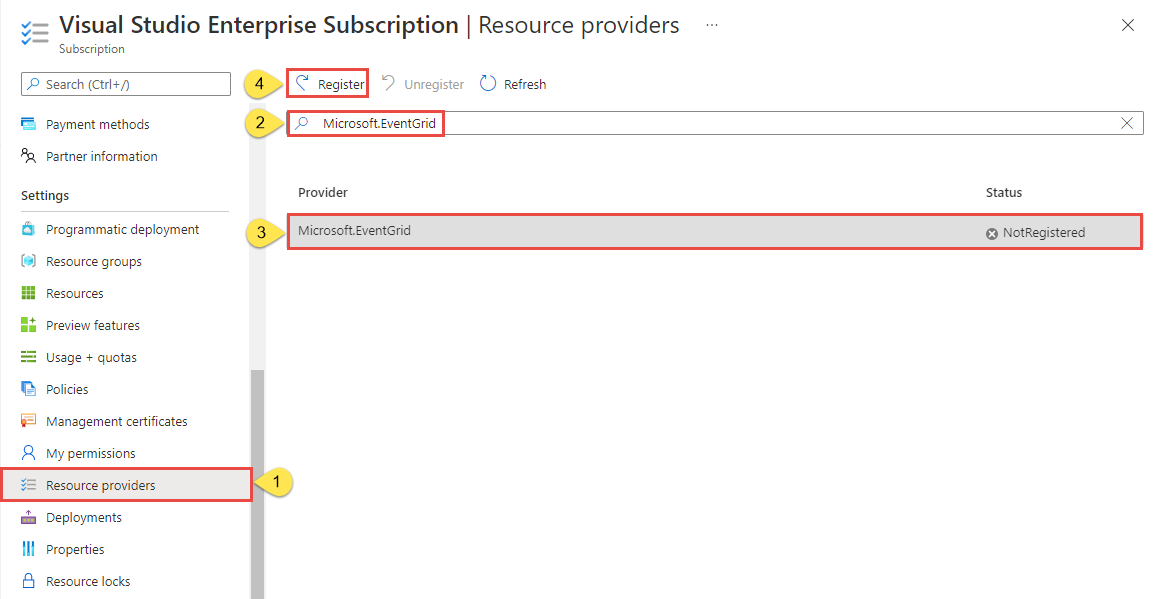
On the Subscription page, select Resource providers under Settings on the left menu.
Search for Microsoft.EventGrid, and confirm that the Status is Not Registered.
Select Microsoft.EventGrid in the provider list.
Select Register on the command bar.
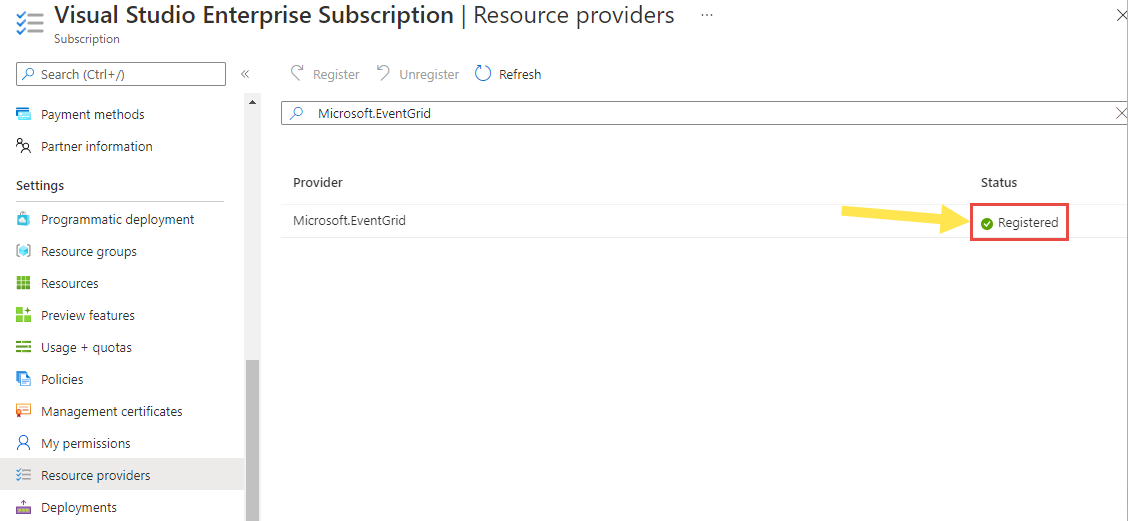
Refresh to make sure the status of Microsoft.EventGrid is changed to Registered.
Subscribe to the Azure Cache for Redis instance
In this step, you'll subscribe to a topic to tell Event Grid which events you want to track, and where to send the events.
In the portal, navigate to your cache instance that you created earlier.
On the Azure Cache for Redis page, select Events on the left menu.
Select Web Hook. You're sending events to your viewer app using a web hook for the endpoint.
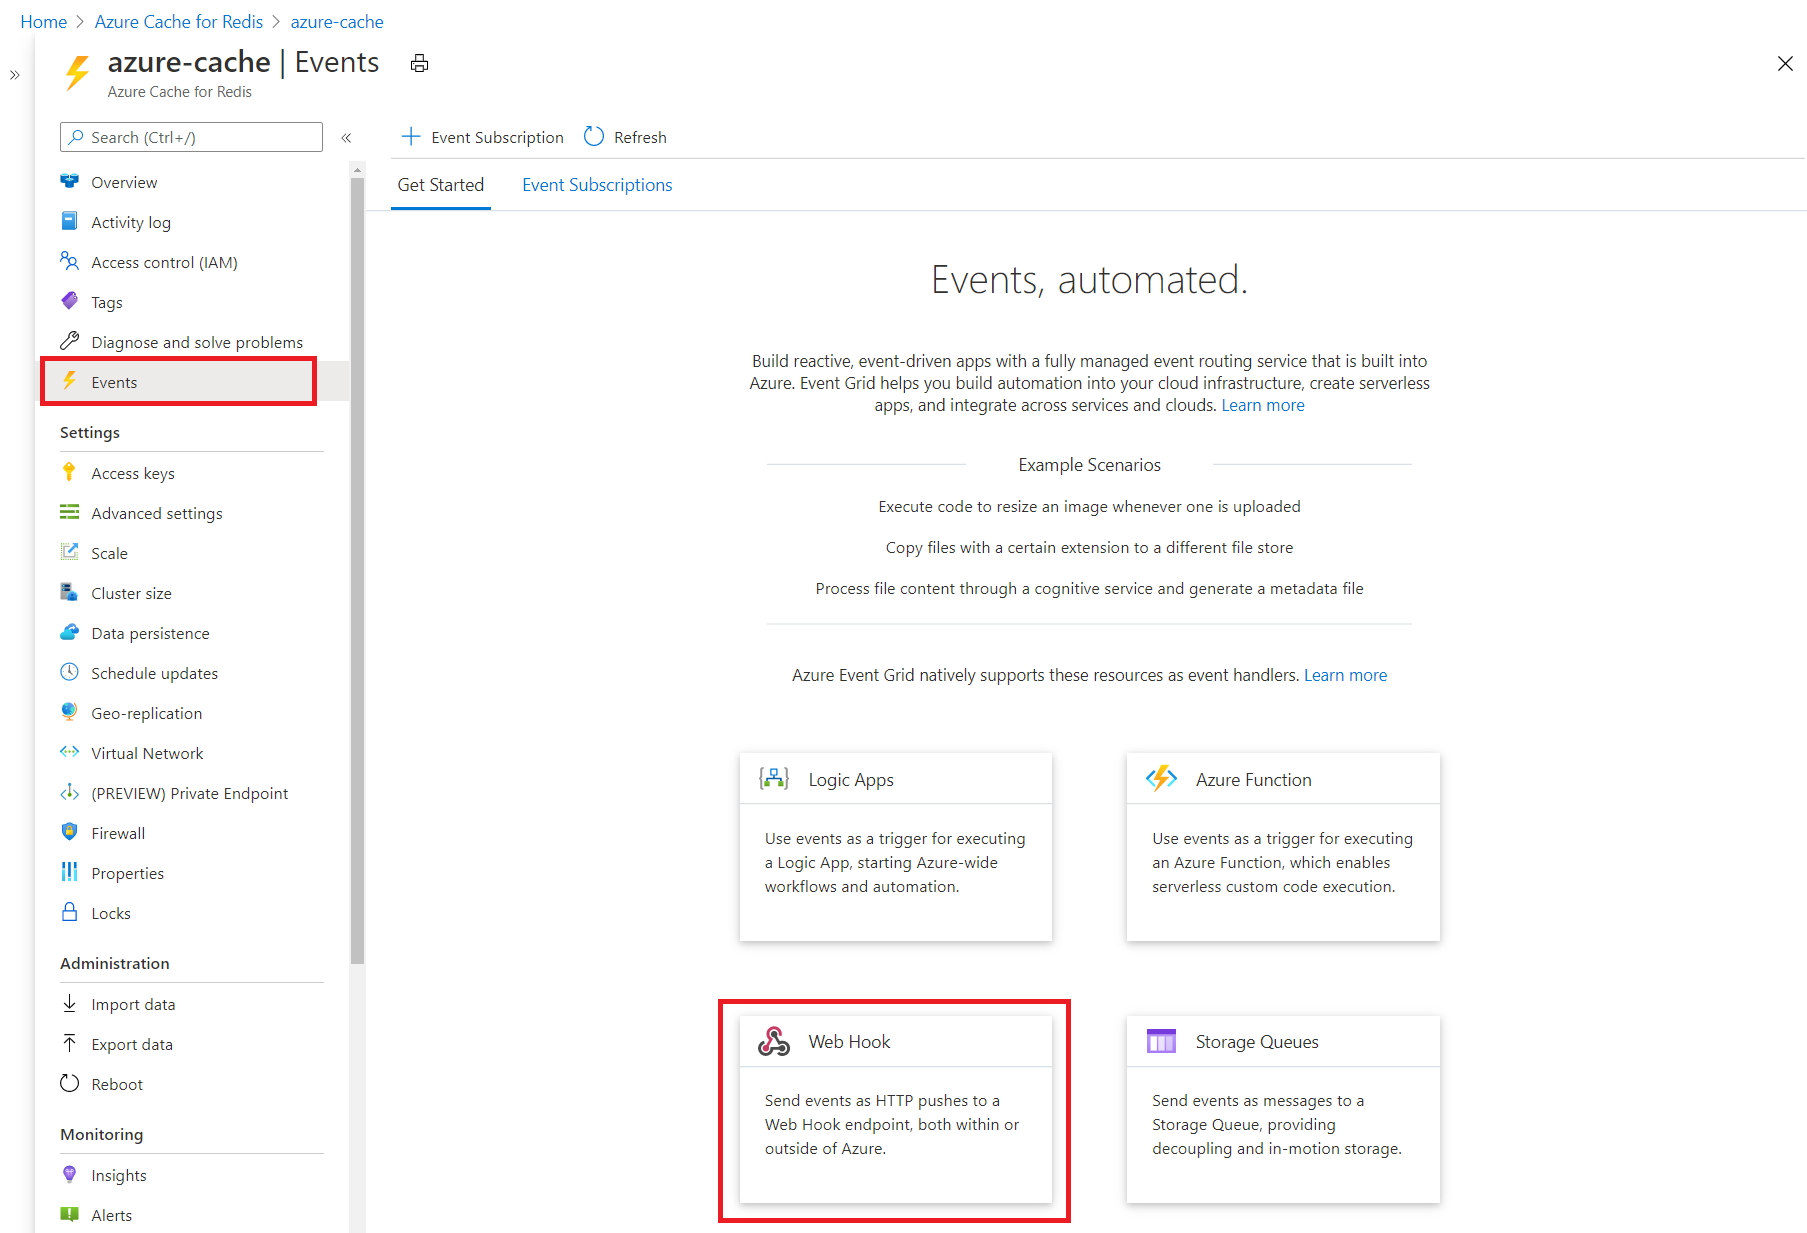
On the Create Event Subscription page, enter the following:
Setting Suggested value Description Name Enter a name for the event subscription. The value must be between 3 and 64 characters long. It can only contain letters, numbers, and dashes. Event Types Drop down and select which event type(s) you want to get pushed to your destination. For this quickstart, we'll be scaling our cache instance. Patching, scaling, import and export are the available options. Endpoint Type Select Web Hook. Event handler to receive your events. Endpoint Select Select an endpoint, and enter the URL of your web app and add api/updatesto the home page URL (for example:https://cache.azurewebsites.net/api/updates), and then select Confirm Selection.This is the URL of your web app that you created earlier. Now, on the Create Event Subscription page, select Create to create the event subscription.
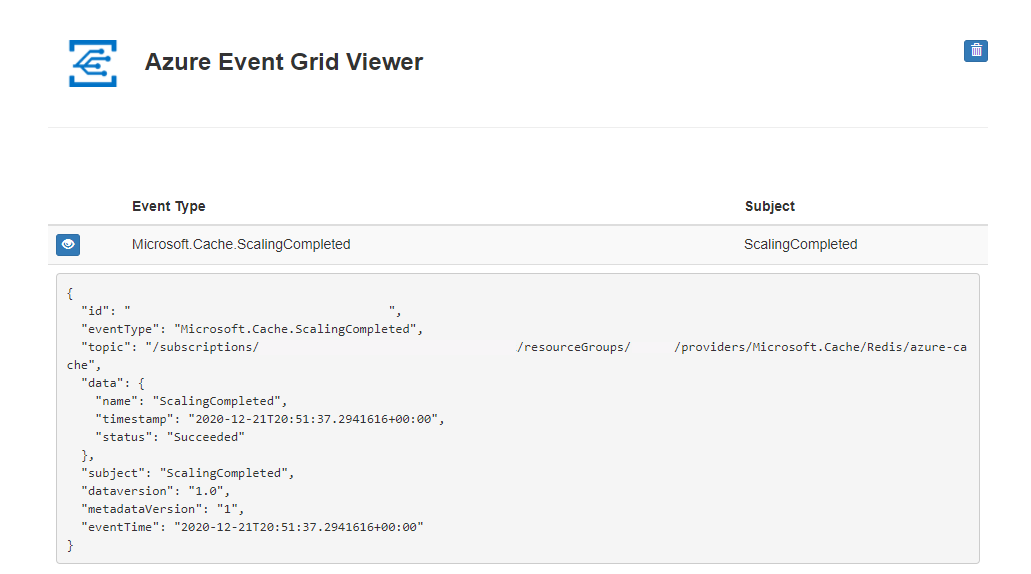
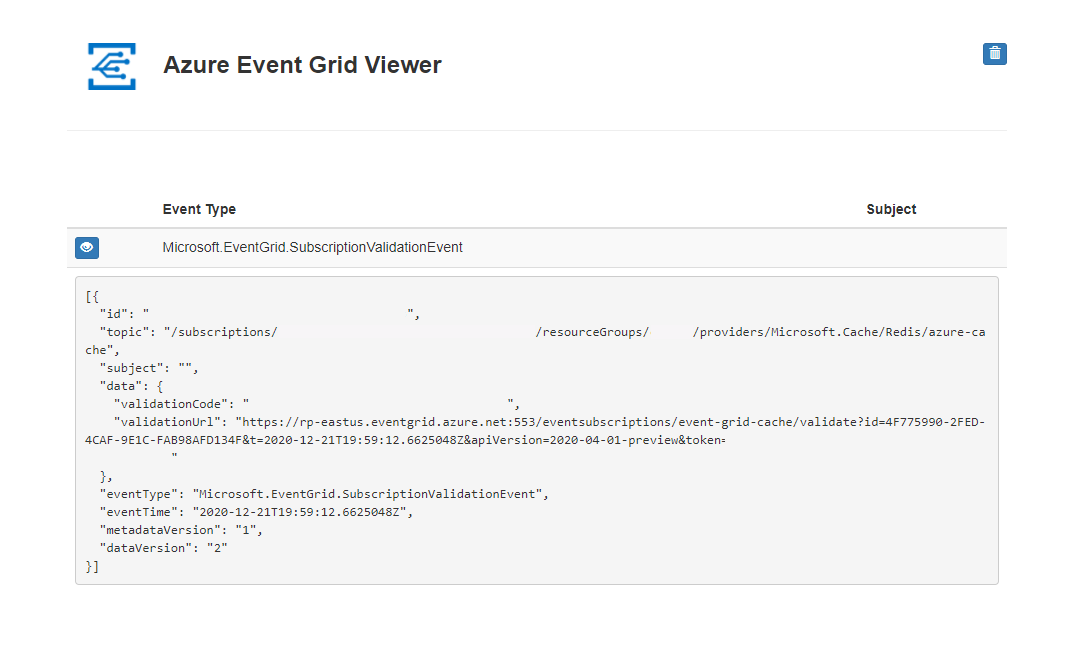
View your web app again, and notice that a subscription validation event has been sent to it. Select the eye icon to expand the event data. Event Grid sends the validation event so the endpoint can verify that it wants to receive event data. The web app includes code to validate the subscription.
Send an event to your endpoint
Now, let's trigger an event to see how Event Grid distributes the message to your endpoint. We'll be scaling your Azure Cache for Redis instance.
In the Azure portal, navigate to your Azure Cache for Redis instance and select Scale on the left menu.
Select the desired pricing tier from the Scale page and select Select.
You can scale to a different pricing tier with the following restrictions:
- You can't scale from a higher pricing tier to a lower pricing tier.
- You can't scale from a Premium cache down to a Standard or a Basic cache.
- You can't scale from a Standard cache down to a Basic cache.
- You can scale from a Basic cache to a Standard cache but you can't change the size at the same time. If you need a different size, you can do a subsequent scaling operation to the desired size.
- You can't scale from a Basic cache directly to a Premium cache. First, scale from Basic to Standard in one scaling operation, and then from Standard to Premium in a subsequent scaling operation.
- You can't scale from a larger size down to the C0 (250 MB) size.
While the cache is scaling to the new pricing tier, a Scaling status is displayed using Azure Cache for Redis on the left. When scaling is complete, the status changes from Scaling to Running.
- You can't scale from a higher pricing tier to a lower pricing tier.
You've triggered the event, and Event Grid sent the message to the endpoint you configured when subscribing. The message is in the JSON format and it contains an array with one or more events. In the following example, the JSON message contains an array with one event. View your web app and notice that a ScalingCompleted event was received.
Clean up resources
If you plan to continue working with this event, don't clean up the resources created in this quickstart. Otherwise, delete the resources you created in this quickstart.
Select the resource group, and select Delete resource group.
Next steps
Now that you know how to create custom topics and event subscriptions, learn more about what Event Grid can help you do:
Feedback
Kommer snart: I hele 2024 udfaser vi GitHub-problemer som feedbackmekanisme for indhold og erstatter det med et nyt feedbacksystem. Du kan få flere oplysninger under: https://aka.ms/ContentUserFeedback.
Indsend og få vist feedback om