Use the Azure portal to manage your Azure Edge Hardware Center orders
This article describes how to manage the orders created by Azure Edge Hardware Center. You can use the Azure portal to track and cancel orders created via the Edge Hardware Center.
In this article, you learn how to:
- Track order
- Cancel order
- Return hardware
Track order
Follow these steps in the Azure portal to track the order you created using the Edge Hardware Center.
In the Azure portal, go to All resources. Filter by Type == Azure Edge Hardware Center. This should list all the orders created using the Edge Hardware Center. From the list of orders, select your order and go to the order resource.

In the selected order resource, go to Overview. In the right pane, you can view the status of the order. For example, here the order was delivered to the customer.

You can see the tracking information for your order after the hardware is shipped.

Cancel order
Follow these steps in the Azure portal to track the order you created using the Edge Hardware Center.
In the Azure portal, go to All resources. Filter by Type == Azure Edge Hardware Center. This should list all the orders created using the Edge Hardware Center. From the list of orders, select your order and go to the order resource.
In the selected order resource, go to Overview. In the right pane, from the top command bar, select Cancel. You can only cancel an order after the order is created and before the order is confirmed. For example, here the Cancel is enabled when the order status is Placed.

You see a notification that the order is being canceled. Once the order is canceled, the order status updates to Canceled.

If your order item shows up as Confirmed and you need to cancel it for some reason, send an email to Operations team with your request.
Return hardware
If you used the Azure Edge Hardware Center to order your hardware, follow these steps to initiate the return. The example here is for Azure Stack Edge device but a similar flow applies to returning other hardware as well.
In the Azure portal, go to your Azure Edge Hardware Center order item resource. In the Overview, go to the top command bar in the right pane and select Return. The return option is only enabled after you have received a device.
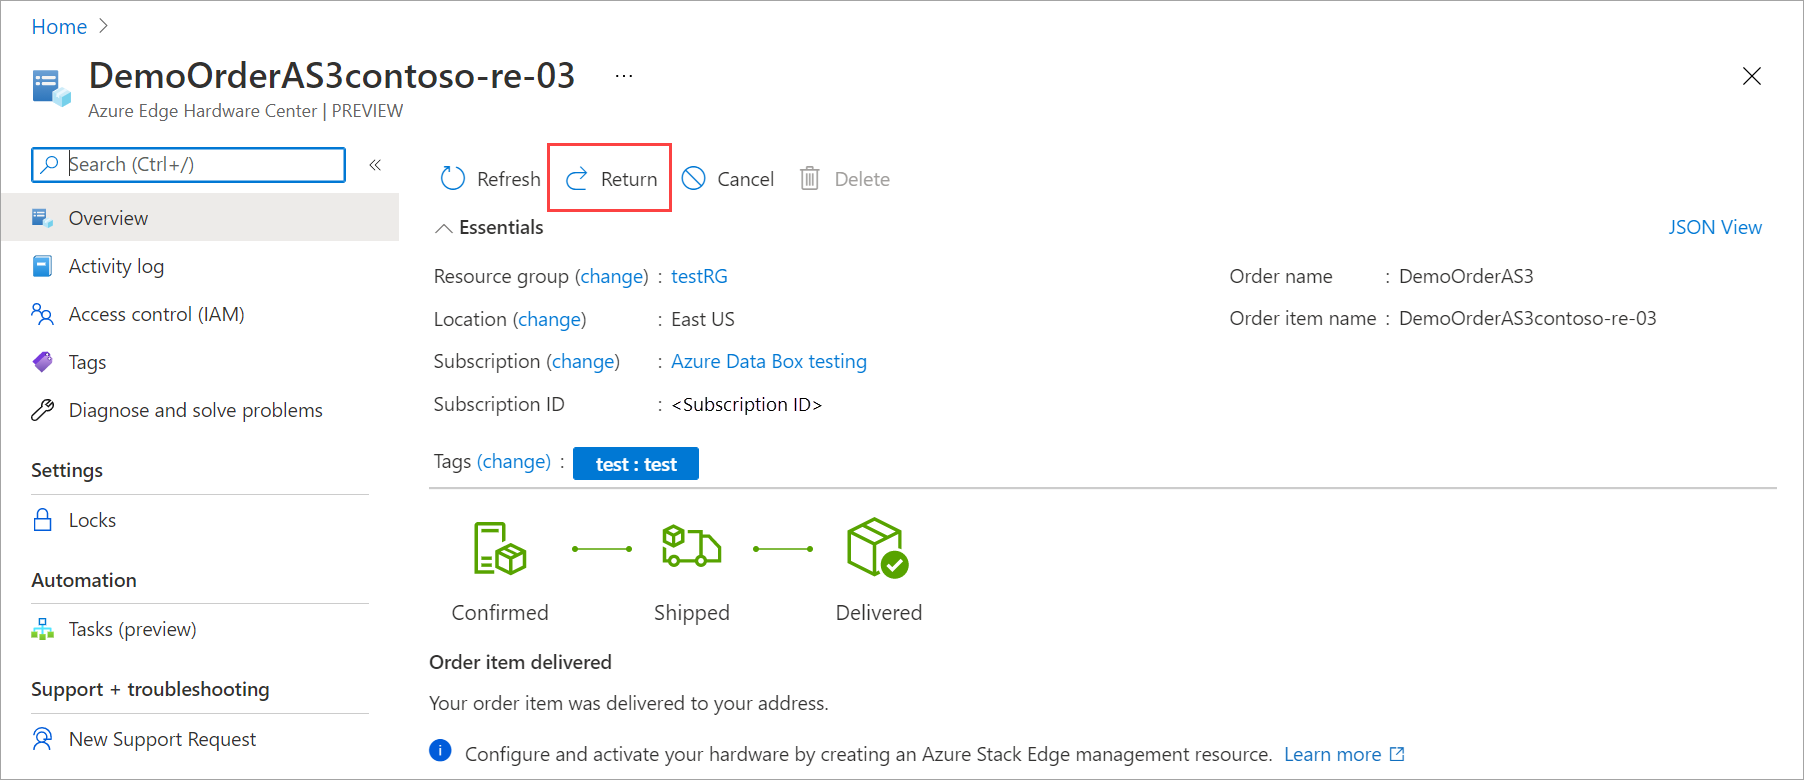
In the Return hardware blade, provide the following information:
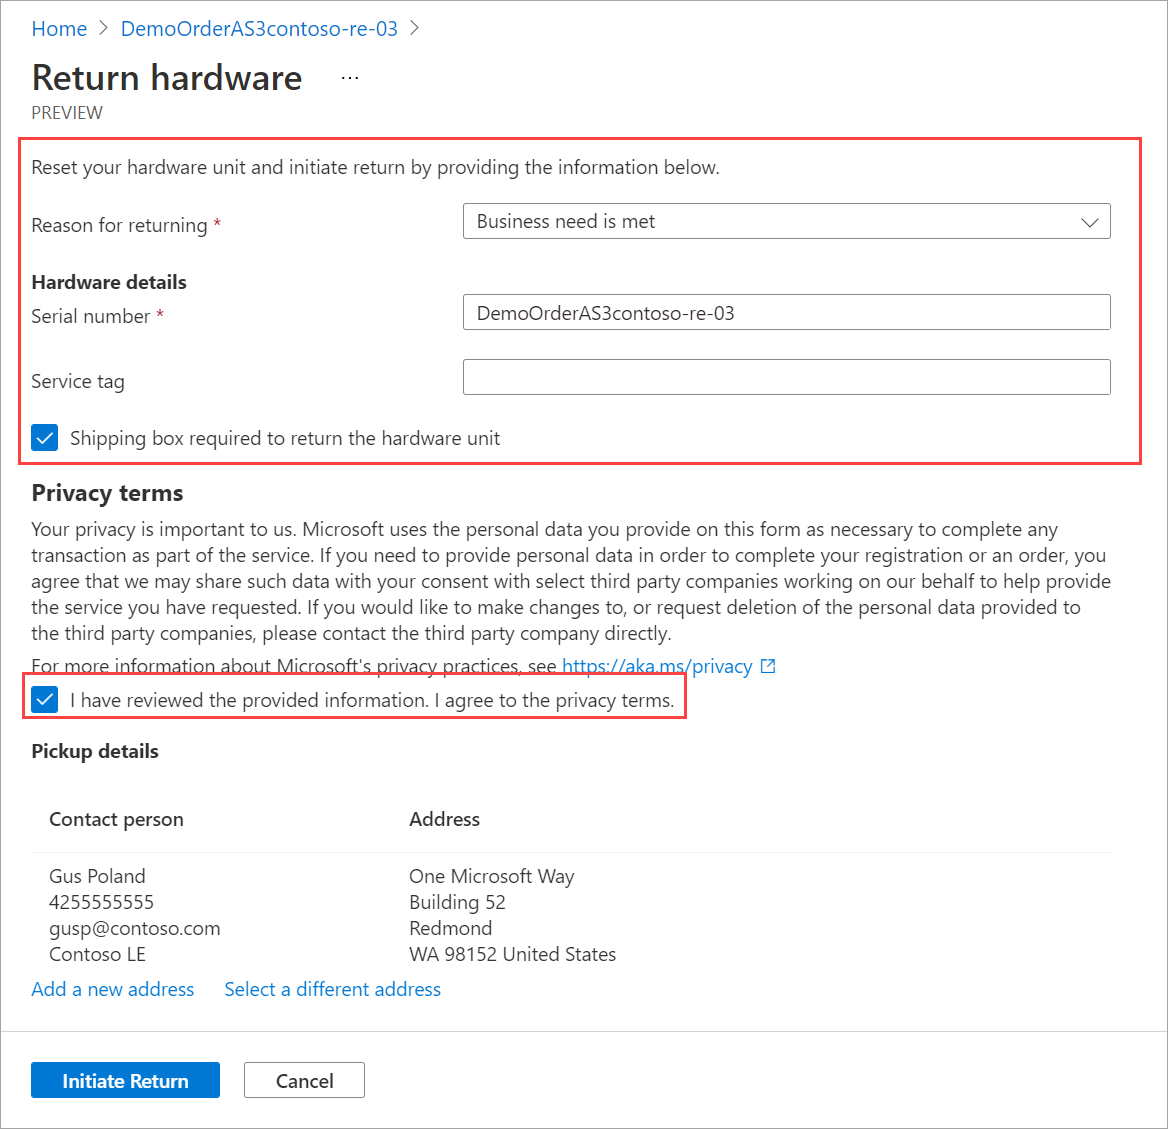
From the dropdown list, select a Reason for returning.
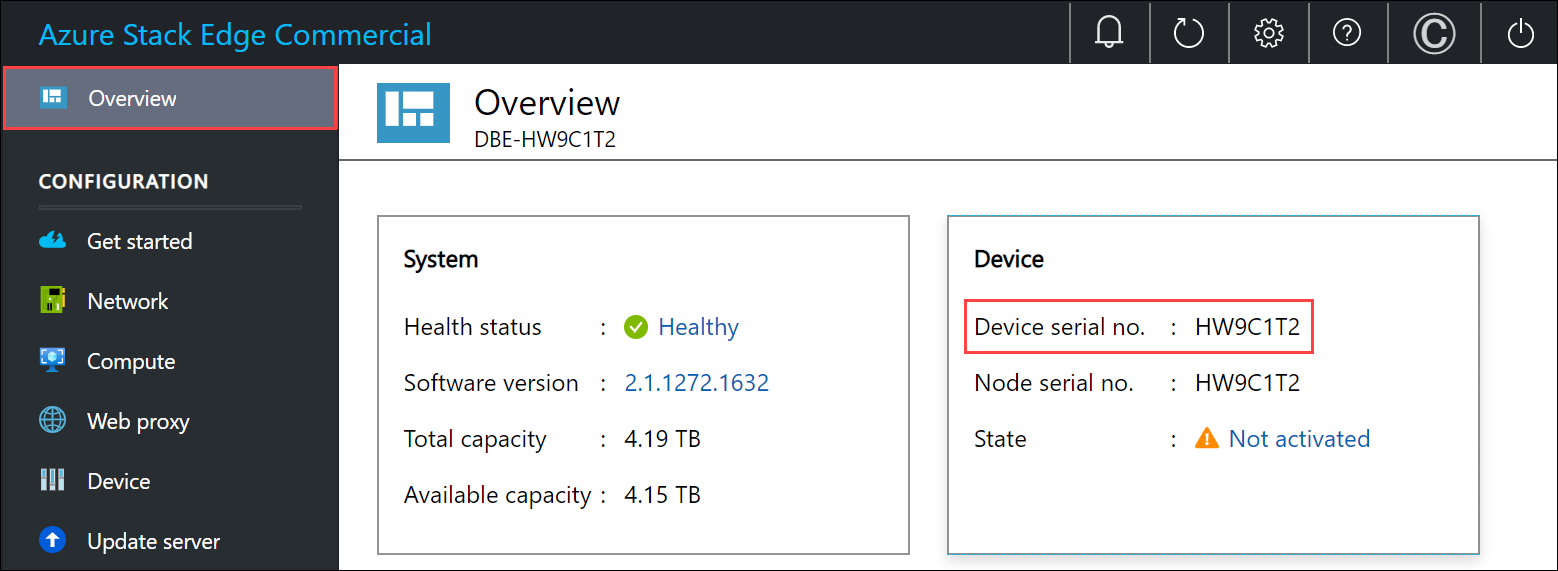
Provide the serial number of the device. To get the device serial number, go the local web UI of the device and then go to Overview.
(Optionally) Enter the Service tag number. The service tag number is an identifier with five or more characters, which is unique to your device. The service tag is located on the bottom-right corner of the device (as you face the device). Pull out the information tag (it is a slide-out label panel). This panel contains system information such as service tag, NIC, MAC address, and so on.

To request a return shipping box, check the Shipping box required to return the hardware unit.you can request it. Answer Yes to the question Need an empty box to return.
Review the Privacy terms, and select the checkbox by the note that you have reviewed and agree to the privacy terms.
Verify the Pickup details. By default, these are set to your shipping address. You can add a new address or select a different one from the saved addresses for the return pickup.
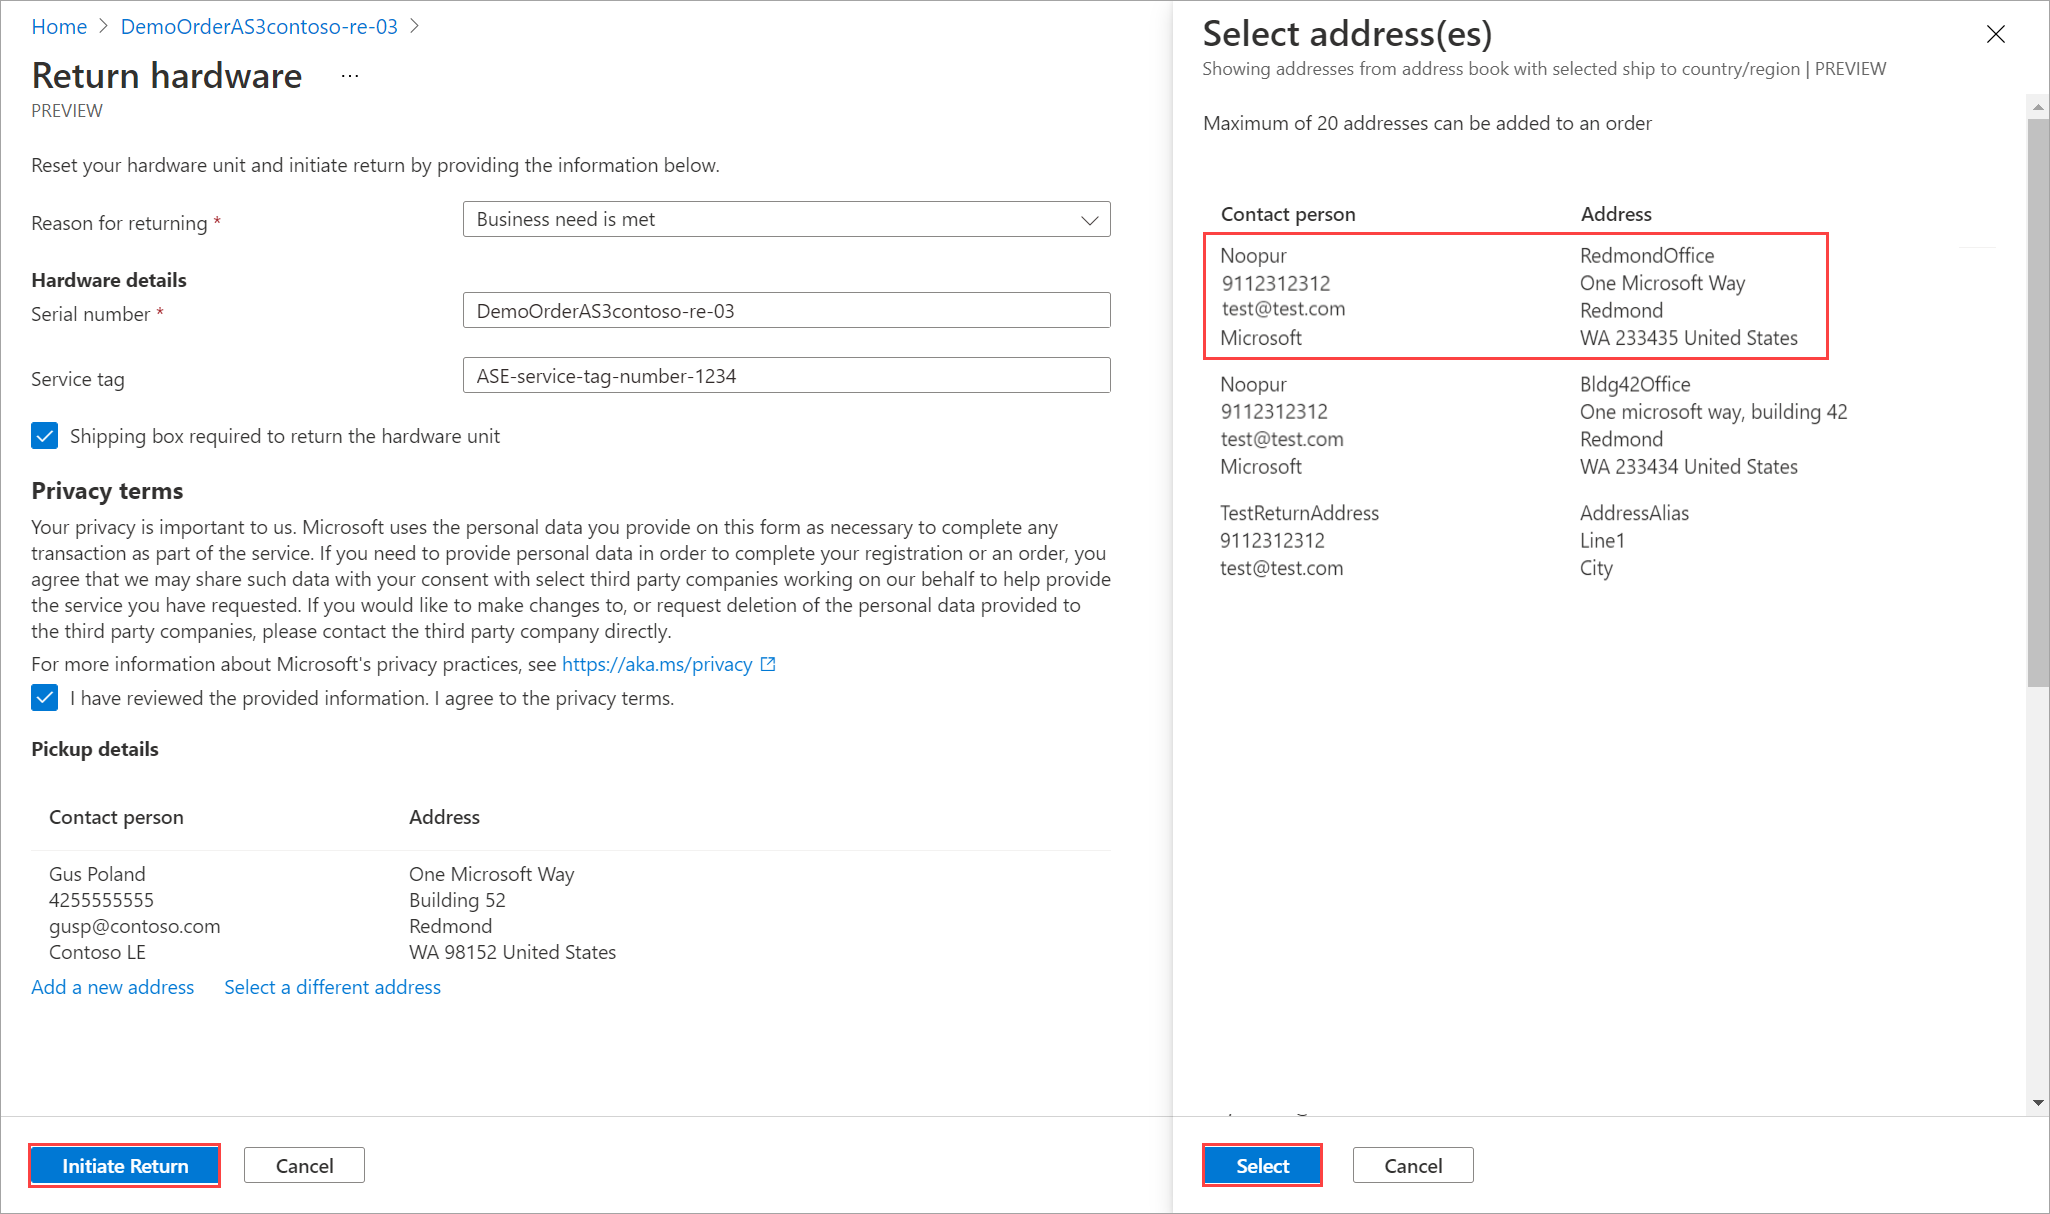
Select Initiate return.
Once the return request is submitted, the order item resource starts reflecting the status of your return shipment. The status progresses from Return initiated to Picked up to Return completed. Use the portal to check the return status of your resource at any time.
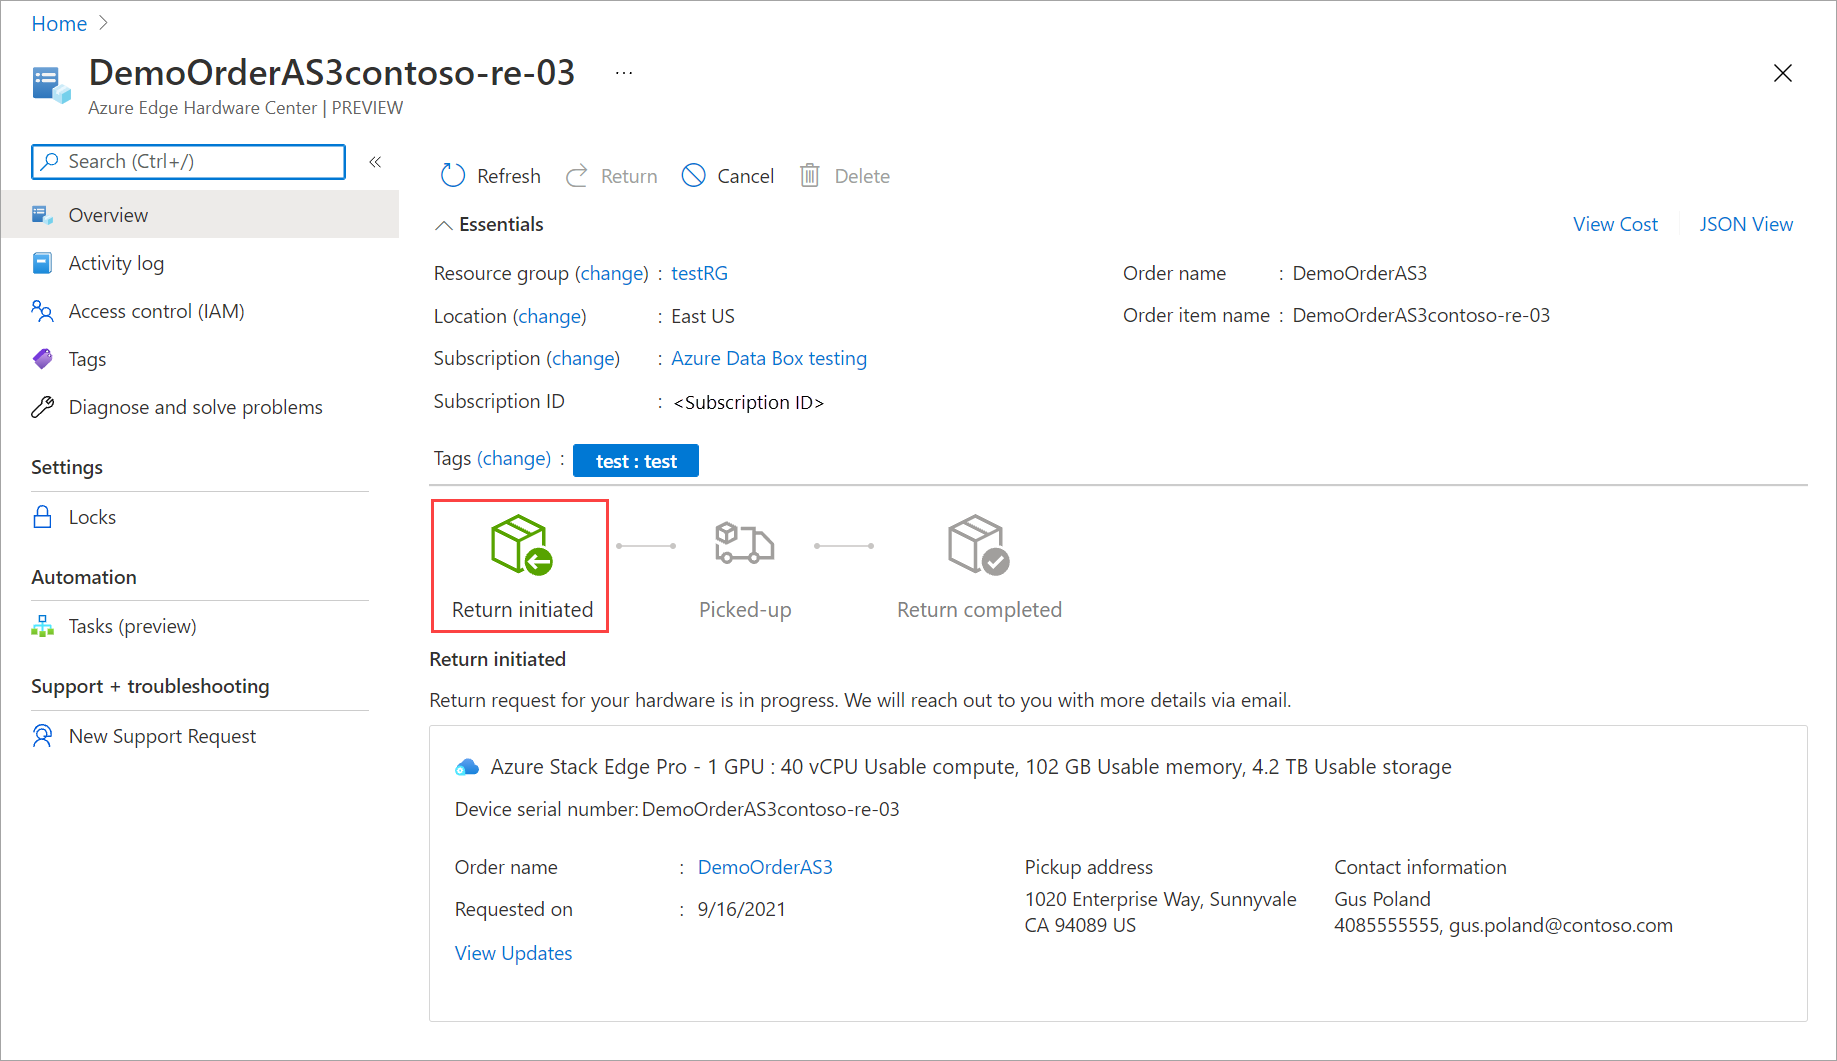
Once the request is initiated, the Azure Stack Edge operations team reaches out to you to help schedule the device pickup.
Next steps
- Review Azure Edge Hardware Center FAQ.