Use the Azure Cosmos DB Data Explorer to manage your data
APPLIES TO:
![]() NoSQL
NoSQL
![]() MongoDB
MongoDB
![]() Cassandra
Cassandra
![]() Gremlin
Gremlin
![]() Table
Table
Azure Cosmos DB Data Explorer is a web-based interface that allows you to view and manage the data stored in Azure Cosmos DB.
The dedicated Azure Cosmos DB Data Explorer (https://cosmos.azure.com) has a few key advantages when compared to the Azure portal's Data Explorer experience, including:
- Full screen real-estate to browse data, run queries, and observe query results
- Ability to provide users without access to the Azure portal or an Azure subscription read or read-write capabilities over data in containers
- Ability to share query results with users who don't have an Azure subscription or Azure portal access
Prerequisites
- An existing Azure Cosmos DB account.
- If you don't have an Azure subscription, Try Azure Cosmos DB free.
Access the Data Explorer directly using your Azure subscription
You can use access the Data Explorer directly and use your existing credentials to quickly get started with the tool.
Navigate to https://cosmos.azure.com.
Select Sign In. Sign in using your existing credentials that have access to the Azure Cosmos DB account.
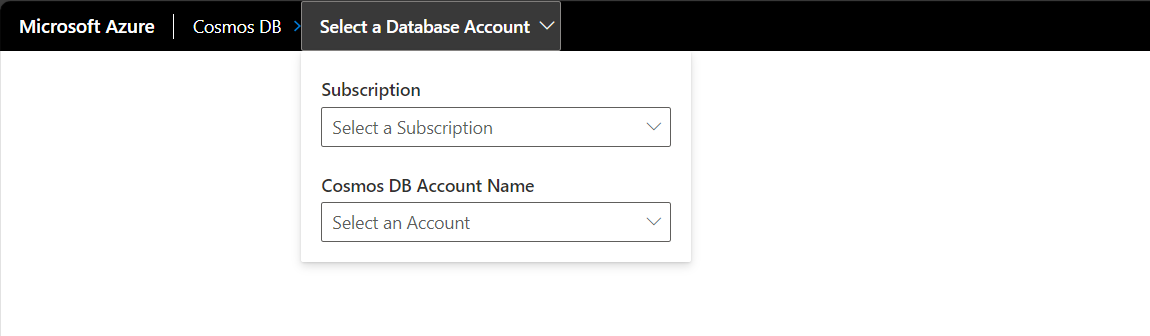
Next, select your Azure subscription and target account from the Select a Database Account menu.
Access the Data Explorer from the Azure portal using your Azure subscription
If you're already comfortable with the Azure portal, you can navigate directly from the in-portal Data Explorer to the standalone Data Explorer.
Sign in to Azure portal.
Navigate to your existing Azure Cosmos DB account.
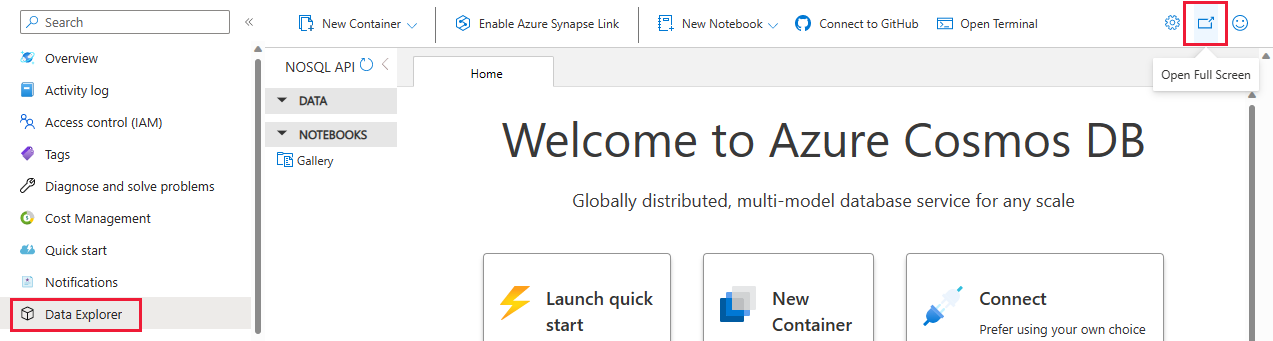
In the resource menu, select Data Explorer.
Next, select the Open Full Screen menu option.
In the Open Full Screen dialog, select Open.
Customize your data views with the Custom Column Selector
The Custom Column Selector in Azure Cosmos DB Data Explorer allows you to customize your data views by selecting specific columns that are most relevant to your analysis when using the NoSQL API. Previously, in the Data Explorer items view, you could only see the partition key and ID columns. Now, with this new feature, you can select one or many properties from your document and create additional columns to easily view your data.
Sign in to Azure portal.
Navigate to your existing Azure Cosmos DB account.
In the resource menu, select Data Explorer.
Next, (Optional) select the Open Full Screen menu option.
In the Open Full Screen dialog, select Open.
Once in Data Explorer, open the collection you want to query, select Items.
Click on the ellipsis menu on the top right of any Column, select Edit Column
Select the columns you want to display and save your settings.
Your data view will now reflect only the selected columns, making it easier to focus on relevant data.
Remove a Custom Column
Once in Data Explorer, open the collection you want to query, select Items.
Click on the ellipsis menu on the top right of any Column, select Remove Column.
Sort your Column View ascending or descending
Once in Data Explorer, open the collection you want to query, select Items.
Click on the ellipsis menu on the top right of any Column, select Remove Column.
Reset your Column View
Once in Data Explorer, open the collection you want to query, select Items.
Click on the ellipsis menu on the top right of any Column, select Edit Column.
Select Reset to return to the default view. Or you can Clear your Filter History, Columns, and Viewport settings by selecting the gear icon in the top right Data Explorer Global menu and select Clear History.
Using Filter History
Filter History enables you to quickly revisit and apply previous filters. This saves you from the repetitive task of manually reconstructing filters for recurring queries. With Filter History, you can access a log of your past filters and reapply them with a simple click. This feature is particularly beneficial for users who perform regular analyses on similar datasets.
Apply a Saved Filter
Once in Data Explorer, open the collection you want to query, select Items.
Click Edit Filter.
Apply a filter to your data as you normally would.
After applying the filter, your filter will be automatically saved and added to the Default filter list in the filter window Drop Down.
To reapply a previous filter, click on the Edit Filter button.
Clear any Filter from the filter window. This step is required to be able to view your saved Filters.
Click the Drop Down in the filter window, and select teh desired filter from the list.
Select Apply Filter
Clear your Filter History
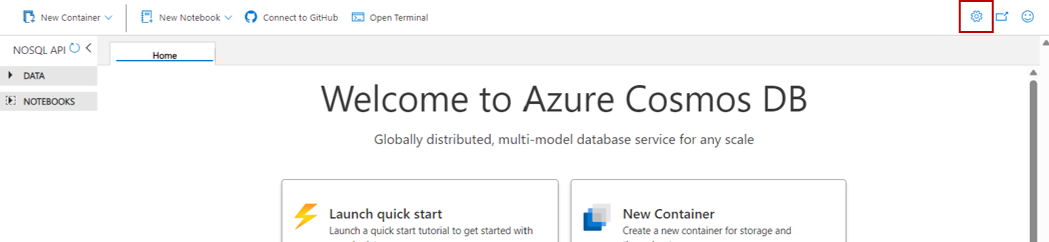
In Data Explorer, click the gear icon in the top right corner of Data Explorer to access settings
Select the Clear History button
Confirm you want to clear your history. This included filter column splitter positions, custom columns, and your tab layout.
Change your Query Window view
We have introduced a new feature in the query view that allows you to switch between horizontal and vertical views for the query and results panel. You can easily toggle between these views by selecting the "Views" option in the command bar menu.
Save your Query Window view preferences
In Data Explorer, click the gear icon in the top right corner of Data Explorer to access settings.
Select "Default Query Results View" from the dropdown menu.
Select either horizontal or vertical as your default view.
Click Save to apply your settings.
Configure request unit threshold
In the Data Explorer, you can configure a limit to the request units per second (RU/s) that queries use. Use this functionality to control the cost and performance in request units (RU) of your queries. This functionality can also cancel high-cost queries automatically.
Start in the explorer for the target Azure Cosmos DB account.
Select the Settings menu option.
In the Settings dialog, configure whether you want to Enable RU threshold and the actual RU threshold value.
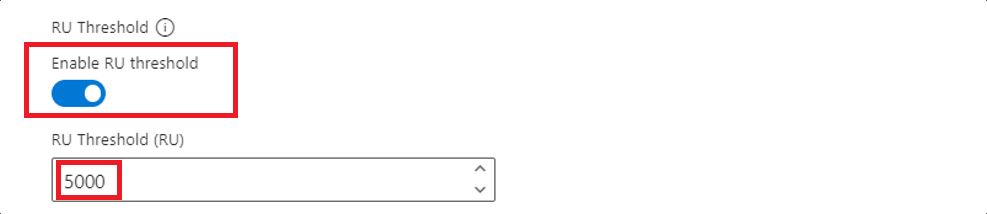
> [!TIP]The RU threshold is enabled automatically with a default value of 5,000 RUs.
Use with Microsoft Entra authentication
You can use Microsoft Entra-based authentication within the explorer by enabling it via configuration. For more information about role-based access control, see the security guide.
Start in the explorer for the target Azure Cosmos DB account.
Select the Settings menu option.
In the Settings dialog, configure whether you want to
Enable Entra ID (RBAC)using one of three possible values:
| Description | |
|---|---|
| Automatic (default) | Role-based access control (RBAC) is automatically used if key-based authentication is disabled for your account. Otherwise, Data Explorer uses key-based authentication for data requests. |
| True | Role-based access control is always used for data requests. If role-based access control isn't configured correctly for the account or identity, then the requests fail. |
| False | Key-based authentication is always used for data requests. If key-based authentication is disabled, then the requests fail. |

Note
Changing this setting to an option that uses key-based authentication could trigger a request to retrieve the primary key on behalf of the identity that is signed in.
Data Explorer will sign in automatically using your account. This might show a brief popup window without asking you for a credential entry. If automatic sign in fails or if popups are blocked in your browser, you must use the Login for Entra ID RBAC button (located on the Data Explorer command bar) and allow popups for Data Explorer prior to making any data requests.
Tip
The Azure Cosmos DB Data Explorer also supports the option to manually set the value of the
Enable Entra ID (RBAC)toTrueusing the https://cosmos.azure.com?feature.enableAadDataPlane=true URL.
Known issues
Here are a few currently known issues:
Browsing items that contain a UUID isn't supported in Data Explorer. This limitation doesn't affect loading containers, only viewing individual items or queries that include these items. To view and manage these items, users should continue to use the same tooling/SDKs that was originally used to create these items.
HTTP 401 errors could occur due to insufficient role-based access control permissions for your Microsoft Entra ID account. This condition can be true particularly if the account has a custom role. Any custom roles must have the
Microsoft.DocumentDB/databaseAccounts/listKeys/*action included to use the Data Explorer.