Custom fields
Azure DevOps Services
Using the custom fields allows storing the custom data against the test run and/or test result. There can be up to 100 custom fields defined for a single Azure DevOps project. Project administrator can manage (add/delete) the set of the custom fields.
Manage the custom fields
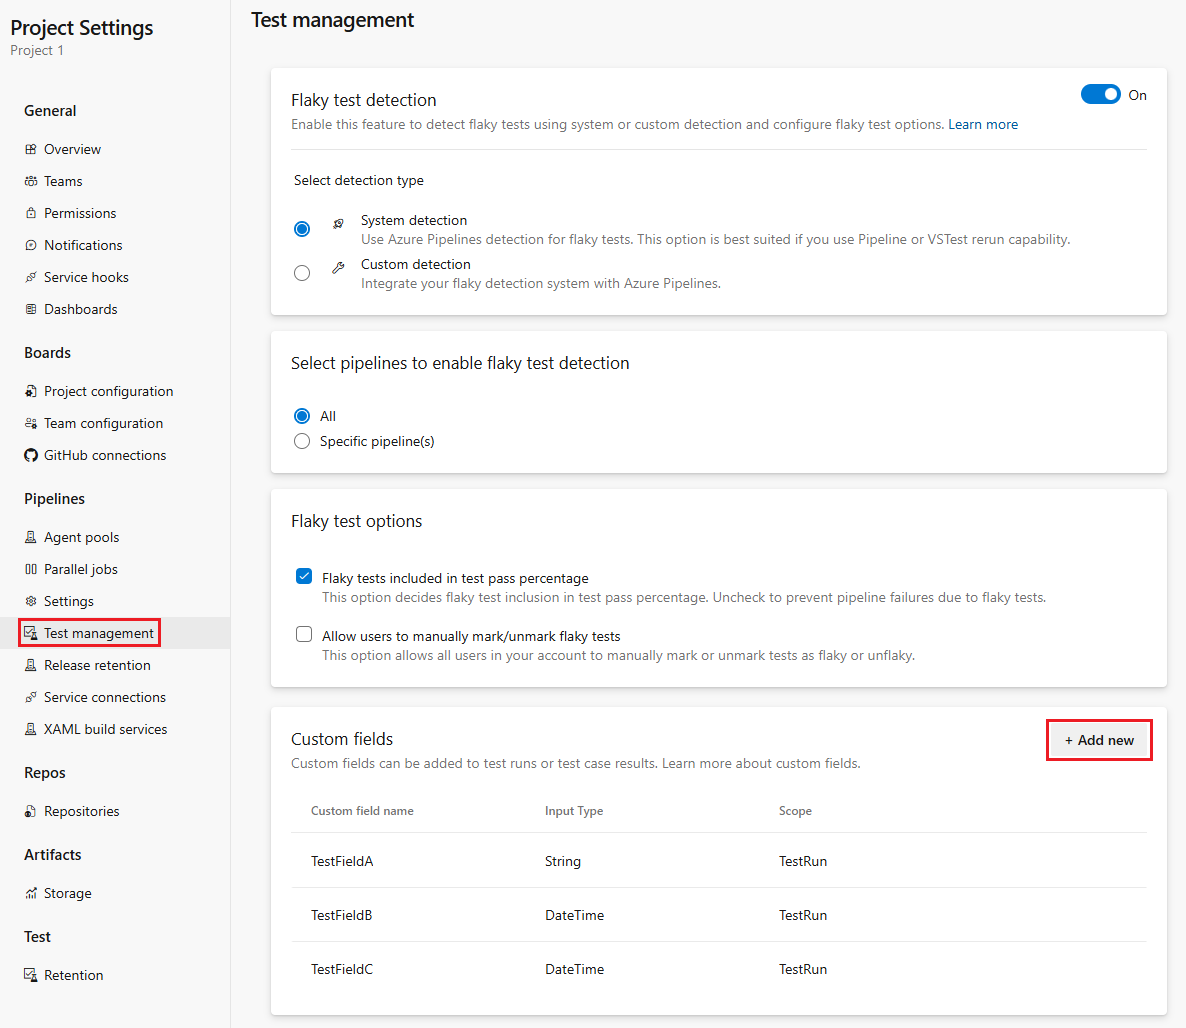
There are two ways to manage the custom fields - either via REST API or project administrator can do that through the Project settings while choosing Test management under Pipelines. On that page new custom field can be added by clicking on the + Add new button.

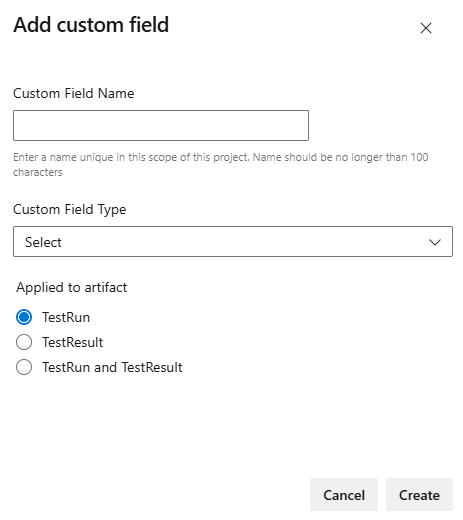
Choose + Add new to add a new custom field. Each custom field must have a name, type configured, and indicate what type of artifact it applies to.

The name of custom field cannot be longer than 50 characters (spaces, numbers, and special characters are not allowed) and must be unique in the project. The names are case insensitive, so you cannot have one custom field named "Test" and the other one named "test". Type can be one of the following:
- Bit
- DateTime
- Int
- Float
- String
- Guid
The existing custom fields can either be edited (only name can be changed) or removed.
Note
After removing the custom field, you cannot use its name for about a day. The background process that is removing the deleted custom fields permanently is run ones a day.
Store custom data into custom fields
You can store your custom data into the configured custom fields either as part of the test run/result creation or after the test run/result was created. Both can be done using REST API for now. In the future we will allow the custom data to be picked up from the test results file. To get the values stored in your custom fields for the existing test run/result, you must use the REST API. For the moment we do not display the custom fields and values stored in these on the Azure DevOps UI (we will be adding that ability in the future).
When you’re creating test run and/or result via REST API and want to store custom data to existing custom field, then the best option for you is to send the custom data as part of the test run and/or result creation. To create a test run call REST API Runs - Create and to create test result call REST API Results - Add.
When the test run and/or result is not created via REST API, but by other means, then you must first find the identification of the test run or result for which you want to set (or update) the custom data in the custom fields and then call REST API Runs - Update for the test run and REST API Results - Update for the test result.
To retrieve the custom data from the custom fields stored previously against the test run and/or result, you must first find the identification of the test run or result. Then you can call REST API Runs - Query for the test run and REST API Results - Get for the test result.
The custom data for the custom fields are sent or received in an array. Each item of that array contains two properties "fieldname" and "value" and you can see an example of that here. The value is object of the type that matches the type configured for the custom field. To understand the type of the custom field you may want to use REST API that provides array of the custom fields. For each field you can find there its ID, name, type and scope. You may also hardcode the type if you know what the type of the custom field of given name is.