Manage labs in Azure Lab Services
Important
Azure Lab Services will be retired on June 28, 2027. For more information, see the retirement guide.
This article describes how to create and delete labs. It also shows you how to view all the labs in a lab plan.
Prerequisites
- An Azure account with an active subscription. If you don't have an Azure subscription, create a free account before you begin.
- An Azure account with permission to manage a lab, such as the Lab Creator, Owner, Contributor, or Lab Services Contributor Azure RBAC role. Learn more about the Azure Lab Services built-in roles and assignment scopes.
- An Azure lab plan. If you don't have a lab plan yet, follow the steps in Quickstart: Set up resources to create labs.
- One or more labs. To create a lab, see Tutorial: Create a lab.
View all labs
Important
Azure Lab Services will be retired on June 28, 2027. For more information, see the retirement guide.
Navigate to Lab Services web portal: https://labs.azure.com.
Select Sign in. Select or enter a user ID that is a member of the Lab Creator role in the lab plan, and enter password. Azure Lab Services supports organizational accounts and Microsoft accounts.
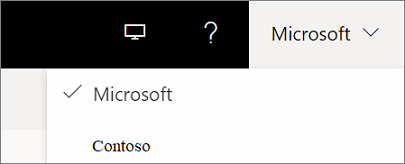
If you have an Administrator or Lab Owner role in two or more Microsoft Entra tenants, you can switch between tenants in the Lab Services web portal (https://labs.azure.com) by selecting the control at the upper right, as shown in the following screenshot:
Confirm that you see all the labs in the selected resource group.
On the lab's tile, you can see the number of virtual machines in the lab and the quota for each user.
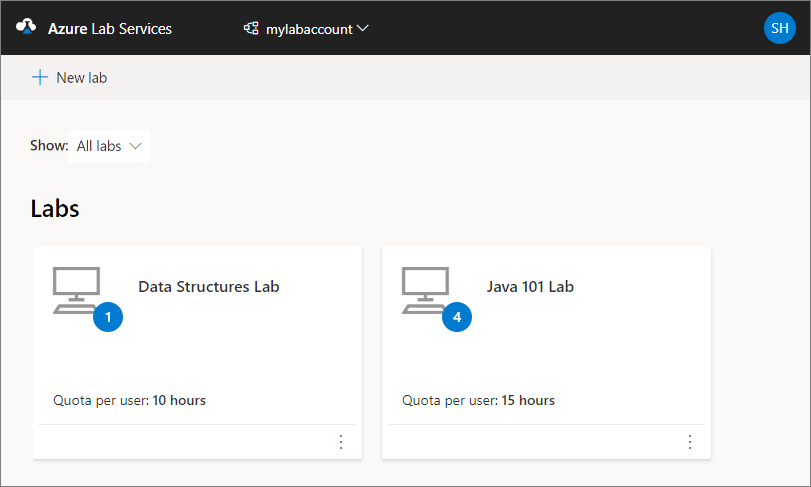
Use the drop-down list at the top to select a different lab plan. You see labs in the selected lab plan.
Note
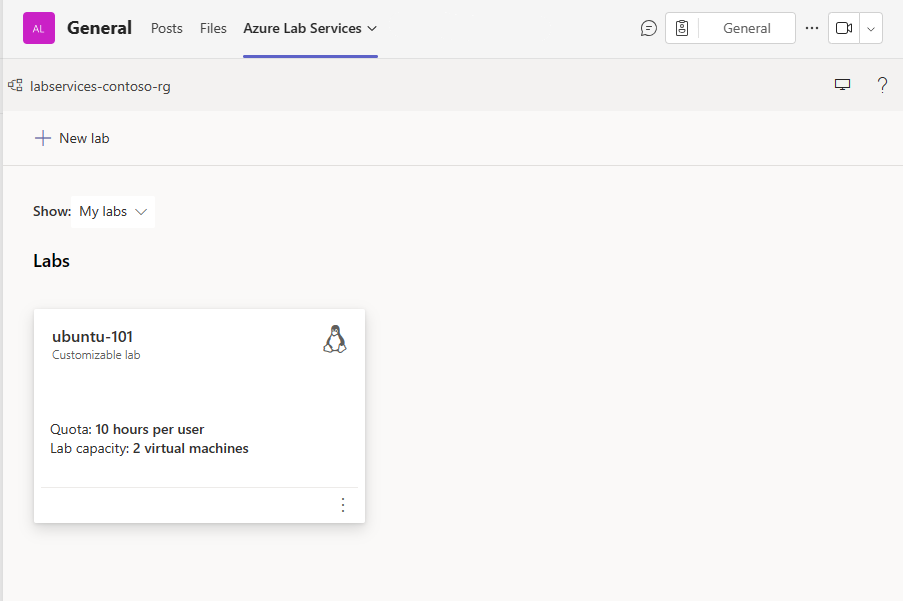
If you're granted access but are unable to view the labs from other people, you might select All labs instead of My labs in the Show filter.
Use a non-organizational account as a lab creator
You can access the Azure Lab Services website to create and manage labs without an organizational account (a guest account). In this case, you need a Microsoft account, or a GitHub or non-Microsoft email account that is linked to a Microsoft account.
Use a non-Microsoft email account
You can use non-Microsoft email accounts to register and sign in to a lab. However, the registration requires that you first create a Microsoft account that's linked to your non-Microsoft email address.
You might already have a Microsoft account that's linked to your non-Microsoft email address. For example, users already have a Microsoft account if you used this email address with other Microsoft products or services, such as Office, Skype, OneDrive, or Windows.
When you use the lab registration link to sign into a lab, you're prompted for your email address and password. If you sign in with a non-Microsoft account that's not linked to a Microsoft account, you receive the following error message:
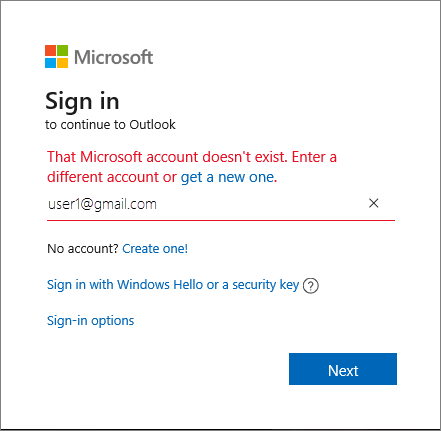
Follow these steps to sign up for a new Microsoft account.
Use a GitHub Account
You can use an existing GitHub account to register and sign into a lab. If you already have a Microsoft account that's linked to your GitHub account, you can sign in and continue the lab registration process.
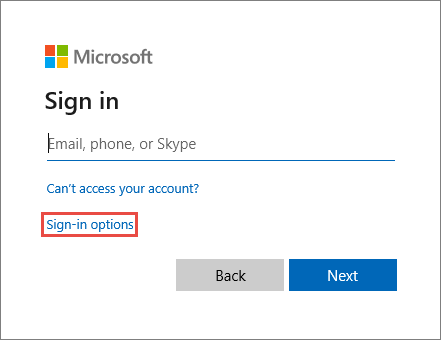
To link your GitHub account to a Microsoft account:
Select the Sign-in options link:
In the Sign-in options window, select Sign in with GitHub.
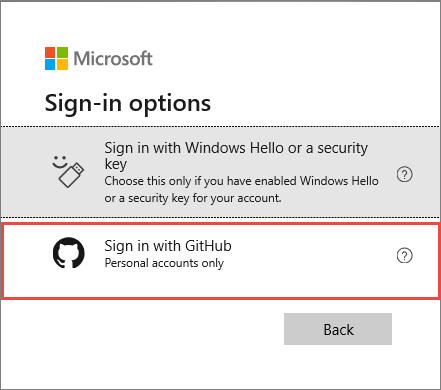
At the prompt, you then create a Microsoft account that's linked to your GitHub account. The linking happens automatically when you select Next. You're then immediately signed in and connected to the lab.
Delete a lab
On the tile for the lab, select three dots (...) in the corner, and then select Delete.
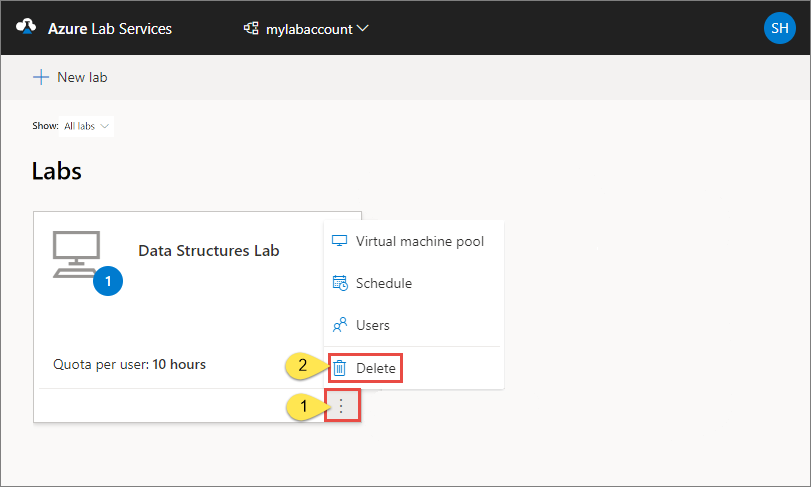
On the Delete lab dialog box, select Delete to continue with the deletion.
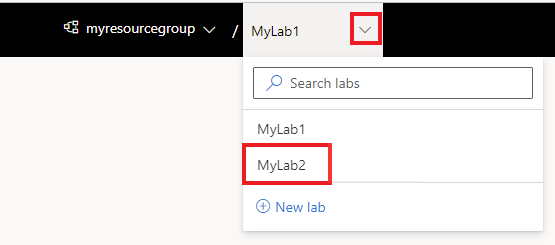
Switch to another lab
To switch to another lab from the current, select the drop-down list of labs at the top.
To switch to a different group, select the left drop-down and choose the lab plan's resource group. To switch to a different lab account, select the left drop-down and choose the lab account name. The Azure Lab Services portal organizes labs by lab plan's resource group/lab account, then by lab name.
Next steps
See the following articles: