Bemærk
Adgang til denne side kræver godkendelse. Du kan prøve at logge på eller ændre mapper.
Adgang til denne side kræver godkendelse. Du kan prøve at ændre mapper.
Azure App Service provides a highly scalable, self-patching web hosting service using the Linux operating system. This tutorial shows how to create a secure PHP app in Azure App Service that's connected to a MySQL database (using Azure Database for MySQL Flexible Server). When you're finished, you'll have a Laravel app running on Azure App Service on Linux.
In this tutorial, you learn how to:
- Create a secure-by-default PHP and MySQL app in Azure
- Configure connection secrets to MySQL using app settings
- Deploy application code using GitHub Actions
- Update and redeploy the app
- Run database migrations securely
- Stream diagnostic logs from Azure
- Manage the app in the Azure portal
Prerequisites
- An Azure subscription If you don't have an Azure subscription, create an Azure free account before you begin. Currently, with an Azure free account, you can try Azure Database for MySQL - Flexible Server free for 12 months. For more information, see Use an Azure free account to try Azure Database for MySQL - Flexible Server for free.
Sample application
To follow along with this tutorial, clone or download the sample application from the repository:
git clone https://github.com/Azure-Samples/laravel-tasks.git
If you want to run the application locally, do the following:
In .env, configure the database settings (like
DB_DATABASE,DB_USERNAME, andDB_PASSWORD) using settings in your local Azure Database for MySQL Flexible Server database. You need a local Azure Database for MySQL Flexible Server instance to run this sample.From the root of the repository, start Laravel with the following commands:
composer install
php artisan migrate
php artisan key:generate
php artisan serve
1 - Create App Service and Azure Database for MySQL Flexible Server resources
In this step, you create the Azure resources. The steps used in this tutorial create an App Service and Azure Database for MySQL Flexible Server configuration that's secure by default. For the creation process, you'll specify:
- The Name for the web app. It's the name used as part of the DNS name for your webapp in the form of
https://<app-name>.azurewebsites.net. - The Runtime for the app. It's where you select the version of PHP to use for your app.
- The Resource Group for the app. A resource group lets you group (in a logical container) all the Azure resources needed for the application.
Sign in to the Azure portal and follow these steps to create your Azure App Service resources.
| Instructions | Screenshot |
|---|---|
In the Azure portal:
|

|
In the Create Web App + Database page, fill out the form as follows.
|

|
The deployment takes a few minutes to complete, and creates the following resources:
|

|
2 - Set up database connectivity
The creation wizard generated app settings for you to use to connect to the database, but not in a format that's useable for your code yet. In this step, you edit and update app settings to the format that your app needs.
| Instructions | Screenshot | ||||||||||
|---|---|---|---|---|---|---|---|---|---|---|---|
| In the App Service page, in the left menu, select Configuration. |

|
||||||||||
In the Application settings tab of the Configuration page, for each of the following settings, select Edit, update the Name field with new values and select OK.
|

|
||||||||||
Create a new MYSQL_ATTR_SSL_CA database setting:
|

|
||||||||||
Create the following extra app settings by following the same steps, then select Save.
|

|
3 - Deploy sample code
In this step, you'll configure GitHub deployment using GitHub Actions. It's just one of many ways to deploy to App Service, but also a great way to have continuous integration in your deployment process. By default, every git push to your GitHub repository will kick off the build and deploy action. You'll make some changes to your codebase with Visual Studio Code directly in the browser, then let GitHub Actions deploy automatically for you.
| Instructions | Screenshot |
|---|---|
In a new browser window:
|

|
In the GitHub page, open Visual Studio Code in the browser by pressing the . key. |

|
In Visual Studio Code in the browser, open config/database.php in the explorer.In the mysql connection, see that the app settings you created earlier for the MySQL connection are already used (DB_HOST, DB_DATABASE, DB_USERNAME, DB_PASSWORD, MYSQL_ATTR_SSL_CA). |

|
| Back in the App Service page, in the left menu, select Deployment Center. |

|
In the Deployment Center page:
.github/workflows directory. |

|
In the Deployment Center page:
|

|
To make any changes to your code, go to Visual Studio Code in the browser:
Tip The GitHub action is defined by the file in your GitHub repository, in .github/workflow. You can make it faster by customizing the file. |

|
4 - Generate database schema
The creation wizard puts the Azure Database for MySQL Flexible Server instance behind a private endpoint, so it's accessible only from the virtual network. Because the App Service app is already integrated with the virtual network, the easiest way to run database migrations with your database is directly from within the App Service container.
| Instructions | Screenshot |
|---|---|
In the App Service page:
https://<app-name>.scm.azurewebsites.net/webssh/host instead. |

|
In the SSH terminal:
|

|
5 - Change site root
Laravel application lifecycle begins in the /public directory instead. The default PHP 8.0 container for App Service uses Nginx, which starts in the application's root directory. To change the site root, you need to change the Nginx configuration file in the PHP 8.0 container (/etc/nginx/sites-available/default). For your convenience, the sample repository contains a custom configuration file called default. As noted previously, you don't want to replace this file using the SSH shell, because your changes will be lost after an app restart.
| Instructions | Screenshot |
|---|---|
In the App Service page:
|

|
In the General settings tab:
|

|
6 - Browse to the app
| Instructions | Screenshot |
|---|---|
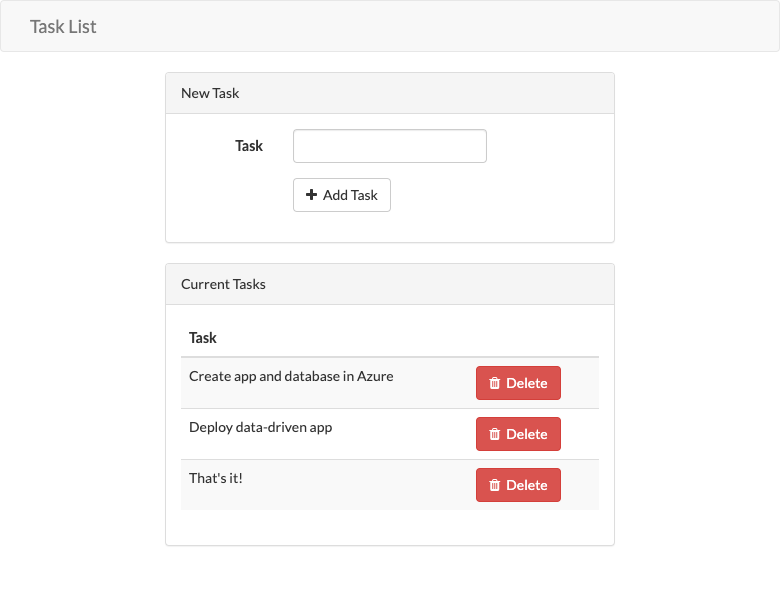
In the App Service page:
|

|
| Add a few tasks to the list.Congratulations, you're running a data-driven PHP app in Azure App Service. |

|
7 - Stream diagnostic logs
| Instructions | Screenshot |
|---|---|
In the App Service page:
|

|
| From the left menu, select Log stream.You see the logs for your app, including platform logs and logs from inside the container. |

|
Clean up resources
When you're finished, you can delete all of the resources from your Azure subscription by deleting the resource group.
| Instructions | Screenshot |
|---|---|
In the search bar at the top of the Azure portal:
|

|
| In the resource group page, select Delete resource group. |

|
|

|
Frequently asked questions
- How much does this setup cost?
- How do I connect to an Azure Database for MySQL Flexible Server database that's secured behind a virtual network?
- How does local app development work with GitHub Actions?
- Why is the GitHub Actions deployment so slow?
How much does this setup cost?
Pricing for the create resources is as follows:
- The App Service plan is created in Premium V2 tier and can be scaled up or down. See App Service pricing.
- The Azure Database for MySQL Flexible Server instance is created in B1ms tier and can be scaled up or down. With an Azure free account, B1ms tier is free for 12 months, up to the monthly limits. See Azure Database for MySQL Flexible Server pricing.
- The virtual network doesn't incur a charge unless you configure extra functionality, such as peering. See Azure Virtual Network pricing.
- The private DNS zone incurs a small charge. See Azure DNS pricing.
How do I connect to an Azure Database for MySQL Flexible Server database that's secured behind a virtual network?
To connect to an Azure Database for MySQL Flexible Server database, you can use several methods based on the tools and environments at your disposal:
- Command-line tool access:
- Use the
mysqlcommand from the app's SSH terminal for basic access.
- Use the
- Desktop tools (for example, MySQL Workbench):
- Using SSH tunneling with Azure CLI:
- Create an SSH session to the web app by using the Azure CLI.
- Use the SSH session to tunnel the traffic to MySQL.
- Using site-to-site VPN or Azure VM:
- Your machine must be part of the virtual network.
- Consider using:
- An Azure VM linked to one of the subnets.
- A machine in an on-premises network that has a site-to-site VPN connection to the Azure virtual network.
- Using SSH tunneling with Azure CLI:
- Azure Cloud Shell integration:
- Integrate Azure Cloud Shell with the virtual network for direct access.
How does local app development work with GitHub Actions?
Take the autogenerated workflow file from App Service as an example, each git push kicks off a new build and deployment run. From a local clone of the GitHub repository, you make the desired updates push it to GitHub. For example:
git add .
git commit -m "<some-message>"
git push origin main
Why is the GitHub Actions deployment so slow?
The autogenerated workflow file from App Service defines build-then-deploy, two-job run. Because each job runs in its own clean environment, the workflow file ensures that the deploy job has access to the files from the build job:
- At the end of the
buildjob, upload files as artifacts. - At the beginning of the
deployjob, download the artifacts.
Most of the time taken by the two-job process is spent uploading and download artifacts. If you want, you can simplify the workflow file by combining the two jobs into one, which eliminates the need for the upload and download steps.
Summary
In this tutorial, you learned how to:
- Create a secure-by-default PHP and Azure Database for MySQL Flexible Server app in Azure
- Configure connection secrets to Azure Database for MySQL Flexible Server using app settings
- Deploy application code using GitHub Actions
- Update and redeploy the app
- Run database migrations securely
- Stream diagnostic logs from Azure
- Manage the app in the Azure portal