Set up a custom domain in Azure Static Web Apps
By default, Azure Static Web Apps provides an autogenerated domain name for your website, but you can point a custom domain to your site. Free SSL/TLS certificates automatically get created for the autogenerated domain name and any custom domains that you might add. This article shows how to configure your domain name with the www subdomain, using an external provider.
There are multiple methods of configuring a custom domain for use with Static Web Apps:
- If you're using an apex domain (a domain without a subdomain, also known as a root domain), see configuring a custom apex domain on Static Web Apps.
- If you're using Azure DNS, see configuring a custom domain with Azure DNS or configuring a custom apex domain with Azure DNS.
Note
Static Web Apps doesn't support set-up of a custom domain with a private DNS server, hosted on-premises. Consider using an Azure Private DNS zone.
Prerequisites
- You must be able to create a CNAME record on your DNS domain using the tools that your DNS service or domain registrar provides.
Watch the video
Get your static web app URL
Go to the Azure portal.
Go to your static web app.
From the Overview window, copy the generated URL of your site and set it aside in a text editor for future use.
Create a CNAME record on your domain registrar account
Domain registrars are services you can use to purchase and manage domain names. To find a domain registrar, see the ICANN list of accredited registrars.
Open a new browser tab and sign in to your domain registrar account.
Go to your domain name's DNS configuration settings.
Add a new
CNAMErecord with the following values.Setting Value Type CNAMEHost Your subdomain, such as www Value Paste the domain name you set aside in the text editor. TTL (if applicable) Leave as default value.
Create a CNAME record in Azure Static Web Apps
Return to your static web app in the Azure portal.
Under Settings, select Custom domains > + Add. Select Custom domain on other DNS.
Select + Add.
In the Enter domain tab, enter your domain name prefixed with www, and then select Next.
For instance, if your domain name is
example.com, enterwww.example.com.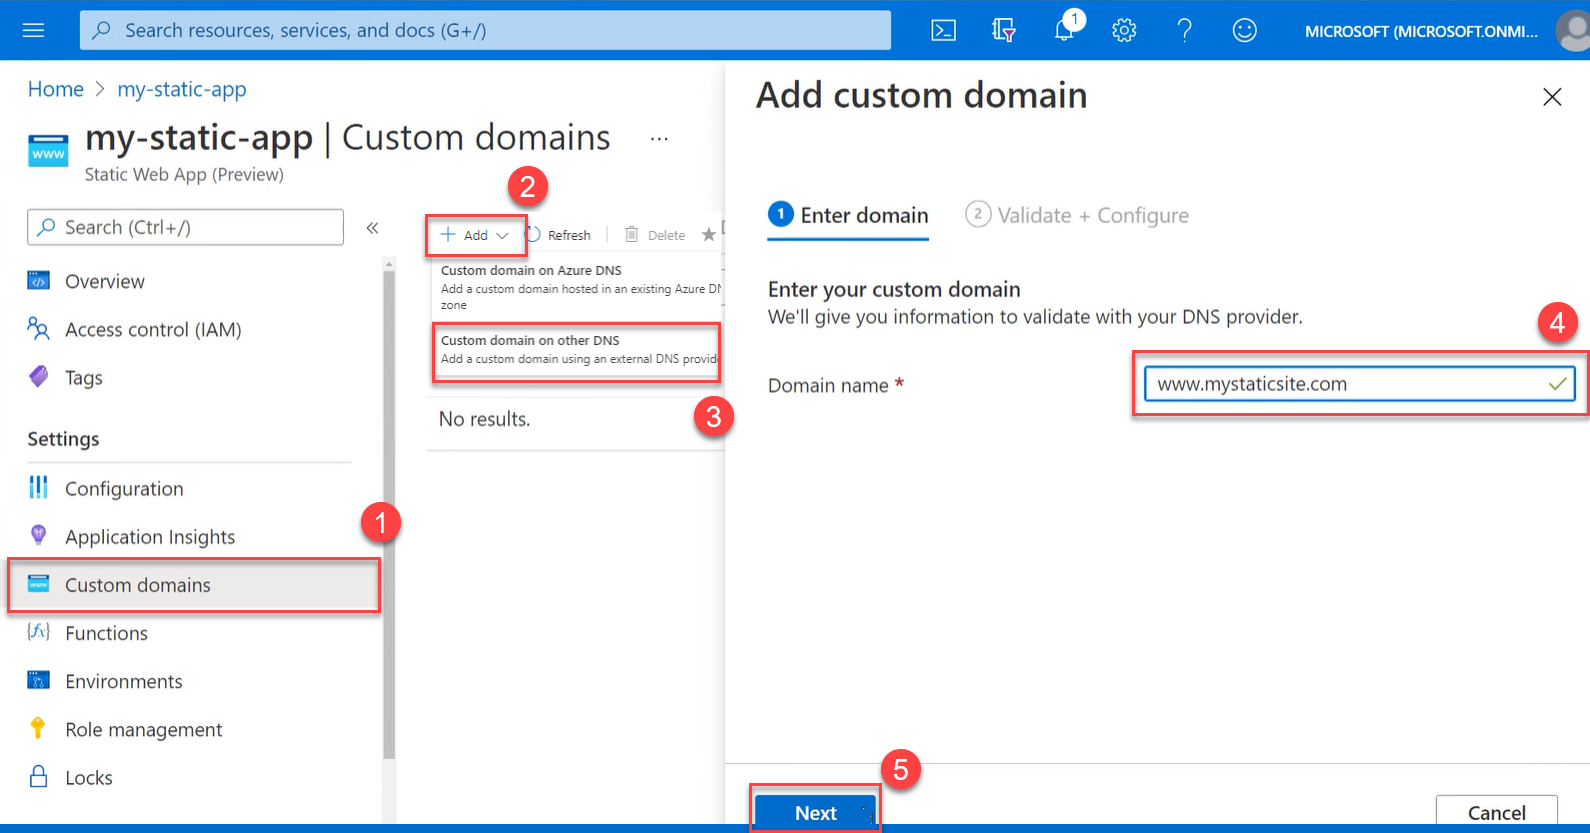
In the Validate + add tab, enter the following values.
Setting Value Domain name This value should match the domain name you entered in the previous step (with the wwwsubdomain).Hostname record type Select CNAME. Select Add.
Azure validates that the CNAME record was created correctly and is available in the global DNS system. Propagation depends on the time to live (TTL) for your domain and may take several days. If the validation fails, return to add the custom domain later.
When the update completes, open a new browser tab and go to your domain with the
wwwsubdomain.You should see your static web app in the browser. Inspect the location to verify that your site is served securely using
https.
Feedback
Kommer snart: I hele 2024 udfaser vi GitHub-problemer som feedbackmekanisme for indhold og erstatter det med et nyt feedbacksystem. Du kan få flere oplysninger under: https://aka.ms/ContentUserFeedback.
Indsend og få vist feedback om