Create pull requests
TFS 2017 | TFS 2015 | TFS 2013
Visual Studio 2019 | Visual Studio 2017 | Visual Studio 2015
Create pull requests (PRs) to change, review, and merge code in a Git repository. You can create PRs from branches in the upstream repository or from branches in your fork of the repository. Your team can review the PRs and give feedback on changes. Reviewers can step through the proposed changes, leave comments, and vote to approve or reject the PRs. Depending on branch policies and other requirements, your PR might need to meet various criteria before you can complete the PR and merge the changes into the target branch.
For PR guidelines and management considerations, see About pull requests.
Prerequisites
To create and complete a PR, you must be a member of the Contributors security group or have the corresponding permissions.
To view or review PRs, you must be a member of an Azure DevOps project with Basic access or higher. If you aren't a project member, get added.
To contribute to a PR, you must be a member of the Readers security group or have the corresponding permissions.
To learn more about permissions and access, see Default Git repository and branch permissions and About access levels.
Create a pull request
You can create a new PR from the Azure DevOps project website, from Visual Studio, or from the Azure DevOps CLI.
From the Azure DevOps project website, you can create a new PR from:
- The Pull requests page.
- A feature branch pushed to your repo.
- An existing PR, by using cherry-pick.
- The Development control in a linked Azure Boards work item.
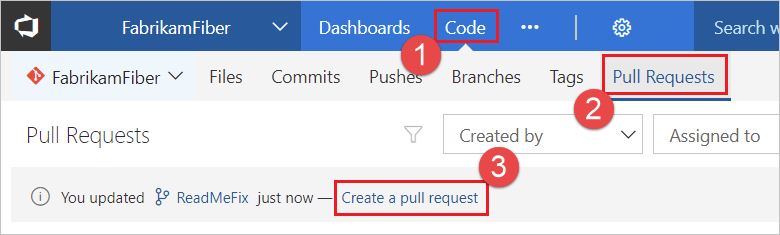
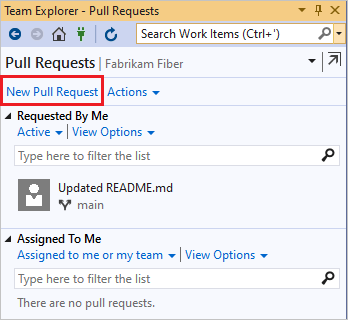
Create a PR from the Pull requests page
You can create PRs for any branch from your project's Pull requests page on the web.
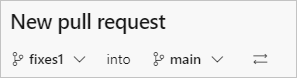
On the Repos > Pull requests page, select New pull request at upper right.

Select the branch with the changes and the branch you want to merge the changes into, such as the main branch.
Enter your PR details and create the PR.
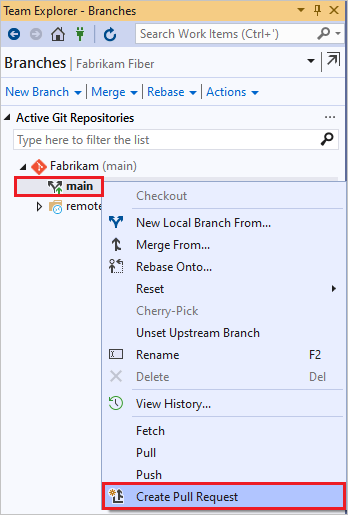
Create a PR from a pushed branch
After you push or update a feature branch, Azure Repos prompts you to create a PR in the Code view on the web. This prompt is displayed on Pull Requests and Files.
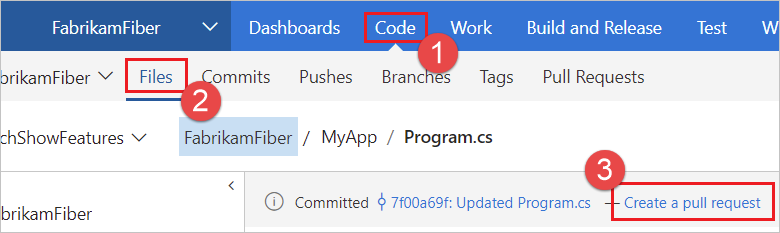
Select Create a pull request to go to a page where you can enter your PR details and create the PR.
Create a PR from a linked work item
You can create a PR directly from an Azure Boards work item linked to the branch.
In Azure Boards, from Backlogs or Queries in the Work view, open a work item that's linked to the branch.
In the Development area of the work item, select Create a pull request.
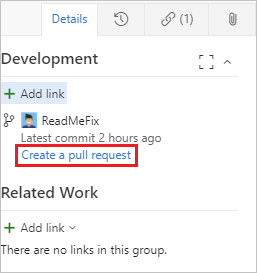
The link takes you to a page where you can enter your PR details and create the PR.
Add updates with cherry-pick
You can copy commits from one branch to another by using cherry-pick. Unlike a merge or rebase, cherry-pick only brings the changes from the commits you select, instead of all the changes in a branch.
To cherry-pick changes from a completed PR, select Cherry-pick on the PR's Overview page. To copy changes from an active PR, select Cherry-pick from the PR's More options menu. This action creates a new branch with the copied changes. You can then create a new PR from the new branch. For detailed instructions, see Copy changes with cherry-pick.
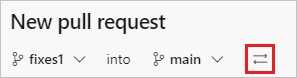
Switch source and target branches of your pull request
Before the first time you save a PR, you can switch the source and target branches of the PR by selecting the Switch source and target branches icon next to the branch names. Once the PR is active, this icon goes away, but you can still change the target branch of the PR.
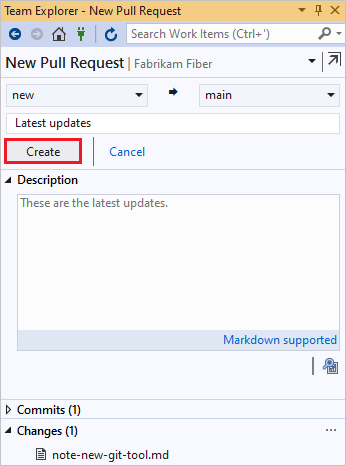
Add or edit pull request title and description
On the New pull request page, enter a Title and detailed Description of your changes, so others can see what problems the changes solve. On a new PR as in existing PRs, you can see the Files and Commits in your PR on separate tabs. You can add reviewers, link work items, and add tags to the PR.
When you're ready to have your changes reviewed, select Create to create the PR.
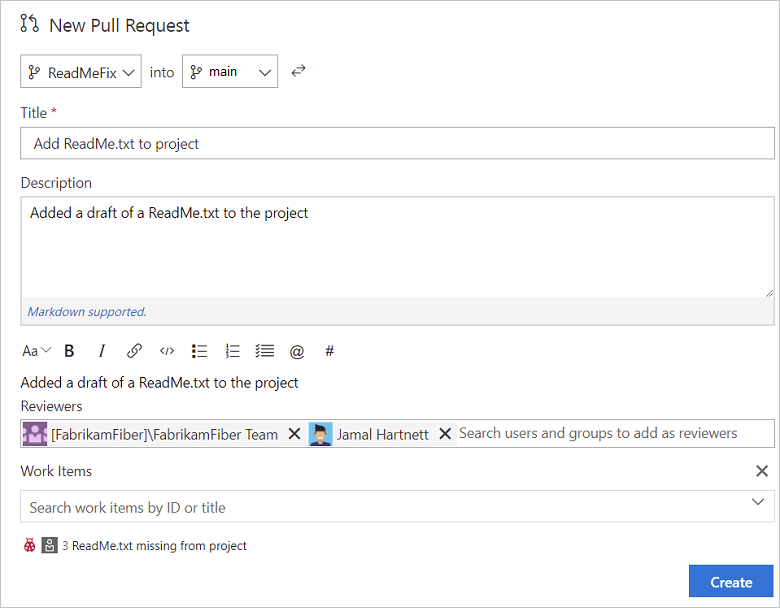
Don't worry if you don't have all of the work items, reviewers, or details ready when you create your PR. You can add or update these items after you create the PR.
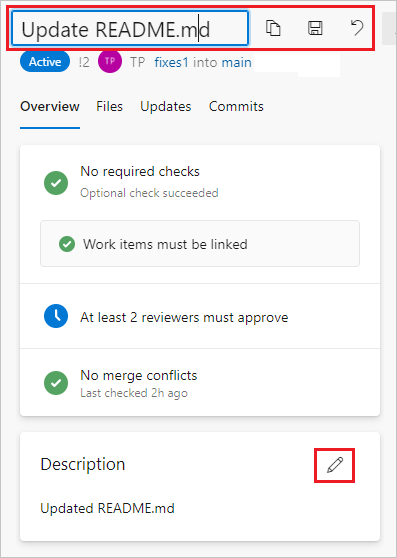
Edit PR title and description
Keep the PR title and description up to date so reviewers can understand the changes in the PR.
You can update the title of an existing PR by selecting the current title and updating the text. Select the Save icon to save changes, or select the Undo icon to discard the changes.
Edit the PR description by selecting the Edit icon in the Description section.
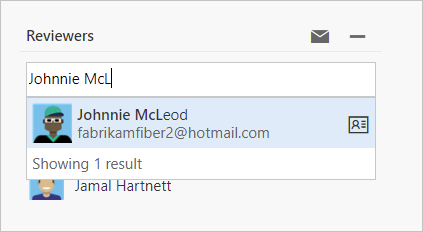
Add reviewers to a pull request
To add reviewers to your PR:
Select the Overview tab in the PR.
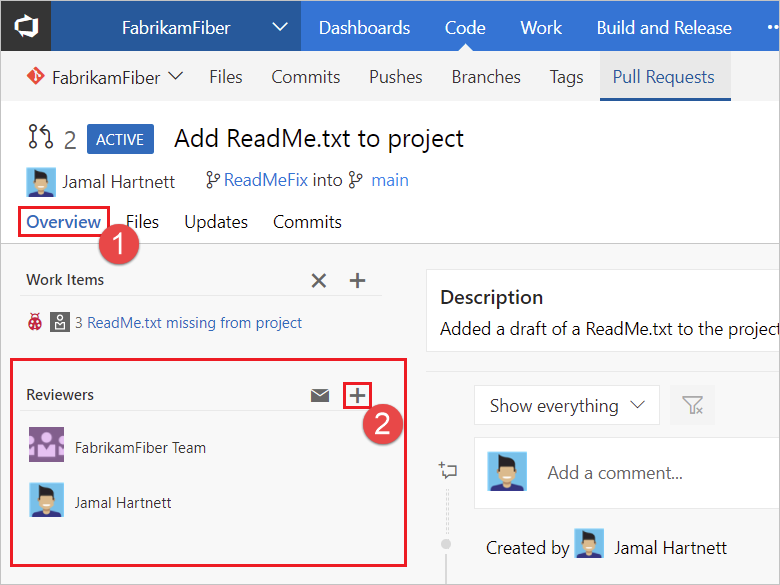
Select the add button in the Reviewers area.

Enter the name of the user or group to add to the reviewer list for the PR. If the user isn't a member of your project, you'll need to add them.
As you enter a name or email address, a list of matching users or groups appears. Select the user or group from the list to add them as a reviewer.
Link work items to a pull request
To link work items to your PR:
Select Overview in the PR.
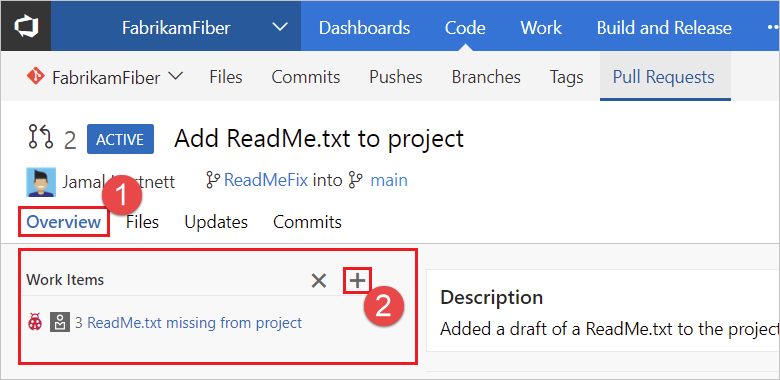
Select the add button in the Work Items area.
Enter the ID of the work item or search for work items with titles that match your text. Select the work item from the list that appears.
Remove work item links by selecting the remove button that appears when you hover over the work item. ![]() Removing a link only removes the link between the work item and the PR. Links created in the branch or from commits stay in the work item.
Removing a link only removes the link between the work item and the PR. Links created in the branch or from commits stay in the work item.
Add labels to a pull request
You can communicate extra information about a PR to the reviewers by using labels. Maybe the PR is still a work in progress, or it's a hotfix for an upcoming release. Use labels to communicate important details and help organize PRs.

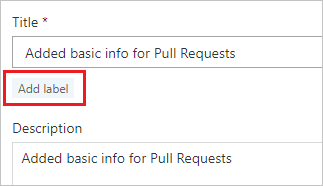
To add a label when creating a PR, choose Add label. After you create a PR, you can manage its labels in the Labels section.
For the email feature to work, your administrator for Azure DevOps Server must configure an SMTP server.