Σημείωση
Η πρόσβαση σε αυτή τη σελίδα απαιτεί εξουσιοδότηση. Μπορείτε να δοκιμάσετε να συνδεθείτε ή να αλλάξετε καταλόγους.
Η πρόσβαση σε αυτή τη σελίδα απαιτεί εξουσιοδότηση. Μπορείτε να δοκιμάσετε να αλλάξετε καταλόγους.
Development teams can vary in their functions and needs. A Microsoft Dev Box dev center helps you manage different scenarios by grouping and applying the same settings to similar projects.
You can create as many dev centers as you need, depending on how you organize and manage your development teams. You can delete dev centers and create new ones to support organizational changes, new business requirements, or new regional centers.
You can add users to a dev center to do administrative tasks, and you can attach network connections to dev centers. This article shows you how to use the Azure portal to create and manage a Microsoft Dev Box dev center.
Note
Microsoft Dev Box uses Microsoft-hosted networks to host dev box pools by default. However, you can host dev boxes in your own virtual networks instead. To use your own network with Microsoft Dev Box, you must create a network connection and then attach the network connection to a dev center.
Permissions
| Category | Requirement |
|---|---|
| Permissions | - To create or delete a dev center, Owner or Contributor role in the Azure subscription or resource group. - To manage a dev center, Owner or Contributor role or specific Write permissions to the dev center. - To attach or remove a network connection, Owner or Contributor role or Network Contributor permissions on the network connection. |
| Connectivity | To attach or remove a network connection, an existing network connection in the same Azure subscription as the dev center. |
| Authentication | To attach or remove a network connection, Microsoft Entra ID for identity and access management and Microsoft Intune for device management. |
Create a dev center
To create a dev center in the Azure portal:
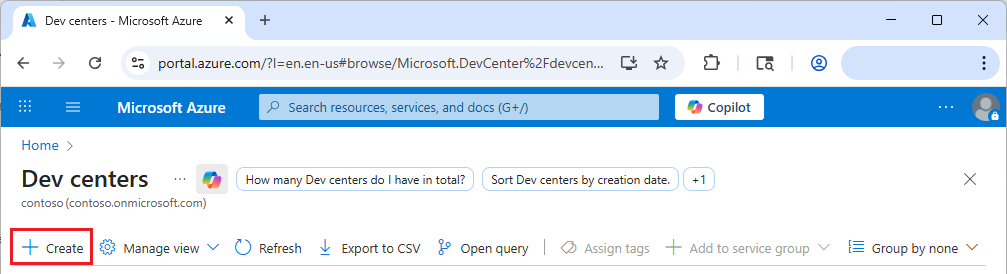
In the Azure portal, search for and then select Dev centers.
On the Dev centers page, select Create.
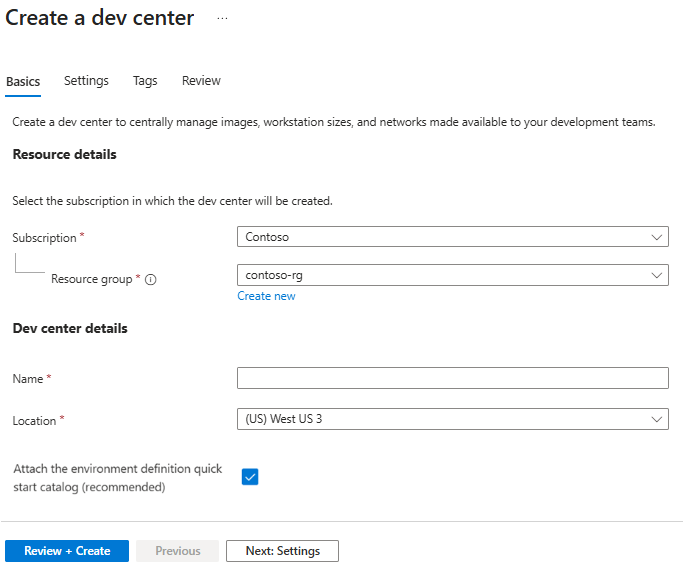
On the Basics tab of the Create a dev center screen, complete the following information:
- Subscription: Select the subscription where you want to create the dev center.
- Resource group: Select an existing resource group, or select Create new and enter a name for the new resource group.
- Name: Enter a name for the dev center.
- Location: Select the Azure region to create the dev center in. For a list of the currently supported Azure locations with capacity, see Products available by region.
- Attach the environment definition quick start catalog (recommended): Select to attach a quick start catalog of predefined environment configurations to the dev center. You can also create and attach your own catalogs.
Select Review + Create, or optionally select Next: Settings to configure more settings.
On the Settings tab of the Create a dev center screen, the following options are already enabled by default. Change this configuration if desired.
- Project level catalogs. Resources from catalogs attached to a dev center are available to all projects within it. This option allows project admins to also attach project-level catalogs to provide customizations for different development teams.
- Microsoft hosted network in projects. Lets project admins specify using Microsoft-hosted networks to host dev boxes in their projects. Microsoft-hosted networks offer network isolation, easy customization, and low administrative overhead. Projects in organizations that require customized networking should use network connection resources instead.
- Azure Monitor Agent. Configures all dev boxes in the dev center to automatically install the Azure Monitor agent. The agent collects monitoring data from the dev box and sends it to Azure Monitor.
Select Review + Create or optionally select Next: Tags to assign tags.
On the Tags tab, enter any name-value tags that you want to assign to resources in the dev center, and then select Review + Create.
Select Create.
Track the progress of the dev center creation in the Notifications pane.
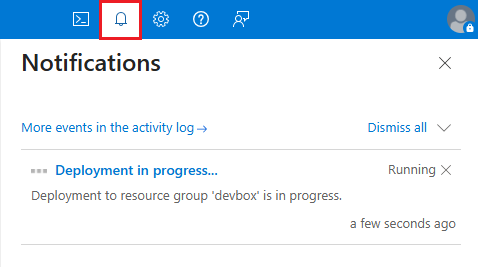
When the deployment completes, select Go to resource and confirm that the dev center page appears.
Assign dev center permissions to users
You can assign users or groups to the following built-in Azure or Microsoft Dev Box roles.
- Owner grants full access to manage all resources in the dev center, including the ability to assign roles in Azure role-based access control (RBAC).
- Contributor grants full access to manage all resources in the dev center, but not assign roles in Azure RBAC, manage assignments in Azure Blueprints, or share image galleries.
- Reader grants the ability to view all resources in the dev center, but not make any changes.
- DevCenter Owner provides access to manage all Microsoft.DevCenter resources and access to them.
- DevCenter Project Admin provides access to manage project resources.
- DevCenter Dev Box User provides access to create and manage dev boxes and can be granted to users by project admins.
To assign roles to users:
- In the Azure portal, go to the page for the dev center you want to assign users to.
- On the dev center page, select Access control (IAM) in the left navigation menu.
- On the Access control (IAM) page, select Add role assignment.
- On the Role tab of the Add role assignment page, select one of the built-in roles, and then select the Members tab.
- On the Members tab, select User, group, or service principal, and then select the Select members link.
- On the Select members screen, search for and select users or groups you want to assign the role, and select Select.
- Select Review + assign, and then select Review + assign again.
For more information, see Assign Azure roles using the Azure portal.
Attach and remove network connections
Network connections enable dev boxes to connect to existing virtual networks. The location or Azure region of the network connection determines where associated dev boxes are hosted.
If you have an existing network connection you want to use with Microsoft Dev Box, you must attach it to a dev center before you can use it for dev box projects and pools. You can attach multiple network connections to a dev center.
Attach a network connection to a dev center
To attach a network connection to a dev center:
In the Azure portal, go to the page for the dev center you want to attach the network connection to.
On the dev center page, select Networking under Dev box configuration in the left navigation menu.
On the Networking page, select Add.

On the Add network connection pane, select the network connection you want to use, and then select Add:
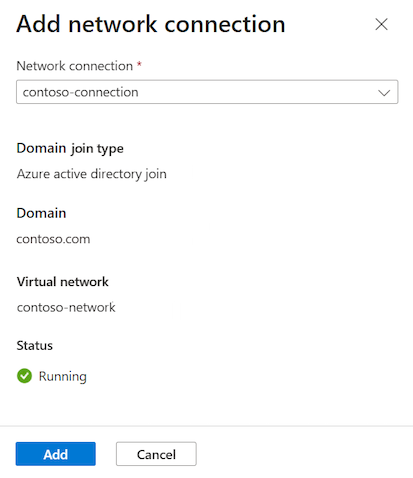
After you attach the network connection, the Azure portal runs several health checks on the network. You can view the status of the checks on the dev center Networking page.
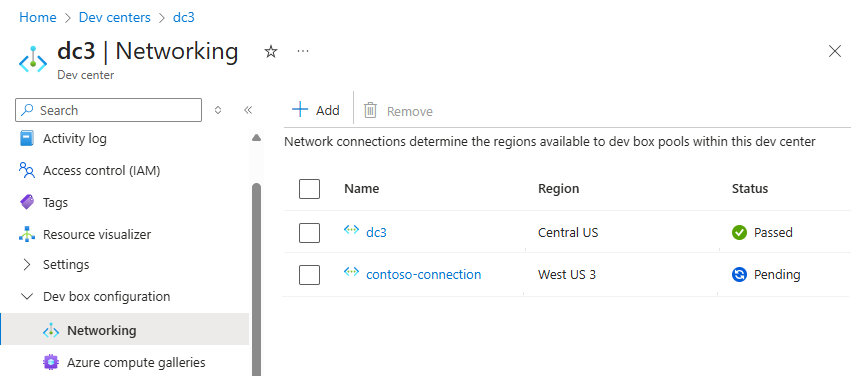
If all the health checks pass, the network connection is added to the dev center and you can select it when you create dev box pools. Dev boxes in the pools are created and domain-joined in the virtual network location assigned to the network connection.
To address health check errors and issues, see Troubleshoot Azure network connections.
Remove a network connection from a dev center
Follow these steps to remove an attached network connection from a dev center.
Note
If the network connection is in use by one or more dev centers, you can't remove it.
In the Azure portal, select the dev center that has the connection you want to remove.
On the dev center page, select Networking under Dev box configuration in the left navigation menu.
Select the network connection you want to remove and then select Remove.
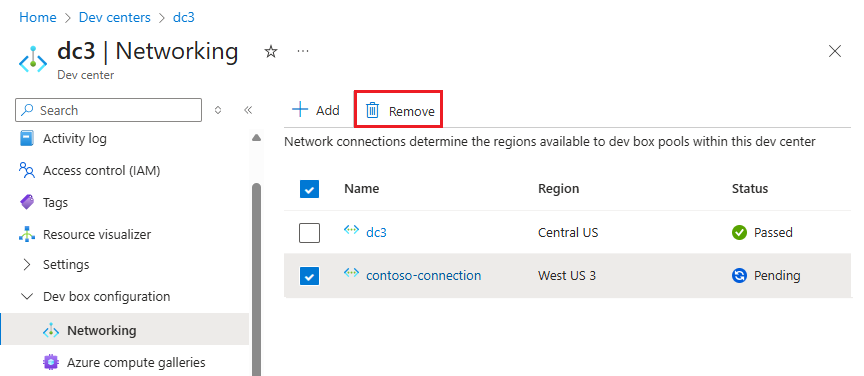
Respond OK to the confirmation message.
After you remove a network connection, it's no longer available for use by dev box pools in the dev center.
Delete a dev center
You can delete a Microsoft Dev Box dev center to reflect organizational or workload changes.
- Deleting a dev center is irreversible.
- You can't delete a dev center that has any projects associated with it. You must delete the projects before you can delete the dev center.
- Attached network connections and their associated virtual networks aren't deleted when you delete a dev center.
To delete a dev center:
In the Azure portal, go to the page for the dev center you want to delete.
On the dev center page, select Delete.

Select OK in the confirmation message.