Create and deploy an Azure OpenAI Service resource
Άρθρο
This article describes how to get started with Azure OpenAI Service and provides step-by-step instructions to create a resource and deploy a model. You can create resources in Azure in several different ways:
The following steps show how to create an Azure OpenAI resource in the Azure portal.
Identify the resource
Sign in with your Azure subscription in the Azure portal.
Select Create a resource and search for the Azure OpenAI. When you locate the service, select Create.
On the Create Azure OpenAI page, provide the following information for the fields on the Basics tab:
Field
Description
Subscription
The Azure subscription used in your Azure OpenAI Service onboarding application.
Resource group
The Azure resource group to contain your Azure OpenAI resource. You can create a new group or use a pre-existing group.
Region
The location of your instance. Different locations can introduce latency, but they don't affect the runtime availability of your resource.
Name
A descriptive name for your Azure OpenAI Service resource, such as MyOpenAIResource.
Pricing Tier
The pricing tier for the resource. Currently, only the Standard tier is available for the Azure OpenAI Service. For more info on pricing visit the Azure OpenAI pricing page
Select Next.
Configure network security
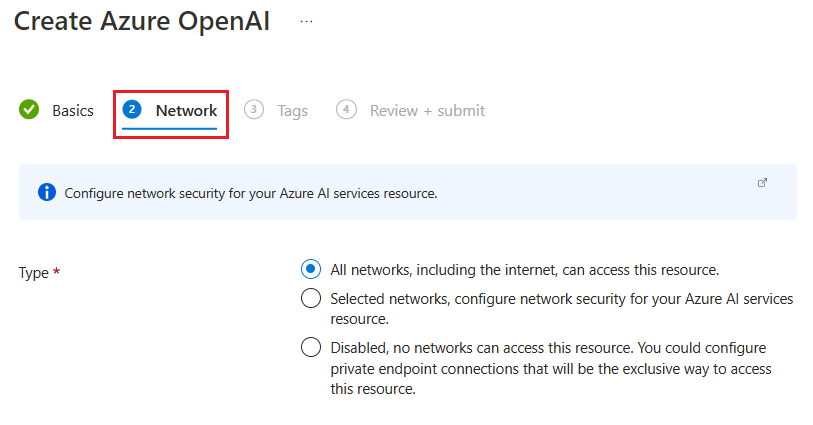
The Network tab presents three options for the security Type:
Option 1: All networks, including the internet, can access this resource.
Option 2: Selected networks, configure network security for your Azure AI services resource.
Option 3: Disabled, no networks can access this resource. You could configure private endpoint connections that will be the exclusive way to access this resource.
Depending on the option you select, you might need to provide additional information.
Option 1: Allow all networks
The first option allows all networks, including the internet, to access your resource. This option is the default setting. No extra settings are required for this option.
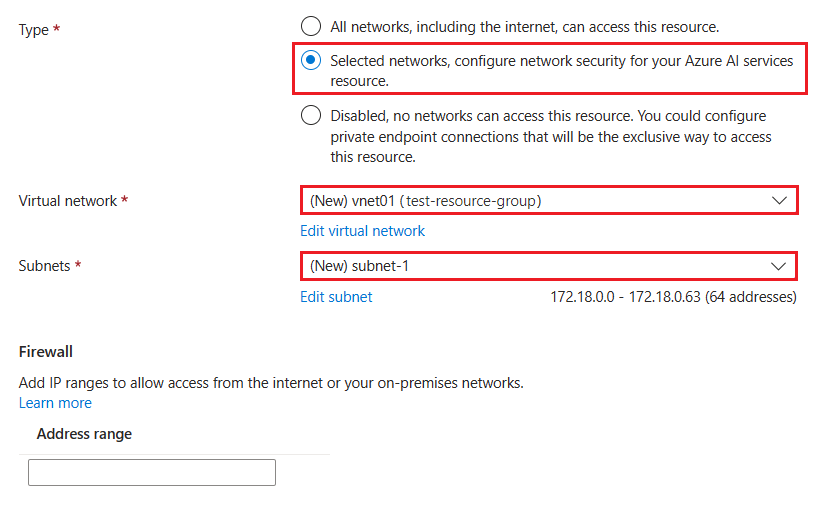
Option 2: Allow specific networks only
The second option lets you identify specific networks that can access your resource. When you select this option, the page updates to include the following required fields:
Field
Description
Virtual network
Specify the virtual networks that are permitted access to your resource. You can edit the default virtual network name in the Azure portal.
Subnets
Specify the subnets that are permitted access to your resource. You can edit the default subnet name in the Azure portal.
The Firewall section provides an optional Address range field that you can use to configure firewall settings for the resource.
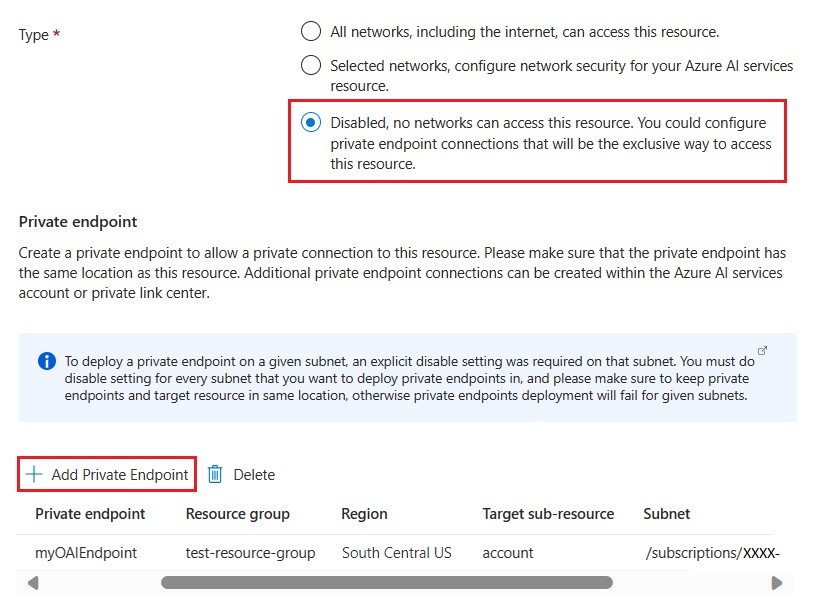
Option 3: Disable network access
The third option lets you disable network access to your resource. When you select this option, the page updates to include the Private endpoint table.
As an option, you can add a private endpoint for access to your resource. Select Add private endpoint, and complete the endpoint configuration.
Confirm the configuration and create the resource
Select Next and configure any Tags for your resource, as desired.
Select Next to move to the final stage in the process: Review + submit.
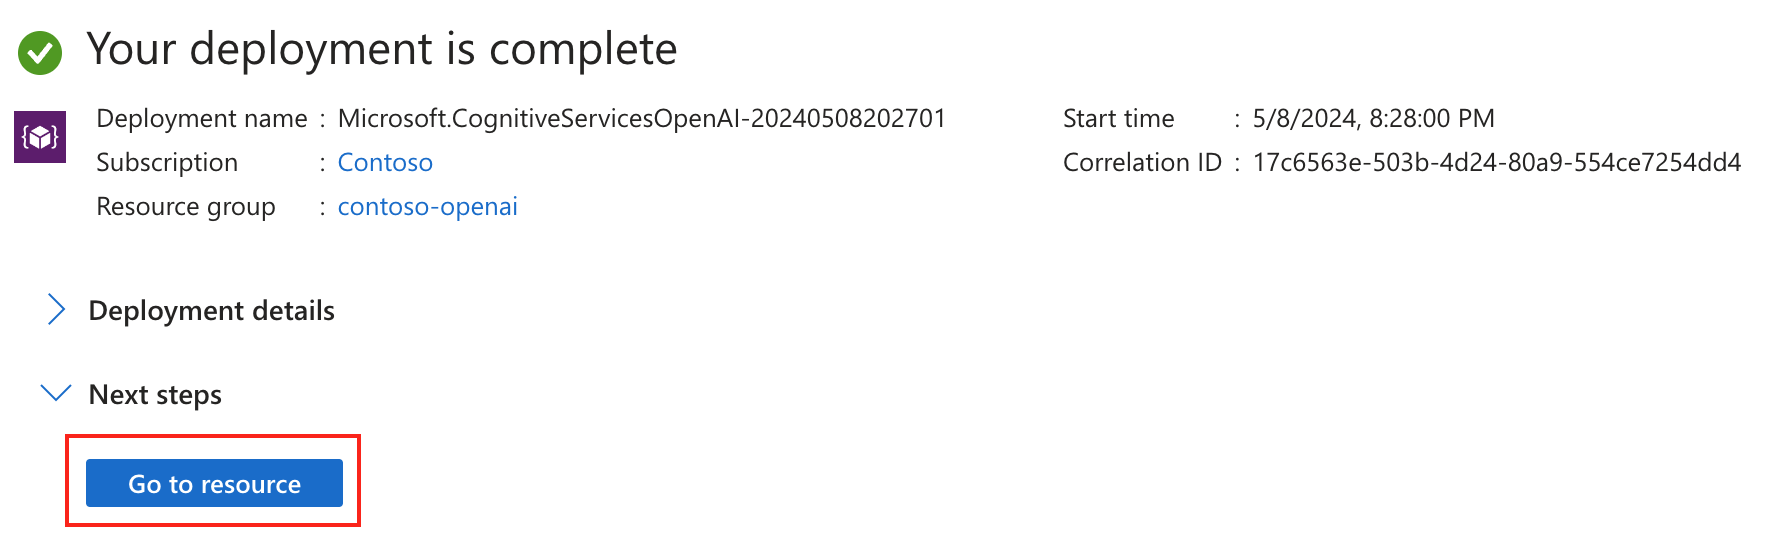
Confirm your configuration settings, and select Create.
The Azure portal displays a notification when the new resource is available. Select Go to resource.
Deploy a model
Before you can generate text or inference, you need to deploy a model. You can select from one of several available models in Azure AI Foundry portal.
Choose a name carefully. The deployment name is used in your code to call the model by using the client libraries and the REST APIs.
Deployment type
Standard, Global-Batch, Global-Standard, Provisioned-Managed. Learn more about deployment type options.
Advanced options (Optional)
You can set optional advanced settings, as needed for your resource. - For the Content Filter, assign a content filter to your deployment. - For the Tokens per Minute Rate Limit, adjust the Tokens per Minute (TPM) to set the effective rate limit for your deployment. You can modify this value at any time by using the Quotas menu. Dynamic Quota allows you to take advantage of more quota when extra capacity is available.
Select a model from the dropdown list.
Enter a deployment name to identify the model.
Σημαντικό
When you access the model via the API, you need to refer to the deployment name rather than the underlying model name in API calls, which is one of the key differences between OpenAI and Azure OpenAI. OpenAI only requires the model name. Azure OpenAI always requires deployment name, even when using the model parameter. In our docs, we often have examples where deployment names are represented as identical to model names to help indicate which model works with a particular API endpoint. Ultimately your deployment names can follow whatever naming convention is best for your use case.
For your first deployment, leave the Advanced options set to the defaults.
Select Create.
The deployments table shows a new entry that corresponds to your newly created model.
When the deployment completes, your model deployment status changes to succeeded.
Sign in to the Azure CLI or select Open Cloudshell in the following steps.
Create an Azure resource group
To create an Azure OpenAI resource, you need an Azure resource group. When you create a new resource through the Azure CLI, you can also create a new resource group or instruct Azure to use an existing group. The following example shows how to create a new resource group named OAIResourceGroup with the az group create command. The resource group is created in the East US location.
Azure CLI
az group create \
--name OAIResourceGroup \
--location eastus
Create a resource
Use the az cognitiveservices account create command to create an Azure OpenAI resource in the resource group. In the following example, you create a resource named MyOpenAIResource in the OAIResourceGroup resource group. When you try the example, update the code to use your desired values for the resource group and resource name, along with your Azure subscription ID <subscriptionID>.
After you create the resource, you can use different commands to find useful information about your Azure OpenAI Service instance. The following examples demonstrate how to retrieve the REST API endpoint base URL and the access keys for the new resource.
Get the endpoint URL
Use the az cognitiveservices account show command to retrieve the REST API endpoint base URL for the resource. In this example, we direct the command output through the jq JSON processor to locate the .properties.endpoint value.
When you try the example, update the code to use your values for the resource group <myResourceGroupName> and resource <myResourceName>.
Azure CLI
az cognitiveservices account show \
--name<myResourceName> \
--resource-group<myResourceGroupName> \
| jq -r .properties.endpoint
Get the primary API key
To retrieve the access keys for the resource, use the az cognitiveservices account keys list command. In this example, we direct the command output through the jq JSON processor to locate the .key1 value.
When you try the example, update the code to use your values for the resource group and resource.
Azure CLI
az cognitiveservices account keys list \
--name<myResourceName> \
--resource-group<myResourceGroupName> \
| jq -r .key1
Deploy a model
To deploy a model, use the az cognitiveservices account deployment create command. In the following example, you deploy an instance of the text-embedding-ada-002 model and give it the name MyModel. When you try the example, update the code to use your values for the resource group and resource. You don't need to change the model-version, model-format or sku-capacity, and sku-name values.
--sku-name accepts the following deployment types: Standard, GlobalBatch, GlobalStandard, and ProvisionedManaged. Learn more about deployment type options.
Σημαντικό
When you access the model via the API, you need to refer to the deployment name rather than the underlying model name in API calls, which is one of the key differences between OpenAI and Azure OpenAI. OpenAI only requires the model name. Azure OpenAI always requires deployment name, even when using the model parameter. In our docs, we often have examples where deployment names are represented as identical to model names to help indicate which model works with a particular API endpoint. Ultimately your deployment names can follow whatever naming convention is best for your use case.
Delete a model from your resource
You can delete any model deployed from your resource with the az cognitiveservices account deployment delete command. In the following example, you delete a model named MyModel. When you try the example, update the code to use your values for the resource group, resource, and deployed model.
If you want to clean up after these exercises, you can remove your Azure OpenAI resource by deleting the resource through the Azure CLI. You can also delete the resource group. If you choose to delete the resource group, all resources contained in the group are also deleted.
If you're not going to continue to use the resources created in these exercises, run the following command to delete your resource group. Be sure to update the example code to use your values for the resource group and resource.
Azure CLI
az cognitiveservices account delete \
--name<myResourceName> \
--resource-group<myResourceGroupName>
Sign in to Azure PowerShell or select Open Cloudshell in the following steps.
Create an Azure resource group
To create an Azure OpenAI resource, you need an Azure resource group. When you create a new resource through Azure PowerShell, you can also create a new resource group or instruct Azure to use an existing group. The following example shows how to create a new resource group named OAIResourceGroup with the New-AzResourceGroup command. The resource group is created in the East US location.
Use the New-AzCognitiveServicesAccount command to create an Azure OpenAI resource in the resource group. In the following example, you create a resource named MyOpenAIResource in the OAIResourceGroup resource group. When you try the example, update the code to use your desired values for the resource group and resource name, along with your Azure subscription ID <subscriptionID>.
After you create the resource, you can use different commands to find useful information about your Azure OpenAI Service instance. The following examples demonstrate how to retrieve the REST API endpoint base URL and the access keys for the new resource.
Get the endpoint URL
Use the Get-AzCognitiveServicesAccount command to retrieve the REST API endpoint base URL for the resource. In this example, we direct the command output through the Select-Object cmdlet to locate the endpoint value.
When you try the example, update the code to use your values for the resource group <myResourceGroupName> and resource <myResourceName>.
To retrieve the access keys for the resource, use the Get-AzCognitiveServicesAccountKey command. In this example, we direct the command output through the Select-Object cmdlet to locate the Key1 value.
When you try the example, update the code to use your values for the resource group and resource.
To deploy a model, use the New-AzCognitiveServicesAccountDeployment command. In the following example, you deploy an instance of the text-embedding-ada-002 model and give it the name MyModel. When you try the example, update the code to use your values for the resource group and resource. You don't need to change the model-version, model-format or sku-capacity, and sku-name values.
Azure PowerShell
$model = New-Object -TypeName'Microsoft.Azure.Management.CognitiveServices.Models.DeploymentModel' -Property @{
Name = 'text-embedding-ada-002'
Version = '2'
Format = 'OpenAI'
}
$properties = New-Object -TypeName'Microsoft.Azure.Management.CognitiveServices.Models.DeploymentProperties' -Property @{
Model = $model
}
$sku = New-Object -TypeName"Microsoft.Azure.Management.CognitiveServices.Models.Sku" -Property @{
Name = 'Standard'
Capacity = '1'
}
New-AzCognitiveServicesAccountDeployment -ResourceGroupName OAIResourceGroup -AccountName MyOpenAIResource -Name MyModel -Properties$properties -Sku$sku
The Name property of the $sku variable accepts the following deployment types: Standard, GlobalBatch, GlobalStandard, and ProvisionedManaged. Learn more about deployment type options.
Σημαντικό
When you access the model via the API, you need to refer to the deployment name rather than the underlying model name in API calls, which is one of the key differences between OpenAI and Azure OpenAI. OpenAI only requires the model name. Azure OpenAI always requires deployment name, even when using the model parameter. In our docs, we often have examples where deployment names are represented as identical to model names to help indicate which model works with a particular API endpoint. Ultimately your deployment names can follow whatever naming convention is best for your use case.
Delete a model from your resource
You can delete any model deployed from your resource with the Remove-AzCognitiveServicesAccountDeployment command. In the following example, you delete a model named MyModel. When you try the example, update the code to use your values for the resource group, resource, and deployed model.
If you want to clean up after these exercises, you can remove your Azure OpenAI resource by deleting the resource through the Azure PowerShell. You can also delete the resource group. If you choose to delete the resource group, all resources contained in the group are also deleted.
If you're not going to continue to use the resources created in these exercises, run the following command to delete your resource group. Be sure to update the example code to use your values for the resource group and resource.
Συμμετάσχετε στη σειρά meetup για να δημιουργήσετε κλιμακούμενες λύσεις AI που βασίζονται σε πραγματικές περιπτώσεις χρήσης με συναδέλφους προγραμματιστές και ειδικούς.