Quickstart: Provision an Azure Spring Apps Standard consumption and dedicated plan service instance
Note
Azure Spring Apps is the new name for the Azure Spring Cloud service. Although the service has a new name, you'll see the old name in some places for a while as we work to update assets such as screenshots, videos, and diagrams.
This article applies to: ✔️ Standard consumption and dedicated (Preview) ❌ Basic/Standard ❌ Enterprise
This article describes how to create a Standard consumption and dedicated plan in Azure Spring Apps for application deployment.
Prerequisites
- An Azure subscription. If you don't have a subscription, create a free account before you begin.
- (Optional) Azure CLI version 2.45.0 or higher. Use the following command to install the Azure Spring Apps extension:
az extension add --name spring
Provision a Standard consumption and dedicated plan instance
You can use either the Azure portal or the Azure CLI to create a Standard consumption and dedicated plan.
Important
The Consumption workload profile has a pay-as-you-go billing model, with no starting cost. You're billed for the dedicated workload profile based on the provisioned resources. For more information, see Workload profiles in Consumption + Dedicated plan structure environments in Azure Container Apps (preview) and Azure Spring Apps pricing.
Use the following steps to create an instance of Azure Spring Apps using the Azure portal.
Open the Azure portal.
In the search box, search for Azure Spring Apps, and then select Azure Spring Apps from the results.
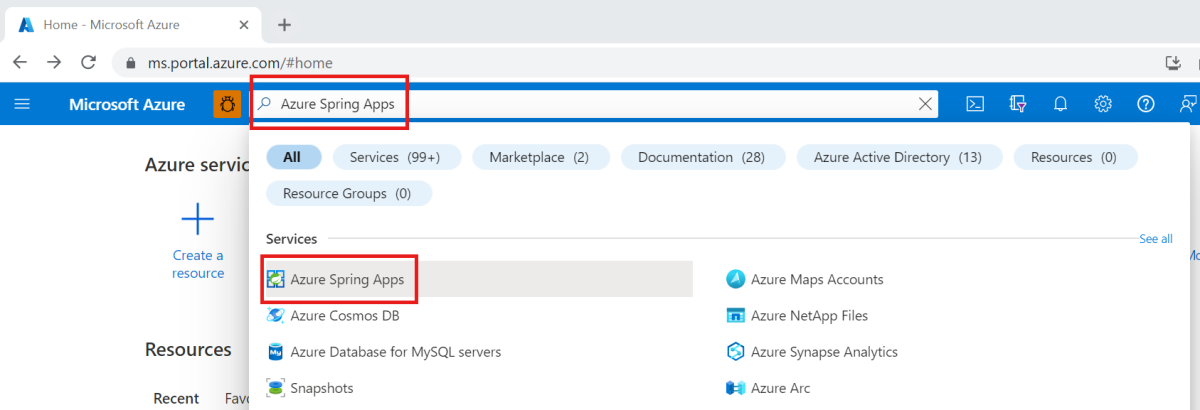
On the Azure Spring Apps page, select Create.

Fill out the Basics form on the Azure Spring Apps Create page using the following guidelines:
Project Details
- Subscription: Select the subscription you want to be billed for this resource.
- Resource group: Select an existing resource group or create a new one.
Service Details
- Name: Create the name for the Azure Spring Apps service instance. The name must be between 4 and 32 characters long and can contain only lowercase letters, numbers, and hyphens. The first character of the service name must be a letter and the last character must be either a letter or a number.
- Location: Currently, only the following regions are supported: Australia East, Central US, East US, East US 2, West Europe, East Asia, North Europe, South Central US, UK South, West US 3.
Plan: Select Standard Consumption and dedicated for the Pricing tier option.
App Environment
Select Create new to create a new Azure Container Apps environment, or select an existing environment from the dropdown menu.

Fill out the Basics form on the Create Container Apps environment page. Use the default value
asa-standard-consumption-app-envfor the Environment name and choose Consumption and Dedicated workload profiles for the Plan.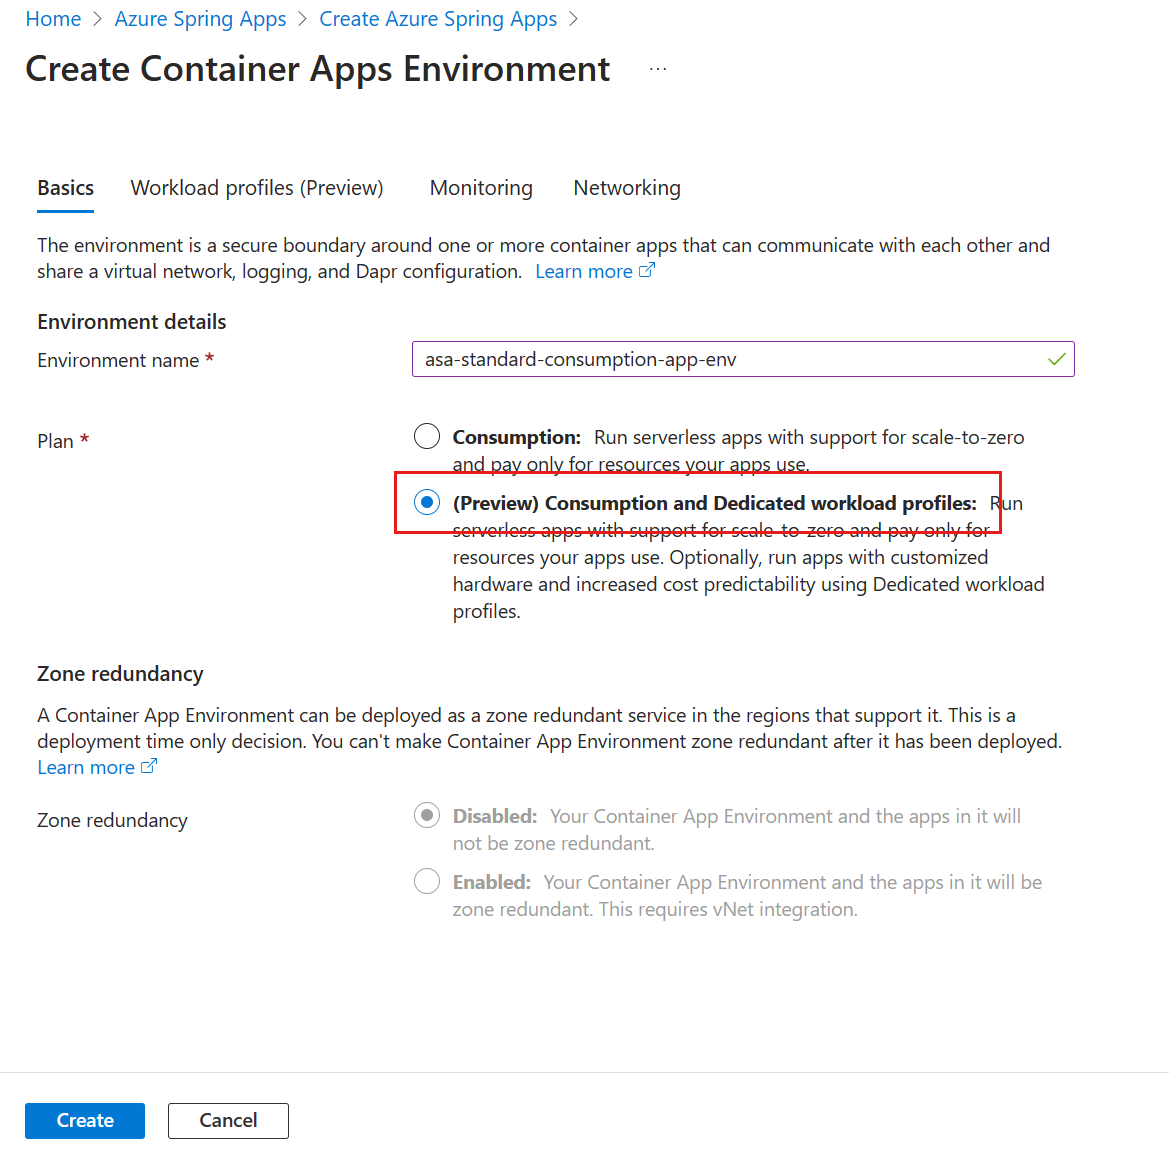
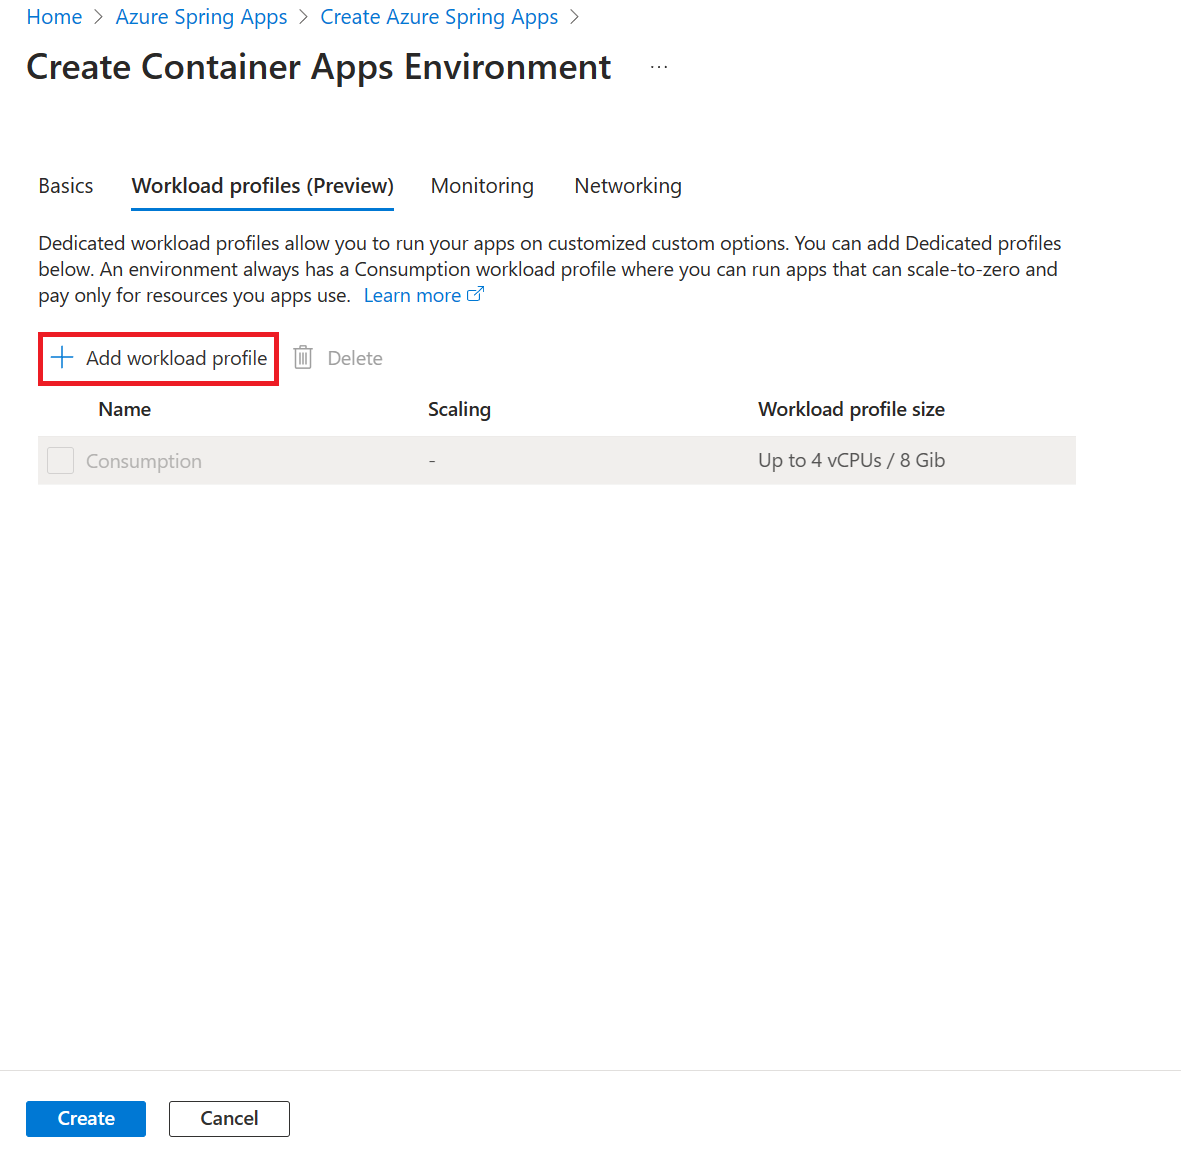
At this point, you've created an Azure Container Apps environment with a default standard consumption workload profile. If you wish to add a dedicated workload profile to the same Azure Container Apps environment, you can select the Workload profiles tab and select Add workload profile.
Select Review and create.
On the Azure Spring Apps Create page, select Review and Create to finish creating the Azure Spring Apps instance.


Note
Optionally, you can also create an Azure Container Apps environment with your own virtual network. For more information, see Quickstart: Create an Azure Spring Apps instance in an Azure Container Apps environment with a virtual network.
Clean up resources
Be sure to delete the resources you created in this article when you no longer need them. To delete the resources, just delete the resource group that contains them. You can delete the resource group using the Azure portal. Alternatively, to delete the resource group by using Azure CLI, use the following commands:
echo "Enter the Resource Group name:" &&
read resourceGroupName &&
az group delete --name $resourceGroupName &&
echo "Press [ENTER] to continue ..."
Next steps
Σχόλια
Σύντομα διαθέσιμα: Καθ' όλη τη διάρκεια του 2024 θα καταργήσουμε σταδιακά τα ζητήματα GitHub ως μηχανισμό ανάδρασης για το περιεχόμενο και θα το αντικαταστήσουμε με ένα νέο σύστημα ανάδρασης. Για περισσότερες πληροφορίες, ανατρέξτε στο θέμα: https://aka.ms/ContentUserFeedback.
Υποβολή και προβολή σχολίων για