Exercise - Create a custom API
In this exercise, you'll build a Dataverse custom API to execute some custom logic. You'll then use the custom API from a step in a Power Automate flow.
Important
Use a test environment with Microsoft Dataverse provisioned. If you do not have one you can sign up for the community plan.
Task 1: Create the custom API project
Download and install Power Platform CLI.
Run the powerapps-cli file to start installation.
Use the setup wizard to complete the setup and select Finish.
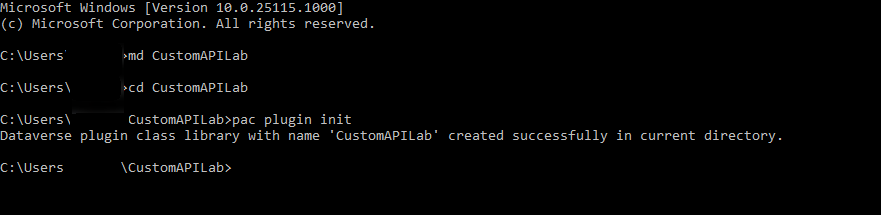
Open Command Prompt.
Run the command below to create a new folder named CustomAPILab.
md CustomAPILabChange directory to the folder you created.
cd CustomAPILabYou should now be in the CustomAPIlAB folder. Run the command below to initialize a new Dataverse plugin class library.
pac plugin initDataverse plugin class library creation should be successful.
Run the command below to open the project in Visual Studio.
start CustomAPILab.csprojThe project should open in Visual Studio.
Right click on the Plugin1.cs file and rename it MatchPlugin.cs.
Select Yes to you're renaming a file dialog.
Right click on the CustomAPILab Project and select Manage NuGet Packages.
Search for System.Text.RegularExpressions and select Install.

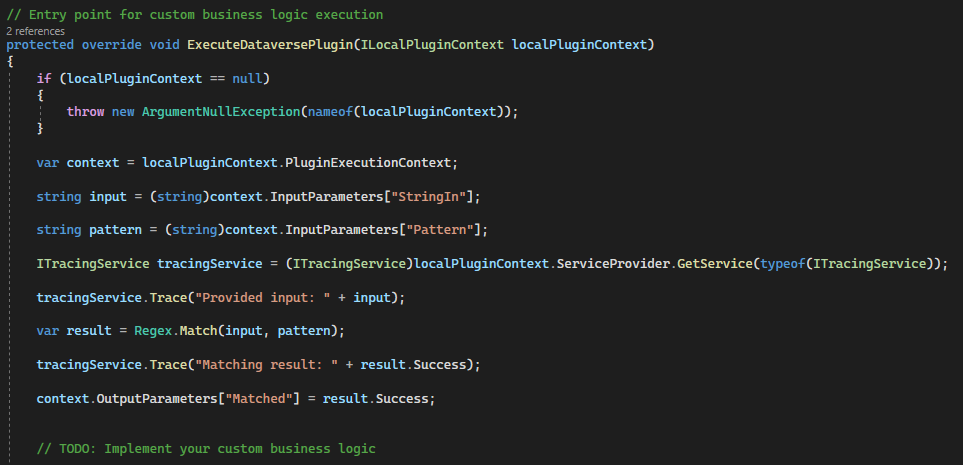
Open the MatchPlugin.cs file.
Add the following statement below.
using System.Text.RegularExpressions;Add the following lines inside the ExecuteDataversePlugin method and after the var context line. These lines get the value from the input parameters passed on the custom API invocation.
string input = (string)context.InputParameters["StringIn"];string pattern = (string)context.InputParameters["Pattern"];Add the following line after to get the tracing service.
ITracingService tracingService = (ITracingService)localPluginContext.ServiceProvider.GetService(typeof(ITracingService));Add the below line to will Write the input value into trace.
tracingService.Trace("Provided input: " + input);Add the following line after to call the Regex.Match method.
var result = Regex.Match(input, pattern);Write the result to trace.
tracingService.Trace("Matching result: " + result.Success);And finally, add the following line to set the output parameter Matched.
context.OutputParameters["Matched"] = result.Success;Your execute method should now look like the following.
Select Build > Build Solution.
The project should build successfully.
Task 2: Register the custom API plugin
Open command prompt and run the command below to launch the Plugin Registration Tool.
pac tool prtSelect + Create New Connection.
Select Office 365, provide your credentials and select Login.
Select the correct environment.
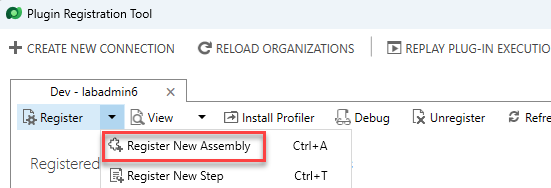
Choose Register | Register New Assembly.
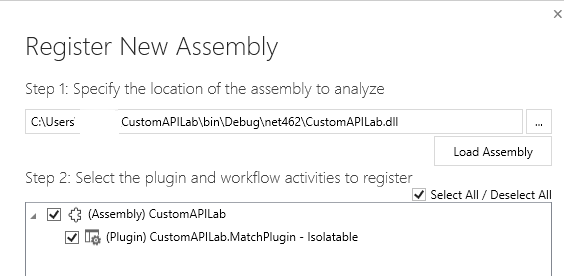
Select ... and then browse to the CustomAPILab\bin\Debug\net462 folder.
Select CustomAPILab.dll.
Select OK.
Select Register Selected Plugins.
Select OK to the success message. Your plugin is ready to connect to the custom API we'll create in the next task.
Task 3: Create the custom API
Navigate to Power Apps maker portal and make sure you are in the correct environment.
Select Solutions on the left navigation.
Select + New Solution.
Enter Custom API Lab in the Display Name.
Select CDS Default Publisher in the Publisher dropdown.
Select Create. This creates a custom solution that will contain our components.
Select + New | More | Other | Custom API
Enter the following information:
Unique Name: contoso_match
Name: Match
Display Name: Match
Description: Match a string
Binding Type: Global
In Plugin Type select the search icon and locate your plugin.
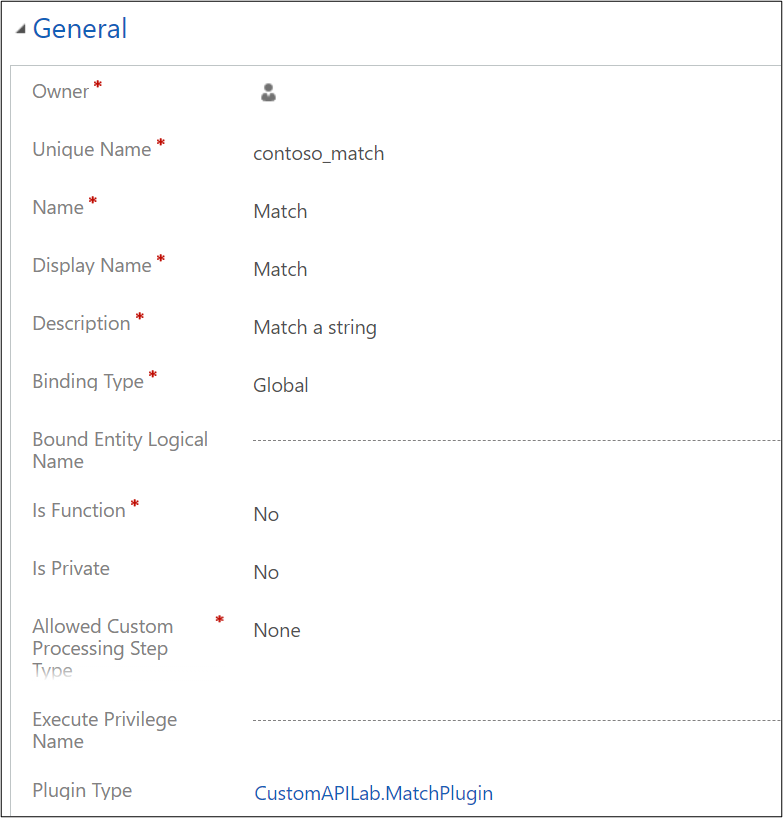
Select Save and Close.
Select Done.
Select + New | More| Other | Custom API Request Parameter.
For Custom API, select the Search icon and select Match (your Custom API).
Enter StringIn for Unique Name, Name, Display Name and Description for simplicity.
Select String for Type.
Select Save and Close.
Select Done.
Repeat steps 13-17 and add another Custom API Request Parameter named Pattern.
Select New | More | Other| Custom API Response Property.
For Custom API, select the Search icon and select Match (your Custom API).
Enter Matched for Unique Name, Name, Display Name and Description for simplicity.
Select Boolean for Type.
Select Save and Close.
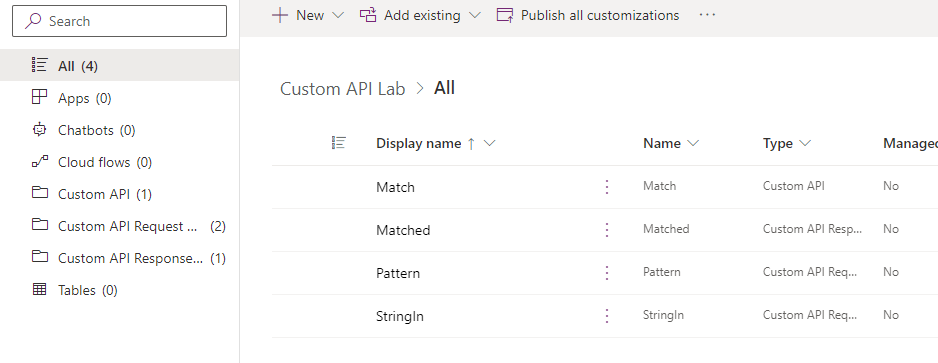
Your solution component list should look like the following.
Task 4: Use custom API from Power Automate
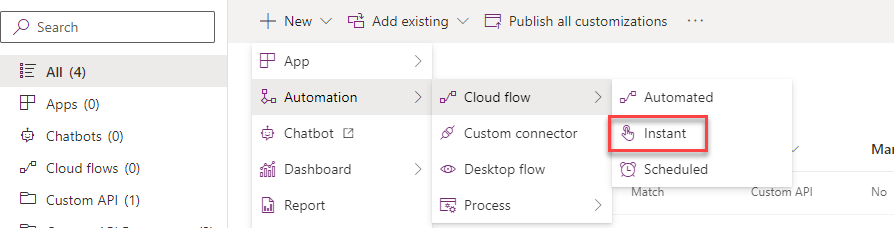
In the solution, select + New | Automation | Cloud Flow | Instant.
Enter String match for Flow name, select Manually trigger a flow trigger, and select Create.
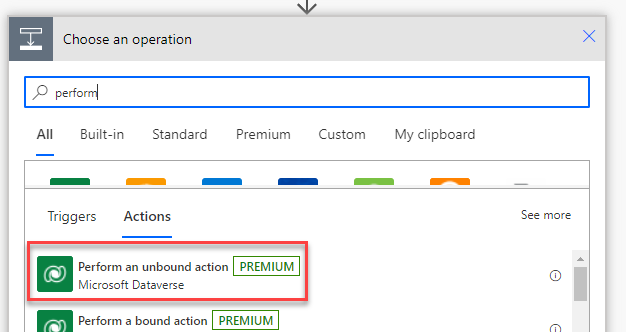
Select the + New Step.
Search for perform and choose Perform an unbound action.
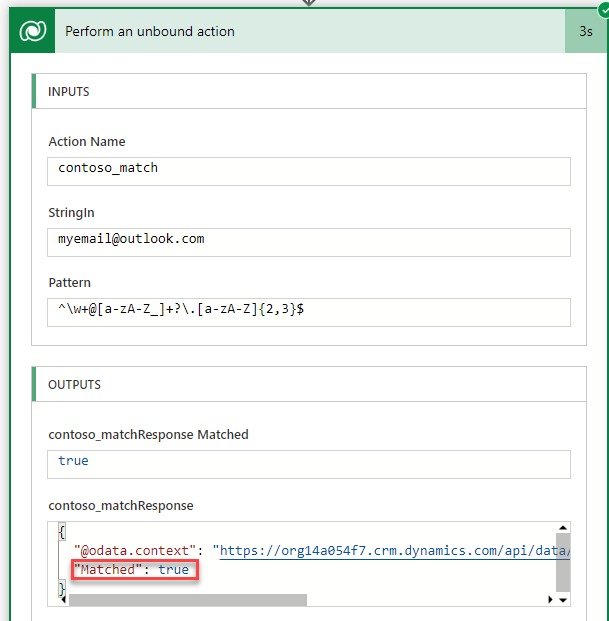
In the Action Name list, locate and select contoso_match.
Enter any valid email address in StringIn.
Enter the following Regular expression in Pattern. This is a simple email pattern. Other examples are available.
^\w+@[a-zA-Z_]+?\.[a-zA-Z]{2,3}$Your flow should look like the following.

Select Save.
After save is complete, select Test.
Select Manually, then select Test.
Select Run flow.
Select Done.
After your flow completes, select the Perform an unbound action to expand and see results.
You have now completed building a custom action and using it from a Power Automate flow. The custom API action contoso_match is now also available for calling directly using the platform API.