Note
Access to this page requires authorization. You can try signing in or changing directories.
Access to this page requires authorization. You can try changing directories.
In this how-to guide, you create an enclave endpoint in the Azure portal. Enclave endpoints define destination rules that other enclaves or transit hubs can use when creating enclave connections.
Prerequisites
- An Azure subscription. If needed, create a free Azure account.
- A community and an enclave.
Sign in to Azure
Sign in to the Azure portal.
Create an enclave endpoint
Enter
Azure Enclavein the search box.Under
Services, selectAzure Enclave.In the
Azure Enclavepage, selectEnclavesin the left menu.On the
Enclavespage, select the name of your enclave to open the enclave resource.Select
Enclave Endpointson the left navigation and then selectCreate.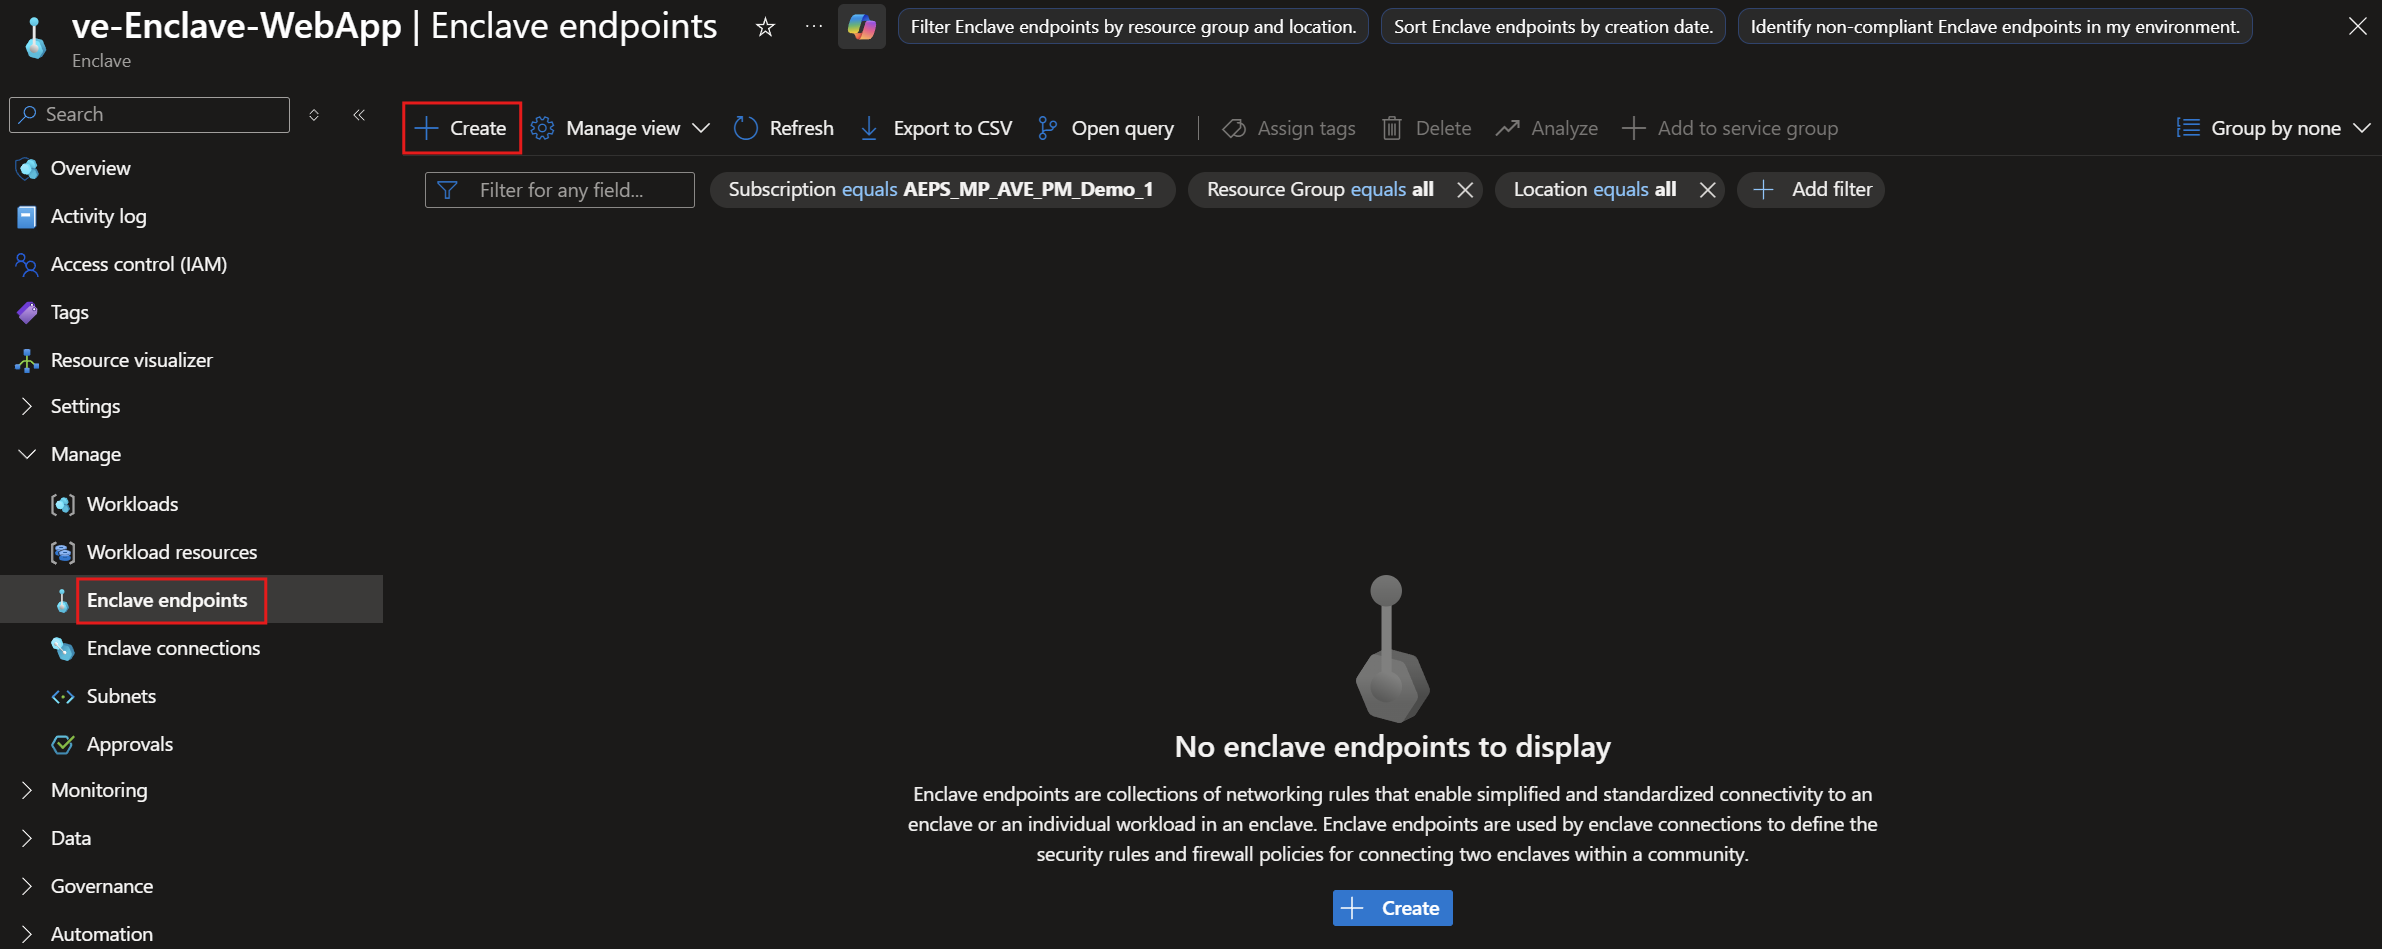
Enter the
Enclave endpoint name, such asendpoint-MyService.Under
Endpoint rules, selectAdd.Enter the
Rule Name,Destination IP addresses/CIDR range,Protocol, andDestination Port Range.For example, to allow traffic to an HTTPS server hosted on an Azure virtual machine (VM) in a workload, enter the VM private IP address or CIDR range, such as
10.0.2.5or10.0.2.0/26, selectTCP, and enter443.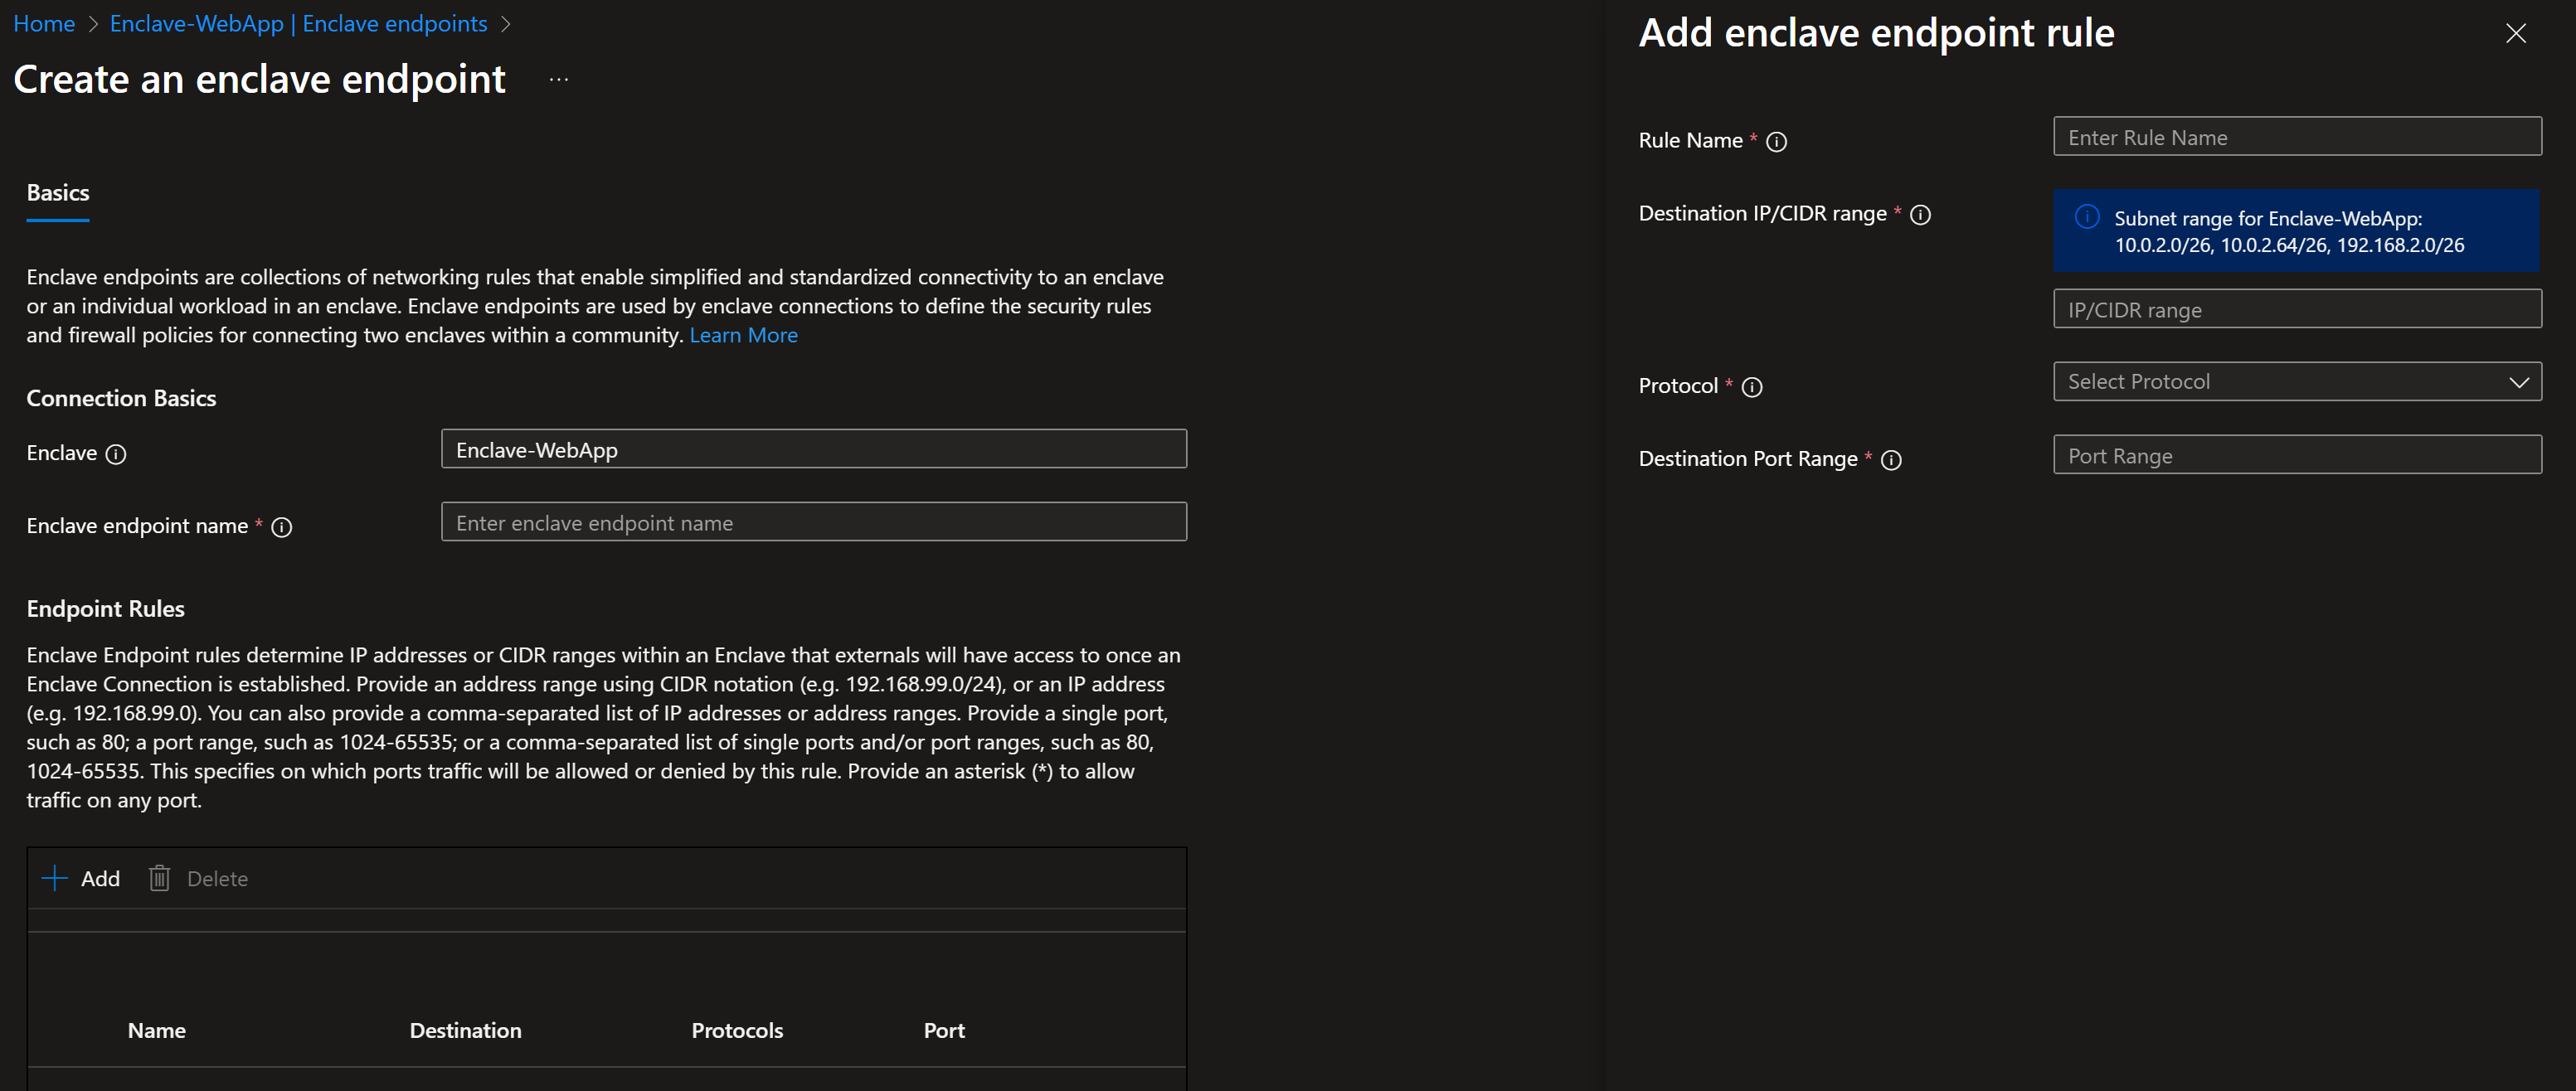
Note
Enclave endpoint rules must use IPv4 destinations in the enclave virtual network. The destination CIDR must map to a subnet that is protected by a network security group.
Select
Review + create, validate that the details for your enclave endpoint are correct, and then selectCreate.
Verify the enclave endpoint
After deployment completes, return to the enclave resource and select Enclave Endpoints. Verify that the new endpoint appears in the list with a status of Succeeded.