Note
Access to this page requires authorization. You can try signing in or changing directories.
Access to this page requires authorization. You can try changing directories.
This article explains how to create root and intermediate certificate authorities within your Azure Device Registry namespace. Use this workflow if you want Azure Device Registry to provision certificate authorities in Microsoft cloud PKI on your behalf.
Important
Azure IoT Hub with Azure Device Registry integration and Microsoft-backed X.509 certificate management is in public preview and isn't recommended for production workloads. For more information, see FAQ: What is new in IoT Hub?.
For information about how the root and intermediate CAs establish trust, see CA hierarchy in Azure Device Registry.
Prerequisites
Before you begin, make sure you have:
- An active Azure subscription. If you don't have one, create a free account.
- An existing Azure Device Registry namespace. For setup instructions, see Deploy Azure IoT Hub with ADR integration and certificate management.
- Permission to manage certificate authorities and policies in the namespace, such as the Azure Device Registry Credentials Contributor role.
Set up the certificate authorities
Use the Azure portal or Azure CLI to create root and intermediate certificate authorities.
Create a root CA
In the Namespaces list, select your namespace.
Under Security, select Certificate Authorities.
Select Create. Root Certificate Authority is disabled if the namespace already has one root CA by default.
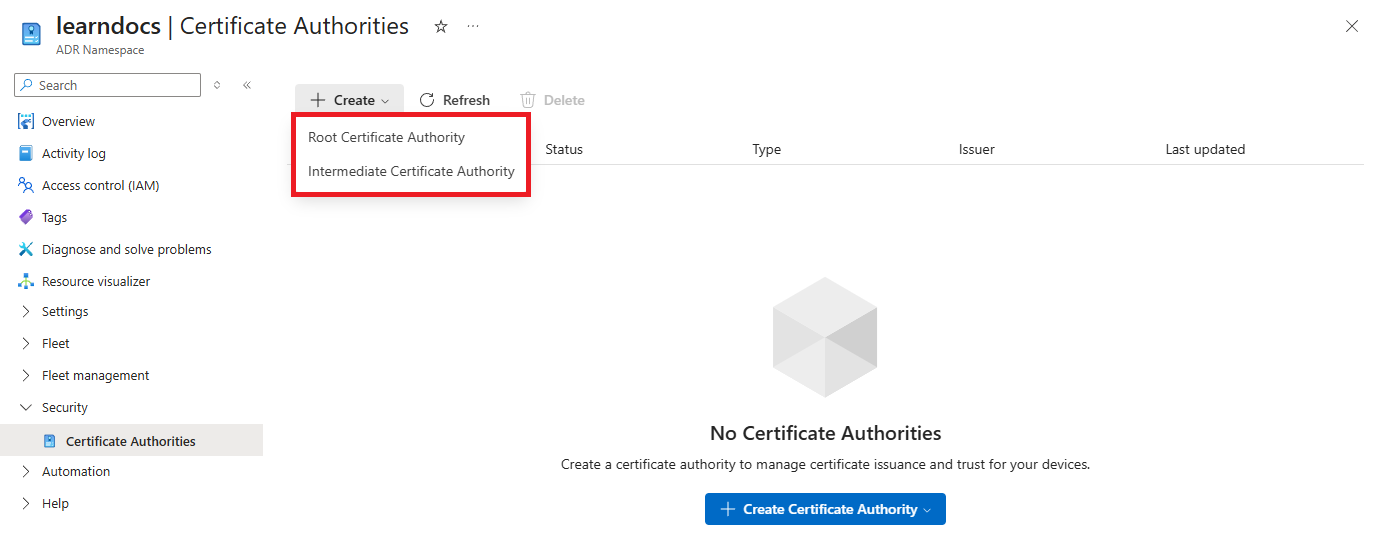
Select Root Certificate Authority.
Give the certificate authority a name that is 3-63 characters in length, then select Create.
Wait for Azure to finish provisioning the root CA. When provisioning is complete, the resource appears on the Certificate Authorities page.
Create an intermediate certificate authority
On the Certificate Authorities page, select Create.
Select Intermediate Certificate Authority.
Select Use this namespace's Root CA, enter a name for the intermediate CA, and then select Create. After you create an intermediate CA, you must create a certificate policy before you can issue device certificates. For instructions, see Create or edit a certificate policy.