Note
Access to this page requires authorization. You can try signing in or changing directories.
Access to this page requires authorization. You can try changing directories.
This article explains how to create an intermediate certificate authority within your Azure Device Registry namespace that is signed and issued by an external CA. Use this workflow if your organization maintains a private Public Key Infrastructure (PKI) and requires all IoT devices to chain up to a common trusted root.
Tip
If you do not possess an external root CA but would like to test this flow, see the additional instructions below to get started with a self-signed root CA and private key using OpenSSL.
Important
Azure IoT Hub with Azure Device Registry integration and Microsoft-backed X.509 certificate management is in public preview and isn't recommended for production workloads. For more information, see FAQ: What is new in IoT Hub?.
Prerequisites
Before you begin, make sure you have the required setup and permissions so you can create, activate, and edit an external CA policy without deployment delays.
- An active Azure subscription. If you don't have one, create a free account.
- An existing Device Registry namespace. For setup steps, see Deploy Azure IoT Hub with ADR integration.
- Permissions to manage policies in the Device Registry namespace, such as the Azure Device Registry Credentials Contributor role.
- CA signing authority: Access to an external PKI (or a managed CA) to perform a one-time signing operation. You need to upload a Microsoft-generated CSR and have your root CA sign it to create the intermediate CA (ICA) certificate.
Requirements for your external CA
To use an external CA, your CA must meet the following requirements:
| Property | Requirements |
|---|---|
| Key type and cryptography | The CA key type must be ECC (P-256, P-384, P-521) with OID 1.2.840.10045.2.1. Explicit EC parameters are rejected, only named curve encoding (OID) is allowed. RSA is rejected. |
| Signature | Signature algorithm must be SHA-256 or higher with ECDSA (ecdsa-with-SHA256, SHA384, or SHA512). SHA-1 is rejected. |
| Path length | Path length for your CA must be set to 1. |
| Subject | The subject on the signed certificate must match the subject from the original CSR (case-insensitive with whitespace normalization) |
| Extensions | BasicConstraints must be present, marked critical, with CA:TRUE. KeyUsage must include DigitalSignature, KeyCertSign, and CrlSign. If the EKU extension is present, it must include ClientAuth (OID 1.3.6.1.5.5.7.3.2). If EKU is absent entirely, that's acceptable (unconstrained CA per RFC 5280). Subject Key Identifier (SKI) must be present. X.509 Version must be Version 3. |
| Validity period | Certificate must not be expired. Certificate NotBefore must not be in the future. Must have at least 365 days of remaining validity. |
Choose the workflow that matches how you operate your environment.
Create an intermediate CA that an external CA signs
Sign in to the Azure portal.
Open your Azure Device Registry namespace.
On the Certificate Authorities page, select Create.
Select Intermediate Certificate Authority.
Select Use an external CA, enter a name for the intermediate CA, and then select Create.
Refresh the Certificate Authorities list if needed. Select the certificate authority and confirm the status is Pending Activation.
Select the Pending Activation link.
In the banner, select Complete Setup.
Select Download certificate signing request (CSR) file.
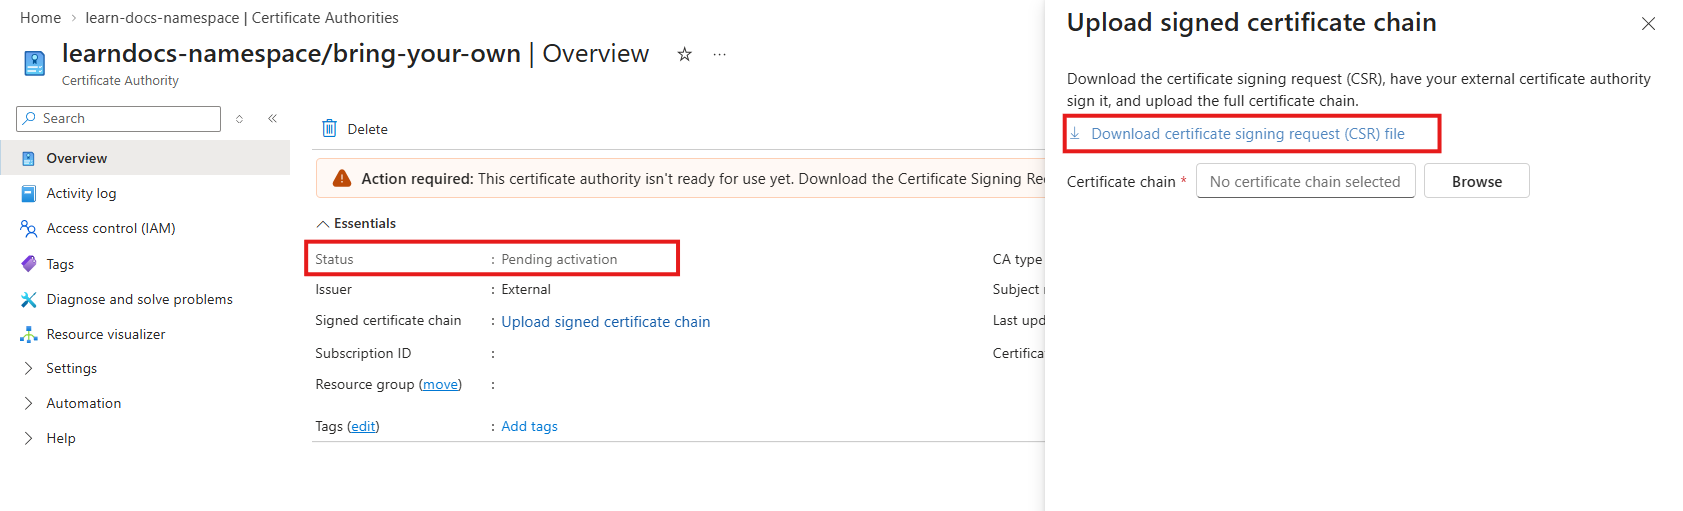
Upload the certificate signing request to your external CA. Have your CA sign the certificate. The signed certificate's subject must exactly match the subject of the original CSR.
If you don't have an external root CA, you can use this resource to create one: Create a self-signed root CA and private key using OpenSSL and PowerShell.
Select and upload the signed full certificate chain.
Select Save to activate the certificate authority.
Refresh the certificate authority details and verify the status is active.
