How to set or edit Azure API Management policies
APPLIES TO: All API Management tiers
This article shows you how to configure policies in your API Management instance by editing policy definitions in the Azure portal. Each policy definition is an XML document that describes a sequence of inbound and outbound statements that run sequentially on an API request and response.
The policy editor in the portal provides guided forms for API publishers to add and edit policies in policy definitions. You can also edit the XML directly in the policy code editor.
More information about policies:
- Policy overview
- Policy reference for a full list of policy statements and their settings
- Policy snippets repo
Prerequisites
If you don't already have an API Management instance and a backend API, see:
Go to your API Management instance
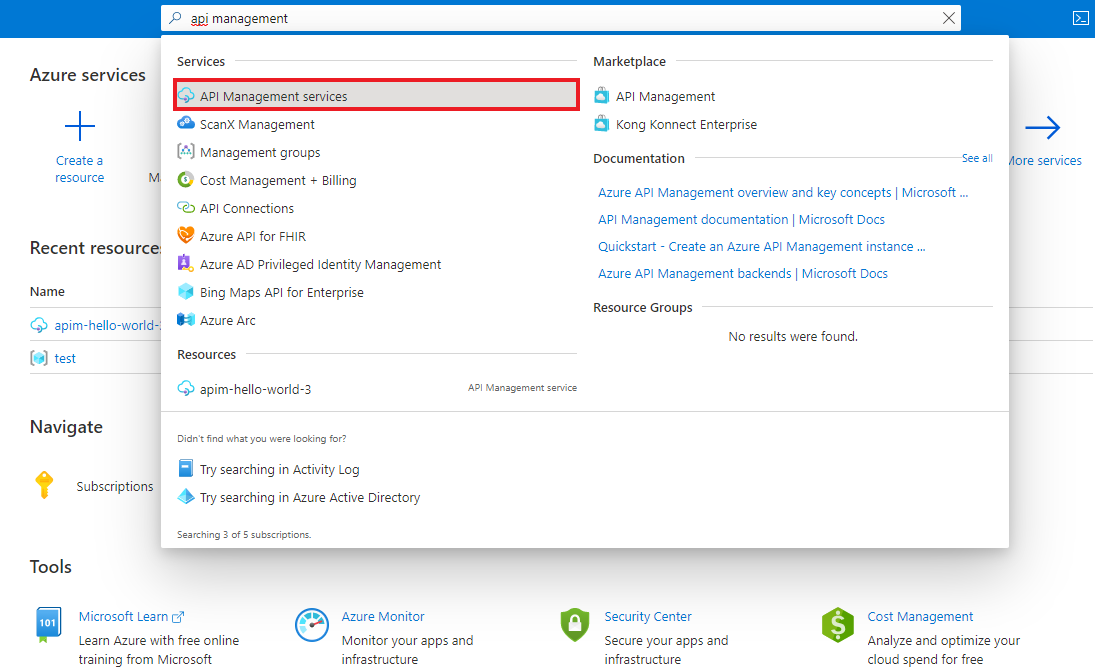
In the Azure portal, search for and select API Management services.
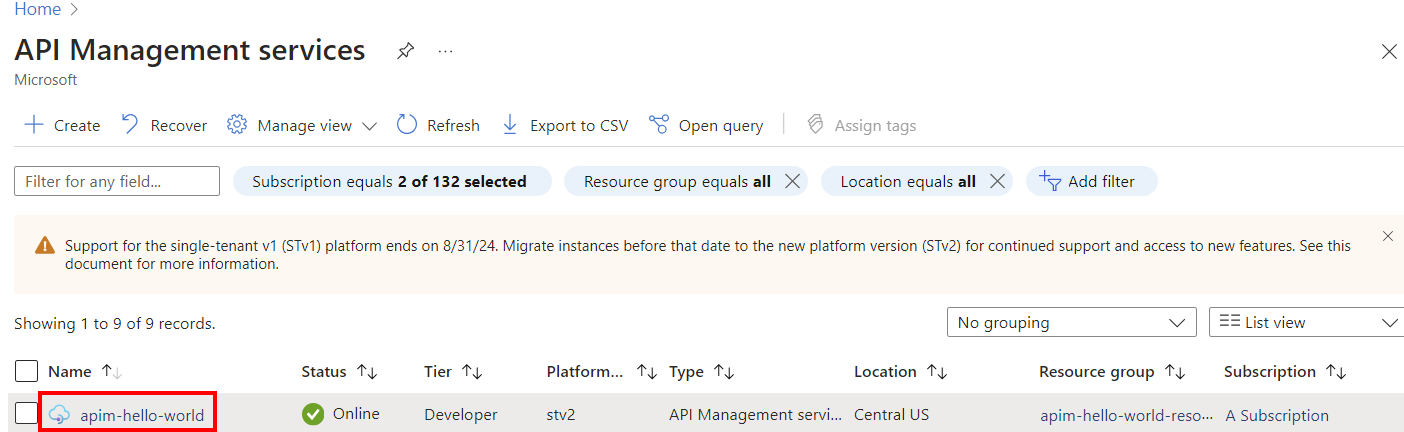
On the API Management services page, select your API Management instance.
Configure policy in the portal
The following example shows how to configure a policy using two options in the policy editor in the portal:
- A guided form-based editor to simplify configuring many policies
- A code editor where you can add or edit XML directly
In this example, the policy filters requests from certain incoming IP addresses. It's scoped to a selected API.
Note
You can configure policies at other scopes, such as for all APIs, a product, or a single API operation. See Configure scope, later in this article, for other examples.
To configure a policy:
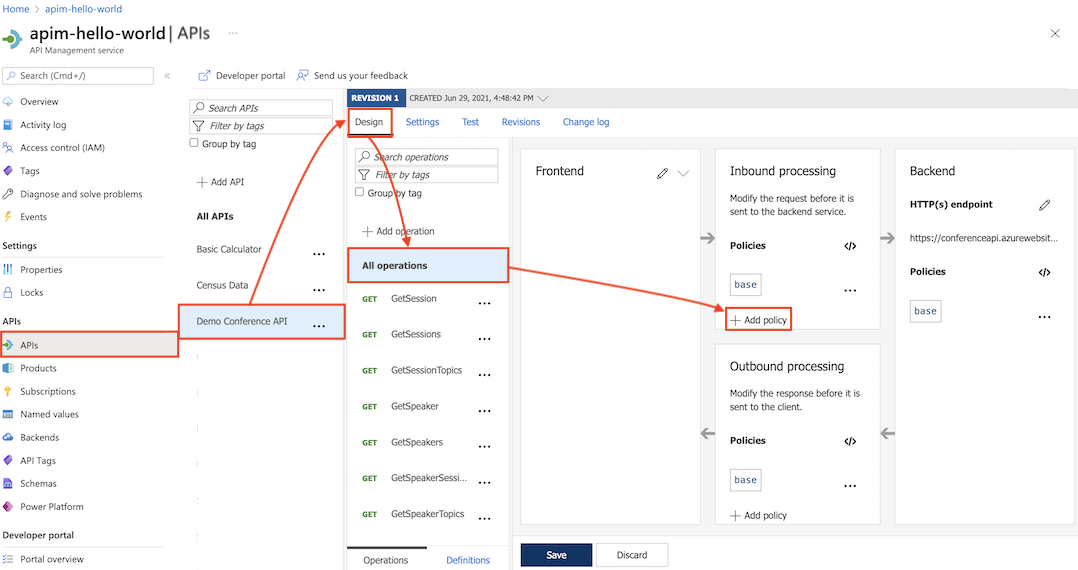
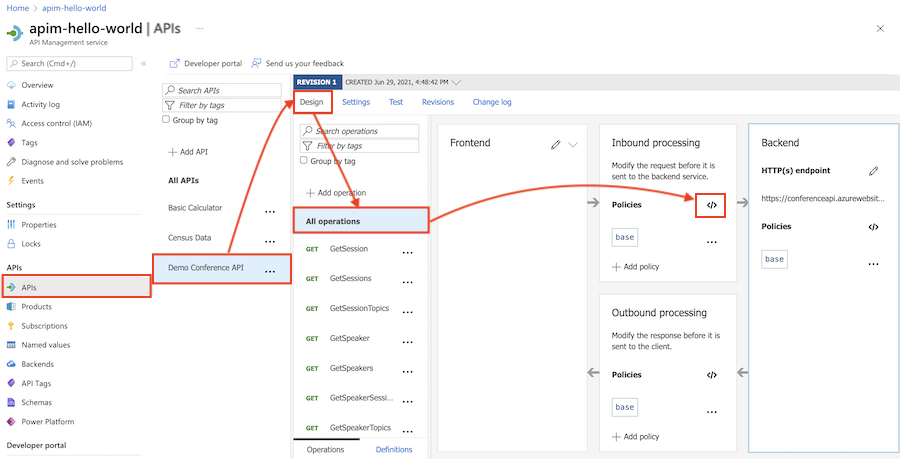
In the left navigation of your API Management instance, select APIs.
Select an API that you previously imported.
Select the Design tab.
To apply the policy to all operations, select All operations.
In the Inbound processing section, select + Add policy.
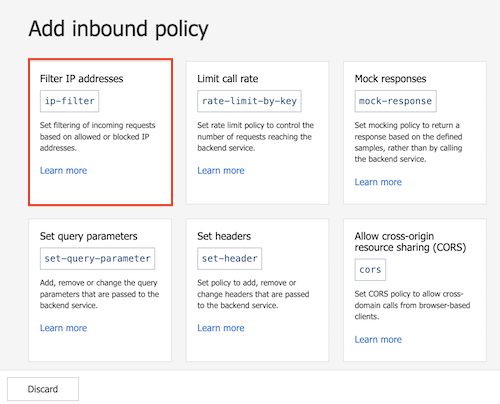
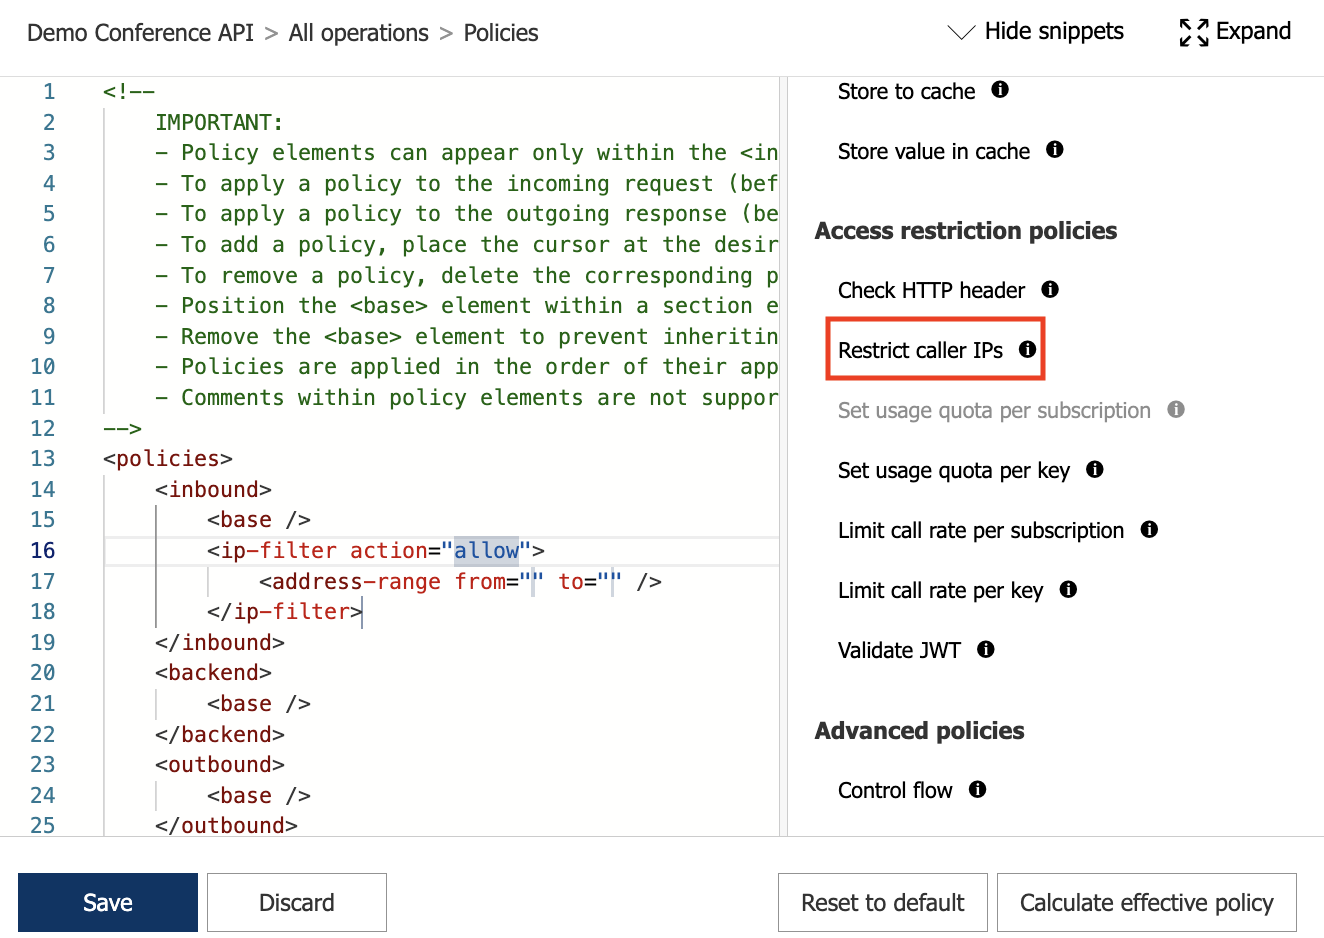
In Add inbound policy, select a policy to add. For example, select Filter IP addresses.
Tip
- Policies shown are scoped to the policy section you're configuring - in this case, for inbound processing.
- If you don't see a policy you want, select the Other policies tile. This will open the XML code editor and display a complete list of policies for that section and scope.
Select Allowed IPs > + Add IP filter and add the first and last IP addresses of a range of incoming addresses that are allowed to make API requests. Add other IP address ranges, if needed.
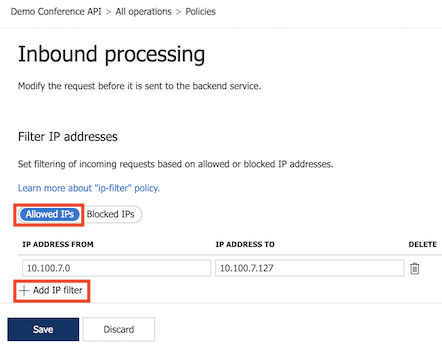
Select Save to propagate changes to the API Management gateway immediately.
The ip-filter policy now appears in the Inbound processing section.
Configure policies at different scopes
API Management gives you flexibility to configure policy definitions at multiple scopes, in each of the policy sections.
Important
Not all policies can be applied at each scope or policy section. If the policy that you want to add isn't enabled, ensure that you are in a supported policy section and scope for that policy. To review the policy sections and scopes for a policy, check the Usage section in the Policy reference topics.
Note
The Backend policy section can only contain one policy element. By default, API Management configures the forward-request policy in the Backend section at the global scope, and the base element at other scopes.
Global scope
Global scope is configured for All APIs in your API Management instance.
In the left navigation of your API Management instance, select APIs > All APIs.
Select the Design tab.
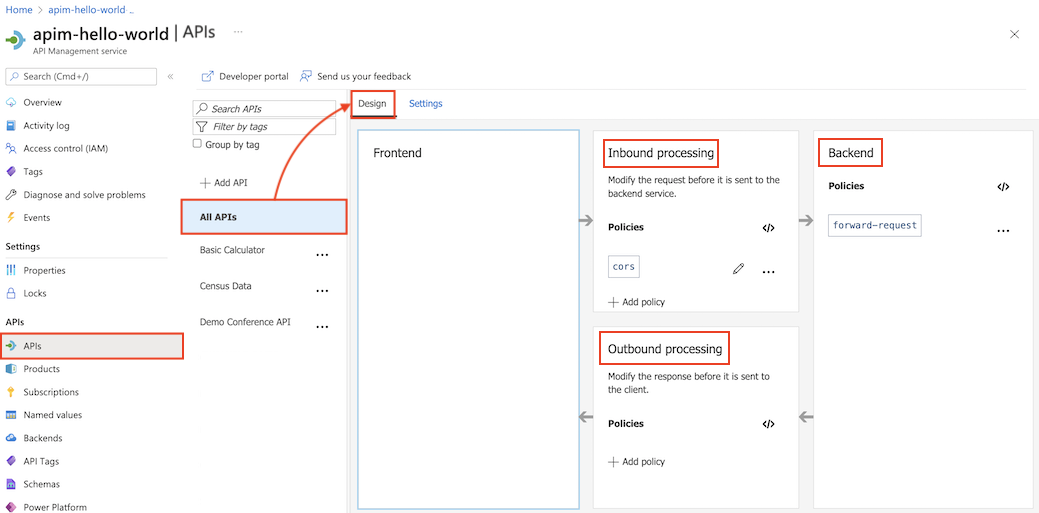
In a policy section, select + Add policy to use a form-based policy editor, or select the </> (code editor) icon to add and edit XML directly.
Select Save to propagate changes to the API Management gateway immediately.
Product scope
Product scope is configured for a selected product.
In the left menu, select Products, and then select a product to which you want to apply policies.
In the product window, select Policies.
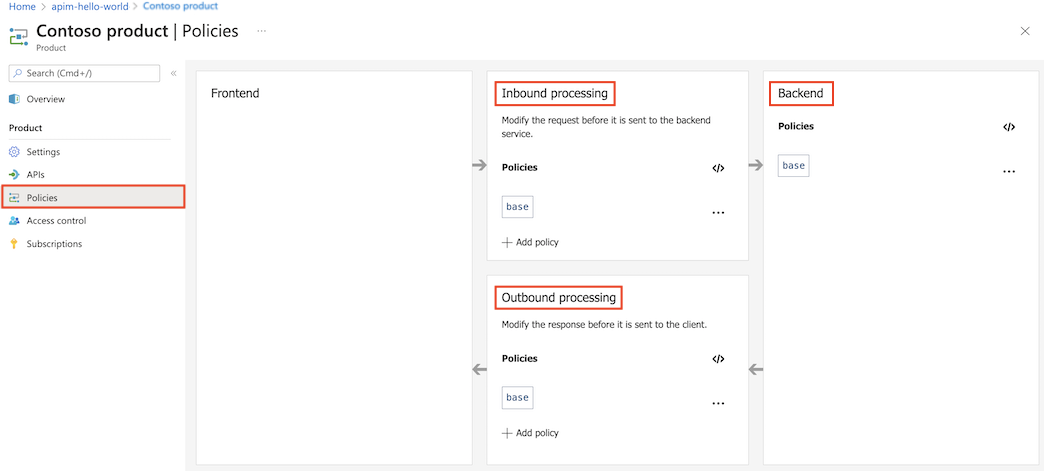
In a policy section, select + Add policy to use a form-based policy editor, or select the </> (code editor) icon to add and edit XML directly.
Select Save to propagate changes to the API Management gateway immediately.
API scope
API scope is configured for All operations of the selected API.
In the left navigation of your API Management instance, select APIs, and then select the API that you want to apply policies to.
Select the Design tab.
Select All operations.
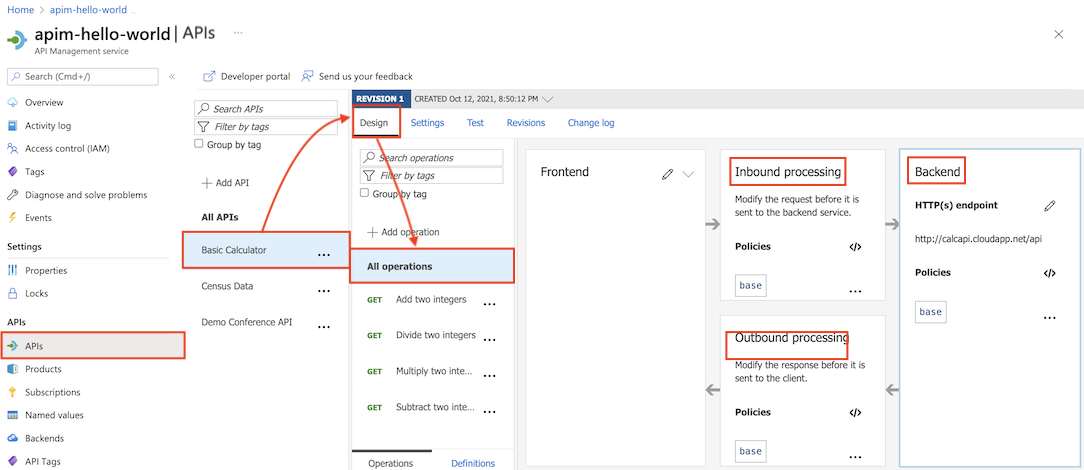
In a policy section, select + Add policy to use a form-based policy editor, or select the </> (code editor) icon to add and edit XML directly.
Select Save to propagate changes to the API Management gateway immediately.
Operation scope
Operation scope is configured for a selected API operation.
In the left navigation of your API Management instance, select APIs.
Select the Design tab.
Select the operation to which you want to apply policies.
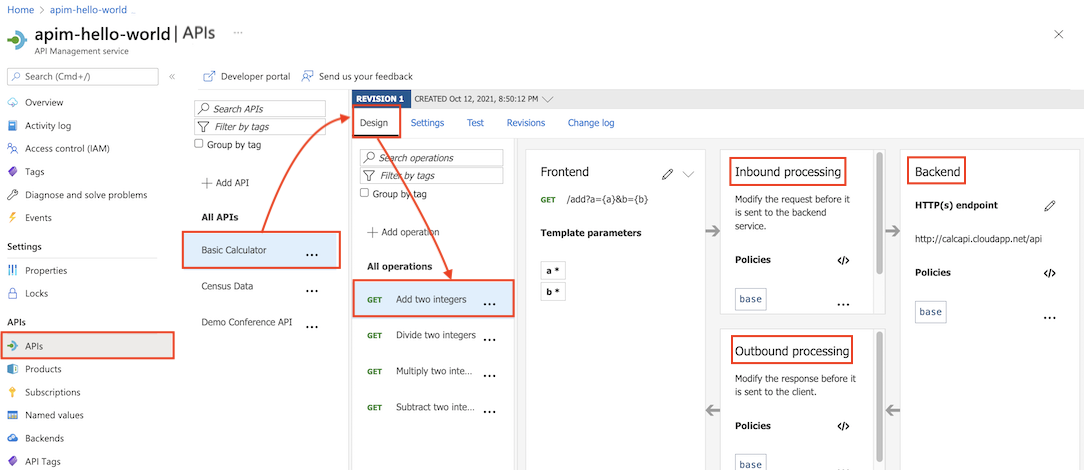
In a policy section, select + Add policy to use a form-based policy editor, or select the </> (code editor) icon to add and edit XML directly.
Select Save to propagate changes to the API Management gateway immediately.
Reuse policy configurations
You can create reusable policy fragments in your API Management instance. Policy fragments are XML elements containing your configurations of one or more policies. Policy fragments help you configure policies consistently and maintain policy definitions without needing to repeat or retype XML code.
Use the include-fragment policy to insert a policy fragment in a policy definition.
Use base element to set policy evaluation order
If you configure policy definitions at more than one scope, multiple policies could apply to an API request or response. Depending on the order that the policies from the different scopes are applied, the transformation of the request or response could differ.
In API Management, determine the policy evaluation order by placement of the base element in each section in the policy definition at each scope. The base element inherits the policies configured in that section at the next broader (parent) scope. The base element is included by default in each policy section.
Note
To view the effective policies at the current scope, select Calculate effective policy in the policy editor.
To modify the policy evaluation order using the policy editor:
Begin with the definition at the most narrow scope you configured, which API Management will apply first.
For example, when using policy definitions configured at the global scope and the API scope, begin with the configuration at the API scope.
Place the
baseelement within a section to determine where to inherit all policies from the corresponding section at the parent scope.For example, in an
inboundsection configured at the API scope, place abaseelement to control where to inherit policies configured in theinboundsection at the global scope. In the following example, policies inherited from the global scope are applied before theip-filterpolicy.<policies> <inbound> <base /> <ip-filter action="allow"> <address>10.100.7.1</address> </ip-filter> </inbound> [...] </policies>Note
- You can place the
baseelement before or after any policy element in a section. - If you want to prevent inheriting policies from the parent scope, remove the
baseelement. In most cases, this isn't recommended.
- You can place the
Continue to configure the
baseelement in policy definitions at successively broader scopes.A globally scoped policy has no parent scope, and using the
baseelement in it has no effect.
Get assistance creating policies using Microsoft Copilot in Azure (preview)
Microsoft Copilot in Azure (preview) provides policy authoring capabilities for Azure API Management. Use Copilot in Azure in the context of API Management's policy editor to create policies that match your specific requirements without knowing the syntax, or have already configured policies explained to you.
You can prompt Copilot in Azure to generate policy definitions, then copy the results into the policy editor and make any necessary adjustments. Ask questions to gain insights into different options, modify the provided policy, or clarify the policy you already have. Learn more
Related content
For more information about working with policies, see:
- Tutorial: Transform and protect APIs
- Set or edit policies
- Policy reference for a full list of policy statements and their settings
- Policy snippets repo
- Author policies using Microsoft Copilot in Azure