Note
Access to this page requires authorization. You can try signing in or changing directories.
Access to this page requires authorization. You can try changing directories.
You can personalise your workspace to suit your work and preferences. Change pages so that they display only the information you need, where you need it. Personalisation affects only your workspace. It doesn't change how others work. You can personalise all types of pages, including the role centre page.
The adjustments outlined in this article are applied universally across all your devices and browsers. There are other modifications, not detailed here, that only affect the specific device and browser on which they're made. Learn more about the differences in Where is personalisation stored?.
Video and training
The following video shows some of the ways in which you can personalise your Role Centre.
For online training, go to Personalise the Microsoft Dynamics 365 Business Central user interface.
About personalisation
You can make various adjustments, such as move or hide fields, columns, actions, and entire parts, and add new fields. You do most adjustments by first activating the Personalising banner using the personalisation mode. You can also readily make the following adjustments on any list page without using the personalisation mode:
- Resize a column
- Create, rename, or edit a view
- Bookmark the page
- Hide or resize a FactBox
- Expand/collapse hierarchical list
Resize a column
There are two ways to change the width of a column in any list, including in dropdown lists for looking up field values:
- Select and drag the boundary between two columns in the header of a list.
- Double-click the boundary between two columns to autofit the width of the column. The width adjusts to the optimal size for readability.
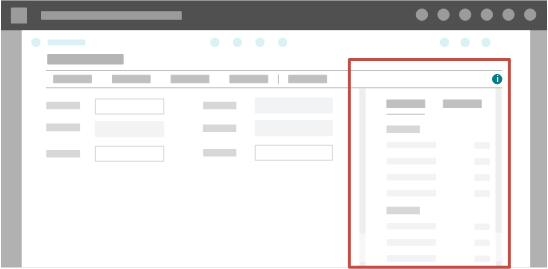
Hide or resize a FactBox
A FactBox is a pane along the right side of a page that displays more information related to the record on the page.
To hide or show the FactBox, select the
 Collapse/Expand the FactBox pane icon at the top of the FactBox pane.
To resize the FactBox, drag the vertical divider between the FactBox and main content. Double-click the divider to reset the width to default.
If you can't resize the FactBox, you're either using Business Central version earlier than 26.0, or Feature: Optimise screen estate usage for web isn't turned on in Feature Management. Contact your admin, or learn more in Enabling Upcoming Features Ahead of Time.
Start personalising by using the personalisation mode
Open any page that you want to personalise.
In the upper-right corner, select Settings
 and then choose the Personalise action.
The Personalising banner appears at the top to indicate that you can start making changes.
Note
To navigate during personalisation, use Ctrl+Click on an action if it is highlighted by the arrowhead.
If you see Personalise lock
 or Personalisation blocked
 on the banner, you can't personalise the page. For more information, see Why a Page is Locked from Personalisation.
To change a user interface (UI) element, point to the element, such as an action, a field, or a part. The element is immediately highlighted with an arrowhead or border. Choose the element, and then choose either Move, Remove, Hide, Show, Show under "Show more", Show when collapsed, Show always, Set/Clear Freeze Pane, or Include/Exclude from Quick Entry, depending on the type and state of the UI element.
To add a field, choose the + Field action. From the Add Field to Page pane, drag and drop a field into the desired position on the page.
When you finish changing the layout of one or more pages, choose Done on the Personalising banner.
For more information, see What You Can Personalise.
What you can personalise
| What you want to do | How to do it | Remarks |
|---|---|---|
| Move something, like a field, column in list, tile, action, or part to another place on the page. | Point anywhere on what you want to move, and drag it to its new position. A thick horizontal or vertical line indicates the position. indicates that you can't move the element to the selected position.
 |
Parts are subdivisions or areas on a page that contain things like multiple fields, another page, a chart, or tiles. Learn more about personalising actions Learn more about personalising parts |
| Hide an element currently shown, like a field, column in list, tile, action, or part. | Select the element, select the arrowhead, and then select Hide. | In the personalisation mode, hidden actions are greyed with italic text, and hidden parts are shaded with diagonal lines. Hidden fields and columns aren't indicated directly on the page, but you can locate them by using the Add Field to Page pane. (Learn more about working fields.) When you exit personalisation mode, all elements disappear from view. If the field you hide is also shown on the FastTab heading when the FastTab is collapsed, the field no longer appears there. |
| Show an action or part that is currently hidden. | For a grayed (hidden) element, choose the arrowhead, and then choose Show. | The hidden element is visible again. |
| Add a hidden field | In the Personalising banner, choose the + Field action. The Add Field to Page pane opens on the right side of the page. If you select a field in the pane, its hidden location appears on the page. To add a field, drag it from the pane, or from its hidden location, to the position that you want it. A thick horizontal or vertical line indicates the position. Another way is to select the arrowhead in the field's hidden location and select Show. |
Each page includes a predefined set of fields that you can choose to display. Learn more about working fields. |
| Display a field in the heading of a collapsed FastTab. | Choose the arrowhead, and then choose Show when collapsed. If you don't see this option, it's set already. In this case, to stop displaying the field on the FastTab heading, choose Show always. |
FastTab is the term used for a group of fields that appear under a common heading. Use the Show when collapsed option to display the most important fields. If you select a field in the heading, the FastTab opens and focuses on the selected field. This option is only applicable if a page has more than one FastTab. If there's only one FastTab, it can't be collapsed, so the Show when collapsed option isn't available. |
| Make a field display only when you select Show more. | Choose the arrowhead, and then choose Show under "Show More". | If you don't see the Show More option, it's set already. In this case, to make a field display always, not just when you select Show more, choose Show always. |
| Change whether a field can be edited. | Select the field, select the arrowhead on the field, and then select Lock editing to prevent changing the field's value or Unlock editing to allow changing the field's value. | You can only unlock fields that you previously locked yourself. Some fields are locked by default, either by design or by a profile admin who customised the page. These fields can't be unlocked. |
| Change the freeze pane in a list to another column. | Choose the arrowhead of the column that you want as the last column of the freeze pane, and then choose Set Freeze Pane. If you want to set the freeze pane back to its original position, choose the arrowhead for the current freeze pane column, and choose Clear Freeze Pane. Note: You can't remove this freeze pane. |
The freeze pane specifies the columns that always appear on the left side of the list, even as you scroll horizontally. |
| Skip over a field when pressing Enter. | Choose the arrowhead next to the field, or column heading in a list, and choose Exclude from Quick Entry. | If you don't see Exclude from Quick Entry, then the field is already skipped. In this case, to stop skipping the field, choose Include in Quick Entry. Learn more about Quick Entry. |
| Reorder and remove views representing filtered lists. | Choose the arrowhead next to a view, and then choose Move, Remove, or Hide. | Learn more about saving and personalising list views. |
| Add a new action to a page or report on your Role Centre. | From the target page, report request page, or Tell Me window, choose the bookmark icon. | Learn more about bookmarking pages and reports. |
| Always start a list as expanded or collapsed. | Choose the Expand All or Collapse All button in the upper-left corner of the list. Alternatively, choose the Expand All or Collapse All action in the menu of the first column. | Applies to collapsible hierarchy lists. |
Personalise action bar and menus
Personalisation lets you decide which actions to show on the navigation and action bars and on Role Centres, and where to show them. You can show, hide, or move individual actions or action groups.
The following video shows how you can personalise actions on pages and Role Centres.
Personalising the navigation and action bars is done basically the same as with other UI elements. However, what you can do with an action or group depends on where the action or group is located. The best way to find out is to enter personalising mode and then let the arrowheads guide you.
There are a couple of terms that you should be familiar with to better understand action personalisation: action group and promoted category.
An action group is an element that expands to display other actions or groups. For example, on the Sales Orders page, one action group is the Functions action that appears when you choose the Actions action.
A promoted category is an action group that appears before the vertical line | on the action bar. The categories typically include the most commonly used actions, so that you can quickly find them. For example, on the Sales Orders page, the Order, Release, and Posting actions are promoted categories.
Note
To clear personalisation, select the arrowhead around the part's designer menu, and then choose Clear personalisation.
Remove, hide, and show actions and action groups
When you want to show or hide an action, the options under the arrowhead define what you can do depending on the action's state.
Choose the arrowhead for an action or action group.
Choose from one of the following options:
Option What it does Remove This option appears if the selected action is also shown somewhere else on the navigation bar or action bar. Choosing this option deletes the action from the selected location so that it no longer appears. The action or action group remains in the other locations. Hide This option appears if the action or action group isn't located anywhere else on the navigation bar or action bar. Like Remove, choosing this option makes the action or action group disappear from the navigation bar or action bar. However, in personalising mode, the action, or action group is still shown in the current position, except that it appears dimmed. Show This option appears if the action or action group is hidden (dimmed). Choosing this option makes the action or action group appear on the navigation bar or action bar.
Move actions and action groups
A horizontal line between two actions or a border around an action group indicates where you can drop actions or actions groups. There are the following limitations:
- You can move individual actions into the promoted categories, but you can't rearrange the order of the actions in the category.
- You can't move an action group into a promoted category.
To move an action or action group, drag and drop it into the desired position, like you do with fields and columns.
To move an action or action group into another action group that is empty, drag the action or action group to the new group and drop it in the Drop an action here box.
About the Automate menu
- You can't hide or move the Automate menu or the Power Automate submenu and its actions.
- You can move flows included under the Automate item, but you can't hide them using personalisation. Moving the flow makes a copy the flow in the destination, it doesn't remove it from the Automate item.
Tip
As an administrator, you can hide the Automation item from users. Learn more at Set Up Power Automate Integration.
Personalise parts
Hover over or select Alt+Up Arrow to get information about a field.
Parts are areas on a page that are typically composed of multiple fields, charts, or other content. A part shows a coloured border when you focus on the part. For example, a Role Centre home screen has multiple parts. Because of their well-defined boundary, you can personalise the entire part and its contents.
- To move a part, drag and drop it into the desired position. A coloured line indicates valid positions on the screen. For example, FactBoxes can only be moved next to other FactBoxes in the FactBox pane.
- You can hide a part by choosing the Hide option under the arrowhead.
- When you start personalising or navigate to a new page, any parts that are currently hidden appear on the page with distinctive visuals to indicate they're hidden. You can unhide that part by choosing the Show option under the arrowhead.
You can clear all personalisation changes that you made within a single part by choosing the Clear personalisation option under the part's arrowhead. Clearing personalisation of a part only affects changes to the contents of the part. It doesn't affect the placement or visibility of the part on the page.
Work with fields and columns
When personalising a page, you use the Add field to page pane to include fields or columns on the page that are currently hidden from view. To open this pane, select the + Field action near the top of the page. Unlike other hidden elements, hidden fields aren't indicated on the page itself in personalisation mode. However, you can identify hidden fields by using the Add field to page pane.
Here are some general guidelines to follow when using the Add field to page pane:
By default, the pane lists all hidden fields. To find hidden fields, look for the
 icon.
icon.You can filter the list to show other fields, for example, those fields currently shown on the page, by selecting the Recommended fields button above the list and choosing a filter option. The name of the button changes based on the filter option you choose.

Selecting a field in the list highlights its location on the page. If the field is hidden, its location shows in a shaded state.
To get more details about a field in the list, hover over it or select Alt+Up Arrow to display a tooltip.
The fields available in the Add field to page pane are determined by the developer of the page and its source table or by a profile admin who customised the page. You can't create new ones.
Some pages have multiple page fields that map to the same source table. The pane shows both/all of those page fields independently. Showing/hiding/moving those fields is also independent without one affecting the other.
Add a field so it's visible on the page
From the Add field to page pane, there are two ways to include a hidden field on the page:
- Drag the field to the desired position. A thick horizontal or vertical line indicates the target location.
- Select the field in the list, then go to the shaded field on the page and select the Show option.
Note
Some fields that you add won't be editable on the page when you're done with personalisation. These fields are either originally designed this way or an administrator customised the page to prevent you from editing them.
Clear personalisation
At some point, you might want to undo some or all of the personalisation changes that you made to a page over time.
On the Personalising banner, choose the Clear personalisation action.
Choose one of the following options.
Caution
Clearing personalisation can't be undone.
Option What it does Only Navigation Menu Clears any personalisation changes that you made to the navigation menu that is shared across the Role Centre and other pages. Such changes include any new actions that were added as bookmarks, and any changes to links and groups in the menu. Only Actions Clears any personalisation changes that you made on the navigation or action bars on the page. Only Fields and Columns Clears any personalisation changes that you made to the page except changes on the navigation or action bars. Such changes include changes to fields, columns, parts, and tiles. All Clears all personalisation changes that you made to the page so it looks like it did originally. Such changes include changes to navigation and action bars, fields, columns, parts, and tiles.
Tips and other points of interest
To help you better understand personalisation, here are some pointers:
- When you make changes to a card page that you open from a list, the changes take effect on all records that you open from that list. For example, let's say you open a specific customer from the Customers list page, and then personalise the page by adding a field. When you open other customers from the list, the field that you added is also shown.
- Changes that you make affect all your Role Centres. For example, if you make a change to the Customer list when the Role Centre is set to Business Manager, you also see the change on the Customers page when the Role Centre is set to Sales Order Processor.
- Changes to a page in a pane take effect on the page wherever it appears.
- You can't personalise a page that's in analysis mode. The Analyse switch is deactivated. If you happen to switch to personalisation mode while the page is in analysis mode, then analysis mode is automatically switched off.
- Some pages have multiple page fields that map to the same source table. The pane shows both/all of those page fields independently. Showing/hiding/moving those fields is also independent without one affecting the other.
- If a part or group is hidden, ghosted fields still show inside it, but you can't drag-and-drop or add/show that field until you make the group/part visible.
Note
Due to restrictions on design capabilities in the web client, it's currently not possible to customise or personalise the controls within the grid and fixed syntax. It applies to all design modes, not just personalisation.
Administrators can make the same layout changes as users by customising a profile (role), which can be assigned to multiple users. To learn more about pages for Roles, go to Customise Pages for Roles
Administrators can also override or disable users' personalisation, and they can define which features are even available for users to see in all or specific companies. For more information, see Customise Business Central.
Related information
Customise Pages for Profiles
Work with Business Central
Change Basic Settings
Change Which Features are Displayed