Create an Azure Machine Learning workspace
To get access to an Azure Machine Learning workspace, you first need to create the Azure Machine Learning service in your Azure subscription. The workspace is central place where you can work with all resources and assets available to train and deploy machine learning models. For reproducibility, the workspace stores a history of all training jobs, including logs, metrics, outputs, and a snapshot of your code.
Understand the Azure Machine Learning service
To create an Azure Machine Learning service, you'll have to:
Get access to Azure, for example through the Azure portal.
Sign in to get access to an Azure subscription.
Create a resource group within your subscription.
Create an Azure Machine Learning service to create a workspace.
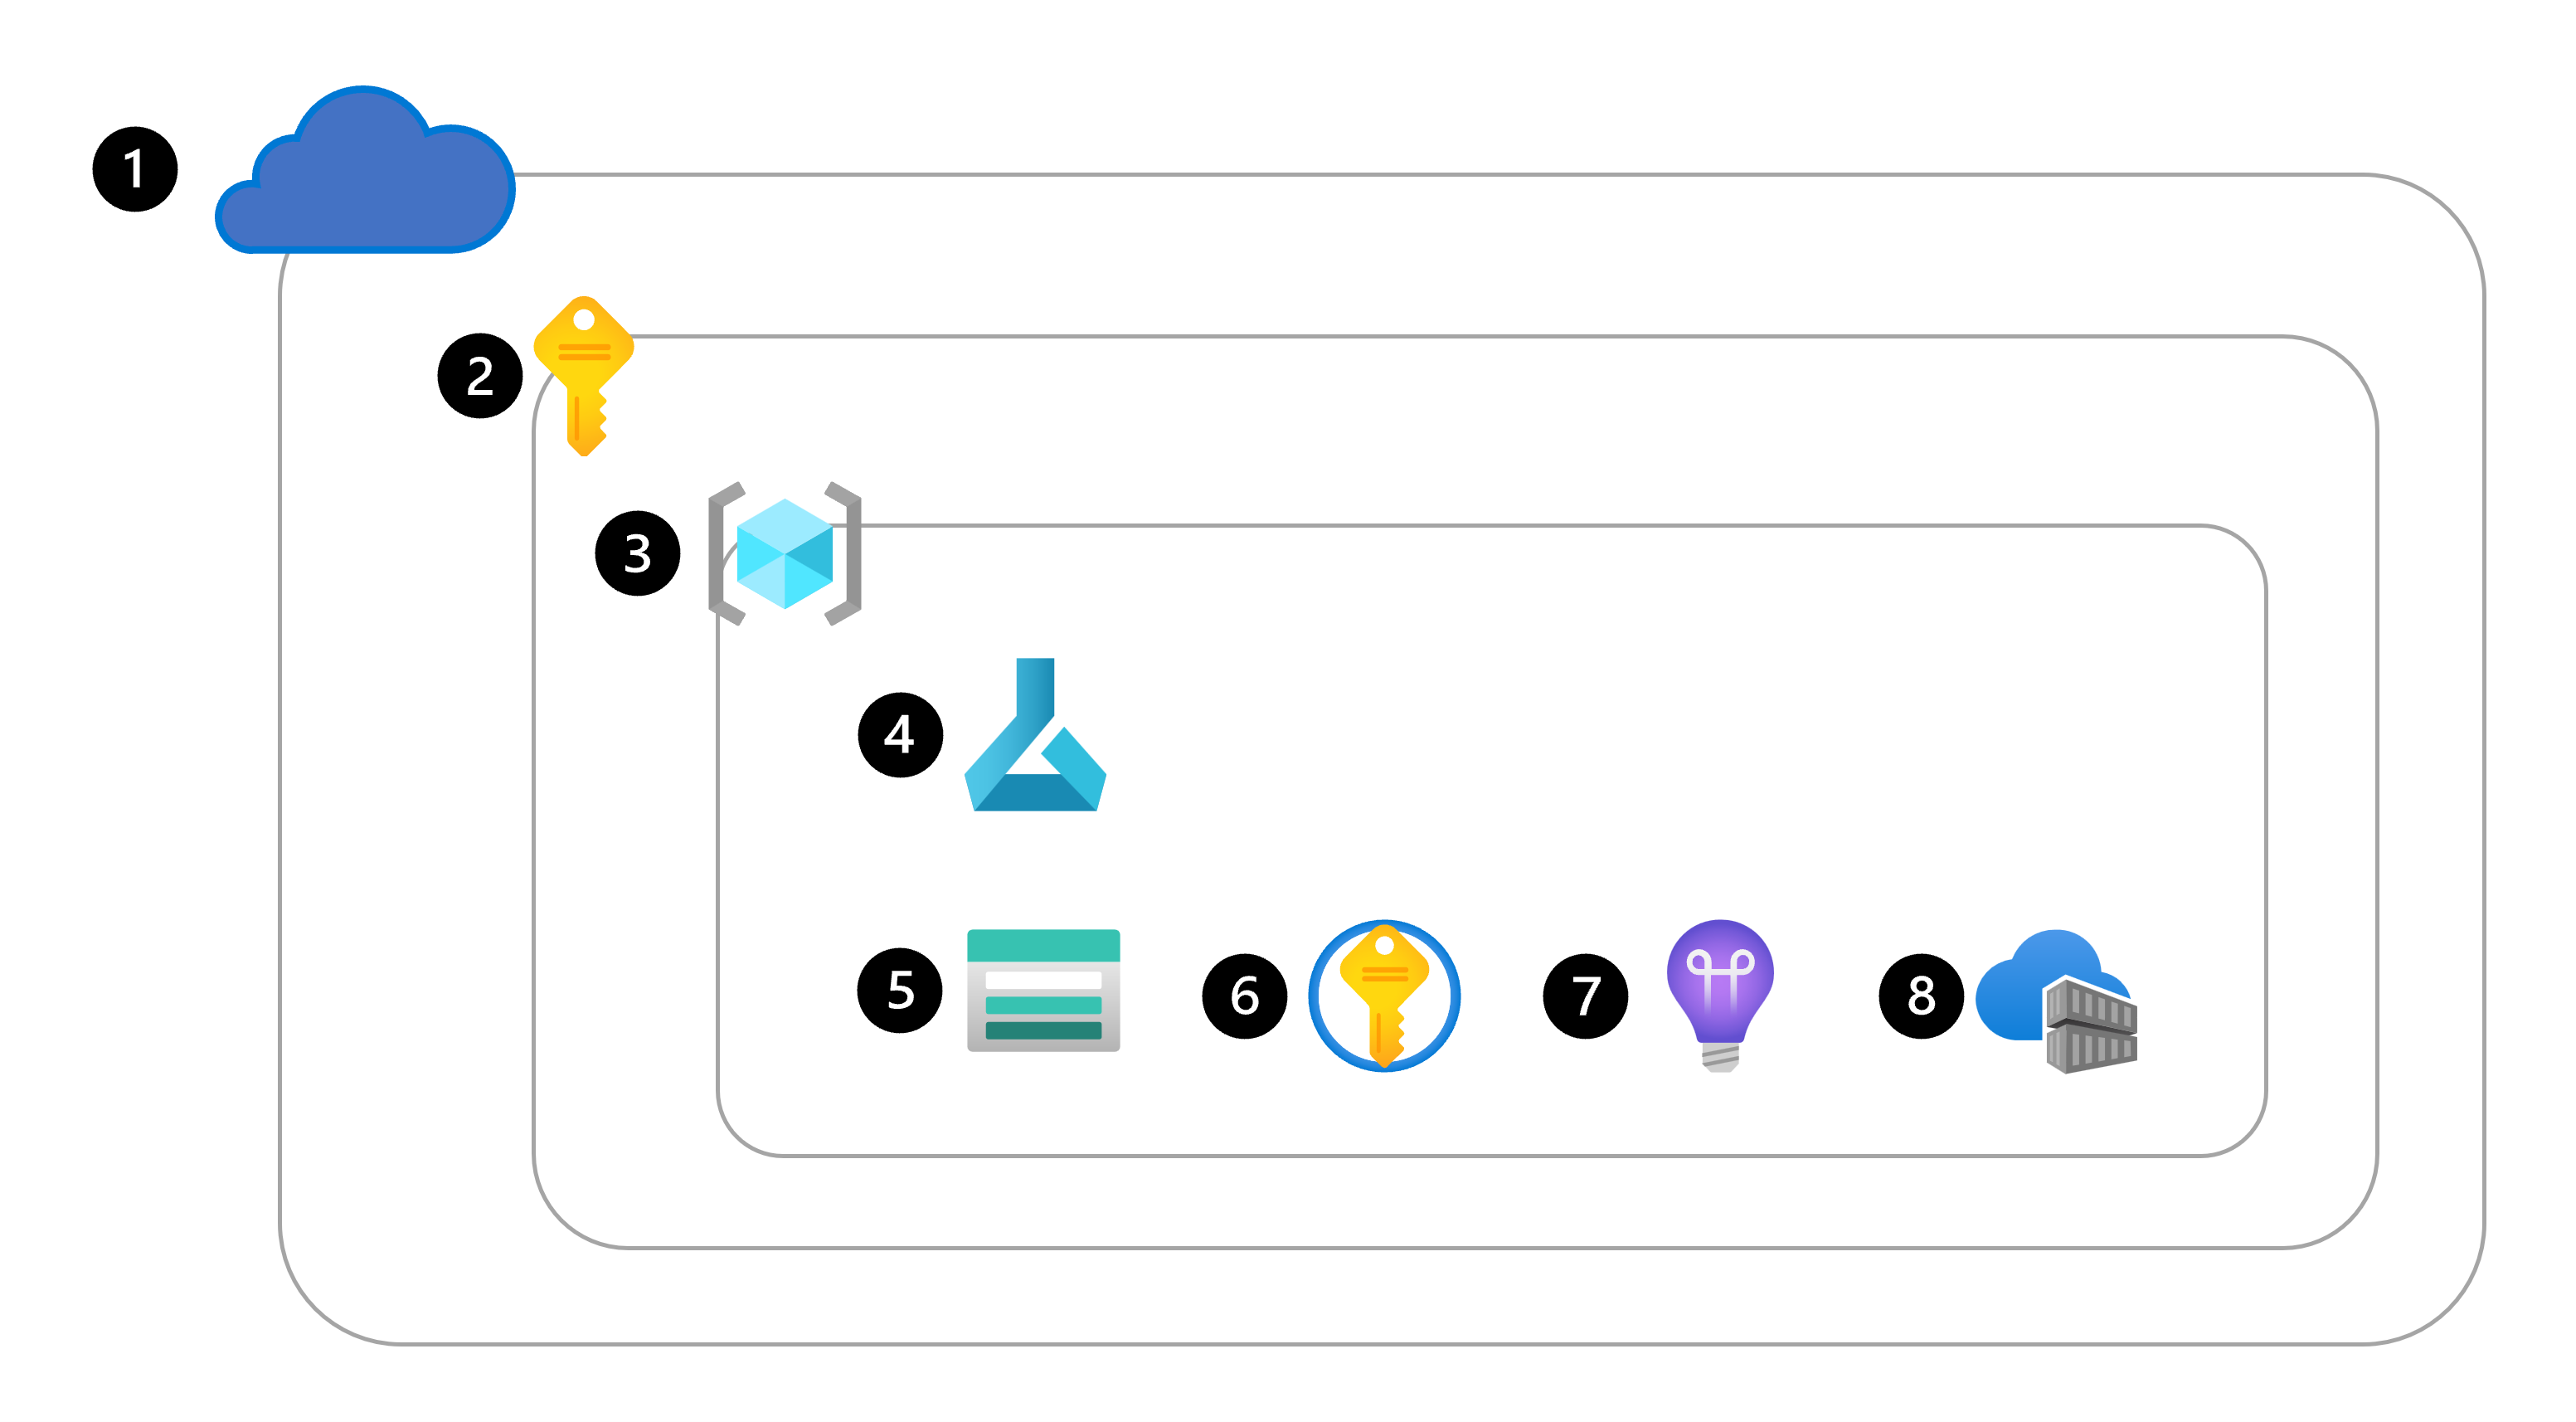
When a workspace is provisioned, Azure will automatically create other Azure resources within the same resource group to support the workspace:
Azure Storage Account: To store files and notebooks used in the workspace, and to store metadata of jobs and models.
Azure Key Vault: To securely manage secrets such as authentication keys and credentials used by the workspace.
Application Insights: To monitor predictive services in the workspace.
Azure Container Registry: Created when needed to store images for Azure Machine Learning environments.
Create the workspace
You can create an Azure Machine Learning workspace in any of the following ways:
- Use the user interface in the Azure portal to create an Azure Machine Learning service.
- Create an Azure Resource Manager (ARM) template. Learn how to use an ARM template to create a workspace.
- Use the Azure Command Line Interface (CLI) with the Azure Machine Learning CLI extension. Learn how to create the workspace with the CLI v2.
- Use the Azure Machine Learning Python SDK.
For example, the following code uses the Python SDK to create a workspace named mlw-example:
from azure.ai.ml.entities import Workspace

workspace_name = "mlw-example"

ws_basic = Workspace(
    name=workspace_name,
    location="eastus",
    display_name="Basic workspace-example",
    description="This example shows how to create a basic workspace",
)
ml_client.workspaces.begin_create(ws_basic)
Explore the workspace in the Azure portal
Creating an Azure Machine Learning workspace will typically take between 5-10 minutes to complete. When your workspace is created, you can select the workspace to view its details.
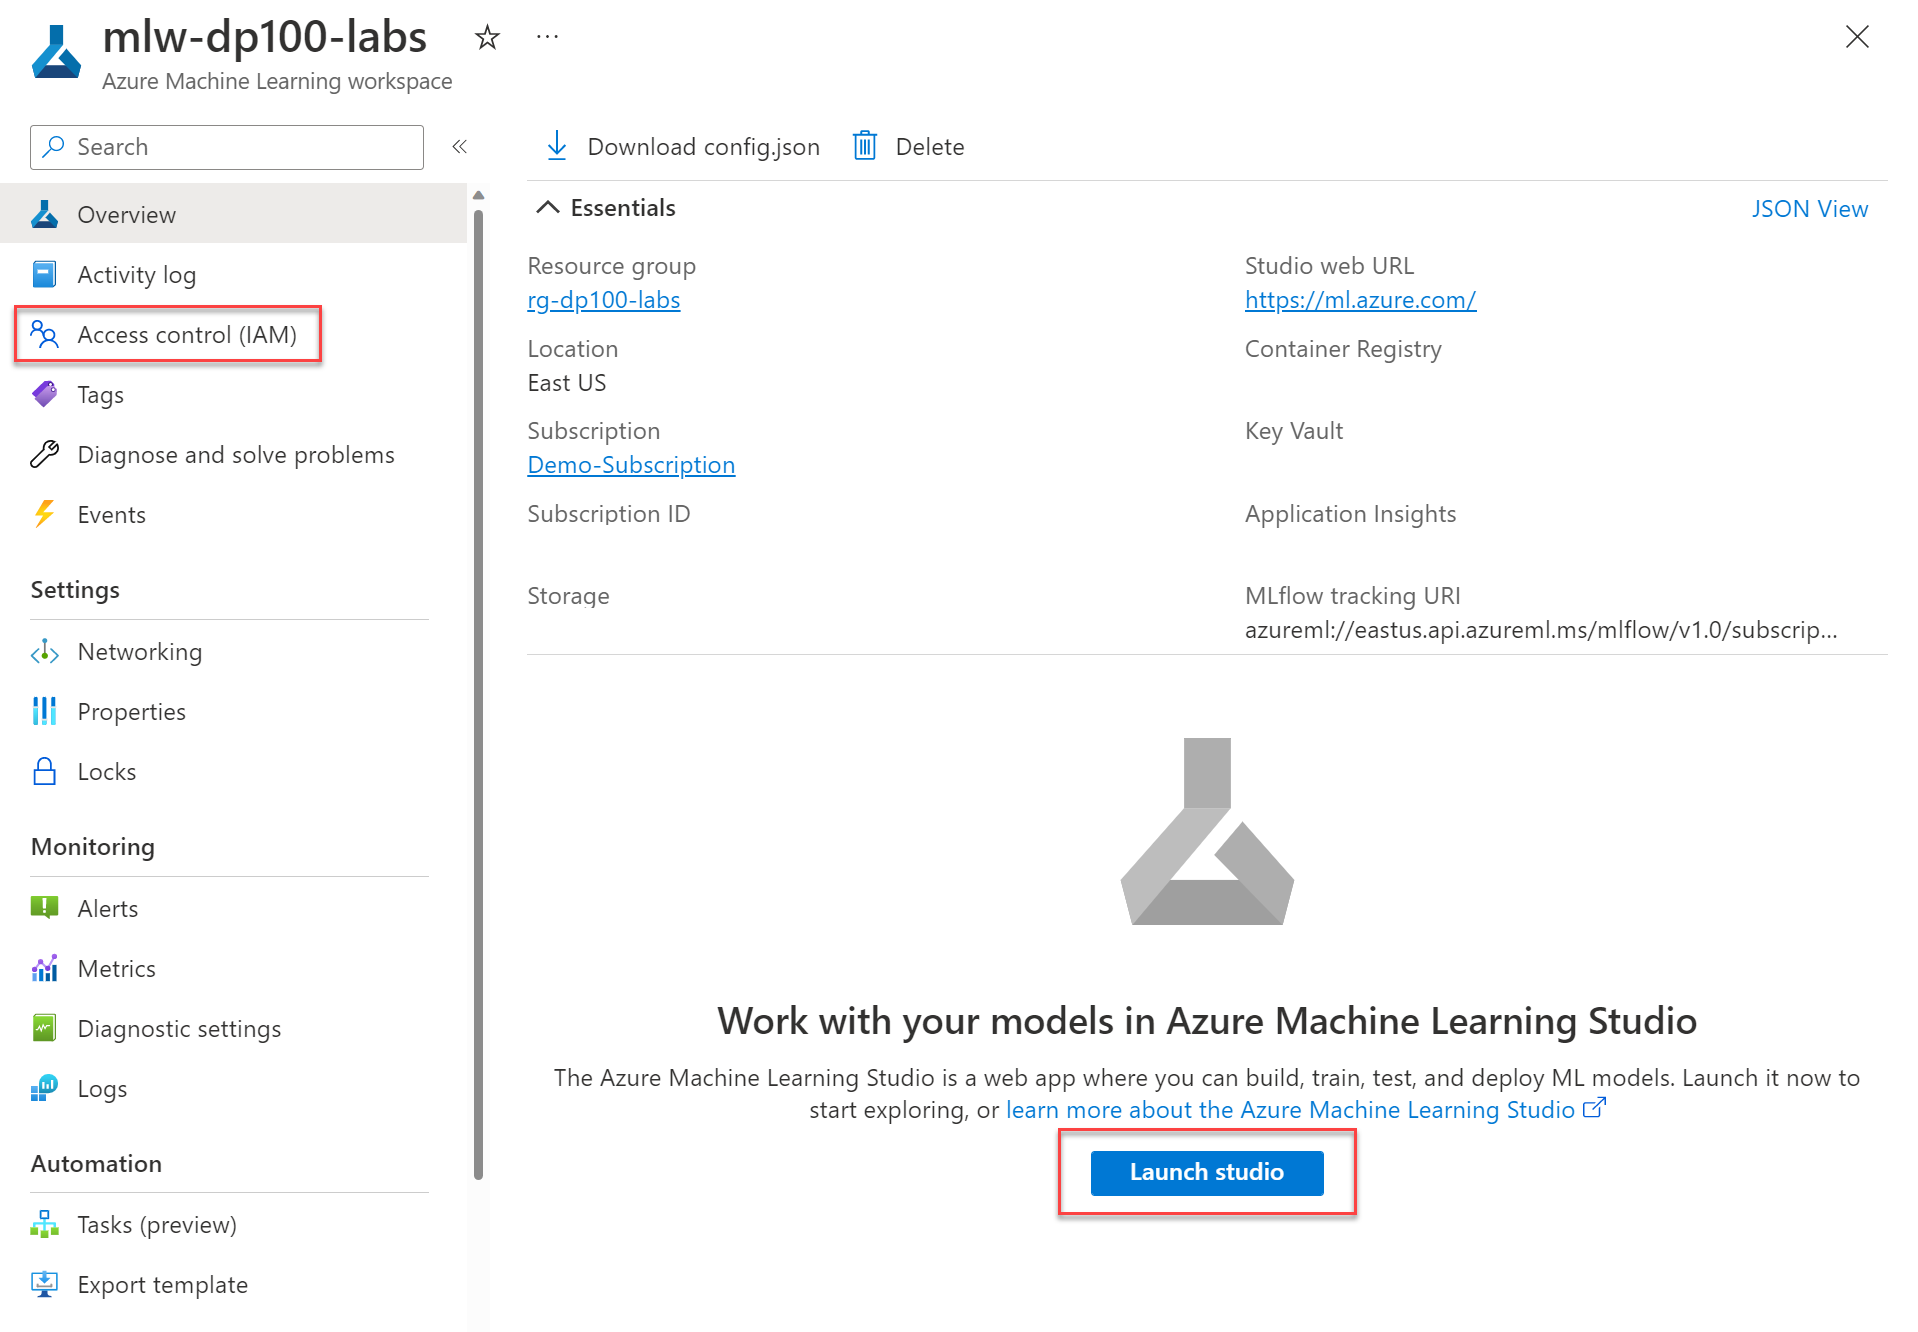
From the Overview page of the Azure Machine Learning workspace in the Azure portal, you can launch the Azure Machine Learning studio. The Azure Machine Learning studio is a web portal and provides an easy-to-use interface to create, manage, and use resources and assets in the workspace.
From the Azure portal, you can also give others access to the Azure Machine Learning workspace, using the Access control.
Give access to the Azure Machine Learning workspace
You can give individual users or teams access to the Azure Machine Learning workspace. Access is granted in Azure using role-based access control (RBAC), which you can configure in the Access control tab of the resource or resource group.
In the access control tab, you can manage permissions to restrict what actions certain users or teams can perform. For example, you could create a policy that only allows users in the Azure administrators group to create compute targets and datastores. While users in the data scientists group can create and run jobs to train models, and register models.
There are three general built-in roles that you can use across resources and resource groups to assign permissions to other users:
- Owner: Gets full access to all resources, and can grant access to others using access control.
- Contributor: Gets full access to all resources, but can't grant access to others.
- Reader: Can only view the resource, but isn't allowed to make any changes.
Additionally, Azure Machine Learning has specific built-in roles you can use:
- AzureML Data Scientist: Can perform all actions within the workspace, except for creating or deleting compute resources, or editing the workspace settings.
- AzureML Compute Operator: Is allowed to create, change, and manage access the compute resources within a workspace.
Finally, if the built-in roles aren't meeting your needs, you can create a custom role to assign permissions to other users.
Tip
Learn more about how to manage access to an Azure Machine Learning workspace, including creating custom roles.
Organize your workspaces
Initially, you might only work with one workspace. However, when working on large-scale projects, you might choose to use multiple workspaces.
You can use workspaces to group machine learning assets based on projects, deployment environments (for example, test and production), teams, or some other organizing principle.
Tip
Learn more about how to organize Azure Machine Learning workspaces for an enterprise environment.