Add and manage fields (Inheritance process)
Azure DevOps Services | Azure DevOps Server 2022 - Azure DevOps Server 2019
You can add a custom field to support tracking additional data requirements or modify select attributes of an ![]() inherited field. For example, you can add a custom field or change the label that appears in the work item form for an inherited field.
inherited field. For example, you can add a custom field or change the label that appears in the work item form for an inherited field.
Important
The Inheritance process model is available for projects configured to support it. If you’re using an older collection, check the process model compatibility. If your on-premises collection is configured to use the on-premises XML process model, you can only use that process model to customize the work tracking experience. For more information, see Choose the process model for your project collection.
For a list of all fields defined for your organization—which includes all fields defined for system and inherited processes—see View work item fields and attributes.
Once you've added a custom field, you can create queries, charts, or Analytics views and Power BI reports to track data related to it.
Prerequisites
We recommend checking out Configure and customize Azure Boards, which offers guidance on tailoring Azure Boards to align with your specific business requirements.
- You must have an organization in Azure DevOps.
- To create, edit, and manage processes, you must be a member of the Project Collection Administrators group or have the corresponding collection-level permissions, Create process, Delete process, Edit process, or Delete a field from organization, set to Allow. For more information, see Set permissions and access for work tracking, Customize an inherited process.
- You must have the Inheritance process model for the project collection where the project is created. For more information, see Choose the process model for your project collection.
- To create, edit, and manage processes, you must be a member of the Project Collection Administrators group, or have the corresponding permissions Create process, Delete process, Edit process, or Delete a field from organization set to Allow. For more information, see Set permissions and access for work tracking, Customize an inherited process.
Open Settings > Process
Sign in to your organization (
https://dev.azure.com/{yourorganization}).Select
 Organization settings.
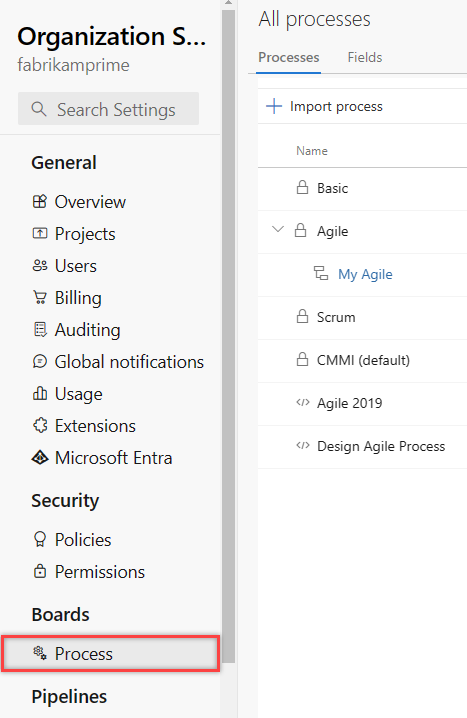
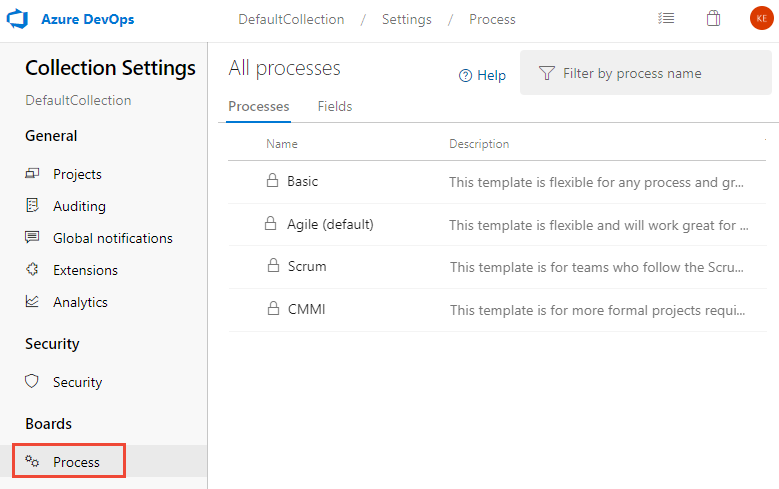
Select Process.
Sign in to your collection (
https://dev.azure.com/{Your_Collection}).Select Collection Settings or Admin settings.
Select Process.
Note
When you customize an inherited process, any projects using that process automatically reflect the customizations. To ensure a smooth transition, we recommend creating a test process and project, which allows you to test your customizations before you implement them organization-wide. For more information, see Create and manage inherited processes.
Custom field names
When you add a custom field to an inherited process, Azure DevOps assigns a reference name prefixed with Custom and then then name of the field with spaces removed. For example, you add a field named DevOps Triage, the reference name is Custom.DevOpsTriage. No spaces are allowed within the reference name.
Add a custom field
You can add fields and specify the group and page where they should appear. Also, once you've added a field, you can drag-and-drop it within a page to move its placement within the form. If you have several fields you want to add to a custom page or group, then add those pages or groups first and then add your fields.
Note
Each process can define up to 1024 fields, including system inherited fields. You can only add fields within a page on a form. You can't add a field to the gray area within the form where the Assigned To, State, and Reason fields are located.
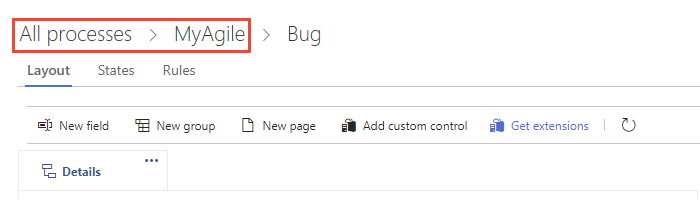
From the Process page of the selected inherited process, choose the work item type you want to add the custom field to.
Here we choose the Bug WIT. Note the breadcrumb links that allow you to move back to All Processes and MyAgile process page.
If the New field and other options are disabled, you don't have the necessary permissions to edit the process. See Set permissions and access for work tracking, Customize an inherited process.
With the WIT selected, choose the
 New field.
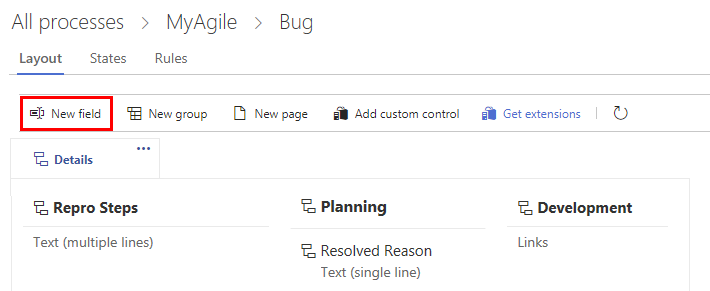
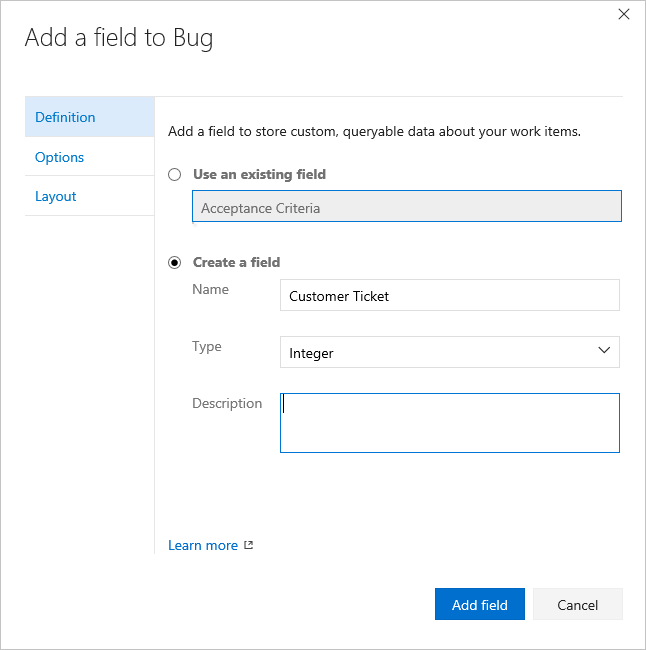
Name the field and select the field type from one of the supported data types. Optionally, add a description.
Note
You must specify a field name that is unique within the organization. A custom field defined for one process cannot be the same as the name defined for another process. For more information on field names, see What is a field? How are field names used?
Here we add an Integer field labeled Customer Ticket.
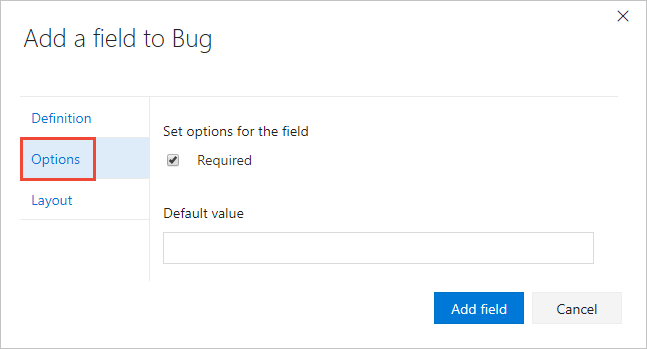
(Optional) On the Options tab, indicate if the field is required and specify a default value. Or leave the values blank. By making a field Required, users must specify a value for the field to save the work item. When you create a work item as well as every time someone opens a work item and the field is empty, the default value is set.
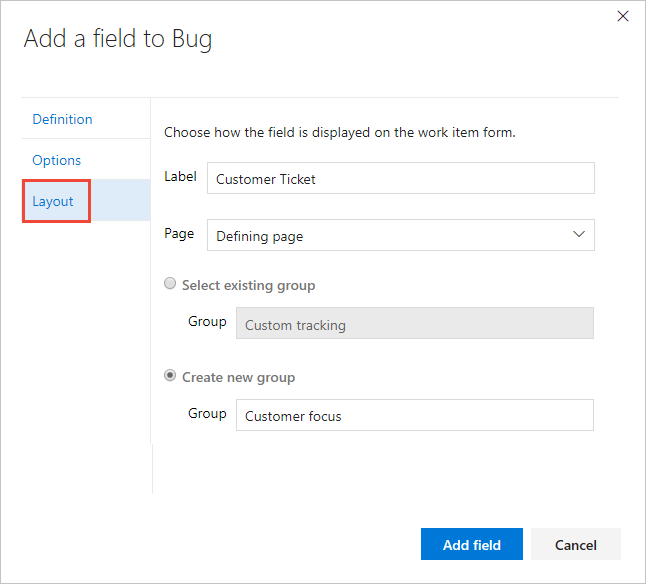
(Optional) On the Layout tab, you can enter a different form label than the name of the field. Also, you can choose the page and group where the field appears on the form.
Here, we add the Customer Ticket field to a new group labeled Customer focus.
Note
While you can change the form label, you must use the field name when you are adding fields to cards (Board, Taskboard) or creating queries based on the field.
Choose Add field to complete adding the field. If you don't specify its layout location, the system adds it to the first group of fields on the form.
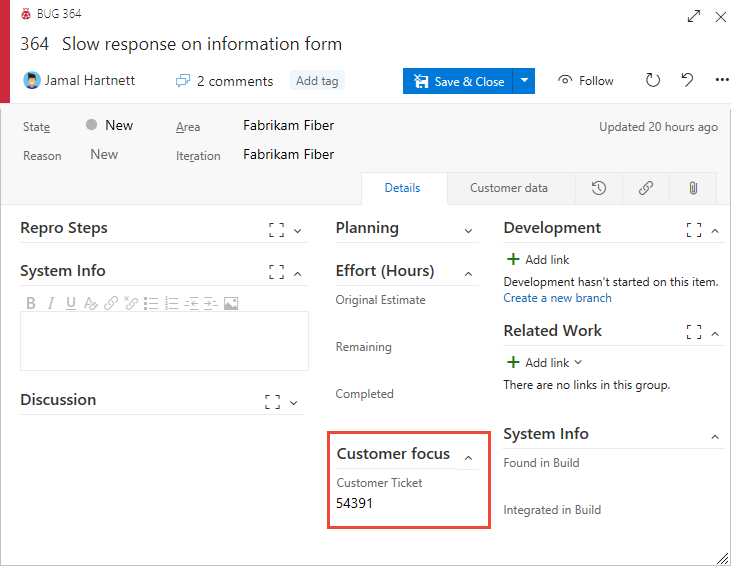
When you've completed making all your changes, open a work item of the type you've customized.
Here, we show the Customer Ticket field has been added to the Status group. You may need to refresh your browser to see the changes.
Add a picklist
Work tracking, process, and project limits
You can add a new field and define a pick list or customize the pick list of an inherited field.
Note
Each organization or collection can define up to 2048 picklists. Each picklist can contain up to 2048 items. Picklist items must be 256 or fewer characters. If you want to add dependent picklists, see Cascading lists.
Start by choosing
New field, then specify the picklist type—integer or string—and then add the items to appear in the picklist. You can add an item and then press Enter to add another item.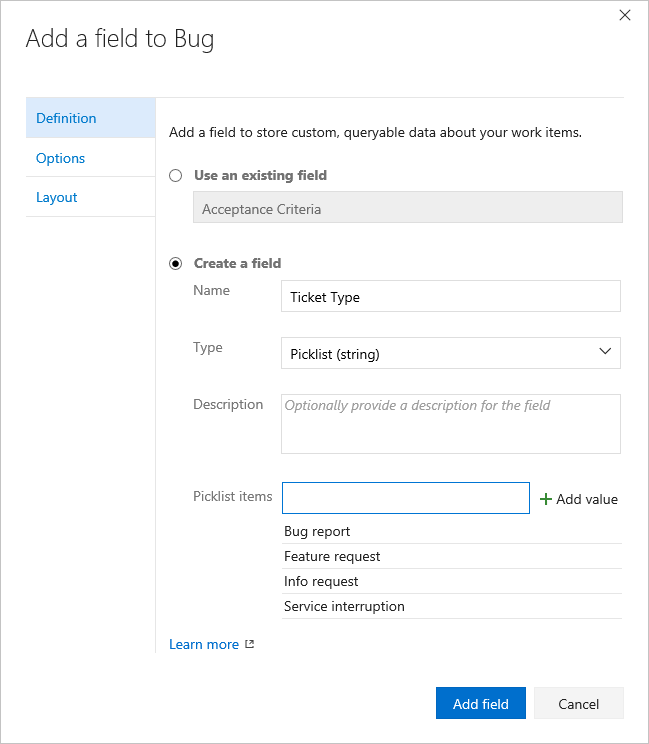
To delete an item in the list, highlight the item and then click the
 delete icon.
To modify the pick list of an inherited field, choose Edit to edit the field. On the Definition tab, you can choose to Add value.

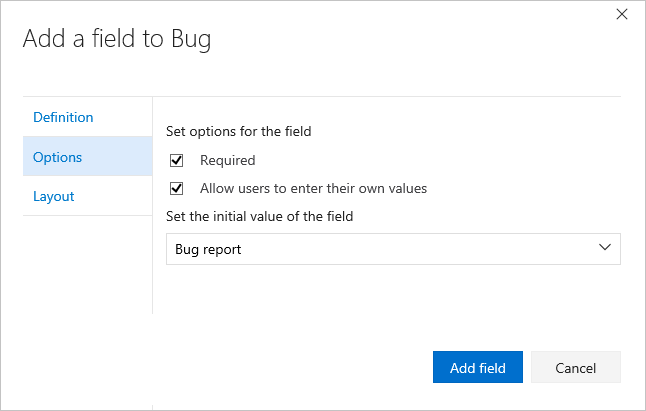
(Optional) Choose the Options tab to define the field as required, specify a default, or allow users to enter their own values.
(Optional) See previous step 5 to specify where you want the field to appear on the form (Layout tab).
Add an Identity field
Use an Identity-based field to add a field similar to the Assigned To field. Identity-based fields act in the same way as the Assigned To field, providing a search and identity picker function. When your organization manages users with Microsoft Entra ID or Active Directory, the system synchronizes Identity-based fields with the names defined in these directories.
Start by choosing
New field, then the field name, Identity type, and optionally a description.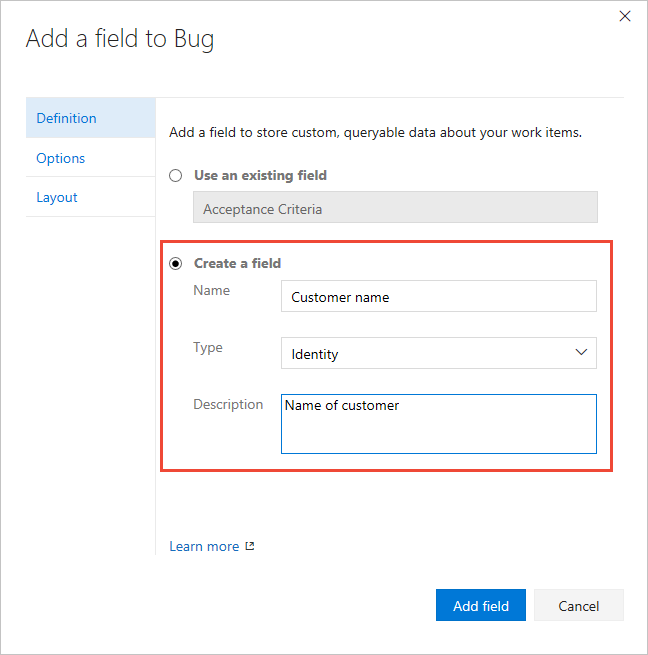
(Optional) See previous step 5 to specify where you want the field to appear on the form (Layout tab).
Add a rich-text, HTML field
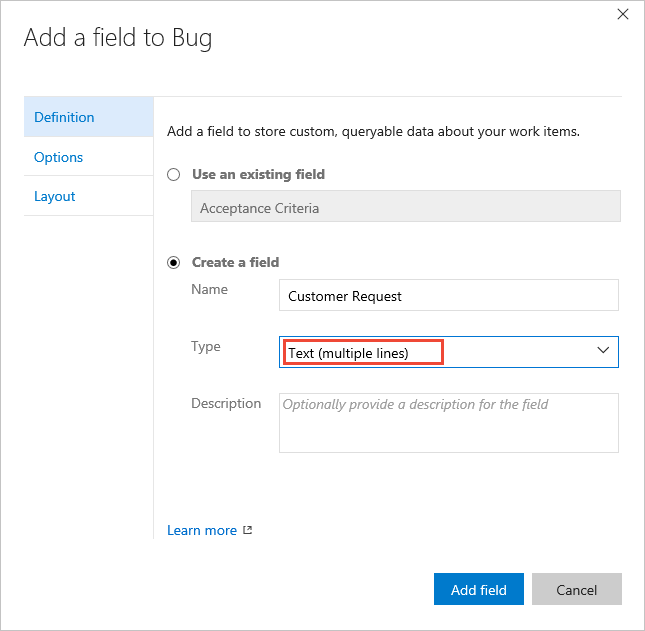
As before, choose the WIT you want to add the field to and then choose the
New field.Choose Text (multiple lines) as the type. Here we label the field as Customer request to capture customer comments for product feature requests.
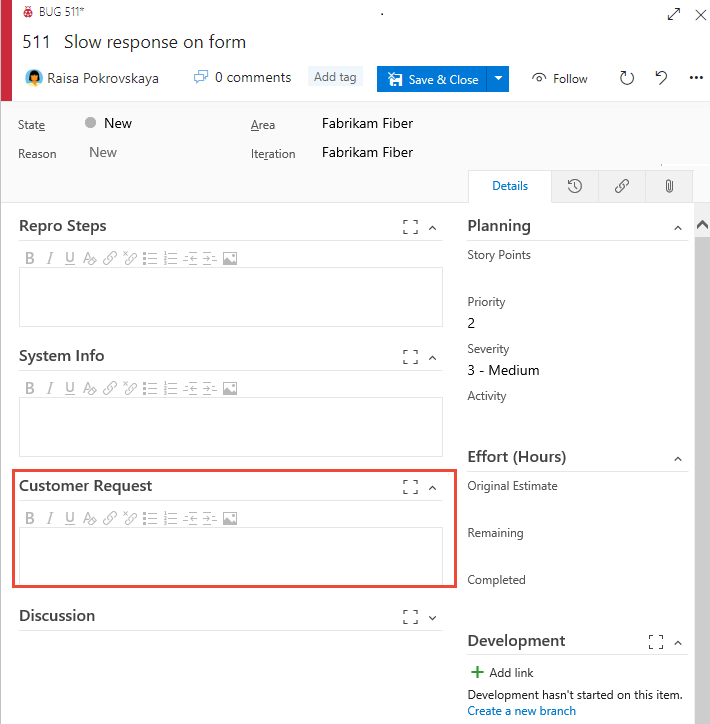
The field is added to the first column under all system-defined rich-text fields, but before the Discussion control.
Add a checkbox field
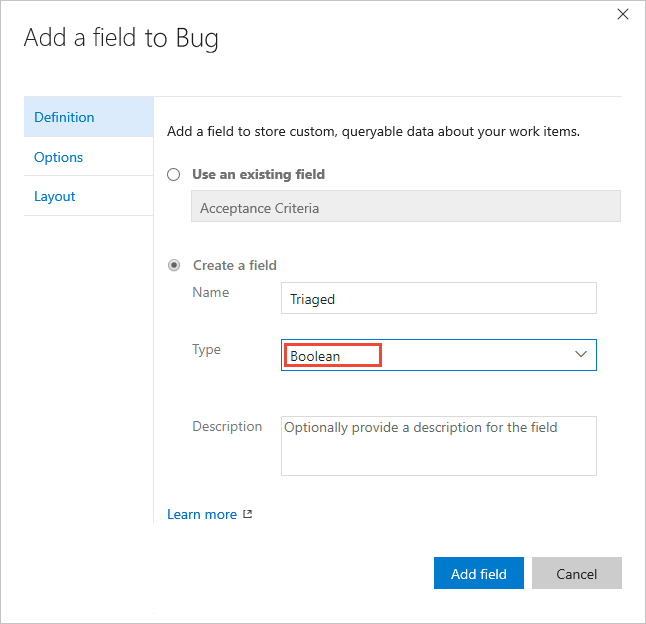
As before, choose the WIT you want to add the field to and then choose
 New field.
Choose Boolean as the type, and give it a label. Here we label the field as Triaged to track the triage state of the bug.
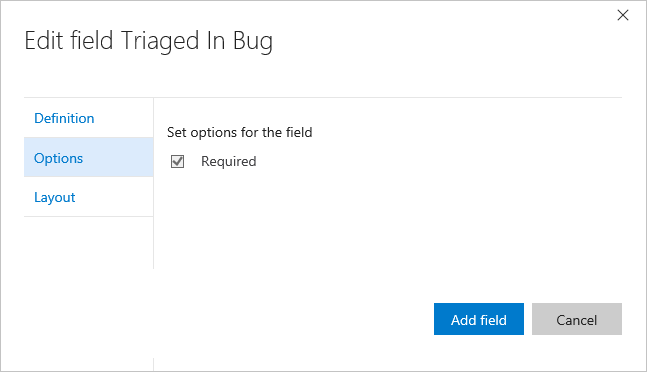
(Optional) Open the Options tab and specify if the field should be required.
By default, the field is added to the last group defined in the second column. Open the Layout tab to drag and drop the field to another group on the form.
Note
The field appears as a checkbox in the work item form. Check the box to indicate a True value. If you display the field on the board or Taskboard, then the field values of True and False display (not a checkbox).
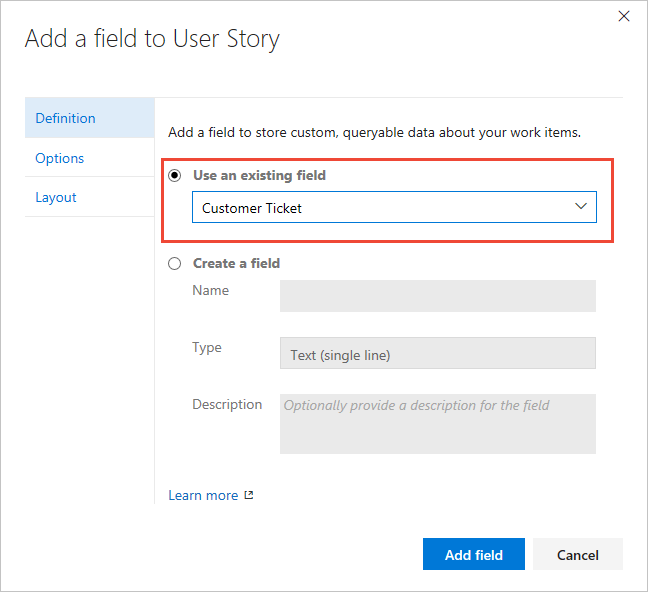
Add an existing field to another WIT
Existing fields correspond to any inherited field and custom field defined within the collection. Once you've added a custom field to one WIT, you can add it to others from the form menu. Or, you can add a field defined for one process to a work item type in another process. Open the work item type and choose the existing field.
To look up descriptions of any system-defined work item field, see the Work item field index.
Here we add the Customer Ticket field to the User Story WIT.
Optionally, specify the Required/Default values and placement within the form for the field.
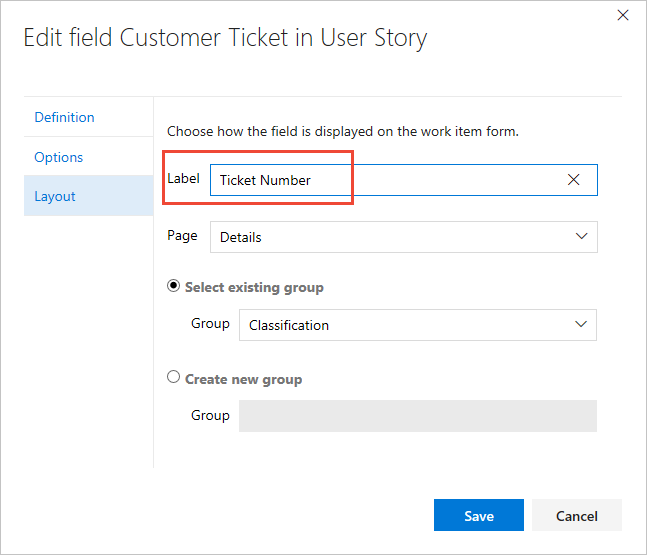
Relabel a field
Renaming a field or changing the field type aren't supported actions. However, from the Layout tab you can change the label that appears on the work item form. When selecting the field in a query, you need to select the field name and not the field label.
Here, we relabel the Customer Ticket field to Ticket Number.
Modify Description help text
Description help text displays when users hover over a field in the work item form. You can define different help text for the same fields for different work item types. Modification is supported for both custom fields and inherited fields. Note that the implementation differs based on the field type.
- For inherited fields: Description help text can be defined differently for each work item type and process.
- For custom fields: Description help text appears the same for the field across all work item types and all processes.
Note
Certain features require installation of Azure DevOps Server 2020.1 update. For more information, see Azure DevOps Server 2020 Update 1 RC1 Release Notes, Boards.
Description help text displays when users hover over a field in the work item form. You can only modify the description help text on a custom field. That help text propagates to all work item types and all processes. You can't customize the help text by process or work item type.
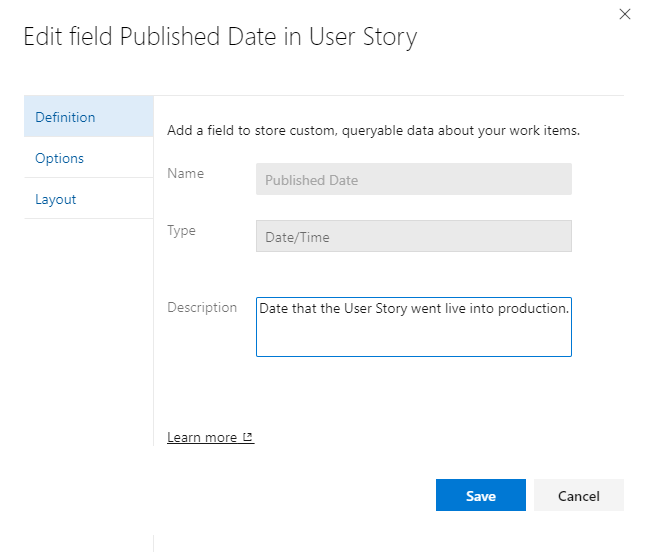
To modify the Description help text, choose the work item type you want to modify, choose Edit for the field and choose the Definition tab. The modified value only affects that field in the process and for that work item type.
Here we modify the Story Points field for User Story.

Here we modify the custom Published field for User Story.
Show, hide, or remove a field
You can choose to show or hide any field or custom control from appearing on a form. If you want to reinstate a field onto the form later, you can un-hide These actions differ from the Delete option, which deletes the field from the organization.
You can choose to show or hide an inherited field or a custom control from appearing on a form. For custom fields, you can remove it from the form. If you want to reinstate it by choosing Show on layout. These actions differ from the Delete option, which deletes the field from the organization.
Note
Data defined for an inherited field, even if you hide it, is maintained in the data store and work item history. You can view a record of it by viewing the history tab for a work item.
When you remove a custom field from the layout, it is maintained in the data store but stripped from the history. You can view it from the query results. If you add the field back to the form, then the history for it is restored.To delete a custom field from a project collection, see Delete a field.
Hide a field or custom control
Hide an inherited field or custom control
Open the context menu for the field or control and choose Hide from layout.
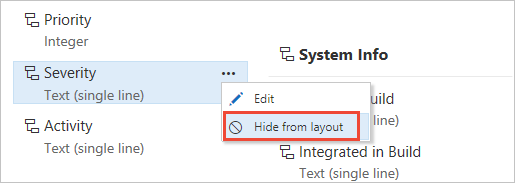
To add a hidden field or control to the form, choose Show on layout.
Remove a custom field from a form
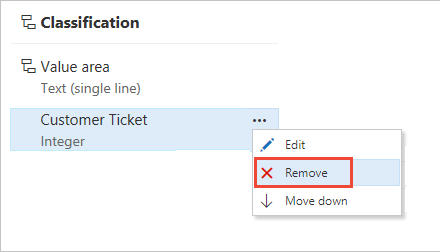
Choose Remove from the context menu of the field you want to remove.
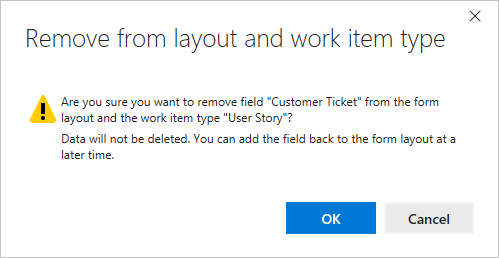
Confirm that you want to remove the field.
To add a custom field that's been removed, choose New field and select Use an existing field.
Revert field to preset defaults
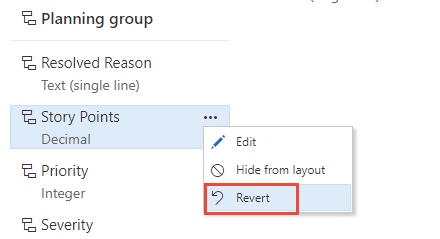
You may discard changes you made to an inherited field. From the Layout page of the modified work item type, choose the Revert option for the field.
Delete a custom field
With the Inheritance process model, you can only delete custom fields. You can't delete fields defined for system default processes.
Deleting a field deletes all data associated with that field, including historical values. Once deleted, you can only restore the field and recover the data using the Fields - Update REST API.
Note
We recommend that you only delete fields that are not in use. You can determine fields that aren't in use by exercising the witadmin listfields command. To learn how, see Manage work item fields (witadmin).
Or, if Analytics is enabled for your organization or collection, you can query Analytics for where a custom field is in use with the following syntax:
https://analytics.dev.azure.com/{OrganizationName}/_odata/v4.0-preview/WorkItemTypeFields?$filter=FieldReferenceName eq {CustomFieldReferenceName}&$select=WorkItemType
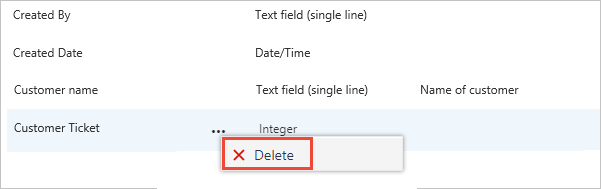
You delete the field from the All processes>Fields page.
To delete fields, you must be a member of the Project Collection Administrators group or be granted explicit permissions to Delete field from account.
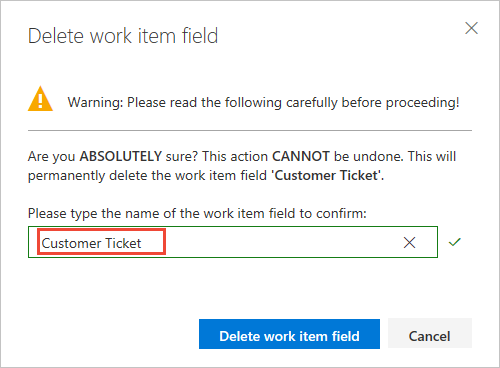
To complete the delete operation, you must type the name of the field as shown.
Related articles
Note
Review changes made to an inherited process through the audit log. For more information, see Access, export, and filter audit logs.
- View work item fields and attributes
- Add or modify a custom work item type
- Customize the web layout
- Customize a project using an inherited process
- Customize cards on boards
- Show bugs on backlogs and boards
- Work tracking, process, and project limits
If you're working with test plans or test cases, see these articles:
Feedback
Coming soon: Throughout 2024 we will be phasing out GitHub Issues as the feedback mechanism for content and replacing it with a new feedback system. For more information see: https://aka.ms/ContentUserFeedback.
Submit and view feedback for