Configure Azure VPN client for P2S certificate authentication connections - Windows
If your point-to-site (P2S) VPN gateway is configured to use OpenVPN and certificate authentication, you can connect to your virtual network using the Azure VPN Client or the OpenVPN client. This article walks you through the steps to configure the Azure VPN Client and connect to your virtual network.
Before you begin
This article assumes that you've already performed the following prerequisites:
- You created and configured your VPN gateway for point-to-site certificate authentication and the OpenVPN tunnel type. See Configure server settings for P2S VPN Gateway connections - certificate authentication for steps.
- You generated client certificates and downloaded the VPN client configuration files. See Point-to-site VPN clients: certificate authentication - Windows
Before beginning client configuration steps, verify that you're on the correct VPN client configuration article. The following table shows the configuration articles available for VPN Gateway point-to-site VPN clients. Steps differ, depending on the authentication type, tunnel type, and the client OS.
| Authentication | Tunnel type | Generate config files | Configure VPN client |
|---|---|---|---|
| Azure certificate | IKEv2, SSTP | Windows | Native VPN client |
| Azure certificate | OpenVPN | Windows | - OpenVPN client - Azure VPN client |
| Azure certificate | IKEv2, OpenVPN | macOS-iOS | macOS-iOS |
| Azure certificate | IKEv2, OpenVPN | Linux | Linux |
| Microsoft Entra ID | OpenVPN (SSL) | Windows | Windows |
| Microsoft Entra ID | OpenVPN (SSL) | macOS | macOS |
| RADIUS - certificate | - | Article | Article |
| RADIUS - password | - | Article | Article |
| RADIUS - other methods | - | Article | Article |
Connection requirements
To connect to Azure, each connecting client computer requires the following items:
- The Azure VPN Client software must be installed on each client computer.
- The Azure VPN Client profile must be configured using the downloaded azurevpnconfig.xml configuration file.
- The client computer must have a client certificate that's installed locally.
View configuration files
The VPN client profile configuration package contains specific folders. The files within the folders contain the settings needed to configure the VPN client profile on the client computer. The files and the settings they contain are specific to the VPN gateway and the type of authentication and tunnel your VPN gateway is configured to use.
Locate and unzip the VPN client profile configuration package you generated. For Certificate authentication and OpenVPN, you'll see the AzureVPN folder. Locate the azurevpnconfig.xml file. This file contains the settings you use to configure the VPN client profile.
If you don't see the file, verify the following items:
- Verify that your VPN gateway is configured to use the OpenVPN tunnel type.
- If you're using Microsoft Entra authentication, you might not have an AzureVPN folder. See the Microsoft Entra ID configuration article instead.
Download the Azure VPN Client
Download the latest version of the Azure VPN Client install files using one of the following links:
- Install using Client Install files: https://aka.ms/azvpnclientdownload.
- Install directly, when signed in on a client computer: Microsoft Store.
Install the Azure VPN Client to each computer.
Verify that the Azure VPN Client has permission to run in the background. For steps, see Windows background apps.
To verify the installed client version, open the Azure VPN Client. Go to the bottom of the client and click ... -> ? Help. In the right pane, you can see the client version number.
Configure the Azure VPN Client profile
Open the Azure VPN Client.
Select + on the bottom left of the page, then select Import.
In the window, navigate to the azurevpnconfig.xml file, select it, then select Open.
From the Certificate Information dropdown, select the name of the child certificate (the client certificate). For example, P2SChildCert. You can also (optionally) select a Secondary Profile.

If you don't see a client certificate in the Certificate Information dropdown, you'll need to cancel and fix the issue before proceeding. It's possible that one of the following things is true:
- The client certificate isn't installed locally on the client computer.
- There are multiple certificates with exactly the same name installed on your local computer (common in test environments).
- The child certificate is corrupt.
After the import validates (imports with no errors), select Save.
In the left pane, locate the VPN connection, then select Connect.

Optional settings for the Azure VPN Client
The following sections discuss optional configuration settings that are available for the Azure VPN Client.
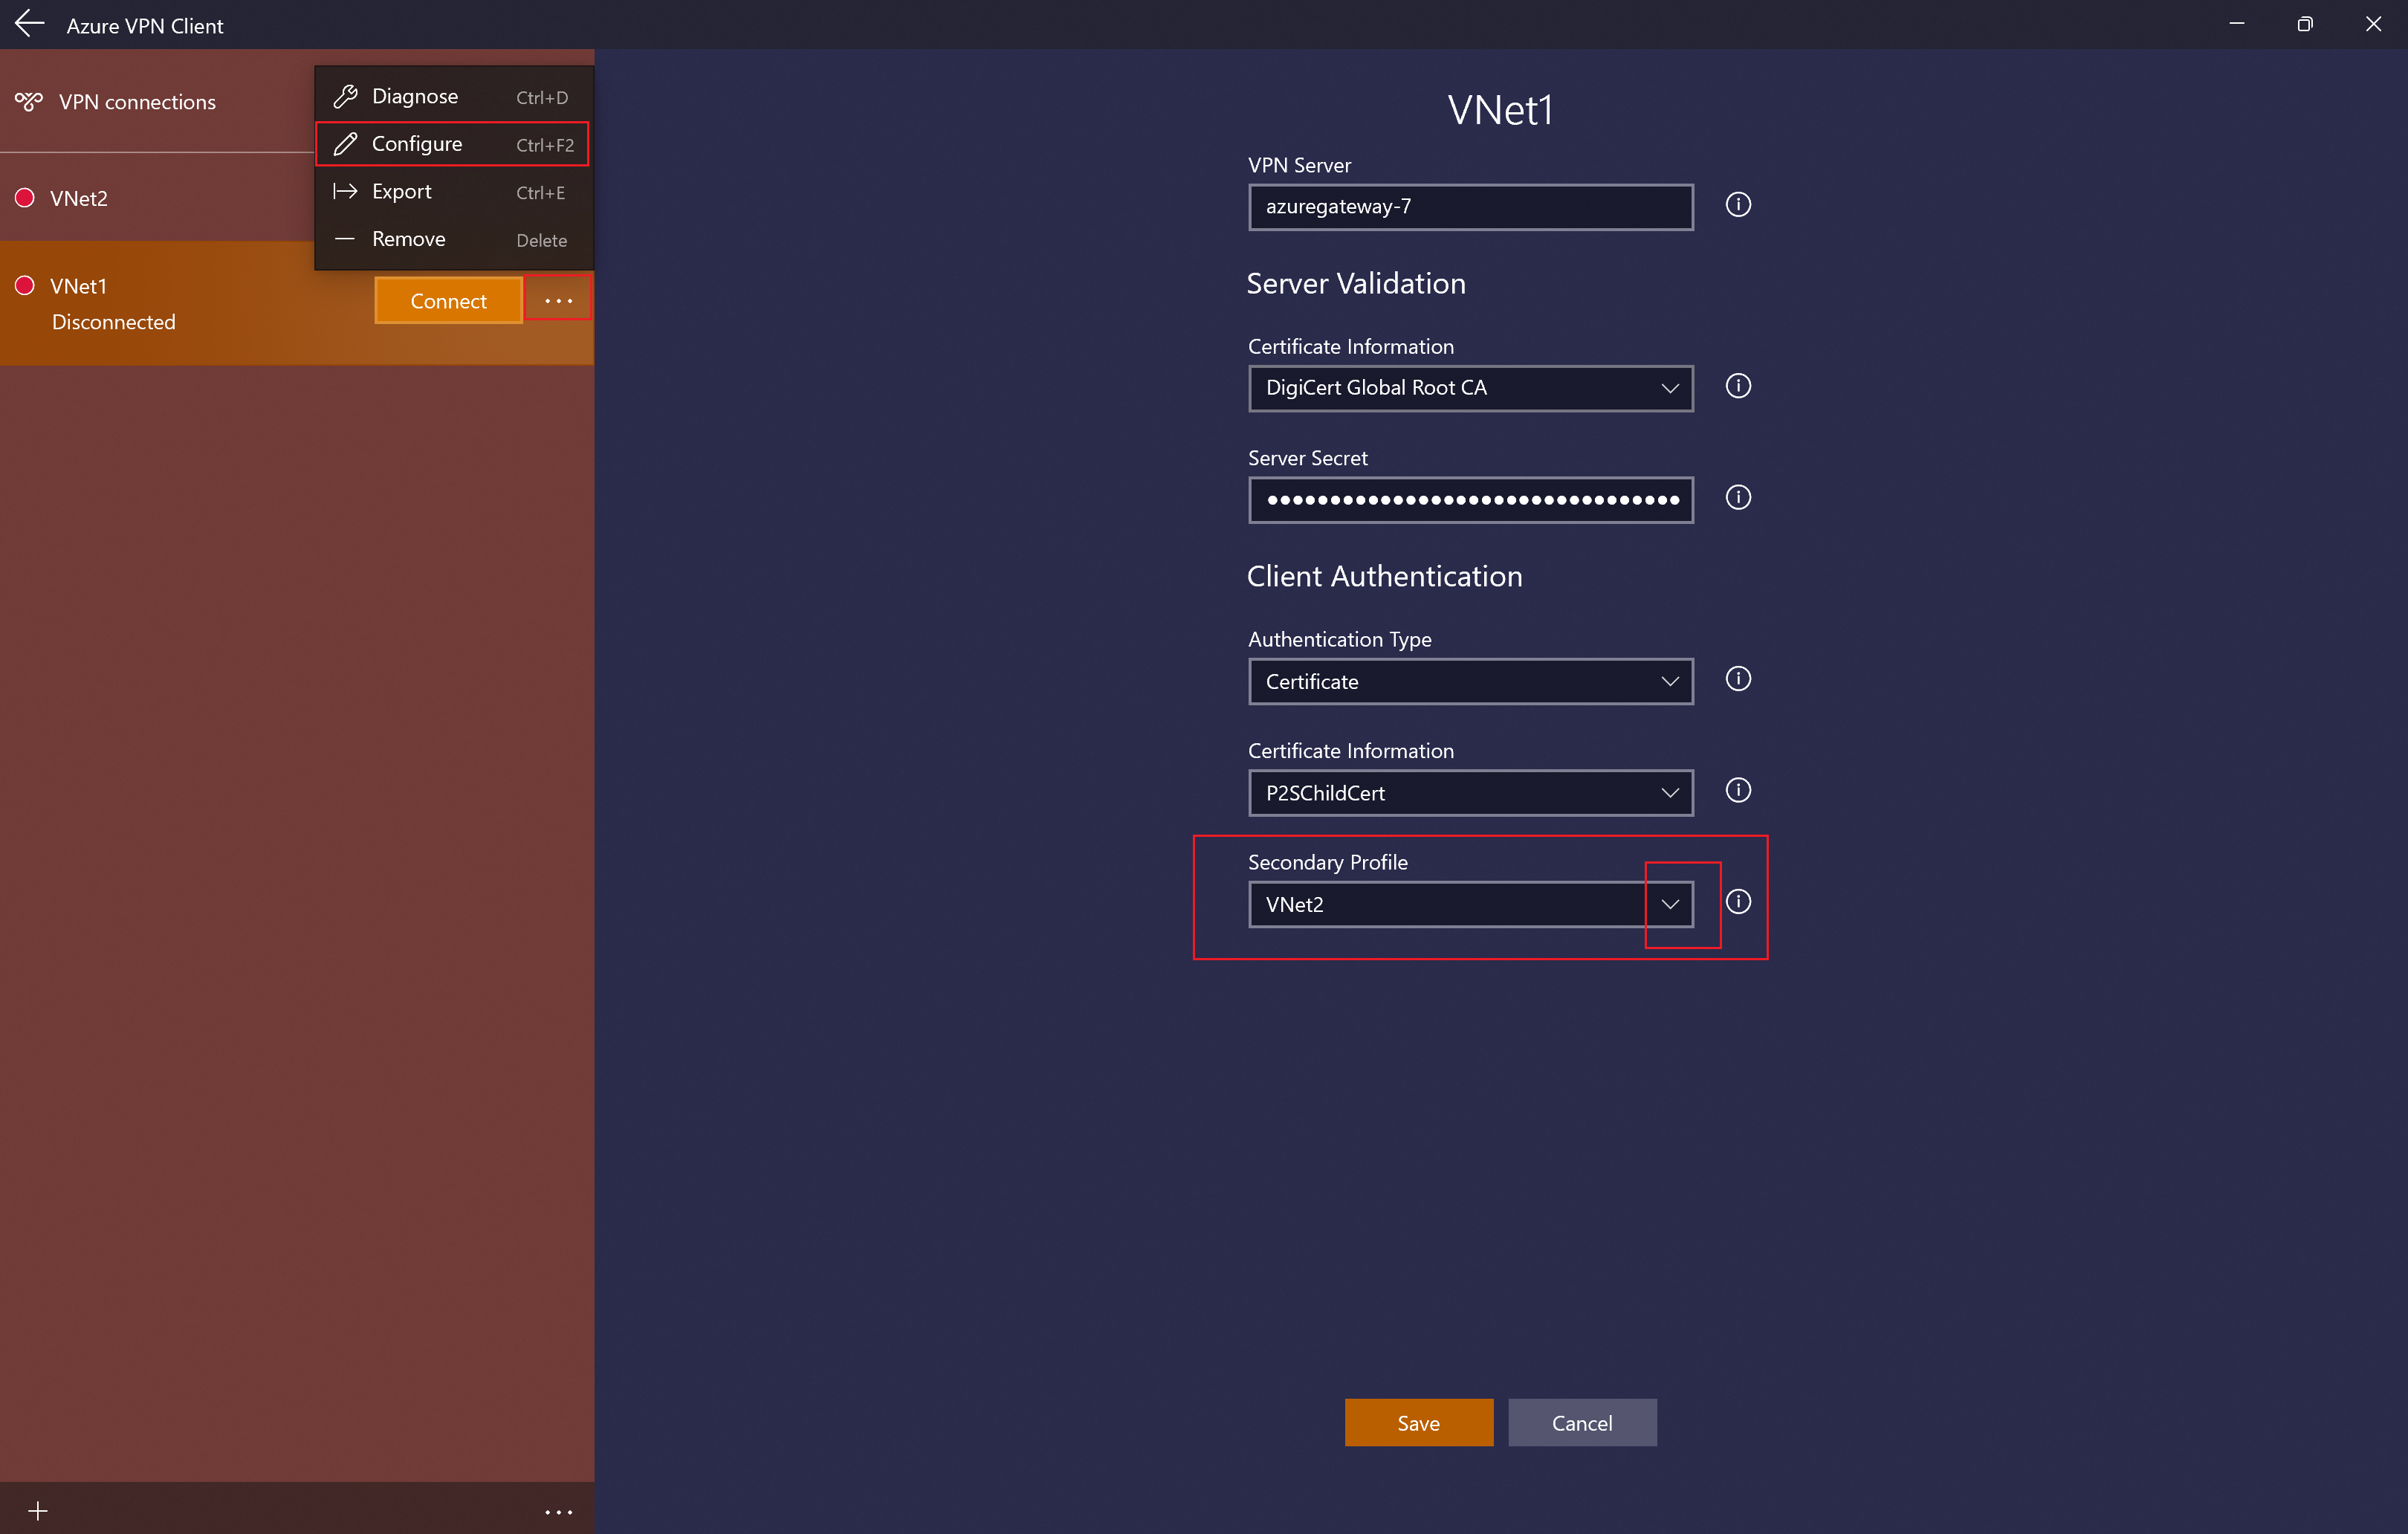
Secondary Profile
The Azure VPN Client provides high availability for client profiles. Adding a secondary client profile gives the client a more resilient way to access the VPN. If there's a region outage or failure to connect to the primary VPN client profile, the Azure VPN Client will auto-connect to the secondary client profile without causing any disruptions.
This feature requires the Azure VPN Client version 2.2124.51.0, which is currently in the process of being rolled out. For this example, we'll add a secondary profile to an already existing profile.
Using the settings in this example, if the client can't connect to VNet1, it will automatically connect to VNet2 without causing disruptions.
Add another VPN client profile to the Azure VPN Client. For this example, we added a profile to connect to VNet2.
Next, go to the VNet1 profile and click "...", then Configure.
From the Secondary Profile dropdown, select the profile for VNet2. Then, Save your settings.

Custom settings: DNS and routing
You can configure the Azure VPN Client with optional configuration settings such as more DNS servers, custom DNS, forced tunneling, custom routes, and other settings. For a description of the available settings and configuration steps, see Azure VPN Client optional settings.
Next steps
Point-to-site configuration steps Point-to-site VPN clients: certificate authentication - Windows
Feedback
Coming soon: Throughout 2024 we will be phasing out GitHub Issues as the feedback mechanism for content and replacing it with a new feedback system. For more information see: https://aka.ms/ContentUserFeedback.
Submit and view feedback for