Note
Access to this page requires authorization. You can try signing in or changing directories.
Access to this page requires authorization. You can try changing directories.
Data in one table often relates to data in another table. For example, you might have a Teachers table and a Class table, and the Class table might have a lookup relation to the Teachers table to show which teacher instructs the class. You can use a lookup column to show data from the Teachers table. This is commonly referred to as a lookup column.
Important
When a lookup column has a value set, Dataverse returns the following information in the table that contains the lookup:
- The ID of the related record.
- The string value in the related record's primary name column.
Anyone who can access the record that contains the lookup column can view the primary name value, even if they don't have permission to view the related record. Don't store sensitive information in a primary name column.
Define a relationship
You can create several types of relationships from one table to another (or between a table and itself). Each table can have a relationship with more than one table, and each table can have more than one relationship to another table.
Imagine you have class, classroom, and student tables. The following common relationship types you use could be the following:
- Many-to-one - Each row in the Class table can match only one row in the Classroom table, but each classroom can match multiple classes. For example, each class has one classroom, while a classroom can host many classes. The Class table contains the lookup column.
- One-to-many - Each row in the Classroom table can match multiple rows in the Class table, but each class can match only one classroom. For example, one classroom can host many classes.
- Many-to-many - Each row in the Student table can match multiple rows in the Class table, and each row in the Class table can match multiple rows in the Student table. For example, each student can attend many classes, and each class can have multiple students.
Additionally, you can set advanced cascading behaviors on many-to-one and one-to-many relationships whenever an action is taken on the parent table.
Add a lookup column (Many-to-one relationship)
To add a lookup relation to a table, create a relation under the Relationships area and specify the table with which you want to create a relationship.
In Power Apps, on the left navigation pane select Tables. If the item isn’t in the side panel pane, select …More and then select the item you want.
Select an existing table, or Create a new table, and then select Relationships.
Select New relationship, and then select a relationship type, such as Many-to-one.
On the right pane, select a Related table for the Current table, and then select Done.
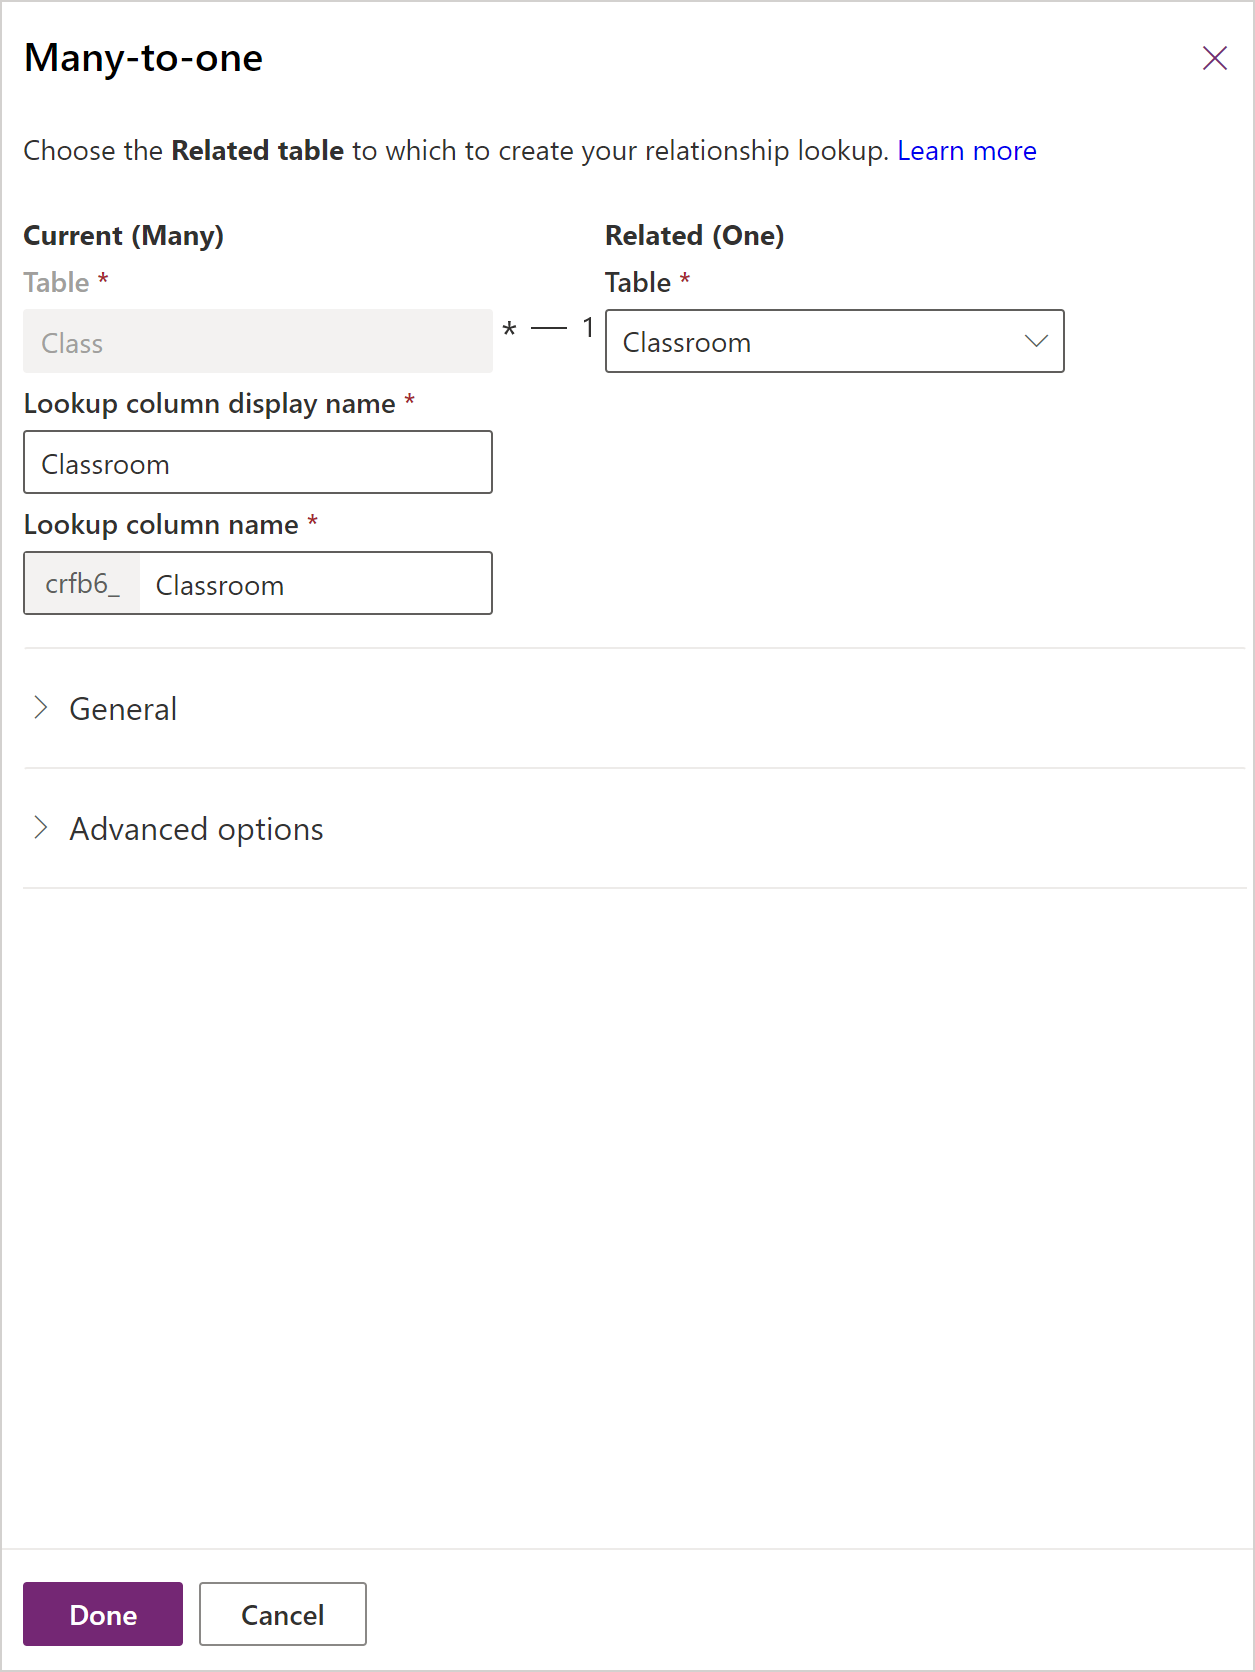
Select Done.
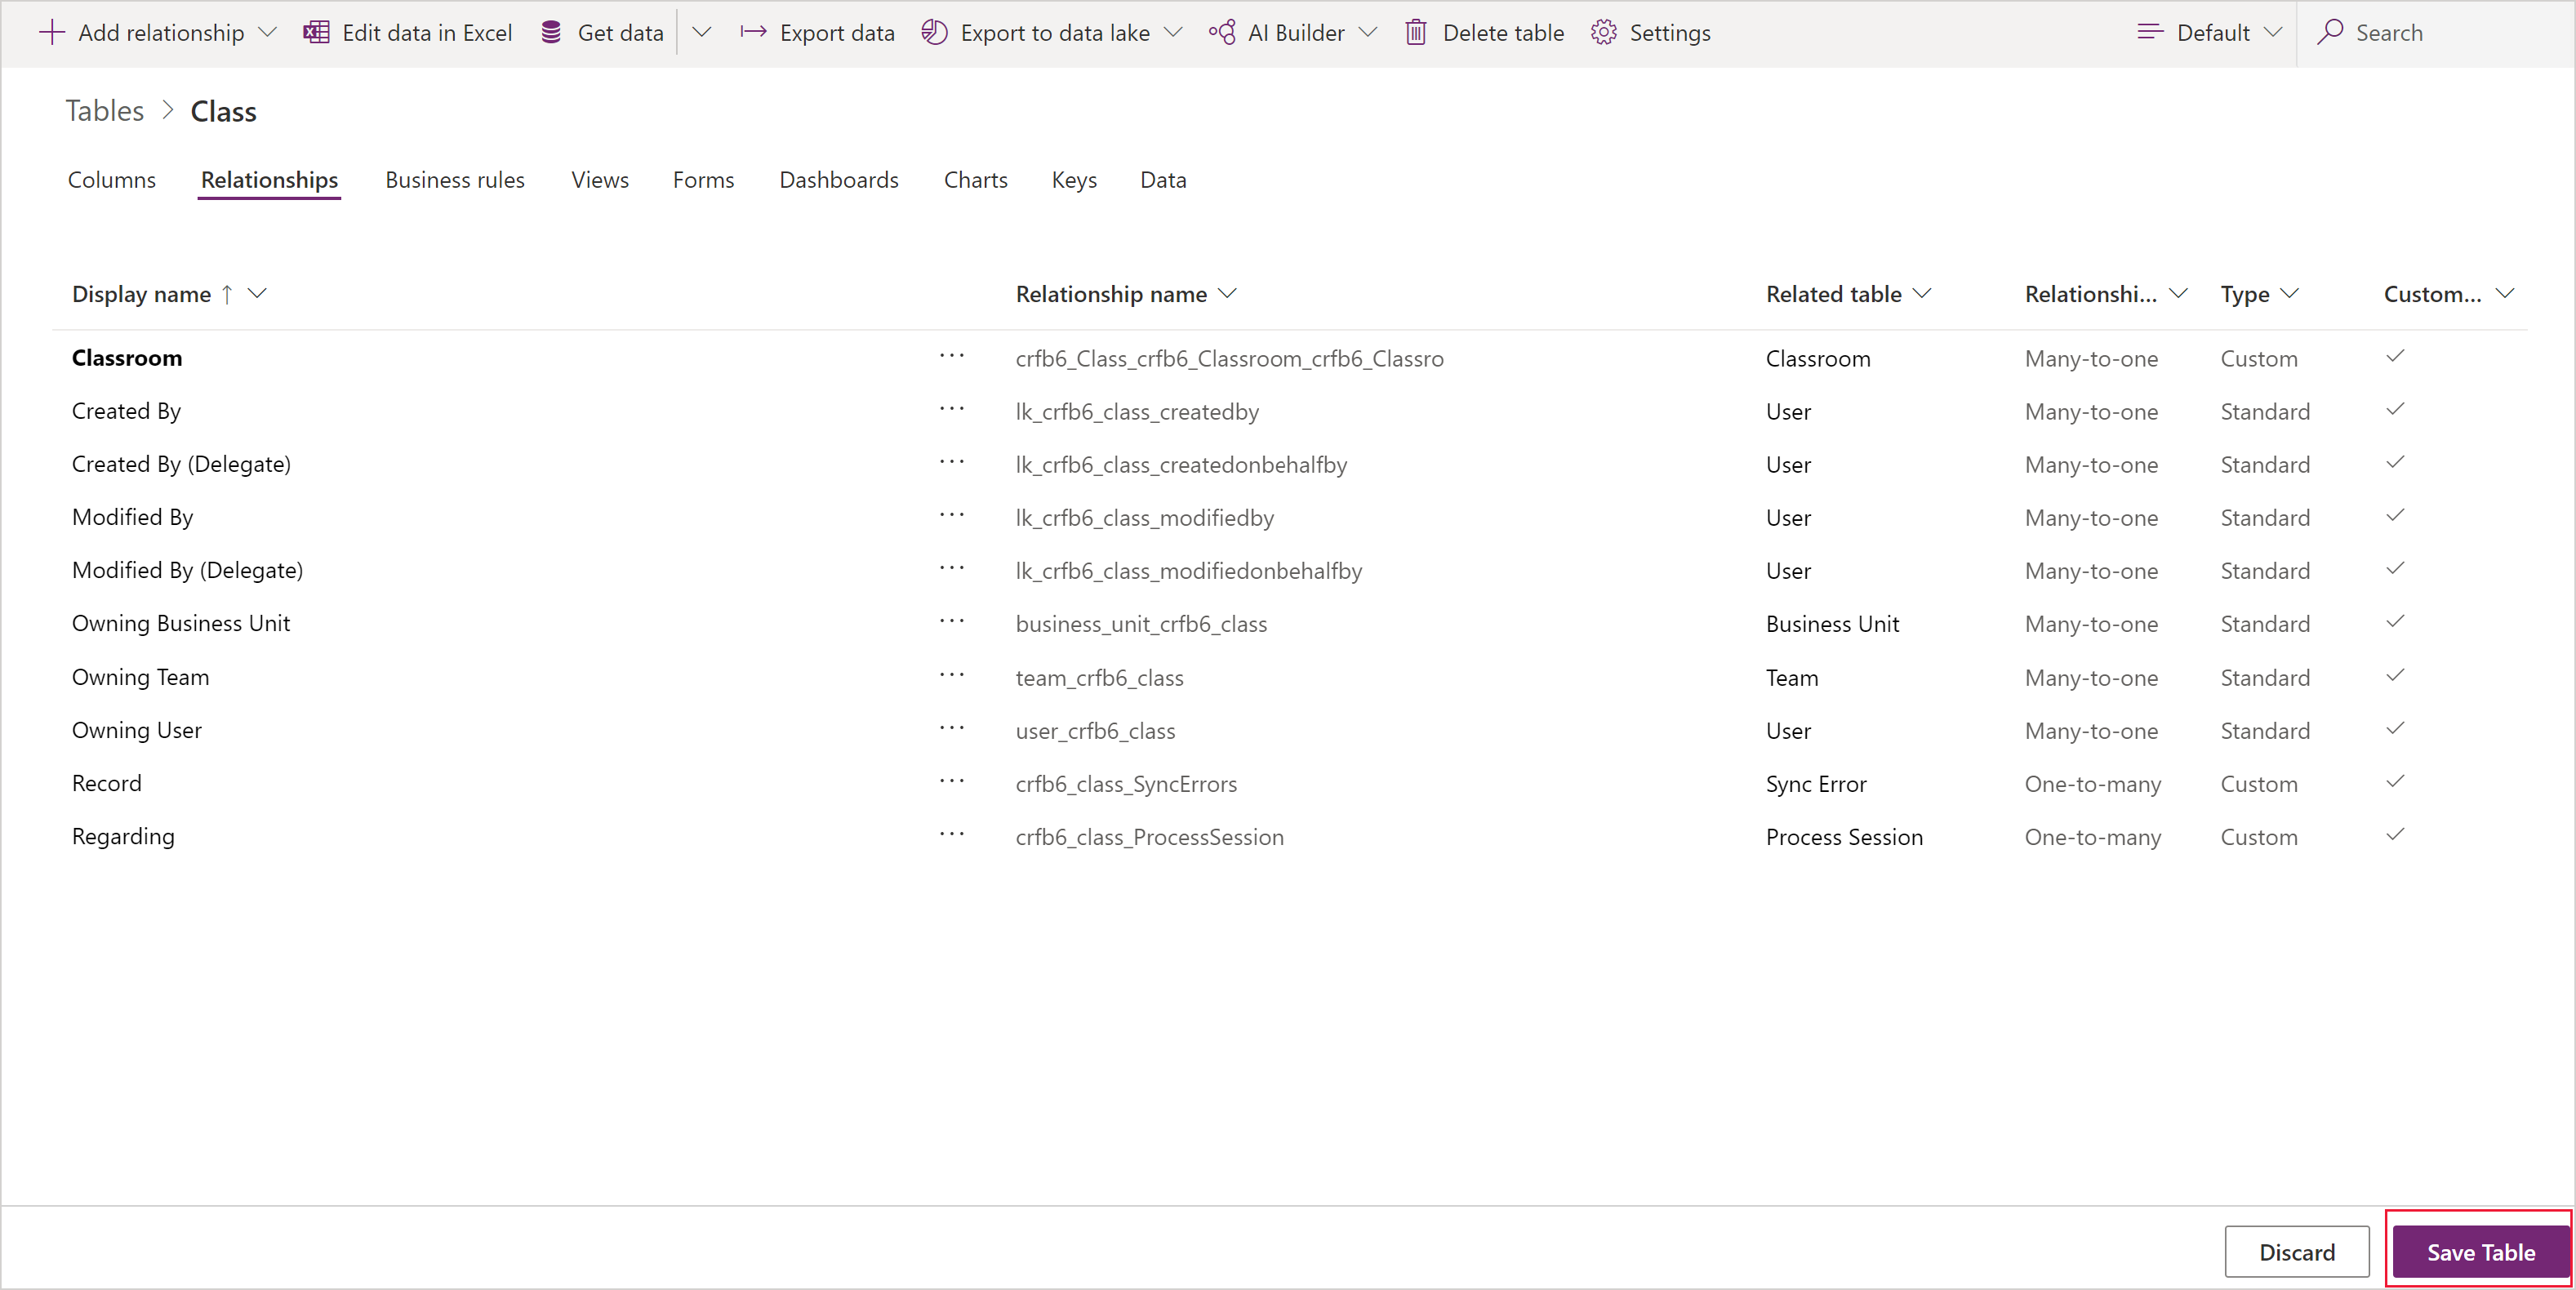
Add a one-to-many relationship
To add a one-to-many relationship, create a relation under the Relationships area and specify the table with which you want to create a relationship.
In Power Apps, select Tables in the left navigation pane. If the item isn’t in the side panel pane, select …More and then select the item you want.
Select an existing table, or Create a new table, and then select Relationships.
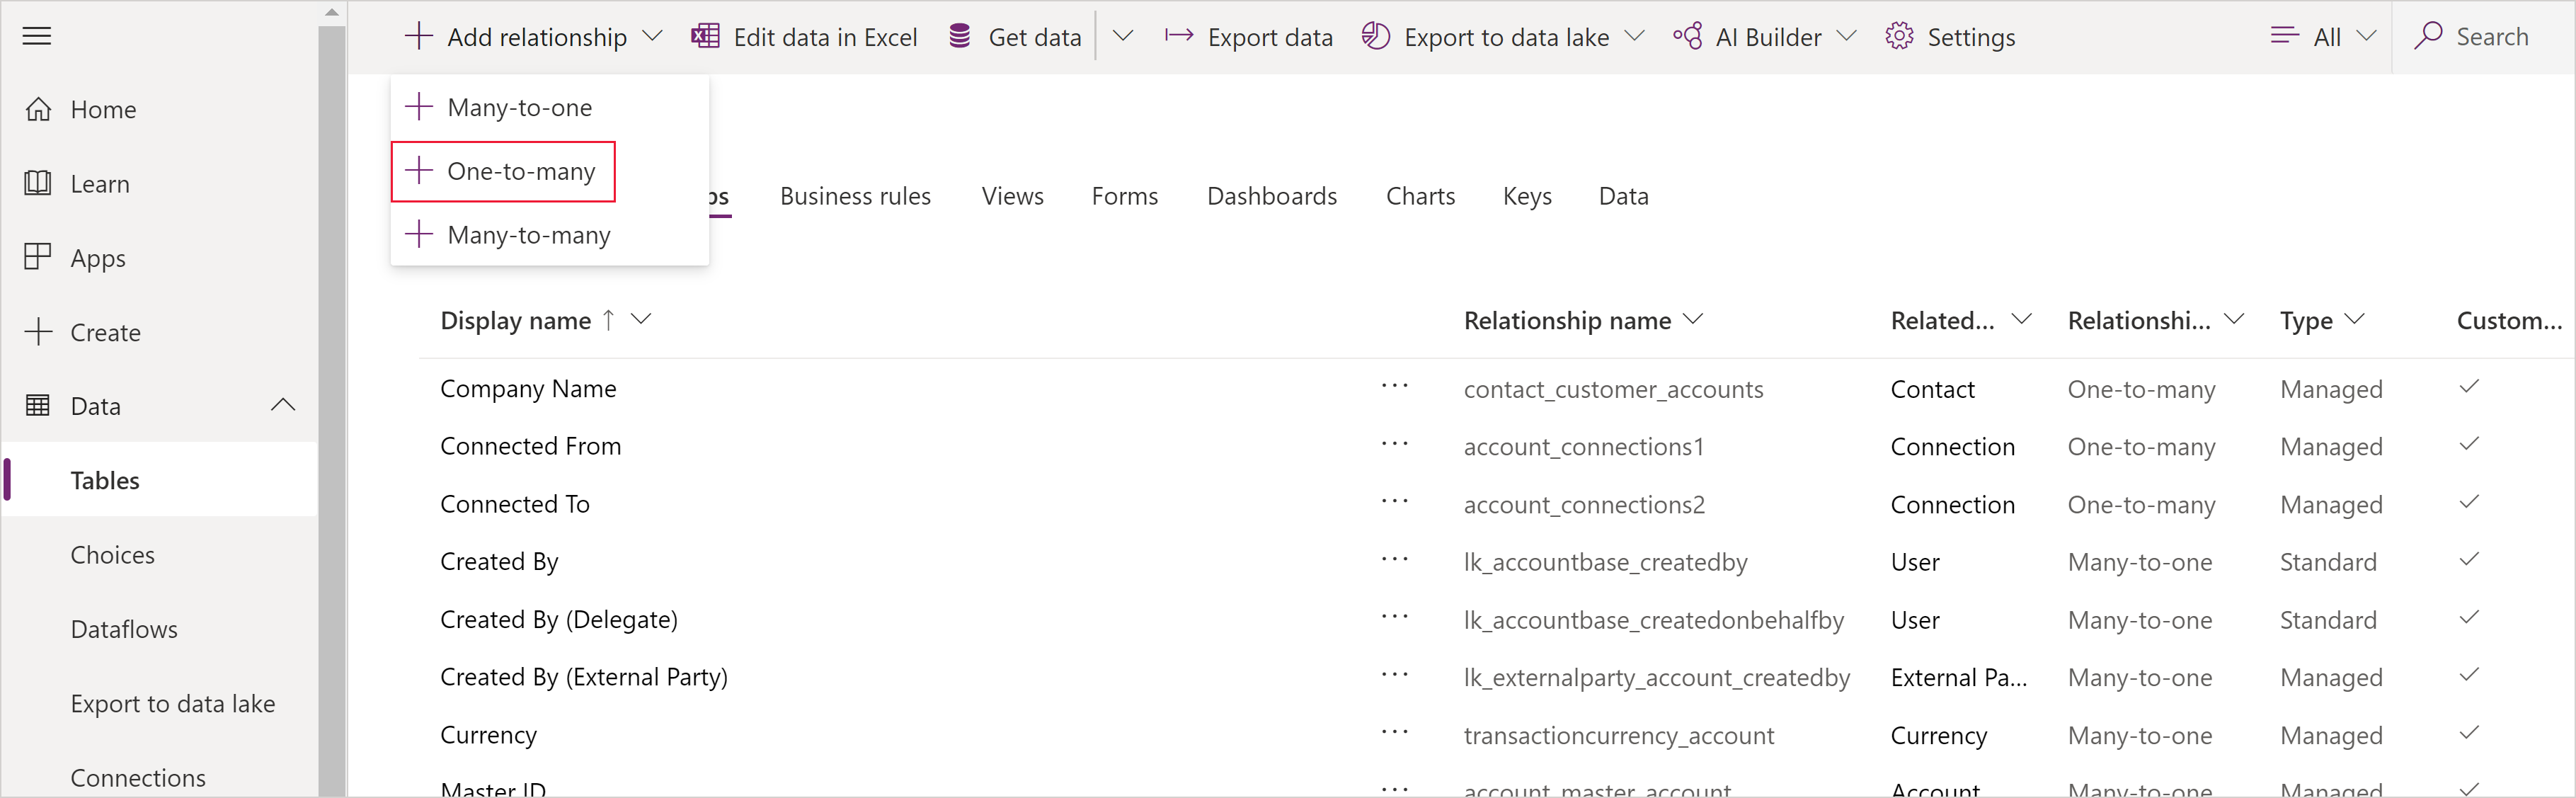
Select the down arrow to the right of Add relationship, and then select One-to-many.
Select a table. Notice the Look up columns will be shown on the Current table, they'll default with the tables name (in this example Teacher) but you can change them if needed. Select Done to add the relationship to your table.
Note
In the case of a One-to-many relationships, the Look up column will be created on the related table, not the table you currently have selected. If you need the lookup on the current table, create a Many-to-one relationship.
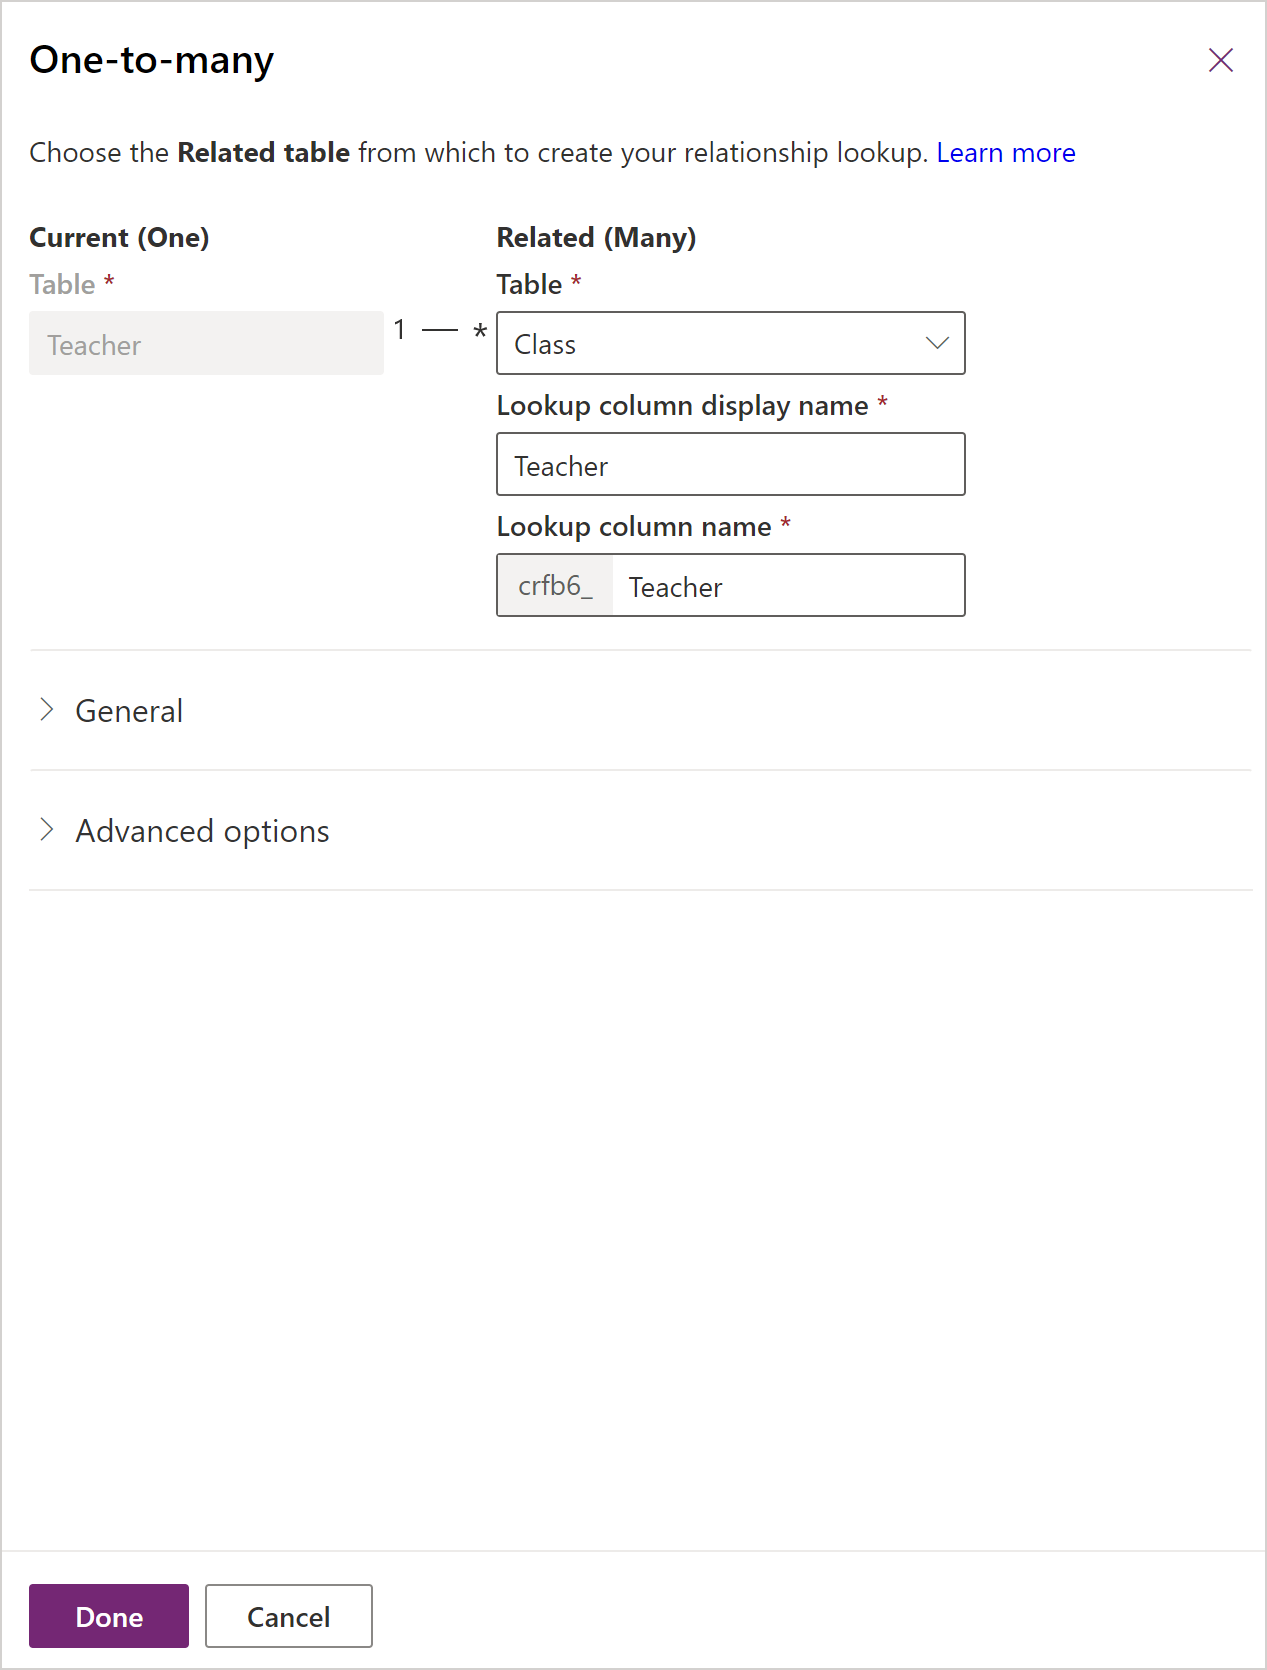
Select Done.
Add a many-to-many relationship
To add a many-to-many relationship, create a relation under the Relationships area and specify the table with which you want to create a relationship.
On powerapps.com, select Tables in the left navigation pane. If the item isn’t in the side panel pane, select …More and then select the item you want.
Select an existing table, or Create a new table
Select the Relationships area.
Select Add relationship and then select Many-to-many. This opens a panel for you to choose the table you want to create a relationship to. Select the table from the Related table drop-down.
After selecting a table, the names for the relationship and relationship table appear. They default to the names of the tables combined, but you can change them if needed.
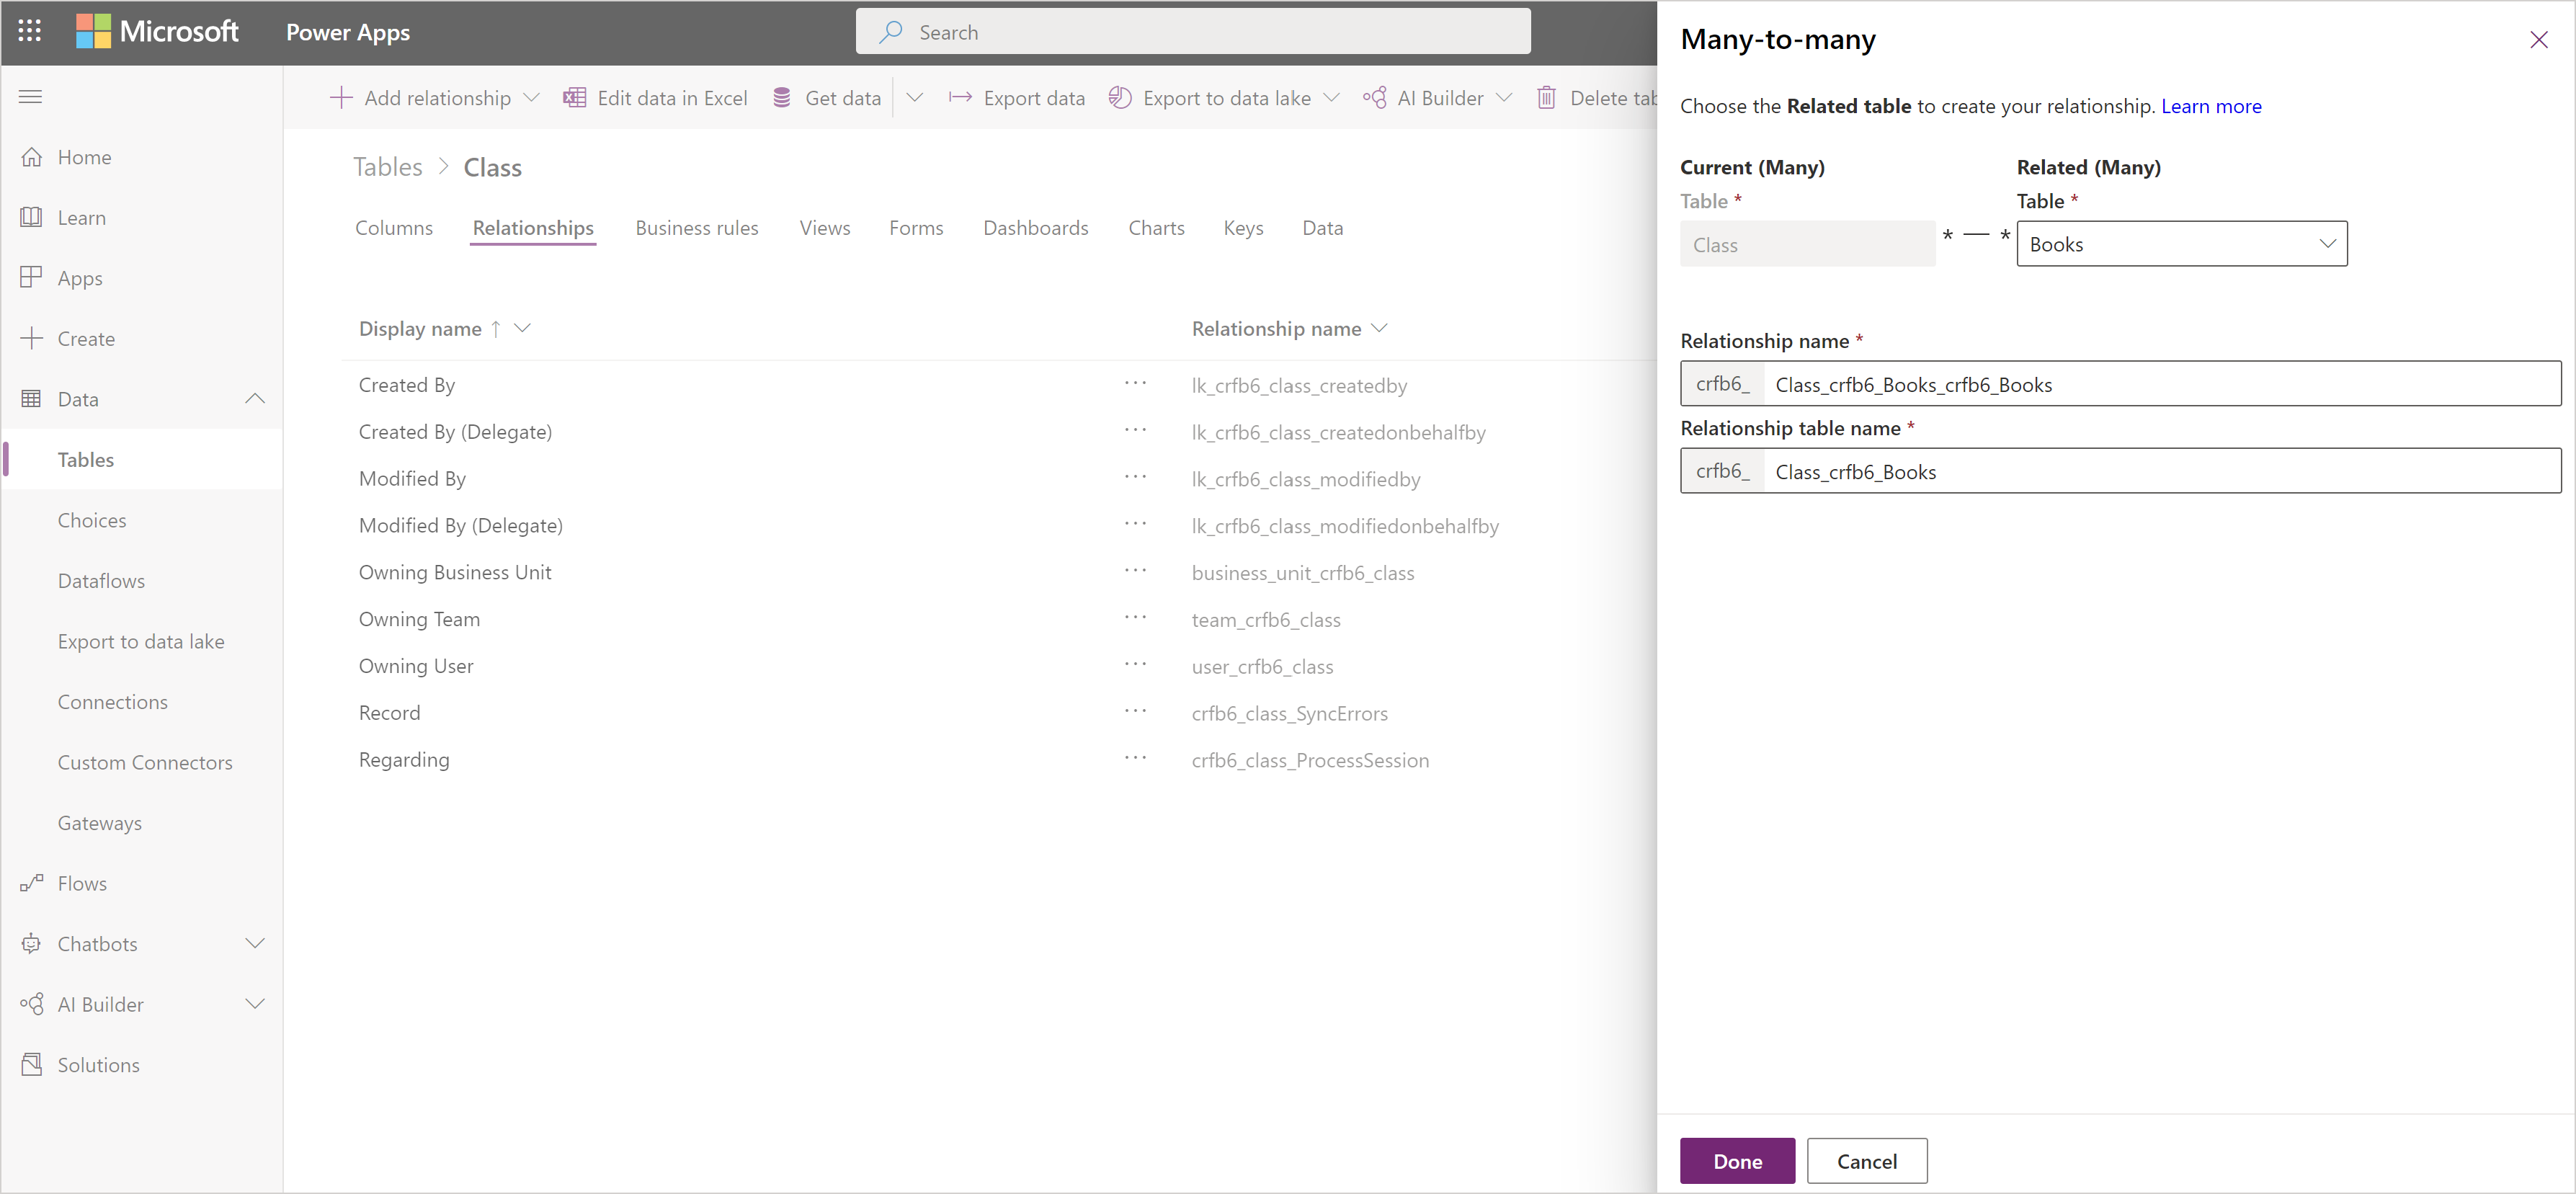
Select Done to add the relationship to your table, and then select Save table.
Add advanced relationship behavior
While building a one-to-many or a many-to-one relationship, you can also set advanced behaviors.
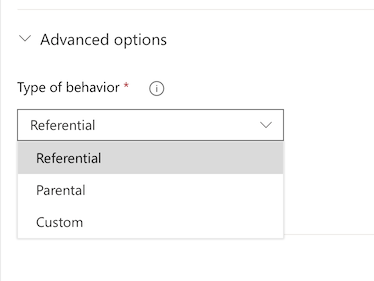
These options are also referred to as cascading behaviors because they cascade down the hierarchy of related tables. For example, it might be desirable to delete the related tests and homework of a student if a student is removed from the system. This type of behavior is called a parental relationship.
On the other hand, you might decide that you don't want actions to cascade down the hierarchy. For example, in the teacher to class relationship you could decide that the child table (class) shouldn't* be deleted when a parent (teacher) is deleted. This is called a referential relationship.
As you model your business data by creating custom tables or when using existing Common Data Model tables, consider the behavior you require and the implications for the entire hierarchy of related tables and choose between one of the following standard behaviors:
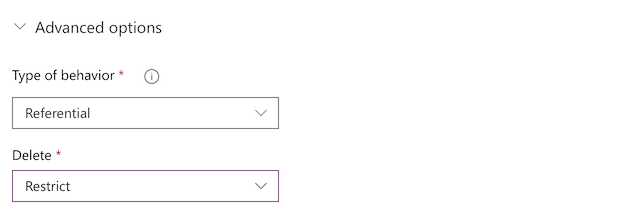
Referential, Remove Link: In a referential relationship between two tables, you can navigate to any related rows, but actions taken on one table don't affect the other. For example, if you have a one-to-many relationship between teachers and classes, deleting a teacher has no impact on the related class.
Referential, Restrict Delete: In a referential, restrict delete relationship between two tables, you can navigate to any related rows. Actions taken on the parent row don't affect the child row, but the parent row can't be deleted while the child row exists. This behavior is useful if you don't want child rows to become orphaned. This restriction forces the user to delete all of the children before deleting the parent.
Parental: In a parental relationship between two tables, any action taken on a record of the parent table is also taken on any child table records that are related to the parent table record. For example, the owner of the parent record has inherited access to the child table records and when the parent record is deleted, all of the child records will also be deleted.
Custom: In a custom relationship between two tables, you select the behavior associated with each of a set of possible actions.
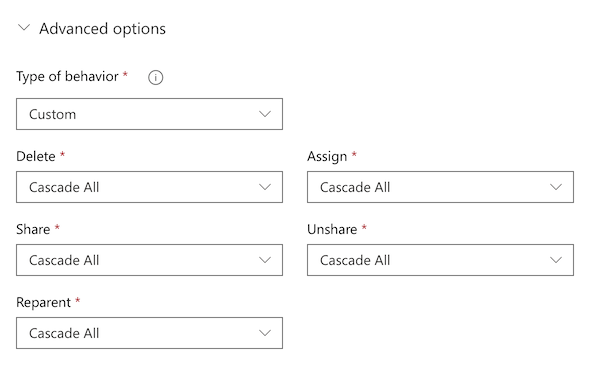
For more information on defaults and custom behaviors: Configure table relationship behavior.
Use a lookup column in an app
If you create an app automatically from a table that contains a lookup column, it appears as a Drop down control that contains data from the Primary name column of the table.
Add 1:N and N:N relationships for canvas apps
Use the Relate function to link two rows through a one-to-many or many-to-many relationship in Microsoft Dataverse. More information: Relate and Unrelate functions in Power Apps