Note
Access to this page requires authorization. You can try signing in or changing directories.
Access to this page requires authorization. You can try changing directories.
[This article is prerelease documentation and is subject to change.]
Power Pages enables you to create an agent directly from a form. These agents integrate with Copilot Studio and use knowledge, actions, and business logic from the form.
By using minimal steps, you can build agents by using existing form fields and logic, and automatically use Power Pages' built-in authorization and security roles. You can also enhance and fine-tune these agents in Copilot Studio to unlock advanced capabilities.
Important
- This is a preview feature.
- Preview features aren’t meant for production use and might have restricted functionality. These features are subject to supplemental terms of use, and are available before an official release so that customers can get early access and provide feedback.
Prerequisites
The tenant admin needs to turn on the agent feature for Power Pages.
Agents in Power Pages use Microsoft Copilot Studio agents. Make sure that the tenant has sufficient message quotas for agents. To learn more about quotas, see Quotas and limits for Copilot Studio.
Create an agent
You can create an agent directly from a form to streamline the manual process.
Sign in to Power Pages.
Find your site, and select Edit.
In the Pages workspace, select a web page with a basic form.
Select the form.
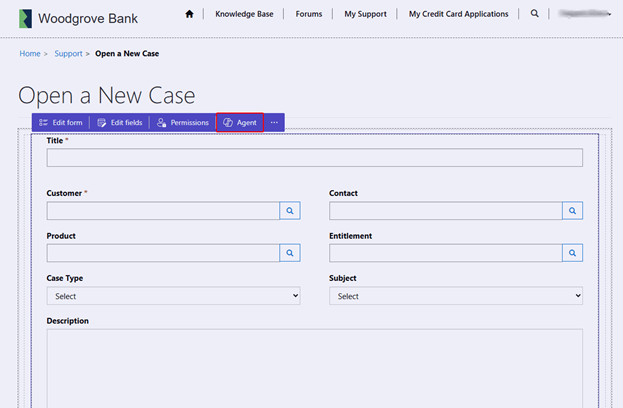
Select Agent.
The Add Agent dialog opens. Create a new agent or extend an existing one for the selected form. The dialog has these configuration options:
Describe the purpose of the form, and give instructions to the agent. These instructions help the agent know when to trigger based on user input.
Select the optional checkbox to let the agent autofill the form by using information from an uploaded image or PDF file.
Enter a name for the new agent or select an existing agent from Microsoft Copilot Studio.
Note
- Only agents you create from Power Pages are available for selection.
- Agent creation from forms supports only columns of Text, Number, Date and time, Choice, and Currency data types.
Select Continue. If you create a new agent, Microsoft Copilot Studio creates it. If you select an existing agent, Microsoft Copilot Studio updates it.
By default, authentication isn't set up when you create an agent in Microsoft Copilot Studio. You can set up authentication manually in the Copilot Studio editor.
Under Choose Roles for this Agent, select Add Roles to assign web roles, and control which users can use the agent based on their assigned roles.
Under Tables and columns for Web API, select the checkbox to let the agent use table permissions for the table related to the form. The agent uses the Power Pages Web API, which needs extra site settings. Selecting this checkbox automatically creates the required site setting.
Note
This configuration lets the agent use all fields in the selected table. To limit access to specific fields, update the site settings in the Management App.
Select Continue.
Select Publish to make the agent available from the Power Pages site.
Known issues
- If you don't see the newly created agent on your site and the classic widget experience still appears, add the site setting
SiteCopilot/EnableNativeControlPVABotsand set its value to true. - If you don't configure authentication for an agent hosted on a private site, the agent might say that a record was created successfully even when no record was created.