Note
Access to this page requires authorization. You can try signing in or changing directories.
Access to this page requires authorization. You can try changing directories.
This article shows you how to host remote Model Context Protocol (MCP) servers on Azure Functions. You also learn how to use built-in authentication to configure server endpoint authorization and better secure your AI tools.
There are two ways to host a remote MCP server in Azure Functions:
| MCP server option | Description | Best for... |
|---|---|---|
| MCP extension server | Uses the Azure Functions MCP extension to create custom MCP servers, where the extension trigger lets you define your tool endpoints. These servers are supported in all Functions languages and are developed, deployed, and managed as any other function app. | When you're already familiar with Functions and its bindings-based programming model. |
| Self-hosted server | Functions can host an MCP server project created using the standard MCP SDKs. | When you've already built your server using the official MCP SDKs and are looking for event-driven, serverless, and scalable hosting in Azure. |
Note
The ability to have Azure Functions host MCP servers you create using official MCP SDKs is currently in preview.
This tutorial covers both MCP server options supported by Functions. Select the tab that best fits your scenario.
In this tutorial, you use Visual Studio Code to:
- Create an MCP server project using the MCP extension.
- Run and verify your MCP server locally.
- Create a function app in Azure.
- Deploy your MCP server project.
- Enable built-in authentication.
Important
This article currently supports only C#, Python, and TypeScript. To complete the quickstart, select one of these supported languages at the top of the article.
This article supports version 4 of the Node.js programming model for Azure Functions.
This article supports version 2 of the Python programming model for Azure Functions.
Prerequisites
Visual Studio Code with these extensions:
Azure Functions extension. This extension requires Azure Functions Core Tools and tries to install it when it's not available.
Azure CLI. You can also run Azure CLI commands in Azure Cloud Shell.
An Azure account with an active subscription. Create an account for free.
Create your MCP server project
Use Visual Studio Code to locally create an MCP server project in your preferred language.
In Visual Studio Code, press F1 to open the command palette. Search for and run the command
Azure Functions: Create New Project....Choose the directory location for your project workspace and choose Select. You should either create a new folder or choose an empty folder for the project workspace. Don't choose a project folder that is already part of a workspace.
Provide the following information at the prompts:
Prompt Selection Select a project type Choose C#.Select a .NET runtime Choose .NET 8.0 LTS.Select a template for your project's first function Choose MCP Tool trigger.Provide a function name Type McpTrigger.Provide a namespace Type My.Functions.Authorization level Choose FUNCTION, which requires access key when connecting to the remote MCP server.Select how you would like to open your project Choose Open in current window.
Provide the following information at the prompts:
Prompt Selection Select a project type Choose TypeScript.Select a template for your project's first function Choose MCP Tool trigger.Provide a function name Type mcpToolTrigger.Authorization level Choose FUNCTION, which requires access key when connecting to the remote MCP server.Select how you would like to open your project Choose Open in current window.
Provide the following information at the prompts:
Prompt Selection Select a project type Choose Python.Select a Python interpreter to create a virtual environment Choose your preferred Python interpreter. If an option isn't shown, type in the full path to your Python binary. Select a template for your project's first function Choose MCP Tool trigger.Name of the function you want to create Enter mcp_trigger.Authorization level Choose FUNCTION, which requires access key when connecting to the remote MCP server.Select how you would like to open your project Choose Open in current window.
Using this information, Visual Studio Code generates a code project for an MCP server trigger. You can view the local project files in the Explorer.
Start the MCP server locally
Function apps need a storage component to run. Before starting the server, start the local storage emulator:
In local.setting.json, ensure you have
"AzureWebJobsStorage": "UseDevelopmentStorage=true".In Visual Studio Code, press F1 to open the command palette. In the command palette, search for and select
Azurite: Start.Check the bottom bar and verify that Azurite emulation services are running. If so, you can now run the server locally.
To start running locally, press F5.
Test the server
Find the
.vscodedirectory and openmcp.json. The editor should add the server's connection info.Start the server by selecting the Start button above server name.
When you connect to the server, you see the number of tools available above the server name.
Open Visual Studio Code Copilot chat in agent mode, then ask a question. For example, "Greet with #your-local-server-name". This question ensures Copilot uses the server to help answer the question.
When Copilot requests to run a tool from the local MCP server, select Allow.
Disconnect from the server when you finish testing by selecting Stop, and
Cntrl+Cto stop running it locally.
Tip
In the Copilot chat window, select the tool icon in the bottom to see the list of servers and tools available for the chat. Ensure the local MCP server is checked when testing.
Remote MCP server authorization
There are two ways to reduce or prevent unauthorized use of your remote MCP server endpoints:
| Method | Description |
|---|---|
| Built-in server authentication (preview) | Functions includes built-in App Service authentication and authorization that implements the OAuth requirements of the MCP authorization specification protocol. Clients attempting to access the server are redirected to a configured identity provider, such as Microsoft Entra ID, for authentication before being allowed to connect. This method provides the highest level of security for your tool endpoints. |
| Key-based authentication | By default, Functions implements an access key requirement so that clients attempting to use MCP server tools must present a shared secret key value in the request header. While not providing the same level of security as OAuth-based authentication, access keys make it harder to access public tools. Use an Anonymous access level to disable access keys in your server when using OAuth-based authentication. |
Note
This tutorial contains detailed configuration instructions for the built-in server authorization and authentication feature, which might also be referred to as App Service Authentication in other articles. You can find an overview of the feature and some usage guidance in the Configure built-in server authorization (preview) article.
Disable key-based authentication
The built-in server authorization feature is a component separate from Azure Functions. When using server authentication, it's best to first disable key-based authentication by allowing anonymous access.
To disable host-based authentication in your MCP server, set system.webhookAuthorizationLevel to Anonymous in the host.json file:
{
  "version": "2.0",
  "extensions": {
    "mcp": {
      ...
      "system": {
        "webhookAuthorizationLevel": "Anonymous"
      }
    }
  }
}
Create the function app in Azure
Create a function app in the Flex Consumption plan in Azure that hosts your MCP server.
In the Azure portal, from the menu or the Home page, select Create a resource.
Select Get started and then Create under Function App.
Under Select a hosting option, choose Flex Consumption > Select.
On the Basics page, use the function app settings as specified in the following table:
Setting Suggested value Description Subscription Your subscription The subscription in which you create your new function app. Resource Group myResourceGroup Name for the new resource group in which you create your function app. Function App name Globally unique name Name that identifies your new function app. Valid characters are a-z(case insensitive),0-9, and-.Region Preferred region Select a region that's near you or near other services that your functions can access. Unsupported regions aren't displayed. For more information, see View currently supported regions. Runtime stack Preferred language Choose one of the supported language runtime stacks. In-portal editing using Visual Studio Code for the Web is currently only available for Node.js, PowerShell, and Python apps. C# class library and Java functions must be developed locally. Version Language version Choose a supported version of your language runtime stack. Instance size Default Determines the amount of instance memory allocated for each instance of your app. For more information, see Instance sizes. On the Storage page, accept the default behavior of creating a new default host storage account or choose to use an existing storage account.
On the Monitoring page, make sure that Enable Application Insights is selected. Accept the default to create a new Application Insights instance, or else choose to use an existing instance. When you create an Application Insights instance, you're also asked to select a Log Analytics Workspace.
On the Authentication page, change the Authentication type to Managed identity for all resources. With this option, a user-assigned managed identity is also created that your app uses to access these Azure resources using Microsoft Entra ID authentication. Managed identities with Microsoft Entra ID provides the highest level of security for connecting to Azure resources.
Accept the default options in the remaining tabs and then select Review + create to review the app configuration you chose.
When you're satisfied, select Create to provision and deploy the function app and related resources.
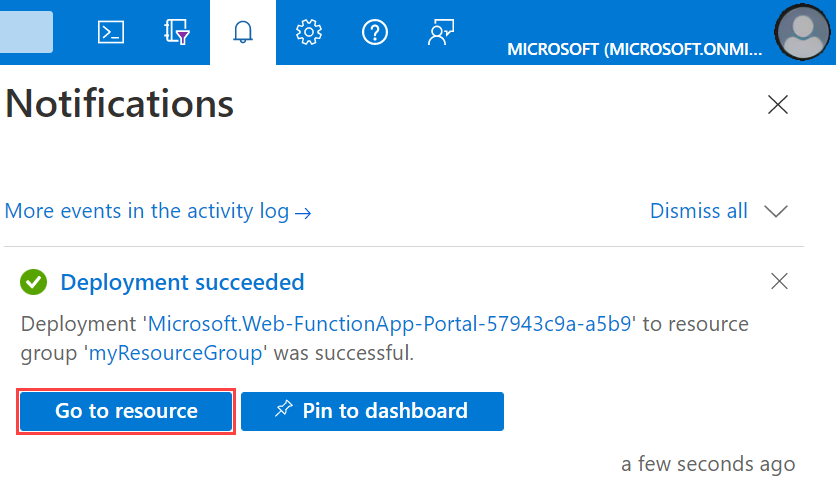
Select the Notifications icon in the upper-right corner of the portal and watch for the Deployment succeeded message.
Select Go to resource to view your new function app. You can also select Pin to dashboard. Pinning makes it easier to return to this function app resource from your dashboard.
Deploy the MCP server project
Important
Deploying to an existing function app always overwrites the contents of that app in Azure.
In the command palette, enter and then select Azure Functions: Deploy to Function App.
Select the function app you just created. When prompted about overwriting previous deployments, select Deploy to deploy your function code to the new function app resource.
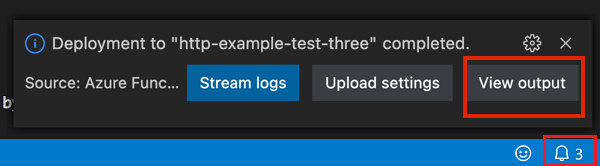
When deployment is completed, select View Output to view the creation and deployment results, including the Azure resources that you created. If you miss the notification, select the bell icon in the lower-right corner to see it again.
Python apps also require you to add this app setting:
PYTHONPATH=/home/site/wwwroot/.python_packages/lib/site-packages.
Now you can deploy the server project:
Important
Deploying to an existing function app always overwrites the contents of that app in Azure.
In the command palette, enter and then select Azure Functions: Deploy to Function App.
Select the function app you just created. When prompted about overwriting previous deployments, select Deploy to deploy your function code to the new function app resource.
When deployment is completed, select View Output to view the creation and deployment results, including the Azure resources that you created. If you miss the notification, select the bell icon in the lower-right corner to see it again.
When deployment finishes, you should see a notification in Visual Studio Code about connecting to the server. Select the Connect button to have the editor set up server connection information in mcp.json.
Enable built-in server authorization and authentication
The following instruction shows how to enable the built-in authorization and authentication feature on the server app and configures Microsoft Entra ID as the identity provider. When done, you test by connecting to the server in Visual Studio Code and see that you're prompted to authenticate before connecting.
Configure authentication on server app
Open the server app on the Azure portal, and select Settings > Authentication from the left menu.
Select Add identity provider > Microsoft as the identity provider.
For Choose a tenant for your application and its users, select Workforce configuration (current tenant).
Under App registration: use these settings:
Setting Selection App registration type Create new app registration Name Enter a descriptive name for your app Client secret expiration Recommended: 180 days Supported account types Current tenant - Single tenant Under Additional checks:, for Client application requirement select Allow requests from specific client applications, select the pencil icon, add the Visual Studio Code client ID
aebc6443-996d-45c2-90f0-388ff96faa56, and select OK. Leave the other sections as they are.Under App Service authentication settings use these settings:
Setting Selection Restrict access Require authentication Unauthenticated requests HTTP 401 Unauthorized: recommended for APIs Token store Check the box, which allows token refresh Select Add. After settings propagate, you should see the following result:

Preauthorize Visual Studio Code as client
Select the name of the Entra app next to Microsoft. This action takes you to the Overview of the Entra app resource.
On the left menu, find Manage -> Expose an API.
Under Authorized client applications, select +Add a client application.
Enter Visual Studio Code's client ID:
aebc6443-996d-45c2-90f0-388ff96faa56.Select the box in front of the scope that looks like
api://abcd123-efg456-hijk-7890123/user_impersonation.Select Add application.
Configure protected resource metadata (preview)
In the same Expose an API view, find the Scopes section, and copy the scope that allows admins and users to consent to the Entra app. This value looks like
api://abcd123-efg456-hijk-7890123/user_impersonation.Run the same command as previous to add the setting
WEBSITE_AUTH_PRM_DEFAULT_WITH_SCOPES:az functionapp config appsettings set --name <function-app-name> --resource-group <resource-group-name> --settings "WEBSITE_AUTH_PRM_DEFAULT_WITH_SCOPES=<scope>"Also in the Expose an API view, find the Application ID URI (looks like
api://abcd123-efg456-hijk-7890123) on the top and save for later step.
Connect to server
Open mcp.json inside the .vscode directory.
When you select Connect in the pop-up after deployment, Visual Studio Code populates the file with server connection information.
If you miss that step, you can also open Output (Ctrl/Cmd+Shift+U) to find the in-line connection button at the end of deployment logs.
You can also manually add connection information:
Get the server domain by running the following command:
az functionapp show --name <FUNCTION_APP_NAME> --resource-group <RESOURCE_GROUP_NAME> --query "defaultHostName" --output tsvIn Visual Studio Code, open command palette, search for and run the MCP: Add Server... command, and then follow these prompts:
Prompt Suggestion Type of server to be added HTTP URL of your MCP server https://<FUNCTION_APP_NAME>.azurewebsites.azurewebsites.net/runtime/webhooks/mcpServer name remote-mcp-server Where to install the server Workspace Visual Studio Code opens the
mcp.jsonsetting file for you.
Follow the instructions in the next section to connect to server depending on how you configured the authentication.
With built-in authentication and authorization
Start the remote server by selecting the Start button above the server name.
When prompted about authentication with Microsoft, select Allow, then sign in with your email (the one used to log into Azure portal).
When you successfully connect to the server, you see the number of tools available above the server name.
Open Visual Studio Code Copilot chat in agent mode, then ask a question. For example,
Greet with #your-remote-mcp-server-name.Stop server when finish testing.
To understand in detail what happens when Visual Studio Code tries to connect to the remote MCP server, see Server authorization protocol.
With access key
If you don't enable built-in authentication and authorization and instead want to connect to your MCP server by using an access key, the mcp.json should contain Functions access key in the request headers of a server registration.
Visual Studio automatically populates the access key when you start the server.
The mcp.json file should look like the following example:
{
	"servers": {
		"remote-mcp-server": {
			"type": "http",
			"url": "https://${input:functionapp-domain}/runtime/webhooks/mcp",
			"headers": {
				"x-functions-key": "${input:functions-key}"
			}
		}
	},
	"inputs": [
		{
			"type": "promptString",
			"id": "functions-key",
			"description": "Functions App Key",
			"password": true
		},
		{
			"type": "promptString",
			"id": "functionapp-domain",
			"description": "The domain of the function app.",
			"password": false
		}
	]
}
If you want to find the access key yourself, go to the Function app on Azure portal. On the left menu, find Functions -> App keys. Under the System keys section, find the one named mcp_extension.
Tip
To see connection logs, go to the server name, then select More > Show Output. For more details on the interaction between the client (Visual Studio Code) and the remote MCP server, select the gear icon and pick Trace.

Configure Azure AI Foundry agent to use your tools
You can configure an agent on Azure AI Foundry to use tools exposed by MCP servers hosted on Azure Functions.
In the Foundry portal, find the agent you want to configure with MCP servers hosted on Functions.
Under Tools, select the Add button, then select + Add a new tool.
Select the Custom tab, then select Model Context Protocol (MCP) and the Create button.
Fill in the following information:
- Name: Name of the server
- Remote MCP Server endpoint:
- MCP extension server:
https://<server domain>/runtime/webhooks/mcp - Self-hosted server:
https://<server domain>/mcp
- MCP extension server:
- Authentication: Choose "Microsoft Entra"
- Type: Choose "Project Managed Identity"
- Audience: This is the Entra App ID URI from Configure protected resource metadata
For example:

Select Connect.
Test by asking a question that can be answered with the help of a server tool in the chat window.
Server authorization protocol
In the debug output from Visual Studio Code, you see a series of requests and responses as the MCP client and server interact. When you use the built-in MCP server authorization, you see the following sequence of events:
- The editor sends an initialization request to the MCP server.
- The MCP server responds with an error indicating that authorization is required. The response includes a pointer to the protected resource metadata (PRM) for the application. The built-in authorization feature generates the PRM for the server app.
- The editor fetches the PRM and uses it to identify the authorization server.
- The editor attempts to obtain authorization server metadata (ASM) from a well-known endpoint on the authorization server.
- Microsoft Entra ID doesn't support ASM on the well-known endpoint, so the editor falls back to using the OpenID Connect metadata endpoint to obtain the ASM. It tries to discover this by inserting the well-known endpoint before any other path information.
- The OpenID Connect specifications actually defined the well-known endpoint as being after path information, and that's where Microsoft Entra ID hosts it. So the editor tries again with that format.
- The editor successfully retrieves the ASM. It then uses this information with its own client ID to perform a sign-in. At this point, the editor prompts you to sign in and consent to the application.
- Assuming you successfully sign in and consent, the editor completes the authentication. It repeats the intialization request to the MCP server, this time including an authorization token in the request. This reattempt isn't visible at the Debug output level, but you can see it in the Trace output level.
- The MCP server validates the token and responds with a successful response to the initialization request. The standard MCP flow continues from this point, ultimately resulting in discovery of the MCP tool defined in this sample.
Troubleshooting
If you run into trouble, ask GitHub Copilot for help. Here are some specific ideas for troubleshooting:
No other ideas at this time. Remember to ask Copilot chat about any errors that occur.
Next steps
Learn how to register Azure Functions-hosted MCP servers on Azure API Center.