Save and share customized views
Cost analysis is used to explore costs and get quick answers for things like finding the top cost contributors. Or, understanding how you're charged for the services you use. As you analyze cost, you may find specific views you want to save or share with others.
Save and share cost views
A view is a saved query in Cost Management. When you save a view, all settings in cost analysis are saved, including filters, grouping, granularity, the main chart type, and donut charts. Underlying data isn't saved. Only you can see private views, while everyone with Cost Management Reader access or greater to the scope can see shared views.
Check out the Sharing and saving views video.
After you save a view, you can share a link to it with others using the Share command. The link is specific to your current scope and view configuration. The link doesn't grant others access to the view itself, which may change over time, or the underlying data. If you don't have access to the scope, an access denied message is shown. We recommend using the Cost Management Contributor role to allow others to save and share views with others.
You can also pin the current view to an Azure portal dashboard. Pinning only includes a snapshot of the main chart or table and doesn't update when the view is updated. A pinned dashboard isn't the same thing as a saved view.
To save a view
- In cost analysis, make sure that the settings that you want saved are chosen.
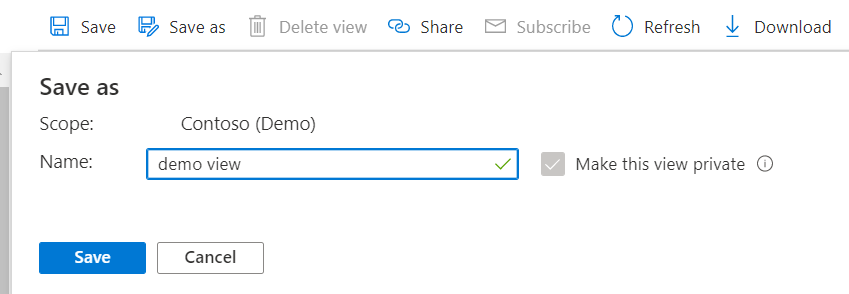
- Select the Save command at the top of the page to update your current view or Save as to save a new view.
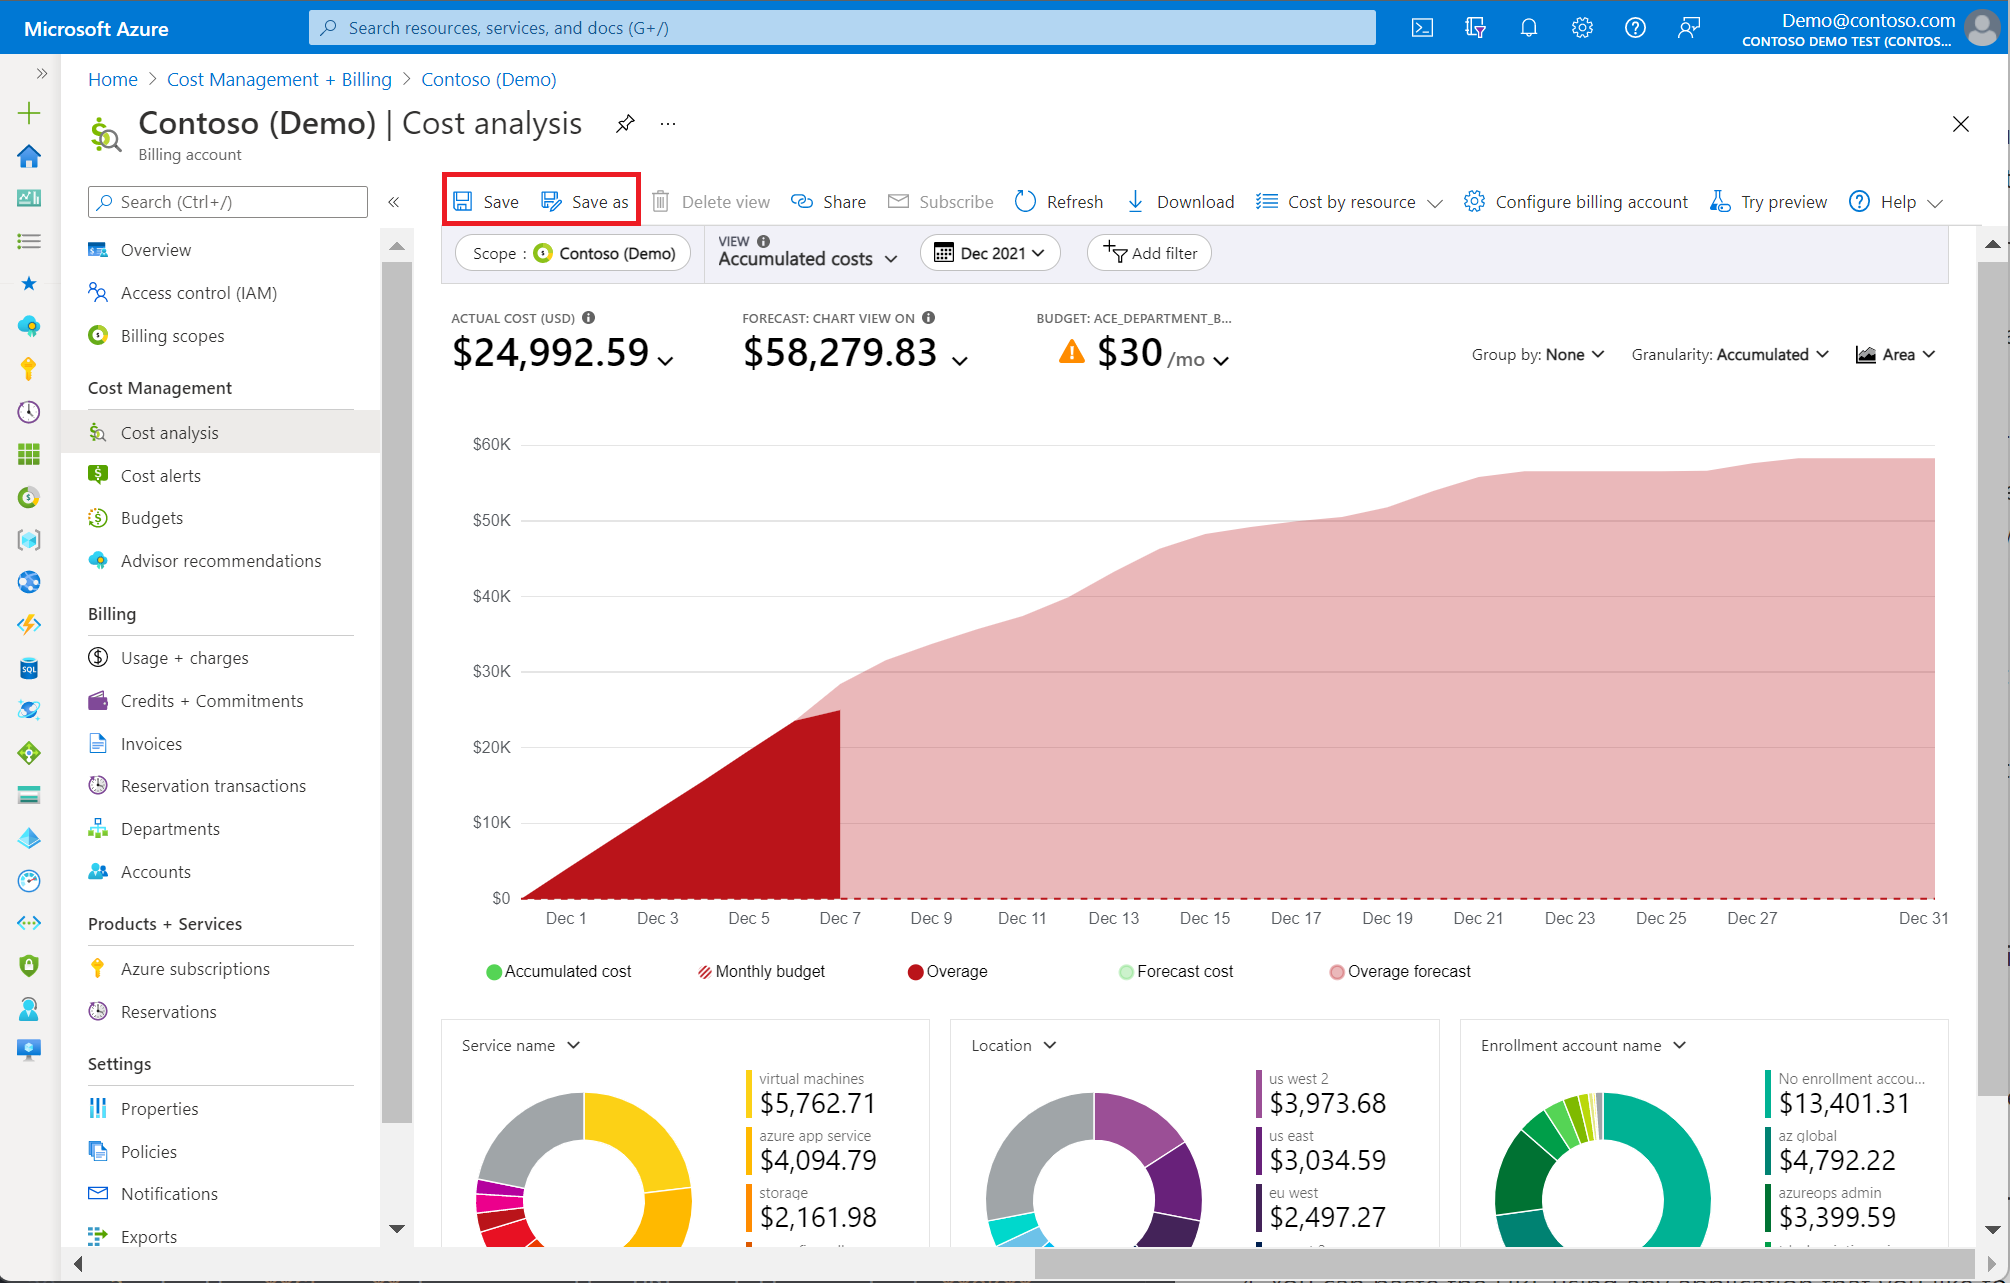
- Enter a name for the view and then select Save.
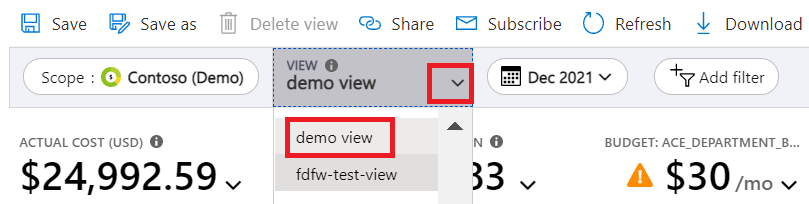
- After you save a view, it's available to select from the View menu.


You can save up to 100 private views across all scopes for yourself and up to 100 shared views per scope that anyone with Cost Management Reader or greater access can use.
To share a view
- In cost analysis, ensure that the currently selected view is the one that you want to share.
- Select the Share command at the top of the page.
- In the Share box, copy the URL and then select OK.

- You can paste the URL using any application that you like to send to others.

If you need to generate a link to a view programmatically, use one of the following formats:
- View configuration –
https://<portal-domain>/@<directory-domain>/#blade/Microsoft_Azure_CostManagement/Menu/open/costanalysis/scope/<scope-id>/view/<view-config> - Saved view –
https://<portal-domain>/@<directory-domain>/#blade/Microsoft_Azure_CostManagement/Menu/open/costanalysis/scope/<scope-id>/viewId/<view-id>
Use the following table for each property in the URL.
| URL property | Description |
|---|---|
| portal-domain | Primary domain for the Azure portal. For example, portal.azure.com or portal.azure.us). |
| directory-domain | Domain used by your Microsoft Entra ID. You can also use the tenant ID. If it's omitted, the portal tries to use the default directory for the user that selected the link - it might differ from the scope. |
| scope-id | Full Resource Manager ID for the resource group, subscription, management group, or billing account you want to view cost for. If not specified, Cost Management uses the last view the user used in the Azure portal. The value must be URL encoded. |
| view-config | Encoded view configuration. See the following details. If not specified, cost analysis uses the view-id parameter. If neither are specified, cost analysis uses the built-in Accumulated cost view. |
| view-id | Full Resource Manager ID for the private or shared view to load. This value must be URL encoded. If not specified, cost analysis uses the view parameter. If neither are specified, cost analysis uses the built-in Accumulated cost view. |
The view-config parameter is an encoded version of the JSON view configuration. For more information about the view body, see the Views API reference. To learn how to build specific customizations, pin the desired view to an empty Azure portal dashboard, then download the dashboard JSON to review the JSON view configuration.
After you have the desired view configuration:
- Use Base 64 encode for the JSON view configuration.
- Use Gzip to compress the encoded string.
- URL-encode the compressed string.
- Add the final encoded string to the URL after the
/view/parameter.
Pin a view to the Azure portal dashboard
As mentioned previously, pinning a view to an Azure portal dashboard only saves the main chart or table. It's essentially a thumbnail you can select to get back to the view configuration in cost analysis. Keep in mind the dashboard tile is a copy of your view configuration – if you save a view that was previously pinned, the pinned tile doesn't update. To update the tile, pin the saved view again.
To pin cost analysis to a dashboard
- In cost analysis, ensure that the currently selected view is the one that you want to pin.
- To the right of your billing scope or subscription name, select the Pin symbol.
- In the Pin to dashboard window, choose Existing to pin the current view to the existing dashboard or choose Create new to pin the current view to a new dashboard.
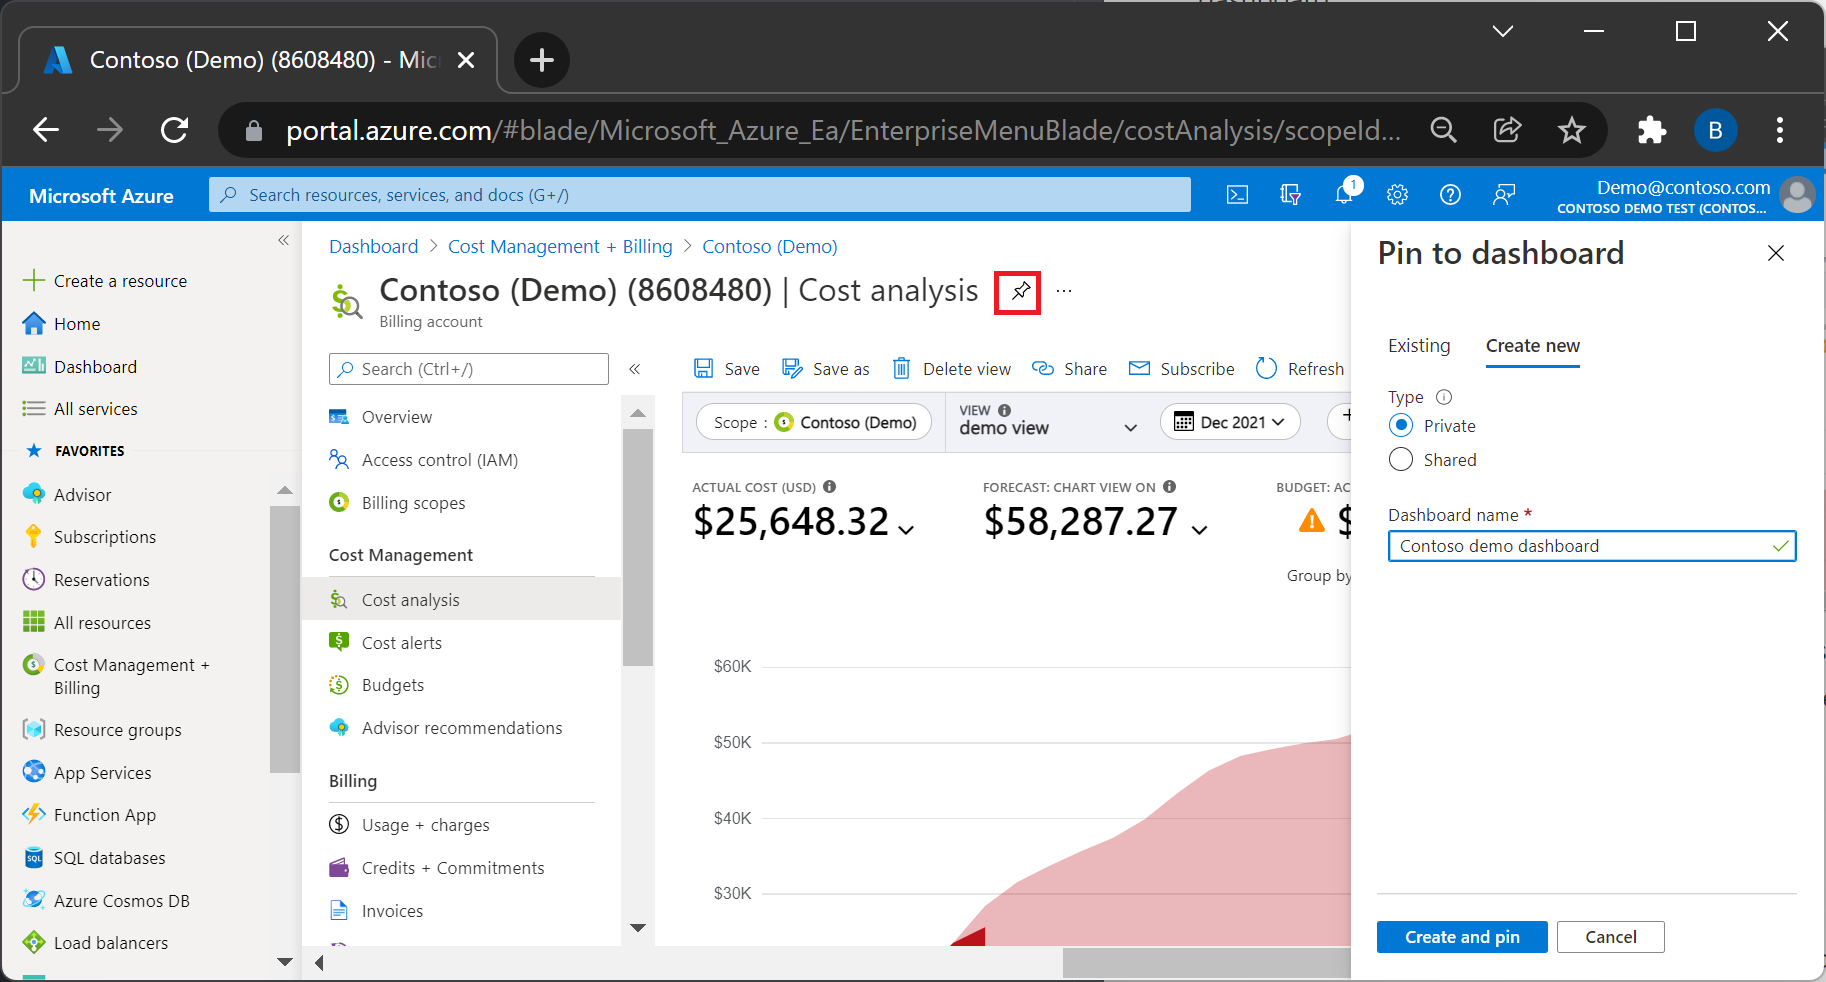
- Select Private to if you don't want to share the dashboard and then select Pin or select Shared to share the dashboard with others and then select Pin.

To view the dashboard after you've pinned it, from the Azure portal menu, select Dashboard.

To rename a tile
- From the dashboard where your tile is pinned, select the title of the tile you want to rename. This action opens cost analysis with that view.
- Select the Save command at the top of the page.
- Enter the name of the tile you want to use.
- Select Save.
- Select the Pin symbol to the right of the page header.
- From the dashboard, you can now remove the original tile.
For more advanced dashboard customizations, you can also export the dashboard, customize the dashboard JSON, and upload a new dashboard. Dashboard creations can include other tile sizes or names without saving new views. For more information, see Create a dashboard in the Azure portal.
Download data or charts
When you want to share information with others that don't have access to the scope, you can download the view in PNG, Excel, and CSV formats. Then you can share it with them by email or other means. The downloaded data is a snapshot, so it isn't automatically updated.

When you download data, cost analysis includes summarized data as it's shown in the table. The cost by resource view includes all resource meters in addition to the resource details. If you want a download of only resources and not the nested meters, use the Resources smart view. You can access the Resources view from the Cost by resource menu at the top of the page, where you can select the Resources, Resource groups, Subscriptions, Services, or Reservations view.
If you need more advanced summaries or you're interested in raw data that hasn't been summarized, schedule an export to publish raw data to a storage account on a recurring basis.
Subscribe to scheduled alerts
In addition to saving and opening views repeatedly or sharing them with others manually, you can also subscribe to updates or a recurring schedule to get alerted as costs change. You can also set up alerts to be shared with others who may not have direct access to costs in the portal.
To subscribe to scheduled alerts
- In Cost analysis, select any chart view you want to subscribe to or create and save a new chart view.
- Built-in views (for example, Accumulated costs, Daily costs, or Cost by service) can't be changed. If you need to change the date range, currency, amortization, or any other setting, you need to save that as a private or shared view.
- Select Subscribe at the top of the page.
- Select + Add at the top of the list of alerts.
- Specify the desired email settings and select Save.
- The Name helps you distinguish the different emails setup for the current view. Use it to indicate audience or purpose of this specific email.
- The Subject is what people see when they receive the email.
- You can include up to 20 recipients. Consider using a distribution list if you have a large audience. To see how the email looks, start by sending it only to yourself. You can update it later.
- The Message is shown in the email to give people more context about why they're receiving the email. You may want to include what it covers, who requested it, or who to contact to make changes.
- To share data with people who don't have access to the scope or view, select Add a CSV download link to include an unauthenticated link to the data.
- To allow people with write access to the scope to modify the email configuration settings, clear the Make this schedule private option. Doing so allows billing account admins or Cost Management Contributors to edit the alert, in addition to the person who created it. By default, the option is selected, meaning that only the creator of the scheduled alert can see or edit it.
- The Start date is when you start receiving the email. It defaults to the current day.
- The End date is when you receive the last email. It can be up to one year from the current day, which is the default. You can update it later.
- The Frequency indicates how often you want the email to be sent. It's based on the start date, so if you want a weekly email on a different day of the week, change the start date first. To get an email after the month is closed, select After invoice finalized. Ensure your view is looking at last month. If you use the current month, it only sends you the first few days of the month. By default, all emails are sent at 8:00 AM local time. To customize any of the options, select Custom.
Note
Scheduled alerts are set to your local time. However emails are sent at a fixed time in the UTC time zone. Daylight savings time isn't accounted for, which might result in a one-hour variation in your actual delivery time.
- After you save the alert, a list of configured alerts for the current view is shown. If you want to see a preview of the email, select the row and select Send now at the top to send the email to all recipients.
Keep in mind that if you choose to include a link to data, anyone who receives the email has access to the data included in that email. Data expires after seven days.
Frequently asked questions
The following sections cover the most commonly asked questions and answers about saving and sharing customized views in Cost Management.
Why am I not receiving emails from scheduled alerts?
There could be a few reasons why you're not receiving alert emails. Try the following actions:
- Confirm that the creator of the schedule continues to have
Readerrole assigned orMicrosoft.CostManagement/scheduledActions/readpermission, if it's a custom role. - Confirm that your email address is shown as a recipient and that it's entered correctly.
- Check your spam or junk mail folder for emails from
microsoft-noreply@microsoft.com. - Check to see if the alert is expired, disabled, or deleted. You can extend, reenable, or create a new scheduled alert to fix the problem.
- Work with your admin to reenable the view charges policy in the Azure portal. The policy applies to indirect Enterprise Agreements and to Microsoft Customer Agreements with a Microsoft partner.
Note
Azure checks the permissions of the alert rule creator before sending the alert email. If your organization has a policy that prohibits permanently assigning higher privileges to users, you can use a service principal and create the alert directly using the Scheduled Actions API.
Why can't I use the Subscribe command in cost analysis?
The Subscribe command is currently unavailable for two scenarios in cost analysis:
- When using a management group scope
- When working with table views
How far in the future can I set the end date?
The end date can be anywhere from one day to one year from today or the start date, whichever is later. You can change or extend it to one year from the current day until the schedule expires. This limitation is in place to ensure that alert subscriptions remain relevant and accurate.
For example, if you create a scheduled alert on March 3, 2023, the end date can be any date from March 4, 2023, to March 3, 2024.
It's important to note that you can edit the end date of an existing scheduled alert at any time. If the end date has already passed and you want to continue receiving the alert, you must edit the scheduled alert with a future end date.
When do I receive alert emails?
You can choose when emails arrive by setting the Frequency to Custom. You should receive the email before that time or within an hour of that time. If there are unforeseen issues, emails could be delayed for up to a day.
Although the configuration of scheduled alerts considers your local time, the actual sending of emails happens at the same time in the UTC time zone. The time conversion doesn't account for daylight savings time. It might result in a one-hour variation in your actual delivery time.
How can I download a CSV file of the alert email content?
If you selected 'Add a CSV download link' when creating the alert rule, you will receive a CSV download link with the email. Please note that the download link will expire on the same day it is issued. Ensure that you download your data as soon as you receive the email to avoid any inconvenience.
Next steps
- For more information about creating dashboards, see Create a dashboard in the Azure portal.
- To learn more about Cost Management, see Cost Management + Billing documentation.