Connect HDInsight to your on-premises network
Learn how to connect HDInsight to your on-premises network by using Azure Virtual Networks and a VPN gateway. This document provides planning information on:
- Using HDInsight in an Azure Virtual Network that connects to your on-premises network.
- Configuring DNS name resolution between the virtual network and your on-premises network.
- Configuring network security groups to restrict internet access to HDInsight.
- Ports provided by HDInsight on the virtual network.
Overview
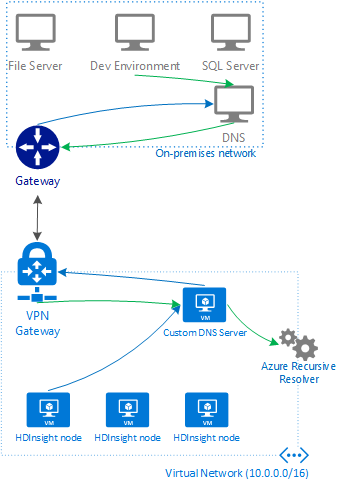
To allow HDInsight and resources in the joined network to communicate by name, you must perform the following actions:
- Create Azure Virtual Network.
- Create a custom DNS server in the Azure Virtual Network.
- Configure the virtual network to use the custom DNS server instead of the default Azure Recursive Resolver.
- Configure forwarding between the custom DNS server and your on-premises DNS server.
These configurations enable the following behavior:
- Requests for fully qualified domain names that have the DNS suffix for the virtual network are forwarded to the custom DNS server. The custom DNS server then forwards these requests to the Azure Recursive Resolver, which returns the IP address.
- All other requests are forwarded to the on-premises DNS server. Even requests for public internet resources such as microsoft.com are forwarded to the on-premises DNS server for name resolution.
In the following diagram, green lines are requests for resources that end in the DNS suffix of the virtual network. Blue lines are requests for resources in the on-premises network or on the public internet.
Prerequisites
- An SSH client. For more information, see Connect to HDInsight (Apache Hadoop) using SSH.
- If using PowerShell, you'll need the AZ Module.
- If wanting to use Azure CLI and you haven't yet installed it, see Install the Azure CLI.
Create virtual network configuration
Use the following documents to learn how to create an Azure Virtual Network that is connected to your on-premises network:
Create custom DNS server
Important
You must create and configure the DNS server before installing HDInsight into the virtual network.
These steps use the Azure portal to create an Azure Virtual Machine. For other ways to create a virtual machine, see Create VM - Azure CLI and Create VM - Azure PowerShell. To create a Linux VM that uses the Bind DNS software, use the following steps:
Sign in to the Azure portal.
From the top menu, select + Create a resource.
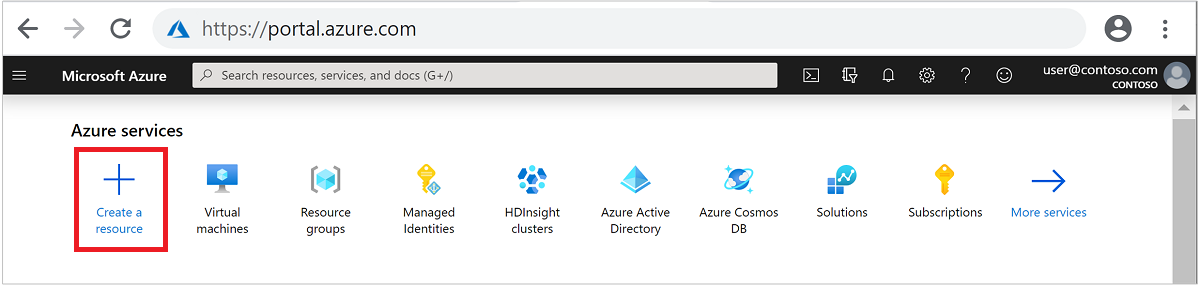
Select Compute > Virtual machine to go to the Create a virtual machine page.
From the Basics tab, enter the following information:
Field Value Subscription Select your appropriate subscription. Resource group Select the resource group that contains the virtual network created earlier. Virtual machine name Enter a friendly name that identifies this virtual machine. This example uses DNSProxy. Region Select the same region as the virtual network created earlier. Not all VM sizes are available in all regions. Availability options Select your desired level of availability. Azure offers a range of options for managing availability and resiliency for your applications. Architect your solution to use replicated VMs in Availability Zones or Availability Sets to protect your apps and data from datacenter outages and maintenance events. This example uses No infrastructure redundancy required. Image Leave at Ubuntu Server 18.04 LTS. Authentication type Password or SSH public key: The authentication method for the SSH account. We recommend using public keys, as they're more secure. This example uses Password. For more information, see the Create and use SSH keys for Linux VMs document. User name Enter the administrator username for the VM. This example uses sshuser. Password or SSH public key The available field is determined by your choice for Authentication type. Enter the appropriate value. Public inbound ports Select Allow selected ports. Then select SSH (22) from the Select inbound ports drop-down list. 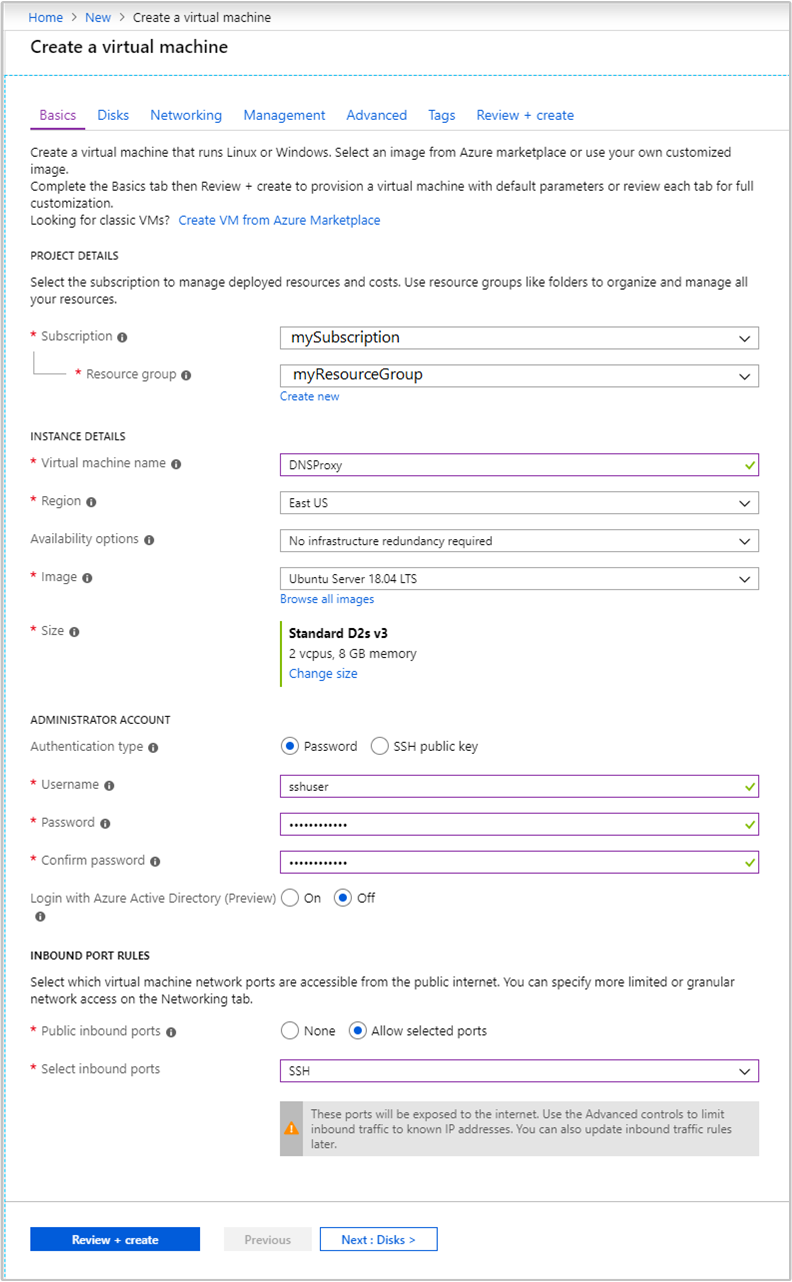
Leave other entries at the default values and then select the Networking tab.
From the Networking tab, enter the following information:
Field Value Virtual network Select the virtual network that you created earlier. Subnet Select the default subnet for the virtual network that you created earlier. Do not select the subnet used by the VPN gateway. Public IP Use the autopopulated value. 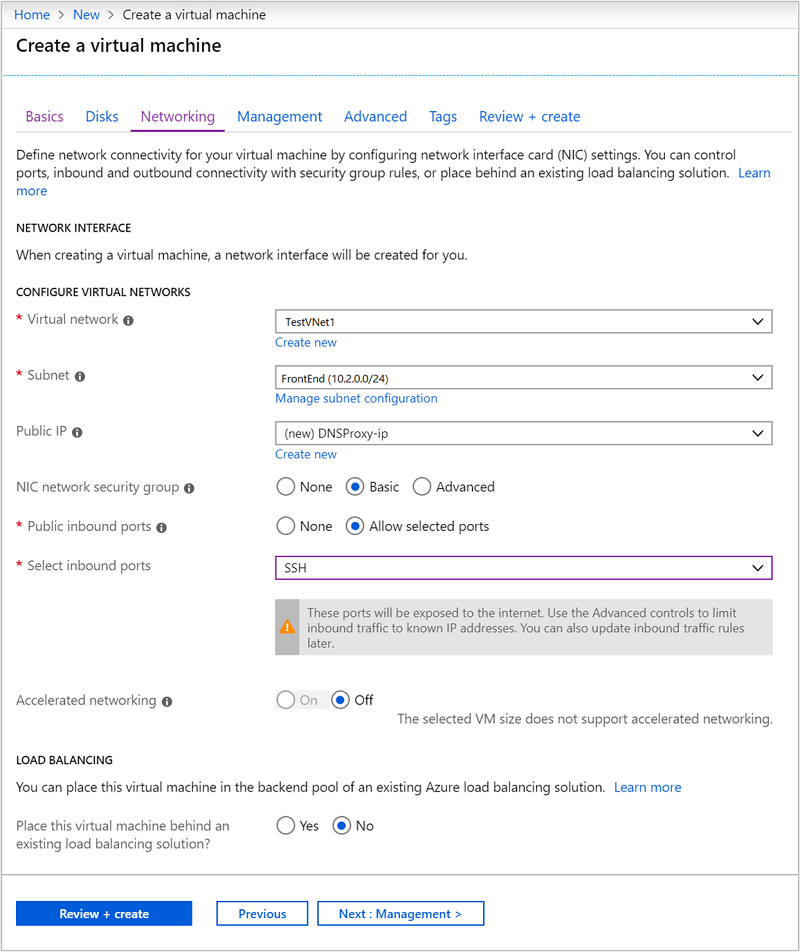
Leave other entries at the default values and then select the Review + create.
From the Review + create tab, select Create to create the virtual machine.
Review IP Addresses
Once the virtual machine has been created, you'll receive a Deployment succeeded notification with a Go to resource button. Select Go to resource to go to your new virtual machine. From the default view for your new virtual machine, follow these steps to identify the associated IP Addresses:
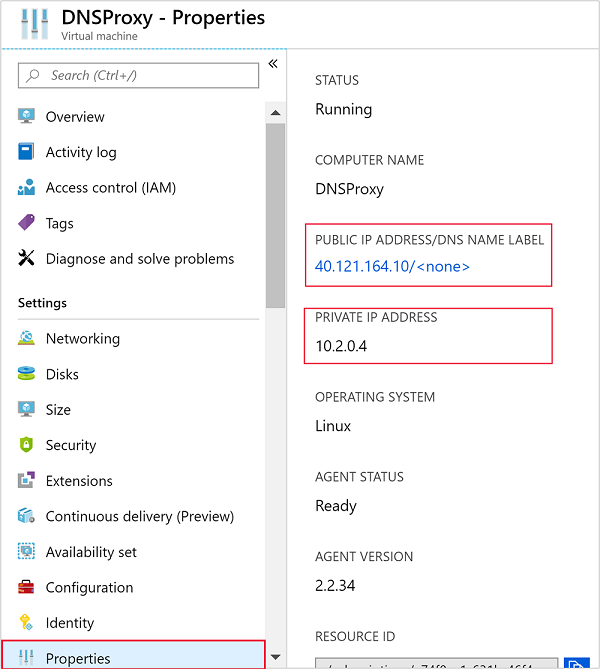
From Settings, select Properties.
Note the values for PUBLIC IP ADDRESS/DNS NAME LABEL and PRIVATE IP ADDRESS for later use.
Install and configure Bind (DNS software)
Use SSH to connect to the public IP address of the virtual machine. Replace
sshuserwith the SSH user account you specified when creating the VM. The following example connects to a virtual machine at 40.68.254.142:ssh sshuser@40.68.254.142To install Bind, use the following commands from the SSH session:
sudo apt-get update -y
sudo apt-get install bind9 -y
To configure Bind to forward name resolution requests to your on premises DNS server, use the following text as the contents of the
/etc/bind/named.conf.optionsfile:acl goodclients { 10.0.0.0/16; # Replace with the IP address range of the virtual network 10.1.0.0/16; # Replace with the IP address range of the on-premises network localhost; localnets; }; options { directory "/var/cache/bind"; recursion yes; allow-query { goodclients; }; forwarders { 192.168.0.1; # Replace with the IP address of the on-premises DNS server }; dnssec-validation auto; auth-nxdomain no; # conform to RFC1035 listen-on { any; }; };Important
Replace the values in the
goodclientssection with the IP address range of the virtual network and on-premises network. This section defines the addresses that this DNS server accepts requests from.Replace the
192.168.0.1entry in theforwarderssection with the IP address of your on-premises DNS server. This entry routes DNS requests to your on-premises DNS server for resolution.To edit this file, use the following command:
sudo nano /etc/bind/named.conf.optionsTo save the file, use Ctrl+X, Y, and then Enter.
From the SSH session, use the following command:
hostname -fThis command returns a value similar to the following text:
dnsproxy.icb0d0thtw0ebifqt0g1jycdxd.ex.internal.cloudapp.netThe
icb0d0thtw0ebifqt0g1jycdxd.ex.internal.cloudapp.nettext is the DNS suffix for this virtual network. Save this value, as it's used later.To configure Bind to resolve DNS names for resources within the virtual network, use the following text as the contents of the
/etc/bind/named.conf.localfile:// Replace the following with the DNS suffix for your virtual network zone "icb0d0thtw0ebifqt0g1jycdxd.ex.internal.cloudapp.net" { type forward; forwarders {168.63.129.16;}; # The Azure recursive resolver };Important
You must replace the
icb0d0thtw0ebifqt0g1jycdxd.ex.internal.cloudapp.netwith the DNS suffix you retrieved earlier.To edit this file, use the following command:
sudo nano /etc/bind/named.conf.localTo save the file, use Ctrl+X, Y, and then Enter.
To start Bind, use the following command:
sudo service bind9 restartTo verify that bind can resolve the names of resources in your on-premises network, use the following commands:
sudo apt install dnsutils
nslookup dns.mynetwork.net 10.0.0.4
Important
Replace
dns.mynetwork.netwith the fully qualified domain name (FQDN) of a resource in your on-premises network.Replace
10.0.0.4with the internal IP address of your custom DNS server in the virtual network.The response appears similar to the following text:
Server:         10.0.0.4
Address:        10.0.0.4#53

Non-authoritative answer:
Name:   dns.mynetwork.net
Address: 192.168.0.4
Configure virtual network to use the custom DNS server
To configure the virtual network to use the custom DNS server instead of the Azure recursive resolver, use the following steps from the Azure portal:
From the left menu, navigate to All services > Networking > Virtual networks.
Select your virtual network from the list, which will open the default view for your virtual network.
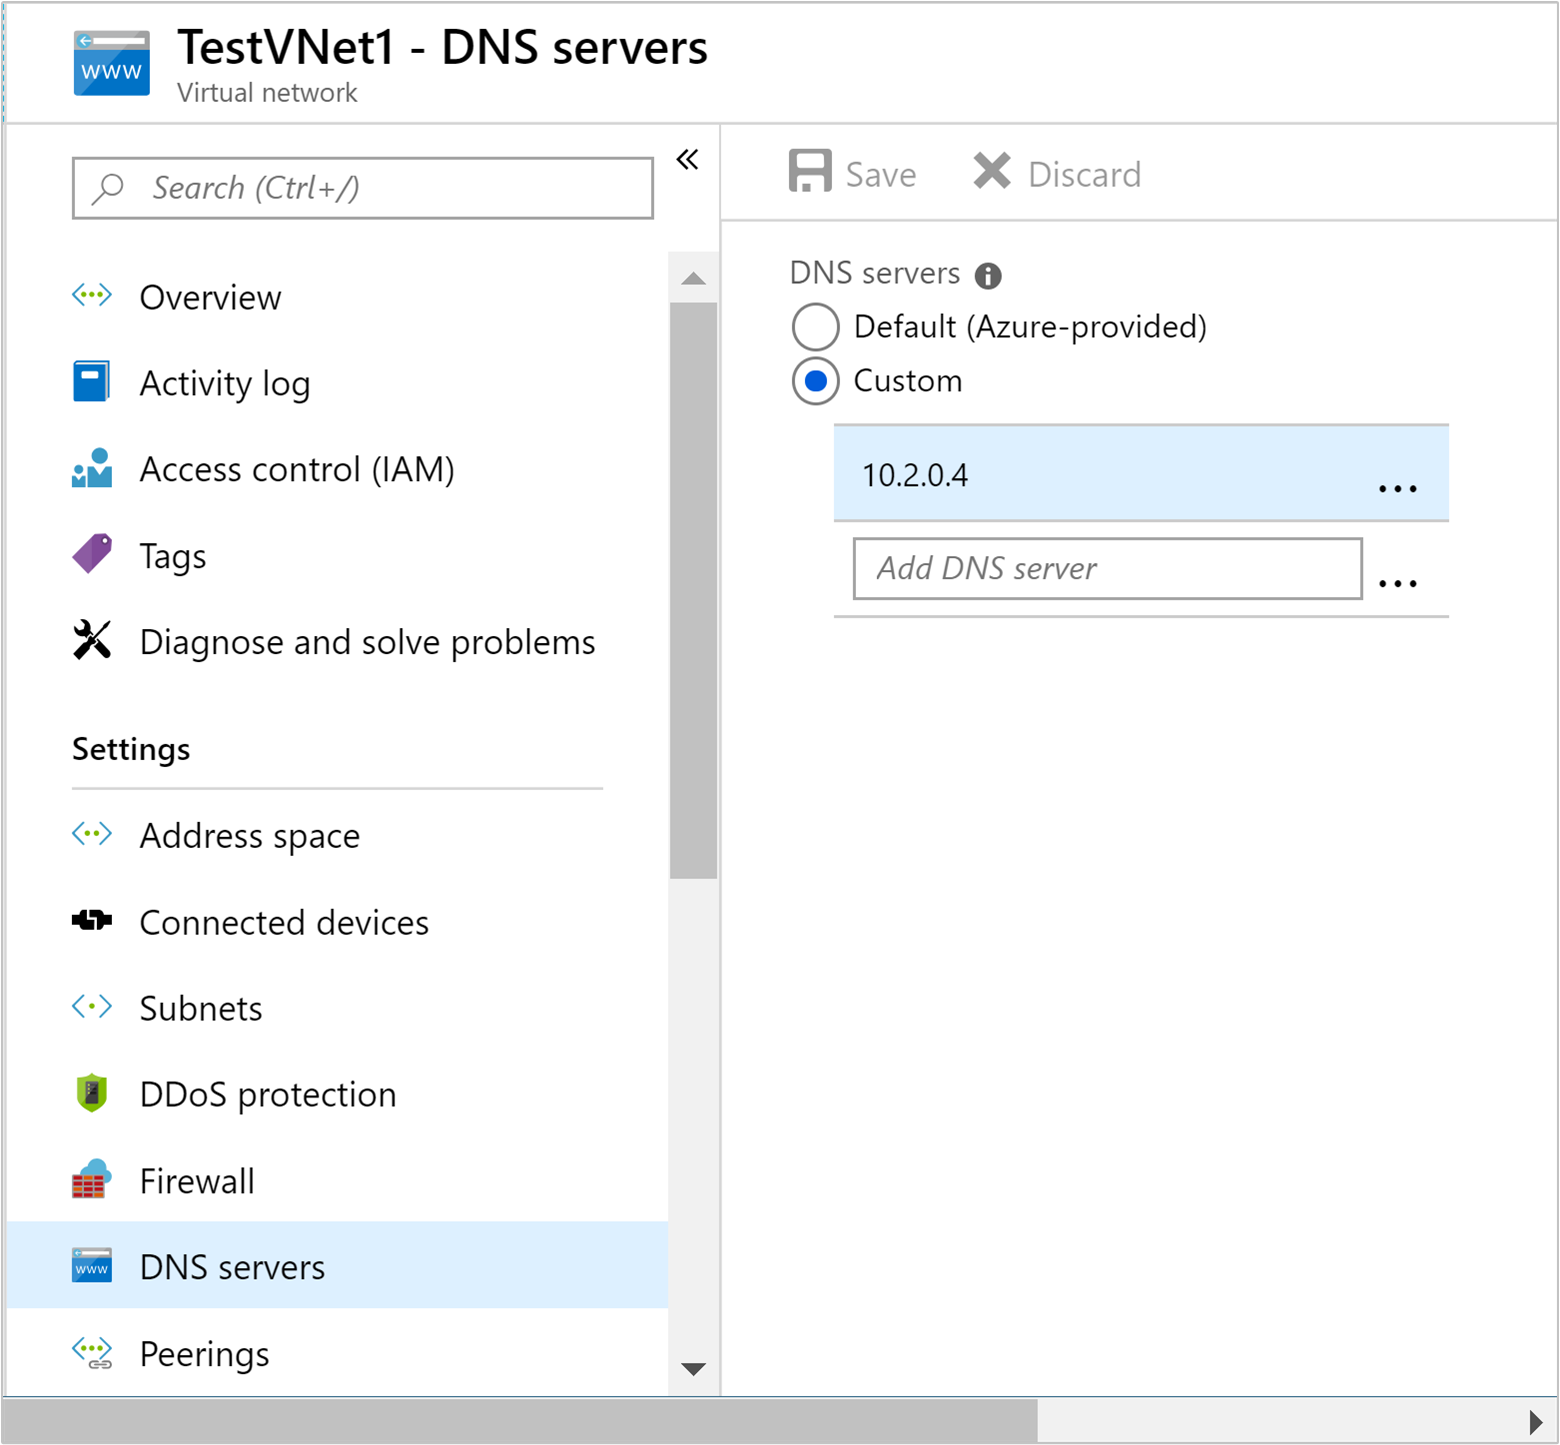
From the default view, under Settings, select DNS servers.
Select Custom, and enter the PRIVATE IP ADDRESS of the custom DNS server.
Select Save.
Configure on-premises DNS server
In the previous section, you configured the custom DNS server to forward requests to the on-premises DNS server. Next, you must configure the on-premises DNS server to forward requests to the custom DNS server.
For specific steps on how to configure your DNS server, consult the documentation for your DNS server software. Look for the steps on how to configure a conditional forwarder.
A conditional forward only forwards requests for a specific DNS suffix. In this case, you must configure a forwarder for the DNS suffix of the virtual network. Requests for this suffix should be forwarded to the IP address of the custom DNS server.
The following text is an example of a conditional forwarder configuration for the Bind DNS software:
zone "icb0d0thtw0ebifqt0g1jycdxd.ex.internal.cloudapp.net" {
    type forward;
    forwarders {10.0.0.4;}; # The custom DNS server's internal IP address
};
For information on using DNS on Windows Server 2016, see the Add-DnsServerConditionalForwarderZone documentation...
Once you've configured the on-premises DNS server, you can use nslookup from the on-premises network to verify that you can resolve names in the virtual network. The following example
nslookup dnsproxy.icb0d0thtw0ebifqt0g1jycdxd.ex.internal.cloudapp.net 196.168.0.4
This example uses the on-premises DNS server at 196.168.0.4 to resolve the name of the custom DNS server. Replace the IP address with the one for the on-premises DNS server. Replace the dnsproxy address with the fully qualified domain name of the custom DNS server.
Optional: Control network traffic
You can use network security groups (NSG) or user-defined routes (UDR) to control network traffic. NSGs allow you to filter inbound and outbound traffic, and allow or deny the traffic. UDRs allow you to control how traffic flows between resources in the virtual network, the internet, and the on-premises network.
Warning
HDInsight requires inbound access from specific IP addresses in the Azure cloud, and unrestricted outbound access. When using NSGs or UDRs to control traffic, you must perform the following steps:
Find the IP addresses for the location that contains your virtual network. For a list of required IPs by location, see Required IP addresses.
For the IP addresses identified in step 1, allow inbound traffic from that IP addresses.
- If you're using NSG: Allow inbound traffic on port 443 for the IP addresses.
- If you're using UDR: Set the Next Hop type of the route to Internet for the IP addresses.
For an example of using Azure PowerShell or the Azure CLI to create NSGs, see the Extend HDInsight with Azure Virtual Networks document.
Create the HDInsight cluster
Warning
You must configure the custom DNS server before installing HDInsight in the virtual network.
Use the steps in the Create an HDInsight cluster using the Azure portal document to create an HDInsight cluster.
Warning
- During cluster creation, you must choose the location that contains your virtual network.
- In the Advanced settings part of configuration, you must select the virtual network and subnet that you created earlier.
Connecting to HDInsight
Most documentation on HDInsight assumes that you have access to the cluster over the internet. For example, that you can connect to the cluster at https://CLUSTERNAME.azurehdinsight.net. This address uses the public gateway, which isn't available if you have used NSGs or UDRs to restrict access from the internet.
Some documentation also references headnodehost when connecting to the cluster from an SSH session. This address is only available from nodes within a cluster, and isn't usable on clients connected over the virtual network.
To directly connect to HDInsight through the virtual network, use the following steps:
To discover the internal fully qualified domain names of the HDInsight cluster nodes, use one of the following methods:
$resourceGroupName = "The resource group that contains the virtual network used with HDInsight"

$clusterNICs = Get-AzNetworkInterface -ResourceGroupName $resourceGroupName | where-object {$_.Name -like "*node*"}

$nodes = @()
foreach($nic in $clusterNICs) {
    $node = new-object System.Object
    $node | add-member -MemberType NoteProperty -name "Type" -value $nic.Name.Split('-')[1]
    $node | add-member -MemberType NoteProperty -name "InternalIP" -value $nic.IpConfigurations.PrivateIpAddress
    $node | add-member -MemberType NoteProperty -name "InternalFQDN" -value $nic.DnsSettings.InternalFqdn
    $nodes += $node
}
$nodes | sort-object Type
az network nic list --resource-group <resourcegroupname> --output table --query "[?contains(name,'node')].{NICname:name,InternalIP:ipConfigurations[0].privateIpAddress,InternalFQDN:dnsSettings.internalFqdn}"To determine the port that a service is available on, see the Ports used by Apache Hadoop services on HDInsight document.
Important
Some services hosted on the head nodes are only active on one node at a time. If you try accessing a service on one head node and it fails, switch to the other head node.
For example, Apache Ambari is only active on one head node at a time. If you try accessing Ambari on one head node and it returns a 404 error, then it is running on the other head node.
Next steps
For more information on using HDInsight in a virtual network, see Plan a virtual network deployment for Azure HDInsight clusters.
For more information on Azure virtual networks, see the Azure Virtual Network overview.
For more information on network security groups, see Network security groups.
For more information on user-defined routes, see User-defined routes and IP forwarding.
Feedback
Coming soon: Throughout 2024 we will be phasing out GitHub Issues as the feedback mechanism for content and replacing it with a new feedback system. For more information see: https://aka.ms/ContentUserFeedback.
Submit and view feedback for