Create Linux-based clusters in HDInsight by using the Azure portal
The Azure portal is a web-based management tool for services and resources hosted in the Microsoft Azure cloud. In this article, you learn how to create Linux-based Azure HDInsight clusters by using the portal. Additional details are available from Create HDInsight clusters.
Warning
Billing for HDInsight clusters is prorated per minute, whether you use them or not. Be sure to delete your cluster after you finish using it. See how to delete an HDInsight cluster.
The Azure portal exposes most of the cluster properties. By using Azure Resource Manager templates, you can hide many details. For more information, see Create Apache Hadoop clusters in HDInsight by using Resource Manager templates.
If you don't have an Azure subscription, create a free account before you begin.
Create clusters
Note
The feature that requires secure transfer enforces all requests to your account through a secure connection. Only HDInsight cluster version 3.6 or newer supports this feature. For more information, see Create Apache Hadoop cluster with secure transfer storage accounts in Azure HDInsight.
Sign in to the Azure portal.
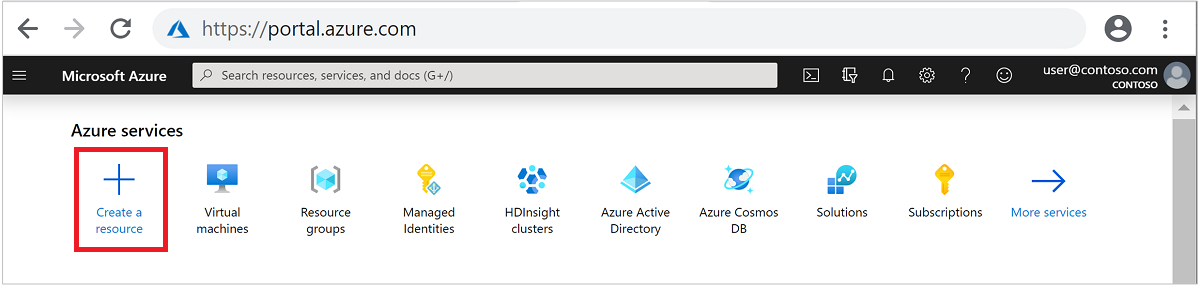
From the top menu, select + Create a resource.
Select Analytics > Azure HDInsight to go to the Create HDInsight cluster page.
Basics
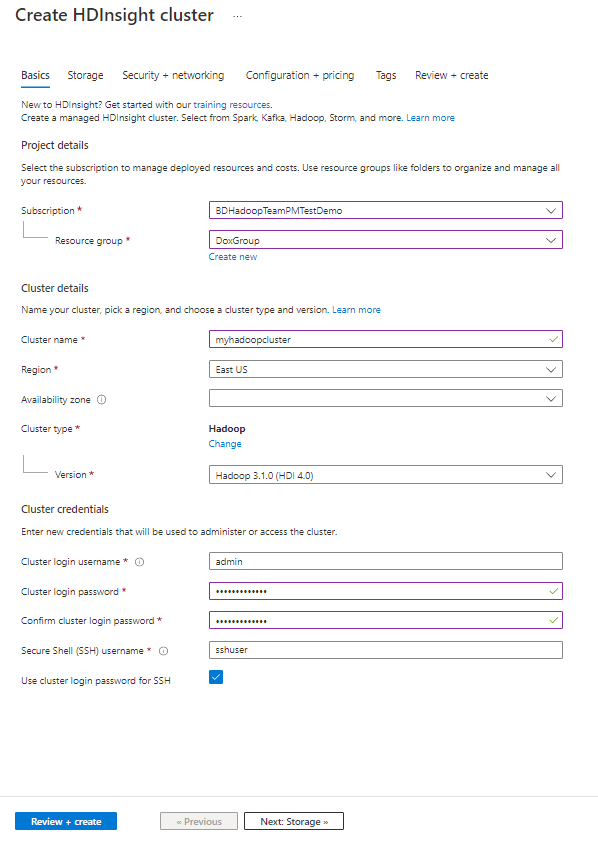
From the Basics tab, provide the following information:
| Property | Description |
|---|---|
| Subscription | From the drop-down list, select the Azure subscription that's used for the cluster. |
| Resource group | From the drop-down list, select your existing resource group, or select Create new. |
| Cluster name | Enter a globally unique name. |
| Region | From the drop-down list, select a region where the cluster is created. |
| Availability zone | Optionally specify an availability zone in which to deploy your cluster. |
| Cluster type | Click Select cluster type to open a list. From the list, select the wanted cluster type. HDInsight clusters come in different types. They correspond to the workload or technology that the cluster is tuned for. There's no supported method to create a cluster that combines multiple types. |
| Version | From the drop-down list, select a version. Use the default version if you don't know what to choose. For more information, see HDInsight cluster versions. |
| Cluster login username | Provide the username, default is admin. |
| Cluster login password | Provide the password. |
| Confirm cluster login password | Reenter the password |
| Secure Shell (SSH) username | Provide the username, default is sshuser |
| Use cluster login password for SSH | If you want the same SSH password as the admin password you specified earlier, select the Use cluster login password for SSH check box. If not, provide either a PASSWORD or PUBLIC KEY to authenticate the SSH user. A public key is the approach we recommend. Choose Select at the bottom to save the credentials configuration. For more information, see Connect to HDInsight (Apache Hadoop) by using SSH. |
Select Next: Storage >> to advance to the next tab.
Storage
Warning
Starting June 15th, 2020 customers will not be able to create new service principal using HDInsight. See Create Service Principal and Certificates using Microsoft Entra ID.
Primary storage
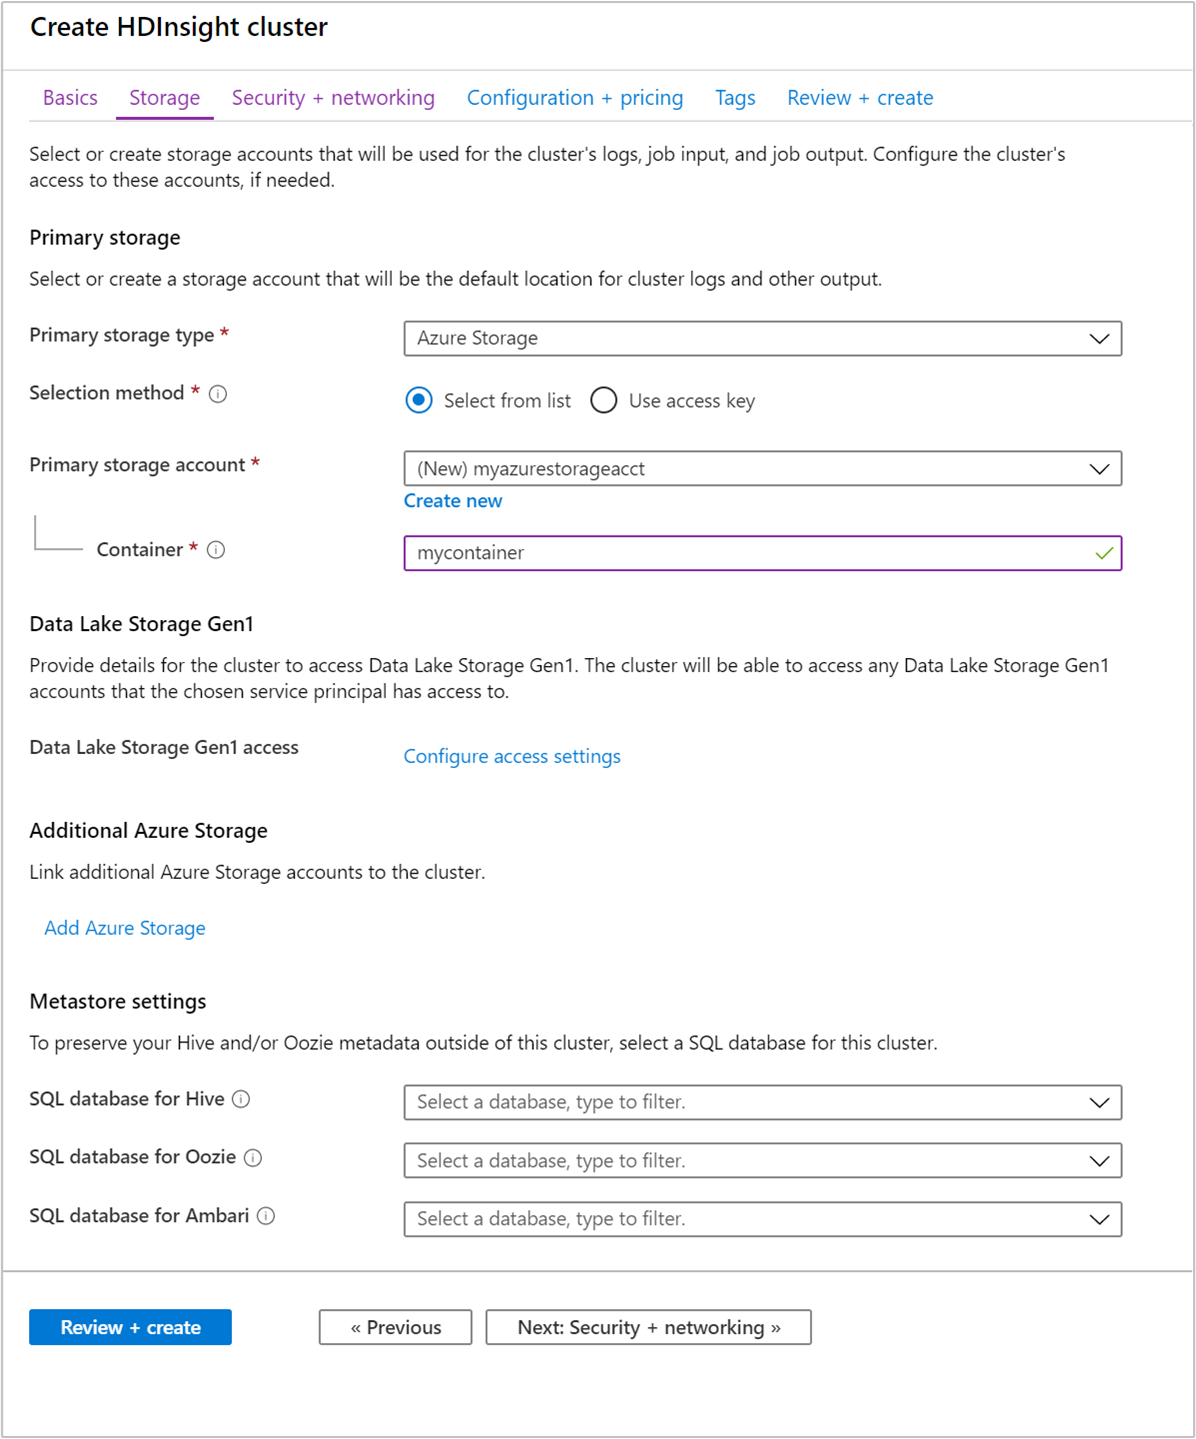
From the drop-down list for Primary storage type, select your default storage type. The later fields to complete will vary based upon your selection. For Azure Storage:
For Selection method, choose either Select from list, or Use access key.
- For Select from list, then select your Primary storage account from the drop-down list, or select Create new.
- For Use access key, enter your Storage account name. Then provide the Access key.
For Container, accept the default value, or enter a new one.
Additional Azure Storage
Optional: Select Add Azure Storage for additional cluster storage. Using an additional storage account in a different region than the HDInsight cluster isn't supported.
Metastore Settings
Optional: Specify an existing SQL Database to save Apache Hive, Apache Oozie, and, or Apache Ambari metadata outside of the cluster. The Azure SQL Database that's used for the metastore must allow connectivity to other Azure services, including Azure HDInsight. When you create a metastore, don't name a database with dashes or hyphens. These characters can cause the cluster creation process to fail.
Important
For cluster shapes that support metastores, the default metastore provides an Azure SQL Database with a basic tier 5 DTU limit (not upgradeable)! Suitable for basic testing purposes. For large or production workloads, we recommend migrating to an external metastore.
Select Next: Security + networking >> to advance to the next tab.
Security + networking
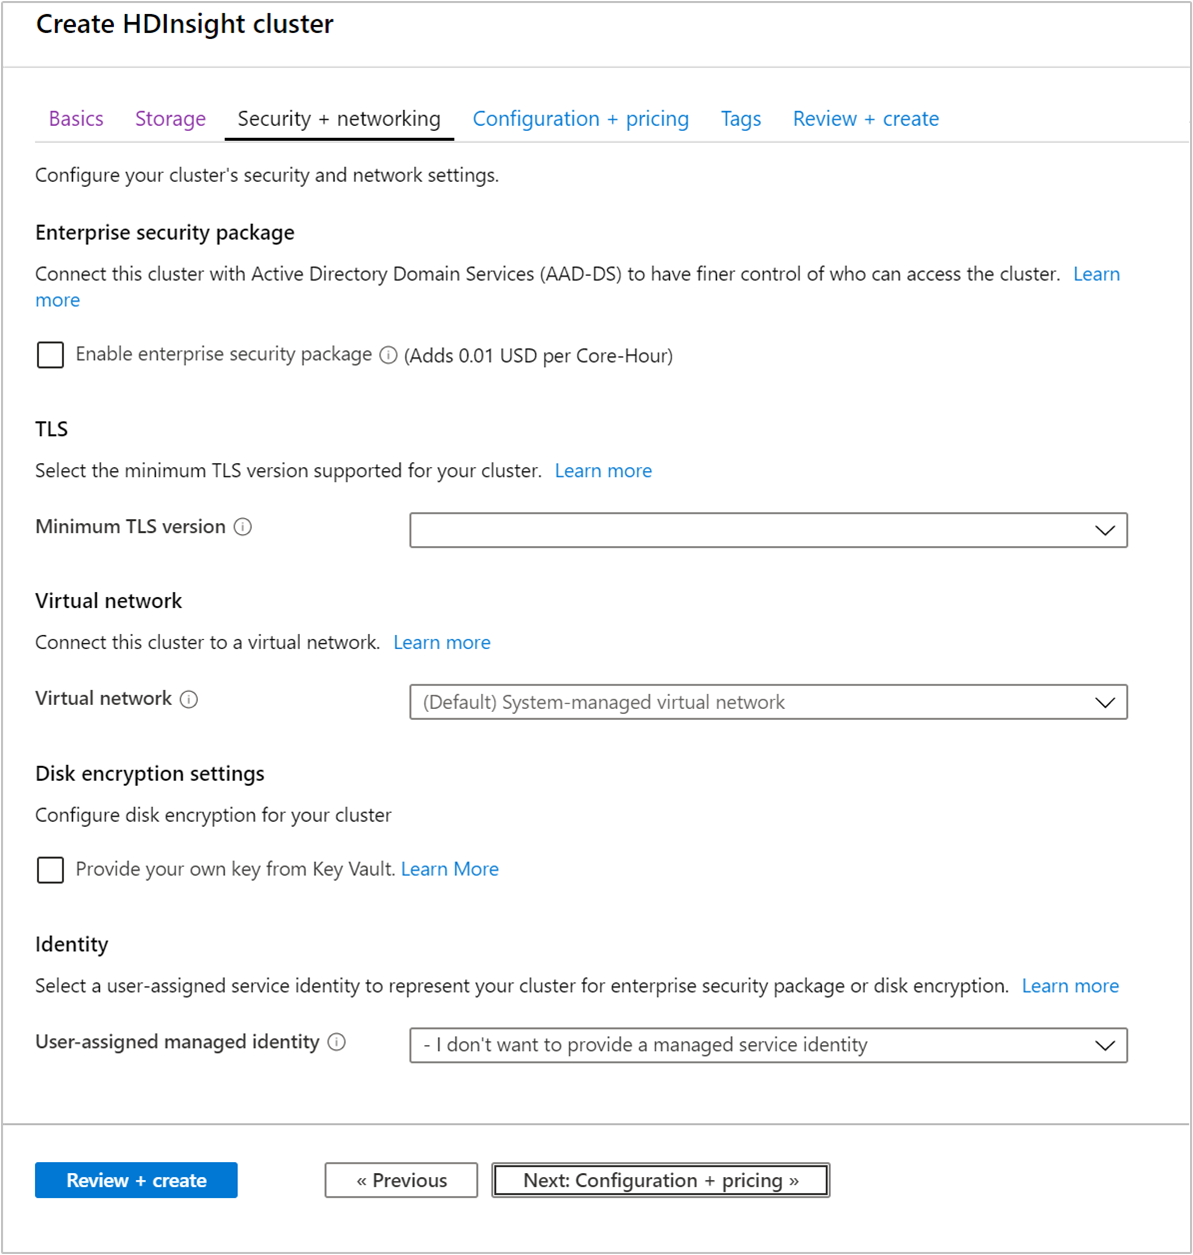
From the Security + networking tab, provide the following information:
| Property | Description |
|---|---|
| Enterprise security package | Optional: Select the check box to use Enterprise Security Package. For more information, see Configure a HDInsight cluster with Enterprise Security Package by using Microsoft Entra Domain Services. |
| TLS | Optional: Select a TLS version from the drop-down list. For more information, see Transport Layer Security. |
| Virtual network | Optional: Select an existing virtual network and subnet from the drop-down list. For information, see Plan a virtual network deployment for Azure HDInsight clusters. The article includes specific configuration requirements for the virtual network. |
| Disk encryption settings | Optional: Select the check box to use encryption. For more information, see Customer-managed key disk encryption. |
| Kafka REST proxy | This setting is only available for cluster type Kafka. For more information, see Using a REST proxy. |
| Identity | Optional: Select an existing user-assigned service identity from the drop-down list. For more information, see Managed identities in Azure HDInsight. |
Select Next: Configuration + pricing >> to advance to the next tab.
Configuration + pricing
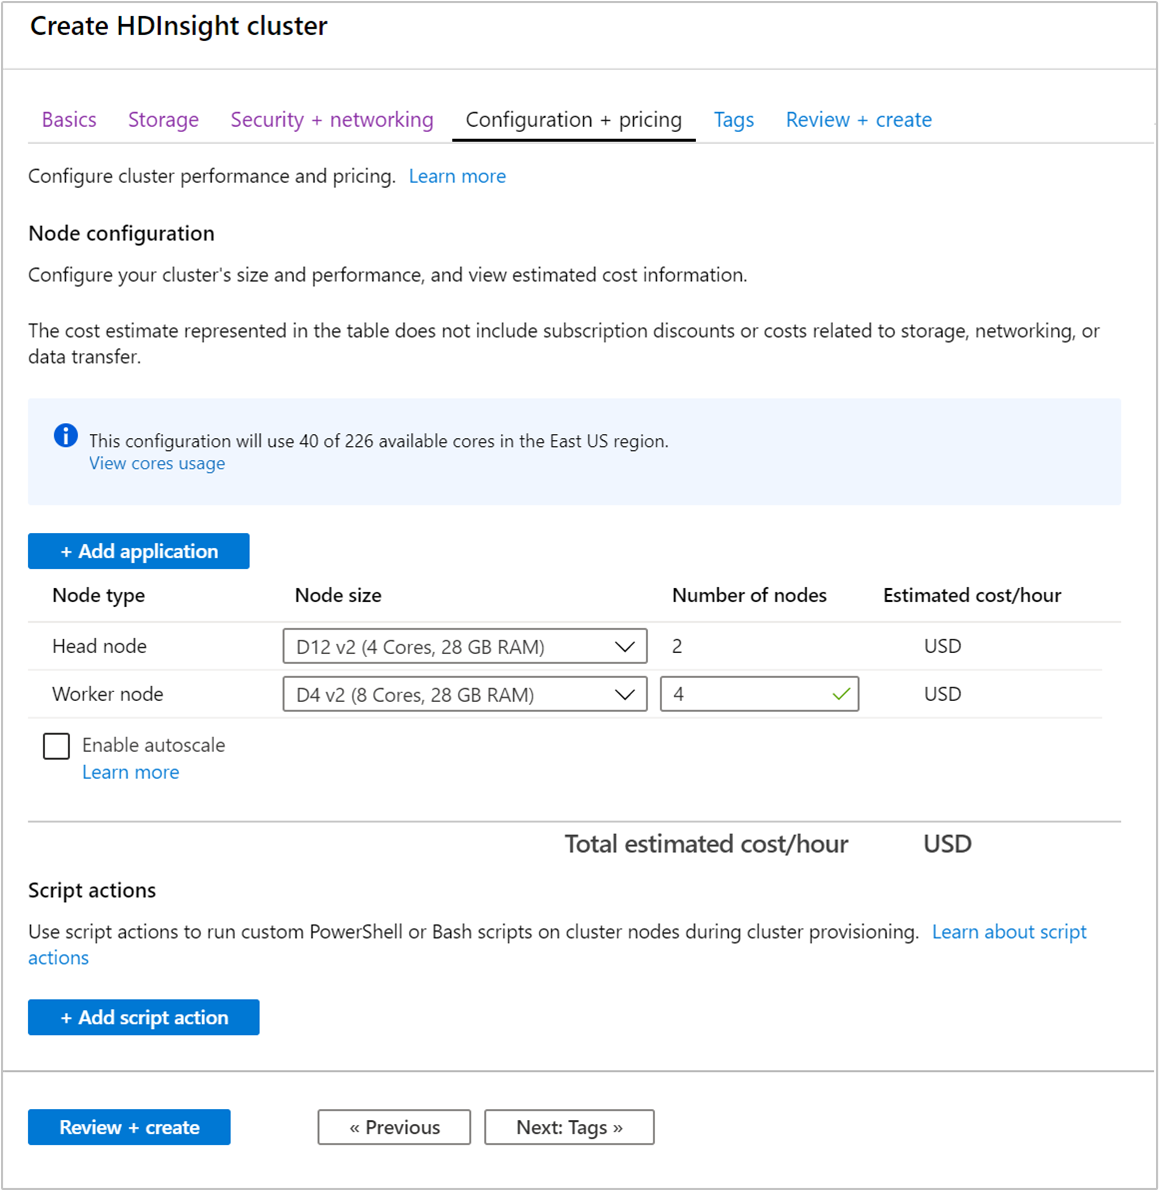
From the Configuration + pricing tab, provide the following information:
| Property | Description |
|---|---|
| + Add application | Optional: Select any applications that you want. Microsoft, independent software vendors (ISVs), or you can develop these applications. For more information, see Install applications during cluster creation. |
| Node size | Optional: Select a different-sized node. |
| Number of nodes | Optional: Enter the number of nodes for the specified node type. If you plan on more than 32 worker nodes, select a head node size with at least eight cores and 14-GB RAM. Plan the nodes either at cluster creation or by scaling the cluster after creation. |
| Enable autoscale | Optional: Select the checkbox to enable the feature. For more information, see Automatically scale Azure HDInsight clusters. |
| + Add script action | Optional: This option works if you want to use a custom script to customize a cluster, as the cluster is being created. For more information about script actions, see Customize Linux-based HDInsight clusters by using script actions. |
Select Review + create >> to validate the cluster configuration and advance to the final tab.
Tags
On the Tags page, provide the following information:
| Property | Description |
|---|---|
| Name | Optional. Enter a name of your choice to easily identify all resources. |
| Value | Leave this blank. |
| Resource | Select All resources selected. |
Review + create
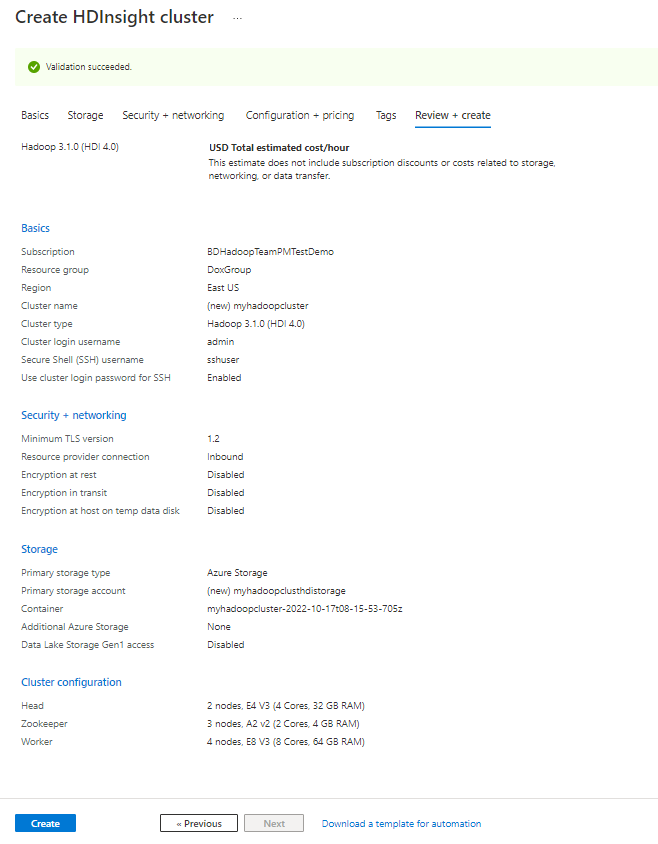
Review the settings. Select Create to create the cluster.
It takes some time for the cluster to be created, usually around 20 minutes. Monitor Notifications to check on the provisioning process.
Post creation
After the creation process finishes, select Go to Resource from the Deployment succeeded notification. The cluster window provides the following information.

Some of the icons in the window are explained as follows:
| Property | Description |
|---|---|
| Overview | Provides all the essential information about the cluster. Examples are the name, the resource group it belongs to, the location, the operating system, and the URL for the cluster dashboard. |
| Cluster dashboards | Directs you to the Ambari portal associated with the cluster. |
| SSH + Cluster login | Provides information needed to access the cluster by using SSH. |
| Delete | Deletes the HDInsight cluster. |
Delete the cluster
See Delete an HDInsight cluster using your browser, PowerShell, or the Azure CLI.
Troubleshoot
If you run into issues with creating HDInsight clusters, see access control requirements.
Next steps
You've successfully created an HDInsight cluster. Now learn how to work with your cluster.
Feedback
Coming soon: Throughout 2024 we will be phasing out GitHub Issues as the feedback mechanism for content and replacing it with a new feedback system. For more information see: https://aka.ms/ContentUserFeedback.
Submit and view feedback for