Note
Access to this page requires authorization. You can try signing in or changing directories.
Access to this page requires authorization. You can try changing directories.
Azure Files offers soft delete, which allows you to recover your file share if you mistakenly deleted it.
Applies to
| Management model | Billing model | Media tier | Redundancy | SMB | NFS |
|---|---|---|---|---|---|
| Microsoft.Storage | Provisioned v2 | HDD (standard) | Local (LRS) | ||
| Microsoft.Storage | Provisioned v2 | HDD (standard) | Zone (ZRS) | ||
| Microsoft.Storage | Provisioned v2 | HDD (standard) | Geo (GRS) | ||
| Microsoft.Storage | Provisioned v2 | HDD (standard) | GeoZone (GZRS) | ||
| Microsoft.Storage | Provisioned v1 | SSD (premium) | Local (LRS) | ||
| Microsoft.Storage | Provisioned v1 | SSD (premium) | Zone (ZRS) | ||
| Microsoft.Storage | Pay-as-you-go | HDD (standard) | Local (LRS) | ||
| Microsoft.Storage | Pay-as-you-go | HDD (standard) | Zone (ZRS) | ||
| Microsoft.Storage | Pay-as-you-go | HDD (standard) | Geo (GRS) | ||
| Microsoft.Storage | Pay-as-you-go | HDD (standard) | GeoZone (GZRS) |
How soft delete works
When soft delete is enabled, deleted file shares are retained in a soft deleted state for the defined retention period before being permanently deleted. When you undelete a file share, the file share and all of contents, including snapshots, are restored to their state prior to deletion.
Important
Soft delete only works on a file share level. If you want to be able to restore deleted files, you can use share snapshots or Azure file share backup.
Soft delete for file shares is enabled at the storage account level so the soft delete settings apply to all file shares within a storage account. New storage accounts have soft delete enabled by default, but you can enable or disable soft delete as desired for new or existing storage accounts. If you disable soft delete, any file shares deleted before disabling soft delete can still be undeleted.
By default, the retention period for file shares is 7 days, but you can specify any retention period between 1 and 365 days. The retention period clock starts when the file share is deleted. You can change the soft delete retention period at any time. Shares deleted before the retention period update expire based on the retention period that was configured when that data was deleted.
To permanently delete a file share in a soft delete state before its expiry time, you must undelete the share, disable soft delete, and then delete the share again. If desired, remember to reenable soft delete for the storage account to protect other file shares from accidental deletion.
For soft-deleted provisioned file shares, the file share quota (the provisioned size of a file share) is used in the total storage account quota calculation until the soft-deleted share expiry date, when the share is fully deleted.
Billing
Billing for soft delete depends on the billing model of the file share. For more information, see the following:
Toggle soft delete settings
The following sections show how to enable and use soft delete for Azure file shares on an existing storage account:
Sign in to the Azure portal.
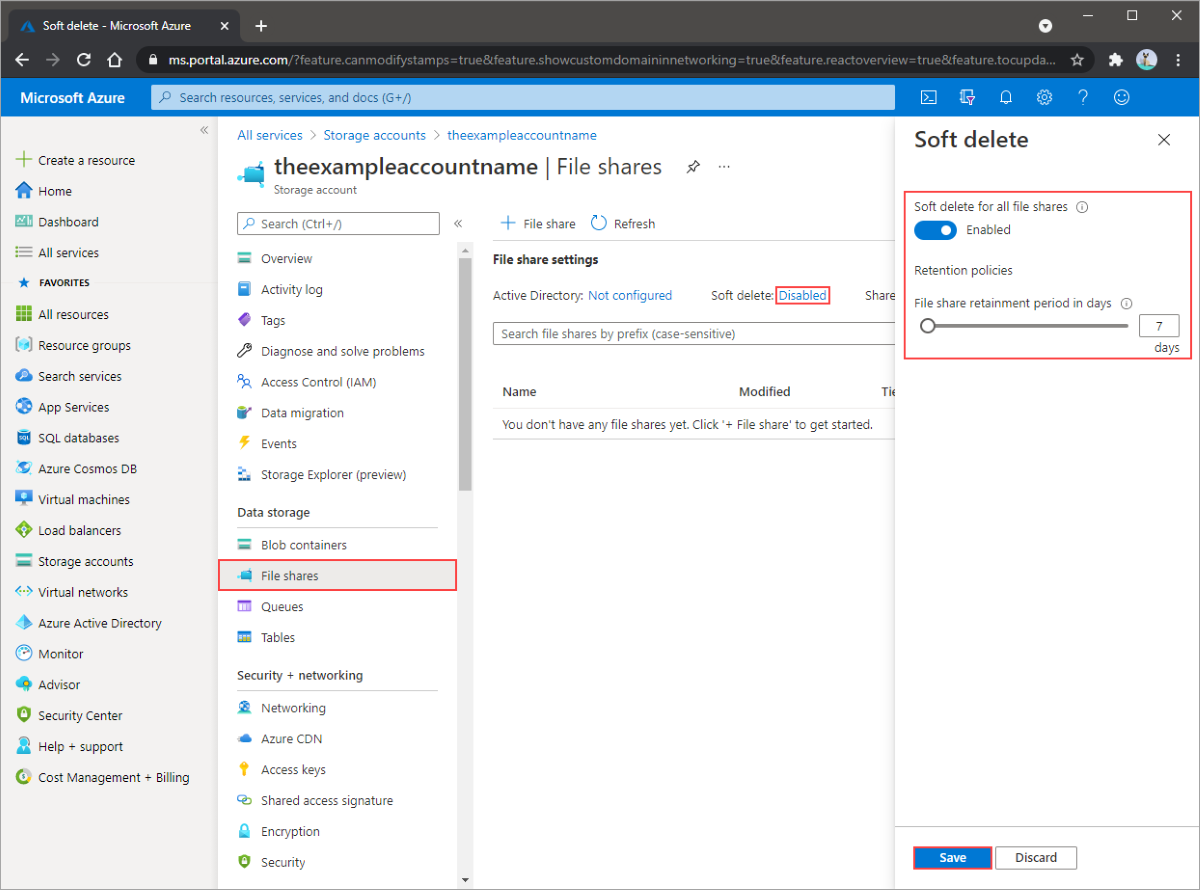
Navigate to your storage account and select File shares under Data storage.
Select Disabled next to Soft delete.
Select Enabled for Soft delete for all file shares.
Under File share retention period in days, use the slider to specify a number between 1 and 365 days.
Select Save to confirm your data retention settings.
Restore soft deleted file share
To restore a soft deleted file share:
Navigate to your storage account and select File shares.
On the file share blade, enable Show deleted shares to display any shares that are soft deleted.
This displays any shares currently in a Deleted state.
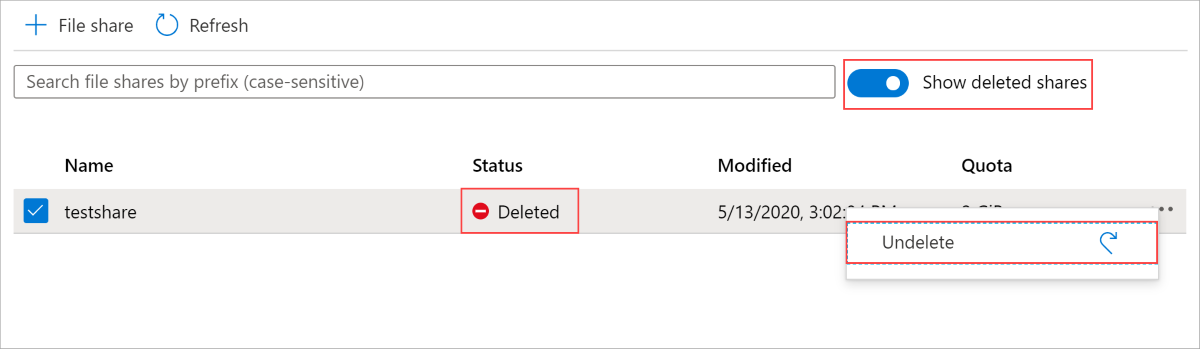
Select the share and select undelete to restore the share.
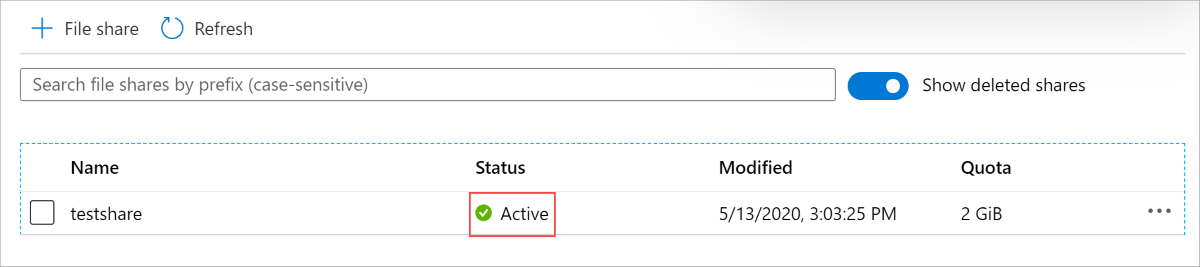
You can confirm the share is restored when its status switches to Active.
Disable soft delete
If you want to stop using soft delete, follow these instructions. To permanently delete a file share that's been soft deleted, you must undelete the share, disable soft delete, and then delete the share again.
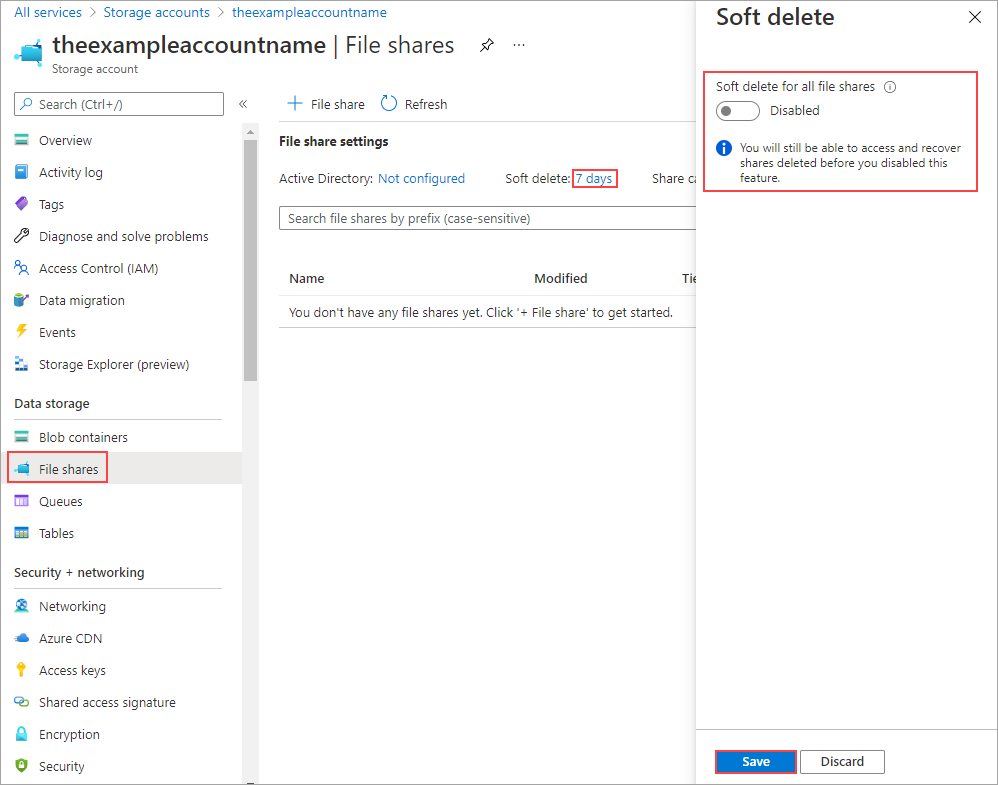
Navigate to your storage account and select File shares under Data storage.
Select Enabled next to Soft delete.
Select Disabled for Soft delete for all file shares.
Select Save to confirm your data retention settings.
Next steps
To learn how to prevent a storage account from being deleted or modified, see Apply an Azure Resource Manager lock to a storage account.
To learn how to apply locks to resources and resource groups, see Lock resources to prevent unexpected changes.