Note
Access to this page requires authorization. You can try signing in or changing directories.
Access to this page requires authorization. You can try changing directories.
As a major HCM solution, Workday holds some of the most sensitive information in your organization such as employees' personal data, contracts, vendor details, and more. Preventing exposure of this data requires continuous monitoring to prevent any malicious actors or security unaware insiders from exfiltrating the sensitive information.
Connecting Workday to Defender for Cloud Apps gives you improved insights into your users' activities and provides threat detection for anomalous behavior.
Main threats
- Compromised accounts and insider threats
- Data leakage
- Insufficient security awareness
- Unmanaged bring your own device (BYOD)
How Defender for Cloud Apps helps to protect your environment
- Detect cloud threats, compromised accounts, and malicious insiders
- Use the audit trail of activities for forensic investigations
Control Workday with built-in policies and policy templates
You can use the following built-in policy templates to detect and notify you about potential threats:
| Type | Name |
|---|---|
| Built-in anomaly detection policy | Activity from anonymous IP addresses Activity from infrequent country Activity from suspicious IP addresses Impossible travel |
| Activity policy template | Logon from a risky IP address |
For more information about creating policies, see Create a policy.
Automate governance controls
Currently, there are no governance controls available for Workday. If you are interested in having governance actions for this connector, you can open a support ticket with details of the actions you want.
For more information about remediating threats from apps, see Governing connected apps.
Protect Workday in real time
Review our best practices for securing and collaborating with external users and blocking and protecting the download of sensitive data to unmanaged or risky devices.
Connect Workday to Microsoft Defender for Cloud Apps
This section provides instructions for connecting Microsoft Defender for Cloud Apps to your existing Workday account using the app connector API. This connection gives you visibility into and control over Workday use. For information about how Defender for Cloud Apps protects Workday, see Protect Workday.
Quick start
Watch our quick start video showing how to configure the prerequisites and perform the steps in Workday. Once you've completed the steps in the video, you can proceed to add the Workday connector.
Note
The video does not show the prerequisite step for configuring the security group Set Up: Tenant Setup – System permission. Make sure you configure it as well.
Prerequisites
The Workday account used for connecting to Defender for Cloud Apps must be a member of a security group (new or existing). We recommended using a Workday Integration System User. The security group must have the following permissions selected for the following domain security policies:
| Functional area | Domain Security policy | Subdomain Security policy | Report/Task Permissions | Integration Permissions |
|---|---|---|---|---|
| System | Set Up: Tenant Setup – General | Set Up: Tenant Setup – Security | View, Modify | Get, Put |
| System | Set Up: Tenant Setup – General | Set Up: Tenant Setup – System | Modify | None |
| System | Security Administration | View, Modify | Get, Put | |
| System | System auditing | View | Get | |
| Staffing | Worker Data: Staffing | Worker Data: Public Worker Reports | View | Get |
Note
- The account that is used to set up permissions for the security group must be a Workday Administrator.
- To set permissions, search for "Domain Security Policies for Functional Area", then search for each functional area ("System"/"Staffing") and grant the permissions listed in the table.
- Once all permissions have been set, search for "Activate Pending Security Policy Changes" and approve the changes.
For more information about setting up Workday integration users, security groups, and permissions, see steps 1 to 4 of the Grant Integration or External Endpoint Access to Workday guide (accessible with Workday documentation/community credentials).
How to connect Workday to Defender for Cloud Apps using OAuth
Sign in to Workday with an account that is a member of the security group mentioned in the prerequisites.
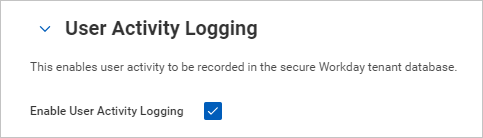
Search for "Edit tenant setup – system", and under User Activity Logging, select Enable User Activity Logging.
Search for "Edit tenant setup – security", and under OAuth 2.0 Settings, select OAuth 2.0 Clients Enabled.
Search for "Register API Client" and select Register API Client – Task.
On the Register API Client page, fill out the following information, and then select OK.
Field name Value Client Name Microsoft Defender for Cloud Apps Client Grant Type Authorization Code Grant Access Token Type Bearer Redirection URI https://portal.cloudappsecurity.com/api/oauth/connect
Note: For US Government GCC High customers, enter the following value:https://portal.cloudappsecurity.us/api/oauth/connectNon-Expiring Refresh Tokens Yes Scope (Functional Areas) Staffing and System 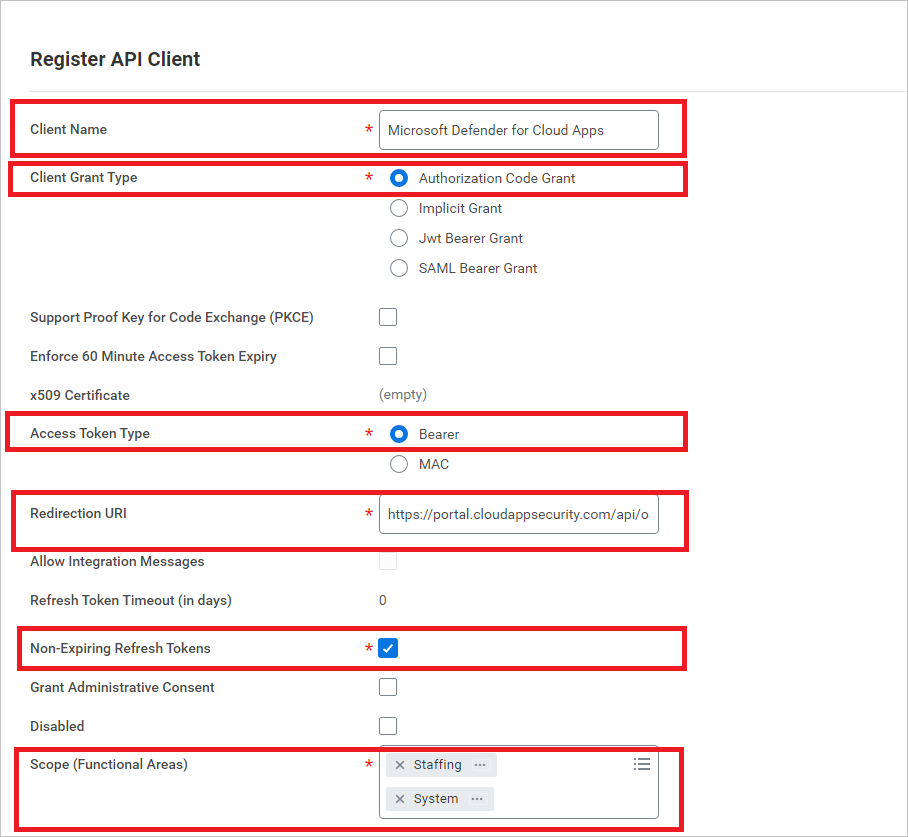
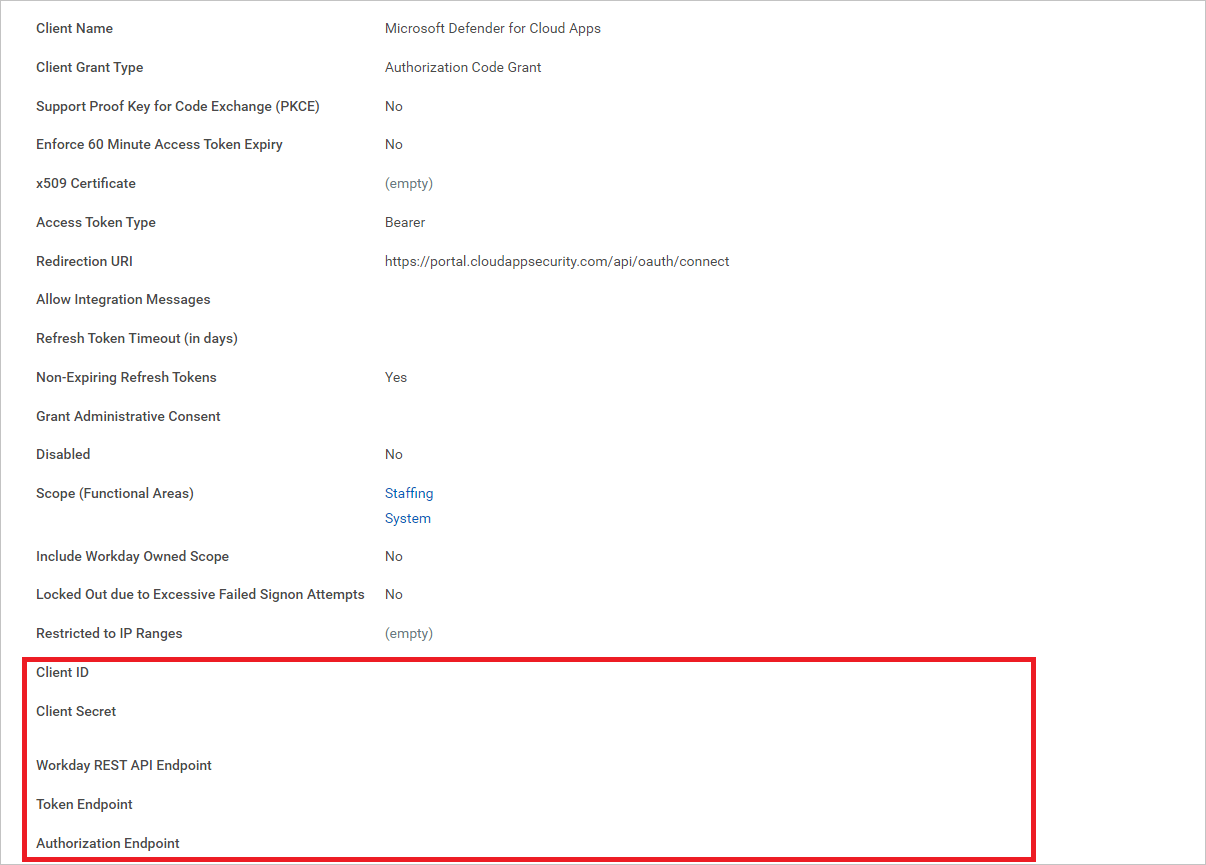
Once registered, make a note for the following parameters, and then select Done.
- Client ID
- Client Secret
- Workday REST API Endpoint
- Token Endpoint
- Authorization Endpoint
Note
If the Workday account is enabled with SAML SSO, then append the query string parameter 'redirect=n' to the authorization endpoint.
If the authorization endpoint already has other query string parameters, then append '&redirect=n' to the end of authorization endpoint. If the authorization endpoint doesn't have any query string parameters, then append '?redirect=n' to the end of authorization endpoint.
How to connect Defender for Cloud Apps to Workday
In the Microsoft Defender Portal, select Settings. Then choose Cloud Apps. Under Connected apps, select App Connectors.
In the App connectors page, select +Connect an app, and then Workday.

In the next screen, give your connector a name and then select Next.
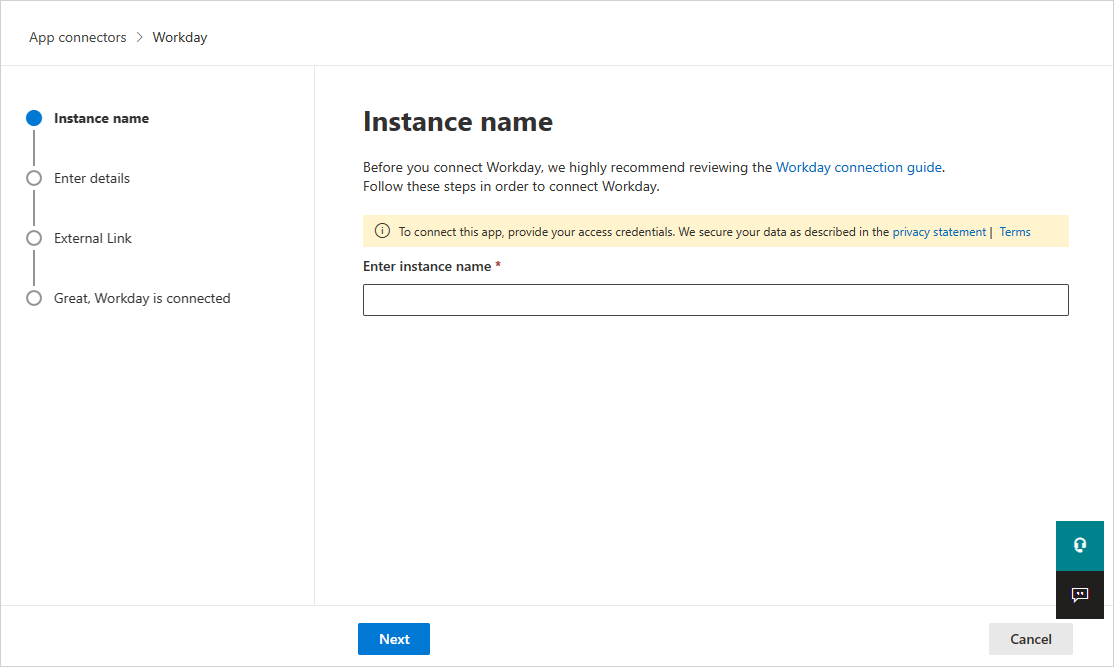
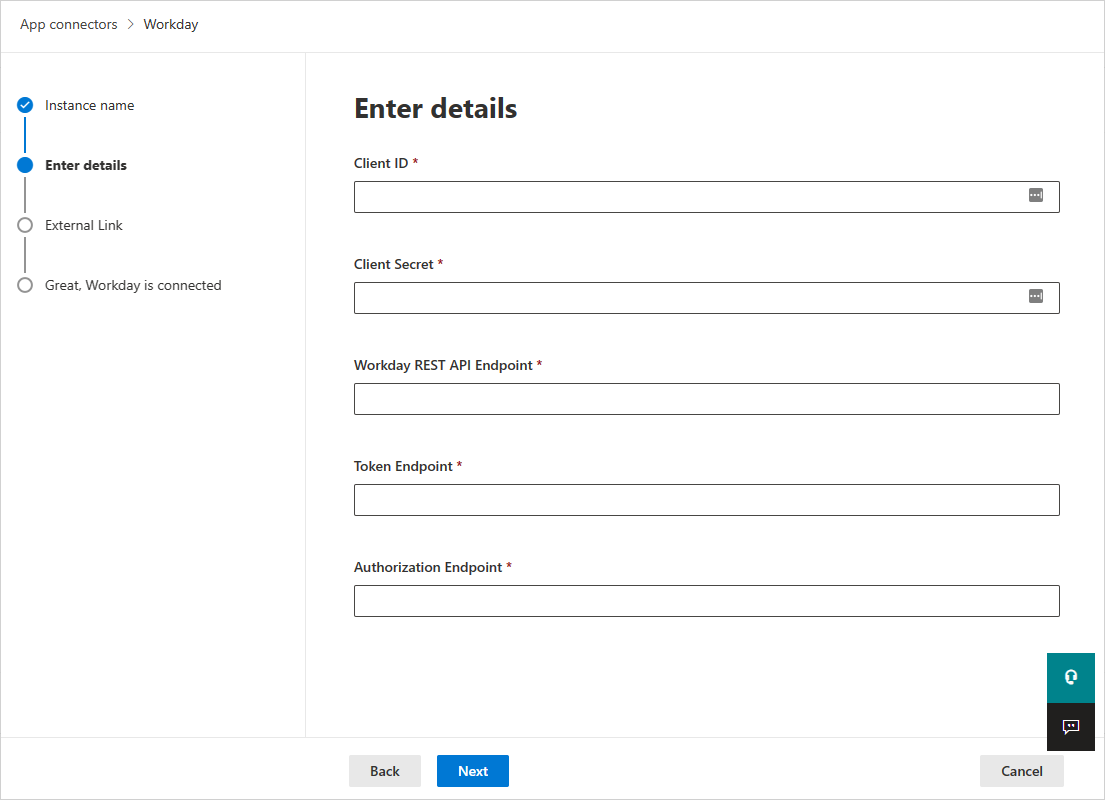
On the Enter details page, fill out the details with the information you noted earlier, and then select Next.
In the External link page, select Connect Workday.
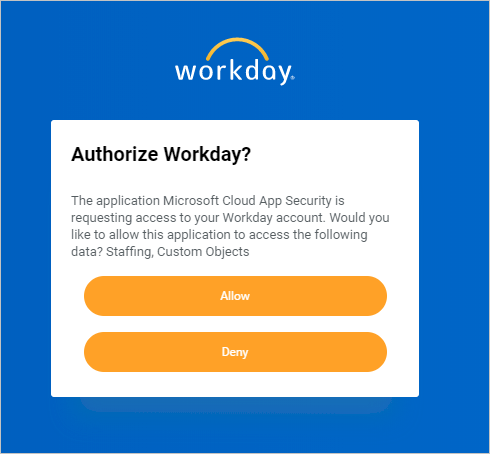
In Workday, a pop-up appears asking you if you want to allow Defender for Cloud Apps access to your Workday account. To proceed, select Allow.
In Defender for Cloud Apps, you should see a message that Workday was successfully connected.
In the Microsoft Defender Portal, select Settings. Then choose Cloud Apps. Under Connected apps, select App Connectors. Make sure the status of the connected App Connector is Connected.
Note
After connecting Workday, you'll receive events for seven days prior to connection.
Note
If you are connecting Defender for Cloud Apps to a Workday sandbox account for testing, note that Workday refreshes their sandbox account every week, causing the Defender for Cloud Apps connection to fail. You should reconnect the sandbox environment every week with Defender for Cloud Apps to continue testing.
If you have any problems connecting the app, see Troubleshooting App Connectors.
Next steps
If you run into any problems, we're here to help. To get assistance or support for your product issue, please open a support ticket.