Create workflows to connect tasks in business processes
You can create workflows that connect tasks in business processes that are performed by different users. You can include system tasks, such as automatic posting, as steps in workflows that are preceded or followed by user tasks. Requesting and granting approval to create new records are typical workflow steps.
On the Workflow page, create a workflow by listing the steps on the lines. Each step consists of a trigger and a response:
- An event that specifies the conditions that will start the workflow.
- A workflow response that defines what the workflow does.
Note
If a business scenario requires a workflow event or response that is not supported in the default version, sign up for Power Automate. For more information, see Use Business Central in Power Automate Flows. Alternatively, get an app at AppSource or work with a Microsoft partner to customise the application code.
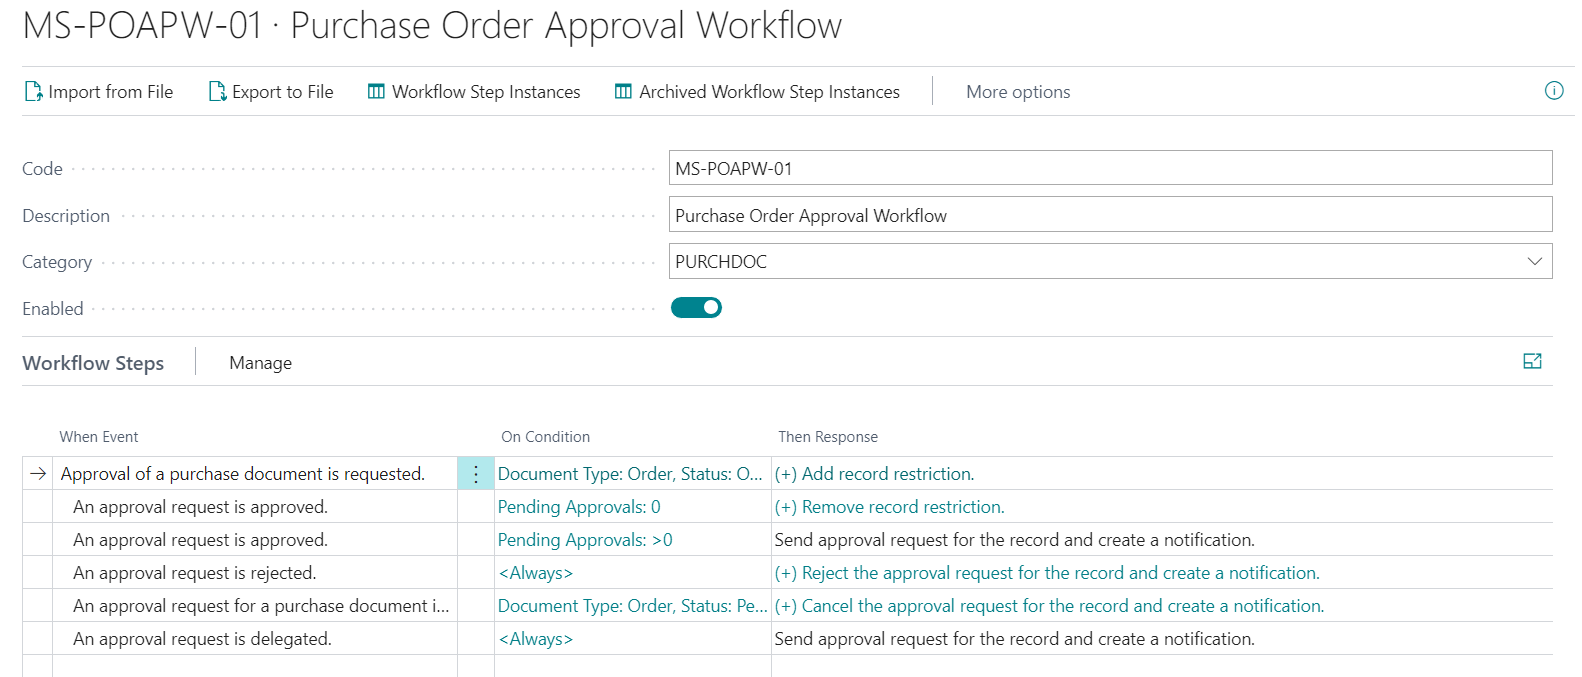
When you create workflows, you can copy the steps from existing workflows or from workflow templates. Workflow templates are non-editable workflows Business Central provides. The identifiers for workflow templates are prefixed with "MS-", such as in "MS-PIW". Learn more at Create Workflows from Workflow Templates.
Note
All notifications about workflow steps are sent through a job queue. Make sure the job queue reflects your business needs. Learn more at Use Job Queues to Schedule Tasks.
A workflow is divided into three sections:
- When Event
This is where the trigger is selected.
Examples of a trigger:- A master data record is changed
- A journal line is created
- An incoming document is created or released
- Approval of a document is requested
- On Condition
The conditions are related to the event and allows creating filters to decide on how the workflow continues. - Then Response
The responses specify the next steps in the workflow.
The options for events and responses are system-defined. To add new options, you'll need to develop an extension.
To create a workflow
Choose the
 icon, enter Workflows, then choose the related link.
Choose the New action. The Workflow page opens.
In the Code field, enter a maximum of 20 characters to identify the workflow.
To create the workflow from a workflow template, on the Workflows page, choose the New Workflow from Template action. Learn more at Create Workflows from Workflow Templates.
In the Description field, describe the workflow.
In the Category field, specify which category the workflow belongs to.
In the When Event field, specify the event that must occur to start the workflow step.
When you choose the field, the Workflow Events page lists all available workflow events.
In the On Condition field, specify one or more conditions that must be met before the event in the When Event field can occur.
When you choose the field, the Event Conditions page lists filter fields that can be conditions for the event. You can add new filter fields if you want.
If the workflow event is the change of a specific field on a record, use the Event Conditions page to select the field and the type of change.
- To specify a field change for the event, on the Event Conditions page, in the Field field, select the field that changes.
- In the Operator field, select either Decreased, Increased, or Changed.
In the Then Response field, specify the response that will follow when the workflow event occurs.
When you choose the field, the Workflow Responses page lists all available workflow responses and response options.
On the Options for the Selected Response FastTab, specify options for the workflow response by selecting values in the different fields that appear, as follows:
- To specify options for a workflow response that involves sending a notification, fill the fields as described in the following table.
Note
These fields vary, depending on the response you've chosen.
Field Description Notify Sender Specify whether to notify the approval requestor instead of the approval request recipient. If you select the checkbox, the Recipient User ID field is disabled because the requestor of the approval, the sender, will be notified instead. The name of the workflow response changes accordingly, to Create Notification for <Sender>. If the checkbox isn't selected, the name of the workflow response is Create Notification for <User>. Recipient User ID Specify the user the notification must be sent to. Note: This option is only available for workflow responses with a placeholder for a specific user. For workflow responses without placeholders for users, the notification recipient is typically defined by the Approval User Setup. Notification Entry Type Specify a trigger for the workflow notification. The trigger can be a record change, an approval request, or passed due date. Link Target Page Specify the page that the link in the notification opens. The page must have the same source table as the record involved. Custom Link Specify the URL of a link included in the notification in addition to the link to the page. To specify options for a workflow response that involves creating an approval request, fill the fields as described in the following table.
Field Description Due Date Formula Specify the number of days the approver has to resolve the request. The period starts when the request is sent. Delegate After Specify if and when an approval request is automatically delegated to the substitute. You can select to automatically delegate one, two, or five days after the date when the approval was requested. Approver Type Specify who the approver is, according to the setup of approval users and workflow users. When the field is set to Salesperson/Purchaser, the user specified in the Salespers./Purch. Code field on the Approval User Setup page determines the approver. Approval request entries are then created according to the value in the Approver Limit Type field. Learn more at Set Up Approval Users. Show Confirmation Message Specify whether to show a confirmation message after a user requests an approval. Approver Limit Type Specify the effect of limits for approvers. An approver's approval limit must be above the value on the request. The following options exist: - Approver Chain specifies that approval request entries are created for all the requester's approvers up to and including the first qualified approver
- Direct Approver specifies that an approval request entry is only created for the requester's immediate approver, regardless of the approver's approval limit.
- First Qualified Approver specifies that an approval request entry is only created for the requester's first approver.
- Specific Approver specifies that you notify the user chosen in the Approver ID field.
To specify options for a workflow response that involves creating journal lines, fill in the fields as described in the following table.
Field Description General Journal Template Name Specify the name of the general journal template that the specified journal lines are created in. General Journal Batch Name Specify the name of the general journal batch that the specified journal lines are created in.
Choose the Increase Indent and Decrease Indent buttons to indent the event name in the When field to define the step's position in the workflow.
- Indent the event under the name of the previous step to indicate that it's the next step.
- Indicate the step is one of several alternative steps that may start, depending on its condition, by indenting the event name to match the other alternative steps. Order such optional steps according to priority by placing the most important step first.
Note
You can only change the indent of a step that doesn't have a subsequent step.
Repeat steps 7 through 11 to add more workflow steps, either before or after the step you've created.
Turn on the Enabled toggle to specify that the workflow will start when the event on the first step of type Entry Point occurs. Learn more at Use Workflows.
Note
Don't enable a workflow until you're sure it's ready.
Tip
To explore the relations between the tables used in workflows, choose the icon, then enter Workflow – Table Relations.
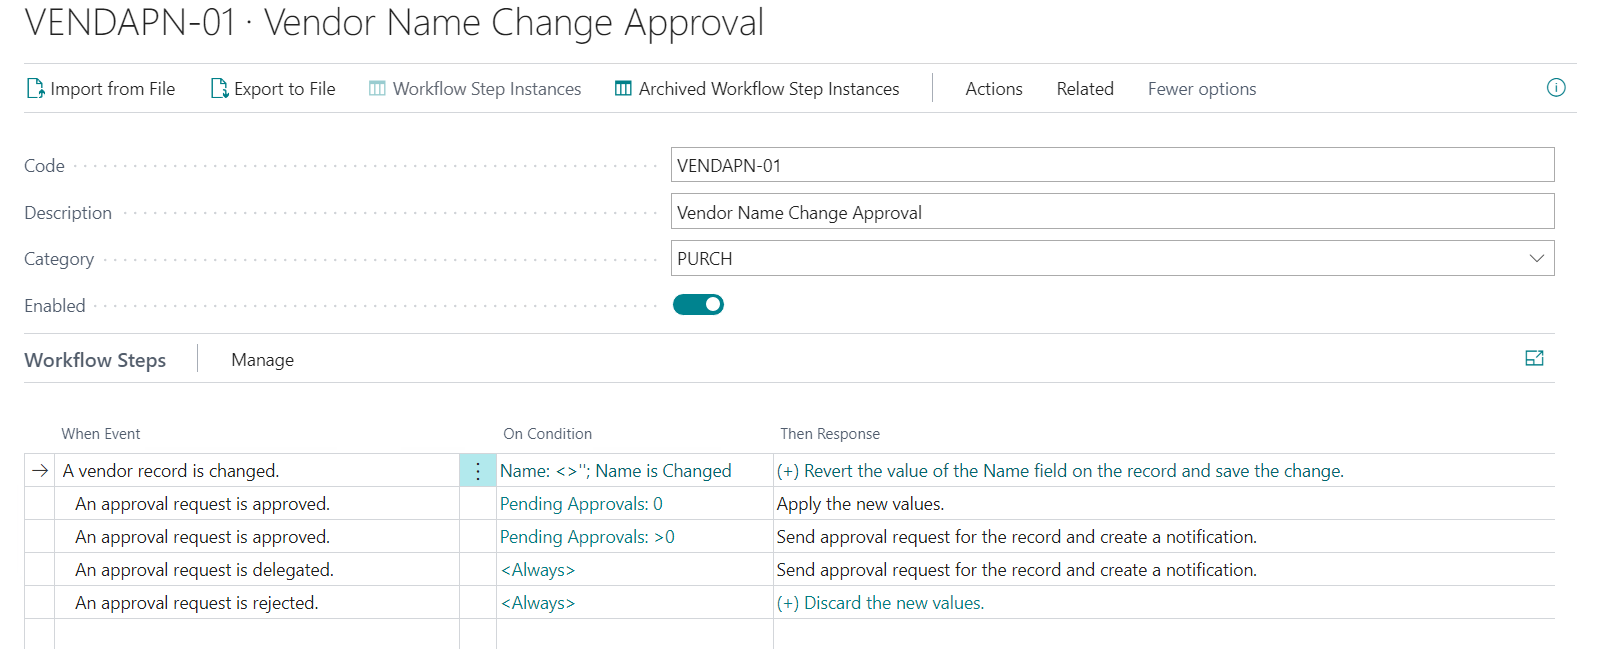
Example of creating a new workflow using existing events
The following example creates a workflow to approve a change to the name of a vendor:
Choose the
icon, enter Workflows, then choose the related link.Choose the New action. The Workflow page opens.
In the workflow section, fill in the fields as described in the following table.
Field Value Code VENDAPN-01 Description Vendor Name Change Approval Category PURCH To create the first workflow step, do the following.
- In the When Event field, specify A vendor record is changed.
- In the On Condition field, choose the word Always. Then, on the Event Conditions page, choose the Add a condition for when a field value changes link, then select the Name field. The result of this step is that the condition reads as Name is Changed.
- In the Then Response field, choose the Select Response link. Then, on the Workflow Responses page, in the Select Response field, choose the Revert the value of the <Field> field on the record and save the change response. Then, in the Options for the Selected Response section, specify the Name field.
- Choose the Add More Responses link, then add an entry for the Create an approval request for the record using approver type <%1> and <%2> response.
- In the Options for the Selected Response section for the new response, change the Approver type field to Workflow User Group. Then, in the Workflow User Group field, specify the user group. Learn more at Set Up Approval Users.
- Add a third response, Send approval request for the record and create a notification.
- Add a fourth response, Show message "%1". Then, in the Options for the Selected Response section, in the Message field, specify An approval request has been sent.
- Choose OK to return to the workflow step.
In the next line, add a new workflow step for the An approval request is approved event.
- In the When Event field, specify An approval request is approved.
- Choose the line menu, then choose Increase Indent.
- In the On Condition field, choose Always. Then, in the Pending Approvals field, specify 0. The condition reads as Pending Approvals:0 to indicate that the request doesn't require more approvers.
- In the Then Response field, choose the Select Response link. Then, on the Workflow Responses page, in the Select Response field, choose the Send approval request for the record and create a notification response.
- Choose OK.
In the next line, add a second workflow step for the An approval request is approved event.
- In the When Event field, specify An approval request is approved.
- In the On Condition field, choose Always. Then, in the Pending Approvals field, specify >0. The condition reads as Pending Approvals:>0 to indicate that this isn't the last approver.
- In the Then Response field, choose the Select Response link. Then, on the Workflow Responses page, in the Select Response field, choose the Send approval request for the record and create a notification response.
- Choose OK.
In the next line, add a workflow step for the An approval request is delegated event.
- In the When Event field, specify An approval request is delegated.
- In the On Condition field, leave the value as Always.
- In the Then Response field, choose the Select Response link. Then, on the Workflow Responses page, in the Select Response field, choose the Send approval request for the record and create a notification response.
- Choose OK.
In the next line, add a second workflow step for the An approval request is rejected event.
- In the When Event field, specify An approval request is rejected.
- In the On Condition field, leave the value as Always.
- In the Then Response field, choose the Select Response link. Then, on the Workflow Responses page, in the Select Response field, choose the Discard the new values response.
- Choose the Add More Responses link, then add an entry for the Reject the approval request for the record and create a notification response
- Choose OK.
To enable the workflow, turn on the Enabled toggle.
The following illustration provides an overview of the result of this procedure.
Next, test the workflow by opening an existing vendor card and changing their name. Verify that an approval request is sent after changing the vendor name.
See also
Create Workflows from Workflow Templates
Set Up Approval Users
Setting Up Approval Workflow Notifications
View Archived Workflow Step Instances
Delete Approval Workflows
Walkthrough: Setting Up and Using a Purchase Approval Workflow
Setting Up Approval Workflows
Use Approval Workflows
Workflow