Create calculation profiles
![]() Microsoft Cloud for Sustainability
Microsoft Cloud for Sustainability
Calculation profiles configure calculation models to run against a data set. You can map these calculation models by activity connection or any entity in the app, such as reference data or activity data source.
Note
There is a limit on the number of activities that a single calculation job can calculate. The easiest way to limit calculation jobs is to narrow the calculation profile criteria. Because of the complexity of calculations, the current expectation is that you will limit each calculation profile to no more than 50,000 records.
Add a calculation profile
On the left navigation under Calculations, select Calculation profiles.
Select New.
On the Calculation profile set up pane, complete these fields:
- Calculation profile name (required): Enter the name of the calculation profile. Be as specific as possible.
- Description (optional): Provide details about the calculation profile.
- Module (required): Specify the module associated with the calculation profile.
Depending on the module you choose, select additional options, as described in this table.
Note
Multi-select option set fields aren't supported within calculations in Sustainability Manager.
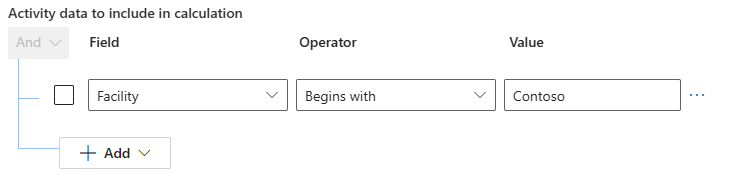
Module Options Carbon activities Emissions source (required): Select an emissions source from the list. IPCC Assessment Report version (required): You can keep the default or select a different report version. To learn more about assessment report versions and the way they're used in Microsoft Sustainability Manager, go to Global Warming Potentials (GWPs). Reference data Activity data source (required): Select an activity data source from the dropdown. Value chain Data type (required): Select a data type from the dropdown. Water Activity data source (required): Select an activity data source from the dropdown. Filter the data set to use in your calculation. Due to how activity data is stored in Dataverse, you need to use explicit, non-nested filters for activity data to ensure your calculation profile works. This restriction means that you must set Operator to Equals, and you can't set up a join or multi-statement filter by adding a related entity to Field.
For example, the filter shown in this screenshot runs as expected:

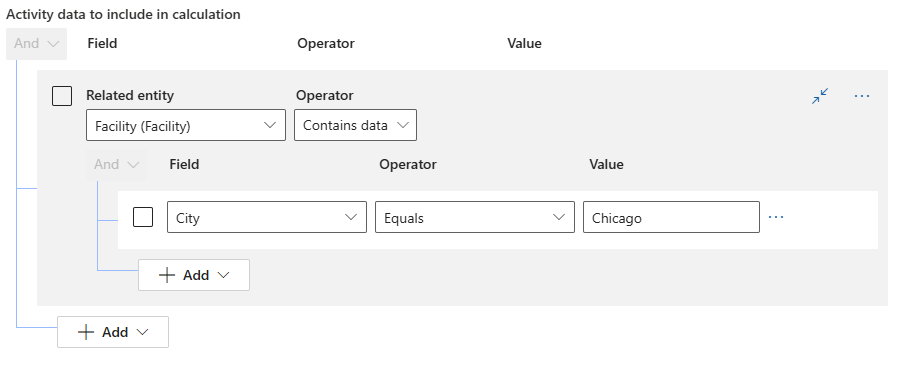
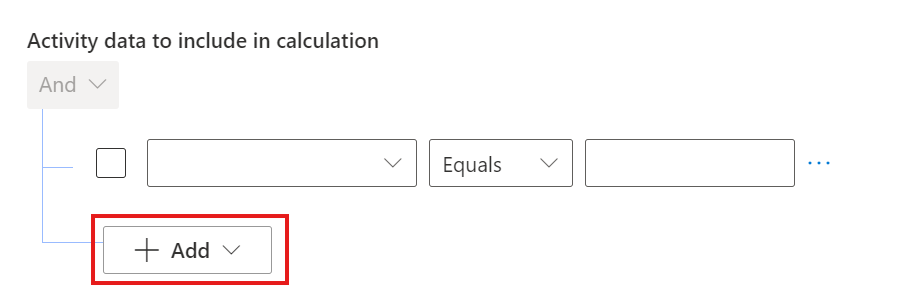
The filters shown in these two screenshots can't properly filter your data:
More detailed explanation: Activity data is stored in elastic tables in Dataverse. You can learn more about elastic tables in the Dataverse documentation at Create and edit elastic tables. Elastic tables are designed to handle large volumes of data in real-time. With elastic tables, you can import, store, and analyze large volumes of data without scalability, latency, or performance issues. Filtering capabilities in calculation profiles are restricted due to the limitations listed in the section Features currently not supported with elastic tables.
Note
If the filter control doesn't load initially, clear your cache and refresh the browser.
Select Add.
Select Add row or Add group.
Under Field, select a field.
For activity data, under Operator, select Equals.
Under Value, select or enter a value.
Add rows for other filters as needed.
In the Calculation model (required) field, select at least one calculation model. To add more, select the + button next to the field.
Under Schedule (optional), elect Automatically run when data is refreshed, unless the calculation is a one-time calculation. If you select this option, your schedule matches the schedule of the data pulled in by the criteria of your filters.
Select Next.
On the Preview results pane, ensure the results match your expectations, and then select Save.
Select Done.
To start the calculation job, on the calculation profiles page, select your calculation profile, and then select Run calculation.
View calculation profiles
The Calculation profiles page contains tiles that show high-level information, so that you can quickly learn the health of your profiles and associated calculation jobs. The information available on the tiles includes the status, time of the last run, emission source, and calculation models used. When a tile is selected, a pane on the right side of the page shows summary information and lets you view the calculation profile history.
View the status of calculation profile jobs
In the left navigation pane, select Calculation profiles.
Select the profile to view. The right pane shows high-level summary information.
To view details about the last run and the history of previous calculation jobs, select History in the right pane. Each associated run has details about every calculation job, such as the time of the last run and the success rate.
To view errors and failed jobs, follow these steps:
- Select the name of the most recent calculation job.
- View the error code.
- View line item details if applicable. These details appear below the errors that are shown.
Edit a calculation profile
- In the left navigation pane, select Calculation profiles.
- Select the profile to edit.
- On the action pane, select the pencil icon to edit. The wizard that you used to create the profile opens.
- Edit the desired field.
- Save your changes and close the page.
Note
For each calculation profile, when a new calculation is performed, the previous calculation errors and the emissions related to the activities are deleted.
Automatically run a calculation profile after data import
The automatic calculation refresh feature automates the execution of calculation profiles when new data is ingested. To use automatic calculation refresh effectively, follow these steps:
- In the left navigation pane, select Calculation profiles.
- Select the profile to edit.
- On the action pane, select the pencil icon to edit. The wizard that you used to create the profile opens.
- Under Schedule, check the Automatically run this calculation when data is refreshed box.
- Select Next, save your changes, and close the page.
Note
Ensure that your criteria in the calculation profile align with the specific data you want to run through the calculation. These criteria determine when the automatic calculation refresh should trigger calculations.
The automatic calculation refresh runs when new data is ingested for that particular data source. For example, if you configure your calculation profile to calculate emissions for Scope 3 Category 1 Purchased Goods and Services, the automatic calculation refresh only runs when new data related to this specific data source is ingested via the ingestion process. Automatic calculation refresh doesn't run for data that you manually add outside of the ingestion process.
Caution
If you have multiple calculation profiles configured to run on the same data source, each profile independently schedules calculations based on the Auto Refresh setting. You can have multiple calculation profiles set to automatically refresh on the same data source, and each one triggers calculations when new data is ingested.
Manage overlapping data in calculation profiles
When you run multiple calculation profiles with overlapping filters on the same data source, it's important to prevent double-counting emissions. Sustainability Manager avoids double-counting emissions by:
- Data deduplication: If calculation profile A runs before calculation profile B and they overlap in their data coverage, calculation profile B removes overlapping activities emissions before it recalculates them to avoid counting the same emissions twice.
- New emission calculation: After deduplication, calculation profile B generates fresh emissions data based on its specific filters.
To prevent double-counting, follow these guidelines:
- Carefully define filter criteria so you can avoid overlap.
- Coordinate with teams so you can ensure filters don't conflict.
- Regularly review and adjust calculation profiles to maintain accurate sustainability reporting.
Retry calculations
When calculations result in errors, Sustainability Manager automatically retries any failed activities with data validation errors after the initial calculation job completes.
If errors persist, you can manually retry calculations:
Ensure that your carbon activity data contains all required fields, including the data referenced in the calculation model. Also ensure the factor mappings are complete.
In the calculation profile, select a calculation job with errors, scroll to the bottom to the Calculation errors on latest job table, and select Retry job. Sustainability Manager retries all of the failed activities.
Note
You can only retry calculations on the entire calculation job, not a subset. If you select a subset of the records, the Retry job button disappears. To make it reappear, deselect all records.
You can rerun only the failed activities of the calculation job until all activities succeed. You can't retry calculations if your calculation model changes. In this case, you need to rerun the entire calculation profile.
Article history
| Date | Description of update |
|---|---|
| July 16, 12024 | Split this article apart from Create calculation models. Added information to Add a calculation profile about filtering to explain the options you need to use for filtering activity data. Added a note in Retry calculations explaining that you can only retry an entire job, not a subset of the records. |


