Create a Power Automate flow from scratch
Sign in to Power Automate to get started with Power Automate. To create a new flow from scratch, select Create in the menu on the left and click on the Automated flow tile.
Specify an event to start the flow
In this example, we will create a simple flow that will send an email if the inventory for a specific item goes below a certain quantity. First, enter the Flow name and then find the Business Central trigger in the Choose your flow's trigger field. Select the When a record is changed trigger for Business Central and click Create.
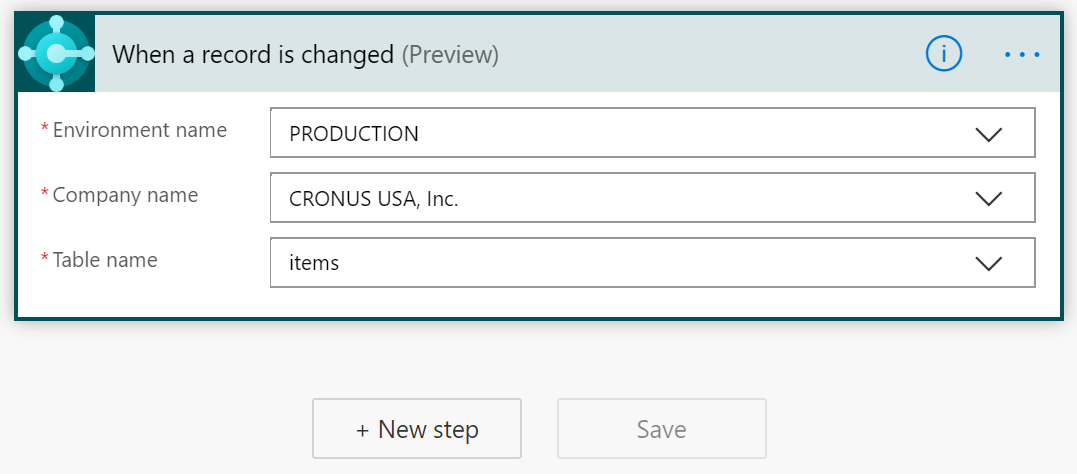
The system will create a new trigger as a first step when you create a flow. The Environment name is by default populated with the value PRODUCTION, but you can change it to SANDBOX (if you have a sandbox environment in Business Central). Next, you need to select the Company name. Choose the company you want to use. We want to check the inventory, so let's select Items in Table name.
Specify an action
To continue with adding an action, click the +New step command. Watch the following demonstration on how to create an action in Power Automate.


