Note
Access to this page requires authorization. You can try signing in or changing directories.
Access to this page requires authorization. You can try changing directories.
Use this guide to convert one or more canvas apps into a single custom-branded app package that you can deploy on Google Play and the iOS App Store.
The wrap feature in Power Apps enables you to create native mobile versions of your canvas apps as custom-branded Android and iOS mobile apps (IPA, APK, AAB packages). You can distribute these wrapped native mobile apps to end users through Google Play, Apple Business Manager, or other native distribution methods.
When you update and republish your app, the wrapped app is automatically updated for users.
Steps to create a custom-branded native app using the wrap wizard
1. Sign in and start a wrap project
- Go to the Power Apps maker portal.
- Select Wrap from the left navigation pane. If the item isn’t in the side panel pane, select …More and then select the item you want.
- Select the app you want to wrap, then select Wrap on the command bar.
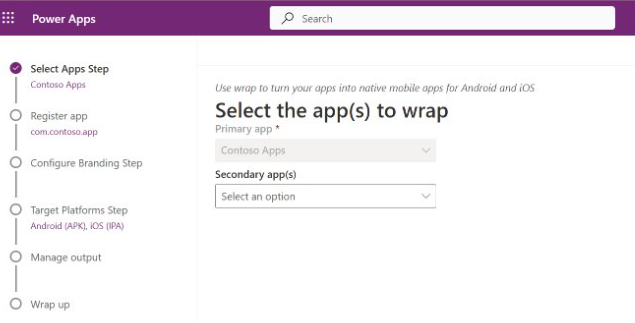
2. Select apps
On the Select the app(s) to wrap screen, choose your primary app (the main app users see at launch) and any optional secondary apps to bundle.
- Primary app: The main app users see when the mobile app launches.
- Secondary app(s): Optional additional apps bundled in the same mobile app package.
Note
- You can use the same primary app in multiple wrap projects.
- If the primary app name appears incorrect, proceed to the next step and return to refresh the name.
Select Next.

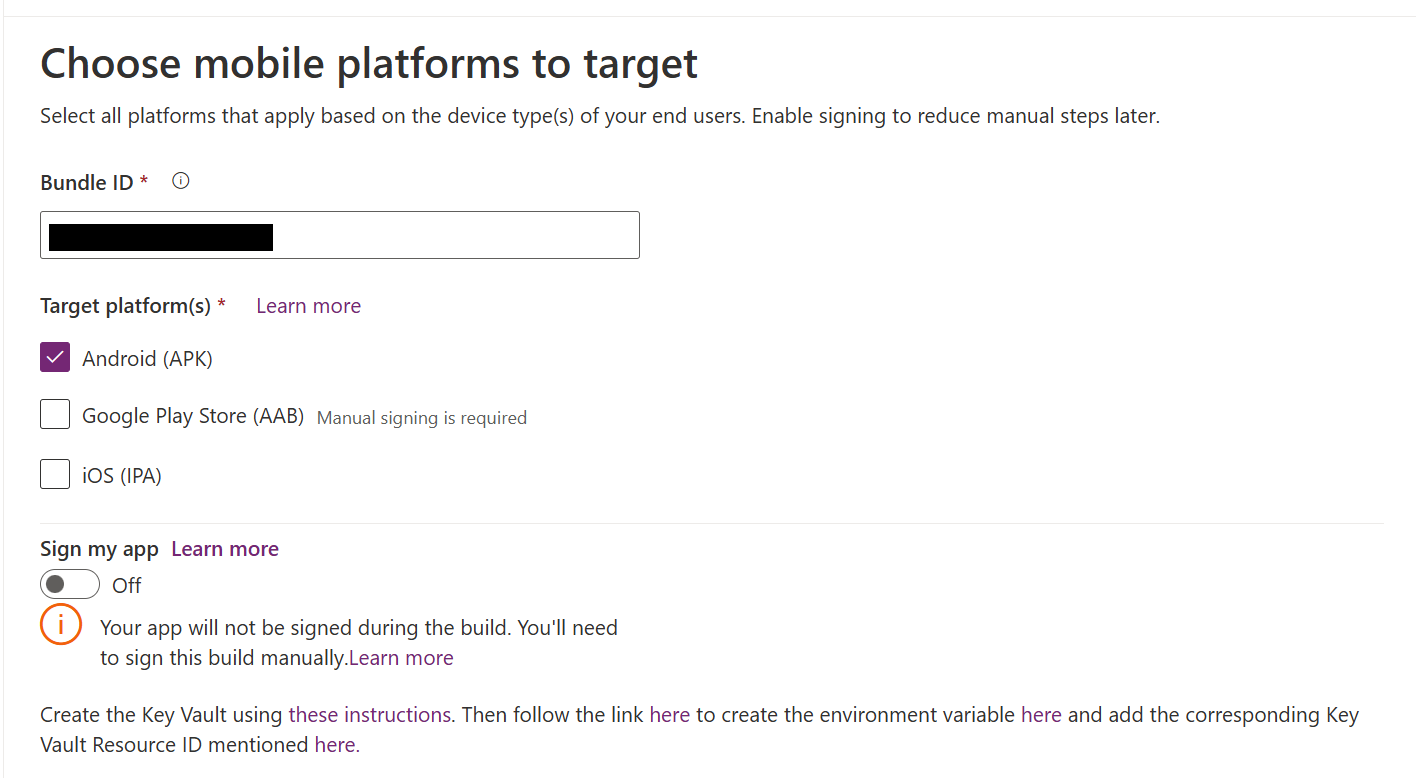
3. Choose target platform
On the Choose mobile platform to target screen, enter a Bundle ID.
Note
The Bundle ID is a unique identifier for your app. It must contain one period (.) and no spaces. Use this same bundle ID when creating the Azure key vault after generating and uploading your iOS or Android certificates. If you have already created the Azure Key Vault, verify the bundle ID in the Tags section of the Azure portal.
Under Target platform(s), select all the mobile platforms your users need.
Select the Azure Key Vault URI from the list.
If you do not see any entries, create an Azure key vault.Create an Azure blob storage account and container if you have not already:
- More information: Create an Azure storage account
- Tutorial video: How to create a storage account
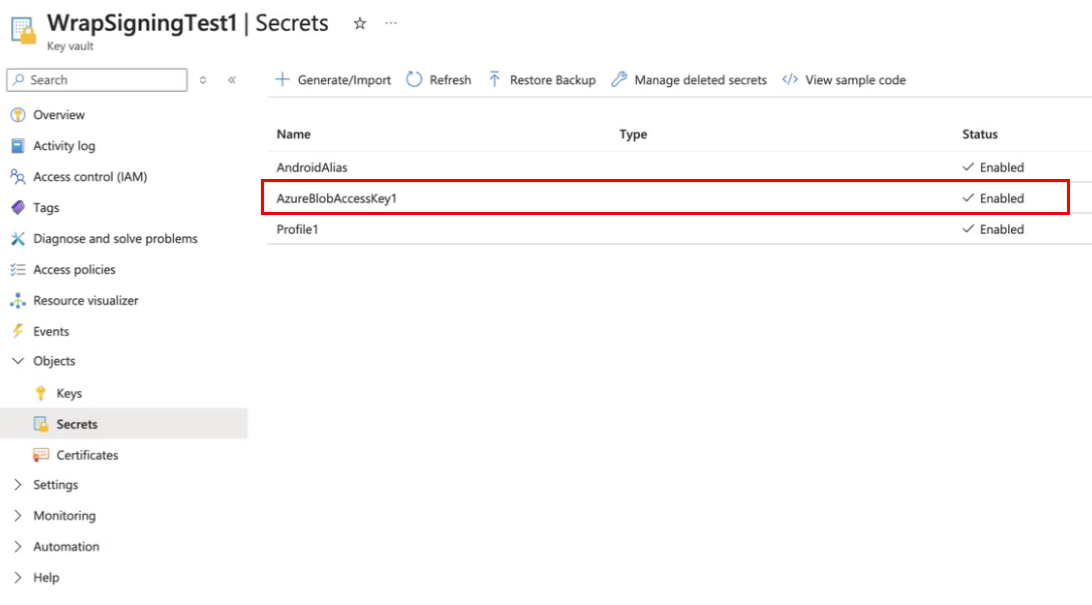
In your key vault in the Azure portal:
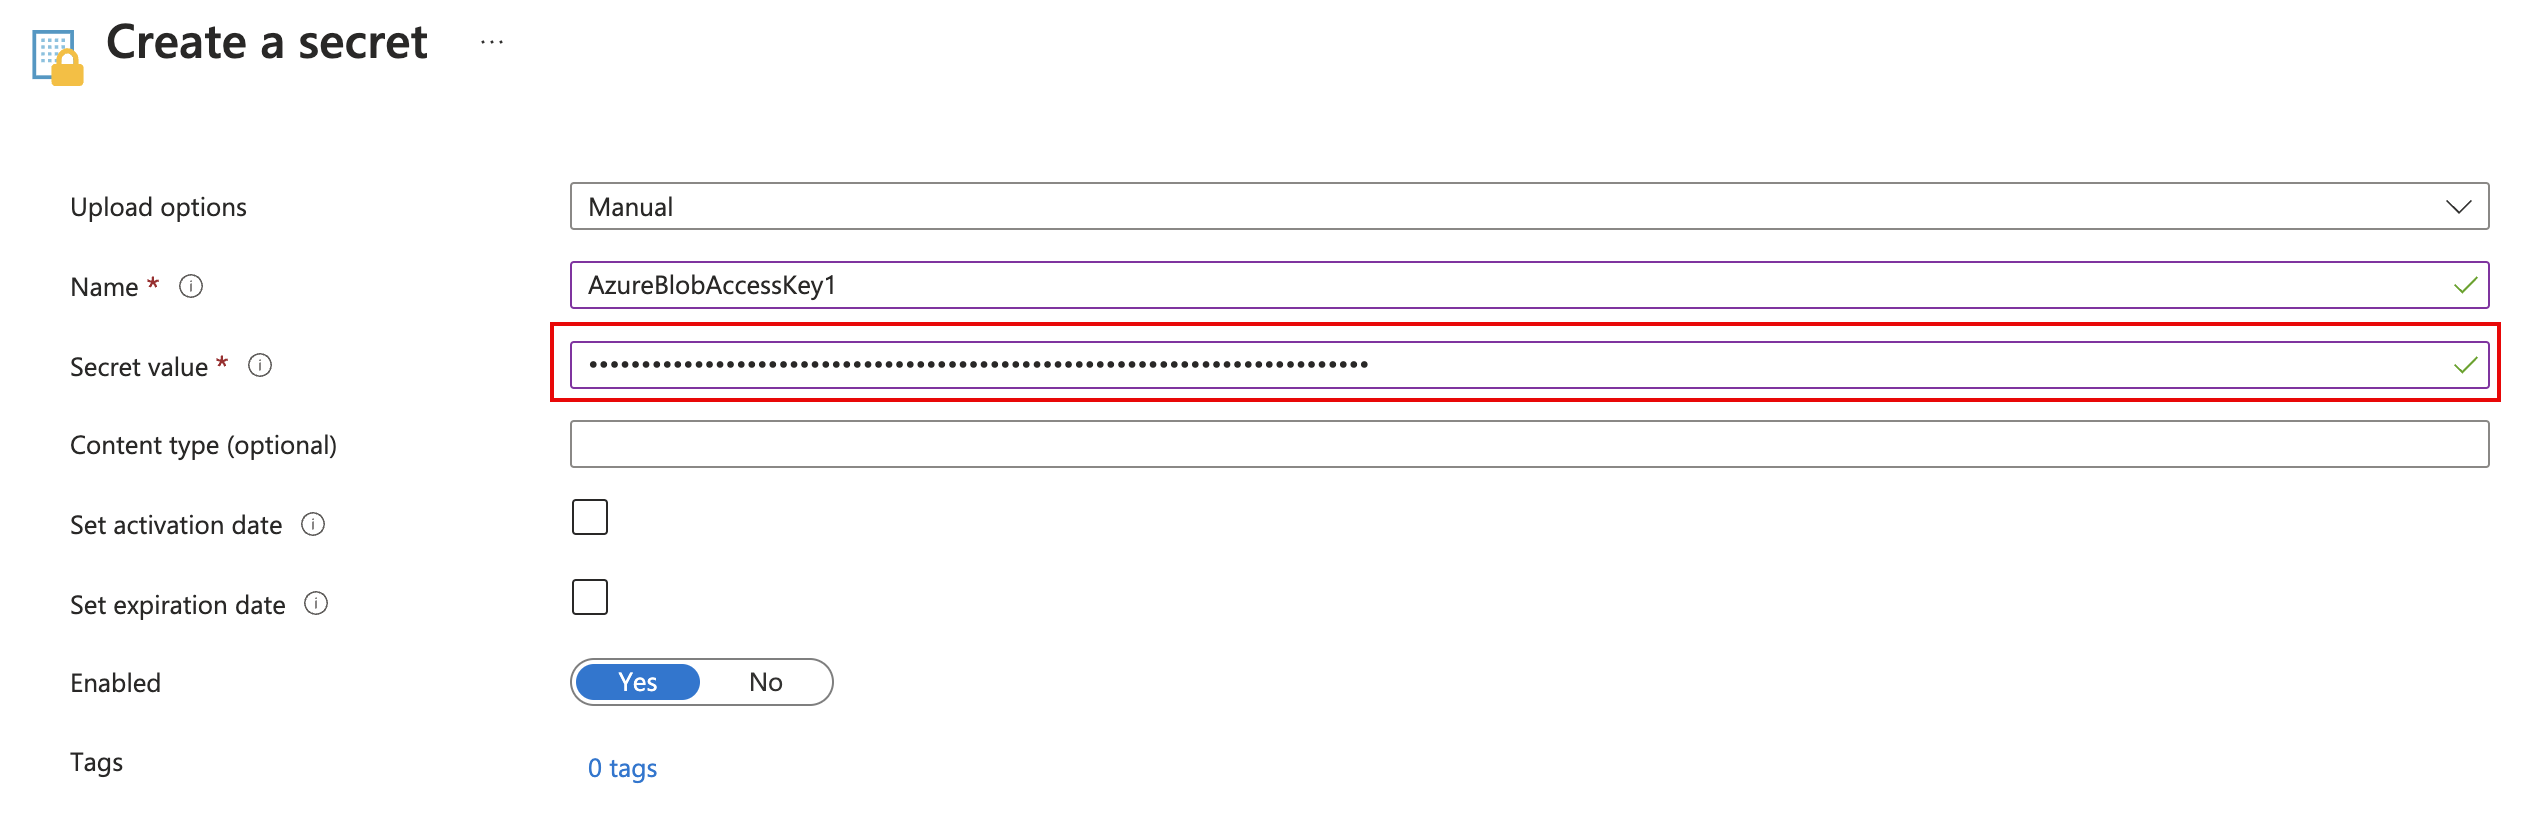
a. Go to Secrets to create a secret for your Azure blob storage access key.
- More information: Add a secret to Key Vault
- To view and copy your access key: View account access keys
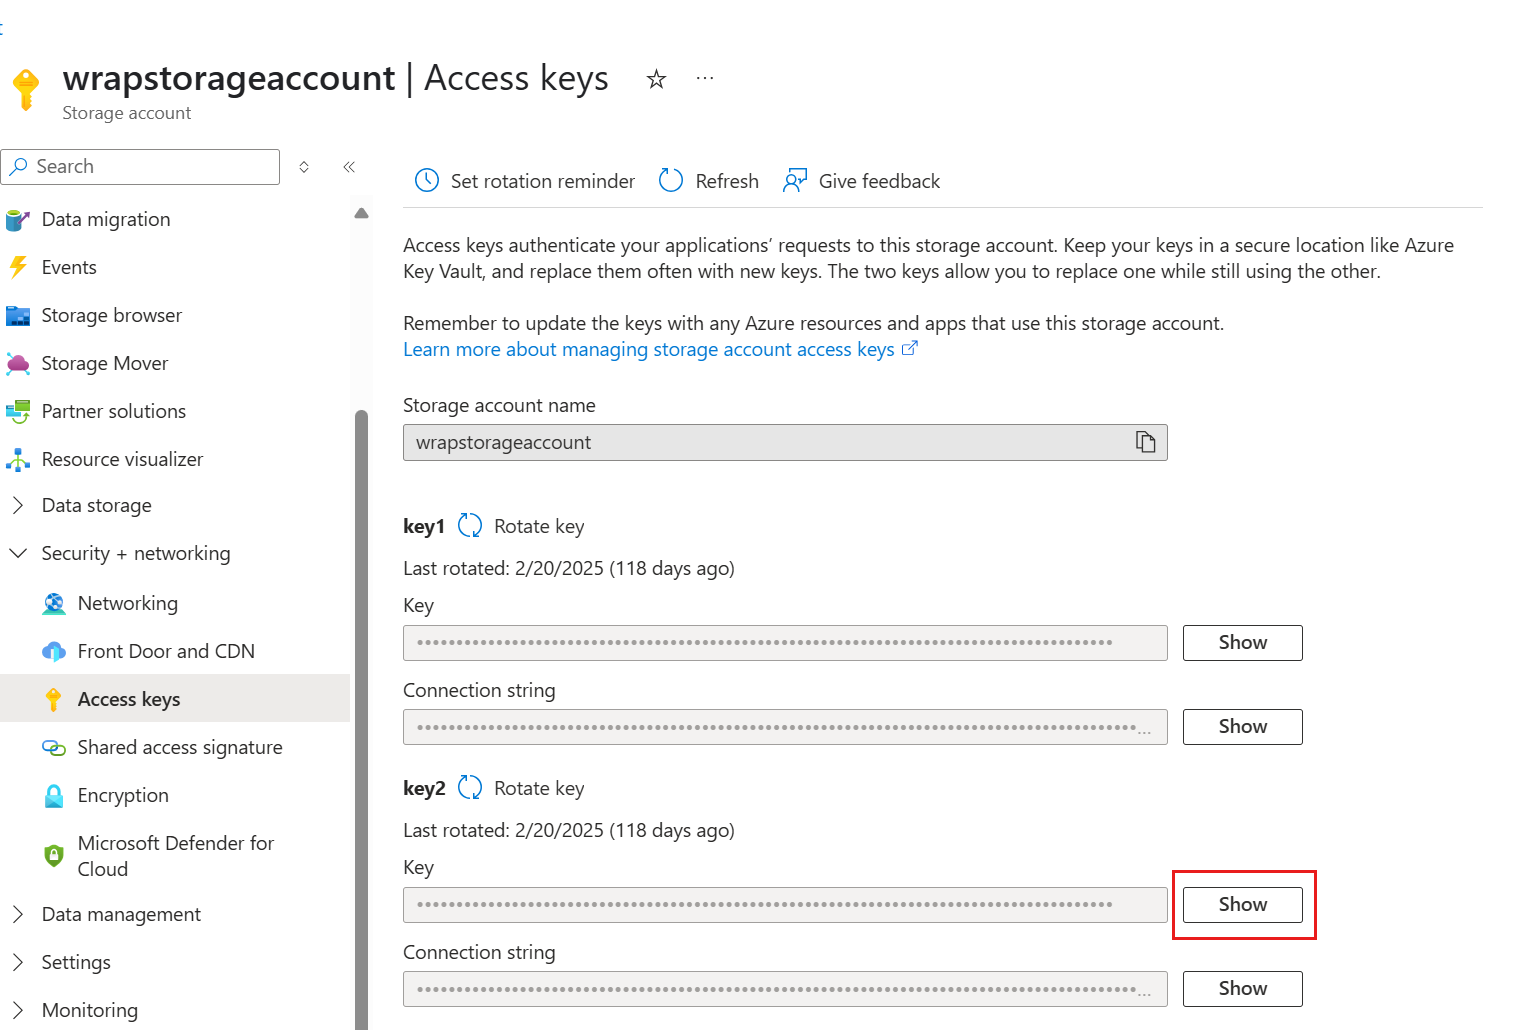
b. Enter the Azure blob storage access key in the Secret value field.
- More information: Add a secret to Key Vault
In your key vault, go to Tags and create a new tag with the same secret value as above.

Set the Sign my app toggle to On or Off:
- If On: Follow the steps in Steps for automated code signing
- If Off: You'll need to perform manual signing later
Note
Manual signing options:
You must manually sign AAB files regardless of the signing option selected in the wizard.
Select Next.


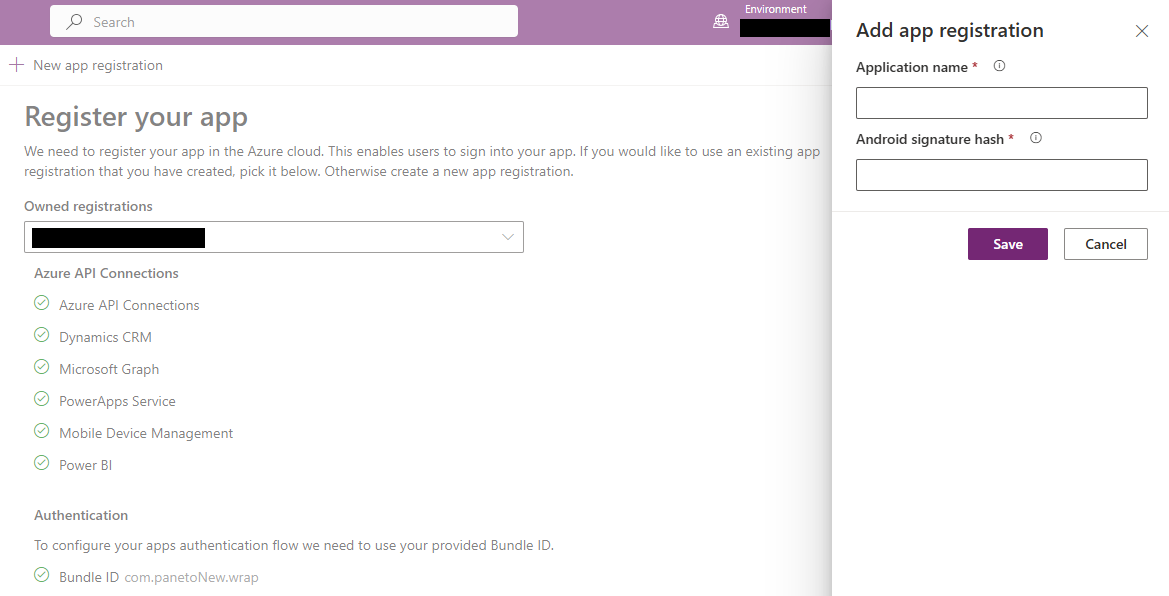
4. Register your app
On the Register your app screen, register your application in Azure to establish trust with the Microsoft identity platform.
If you have already registered an app:
- Find your registration in the owned registration field.
If you do not see your registered app:
Select New app registration to create a new registration.
Provide:
- Application name: The customer-facing name of your app
- Android signature hash (if targeting Android): A 28-character alphanumeric string
In the Microsoft Entra admin center, go to App registrations and select your app. In the Essentials section, locate Supported account types, set it to Accounts in any organizational directory (Any Microsoft Entra directory - Multitenant).
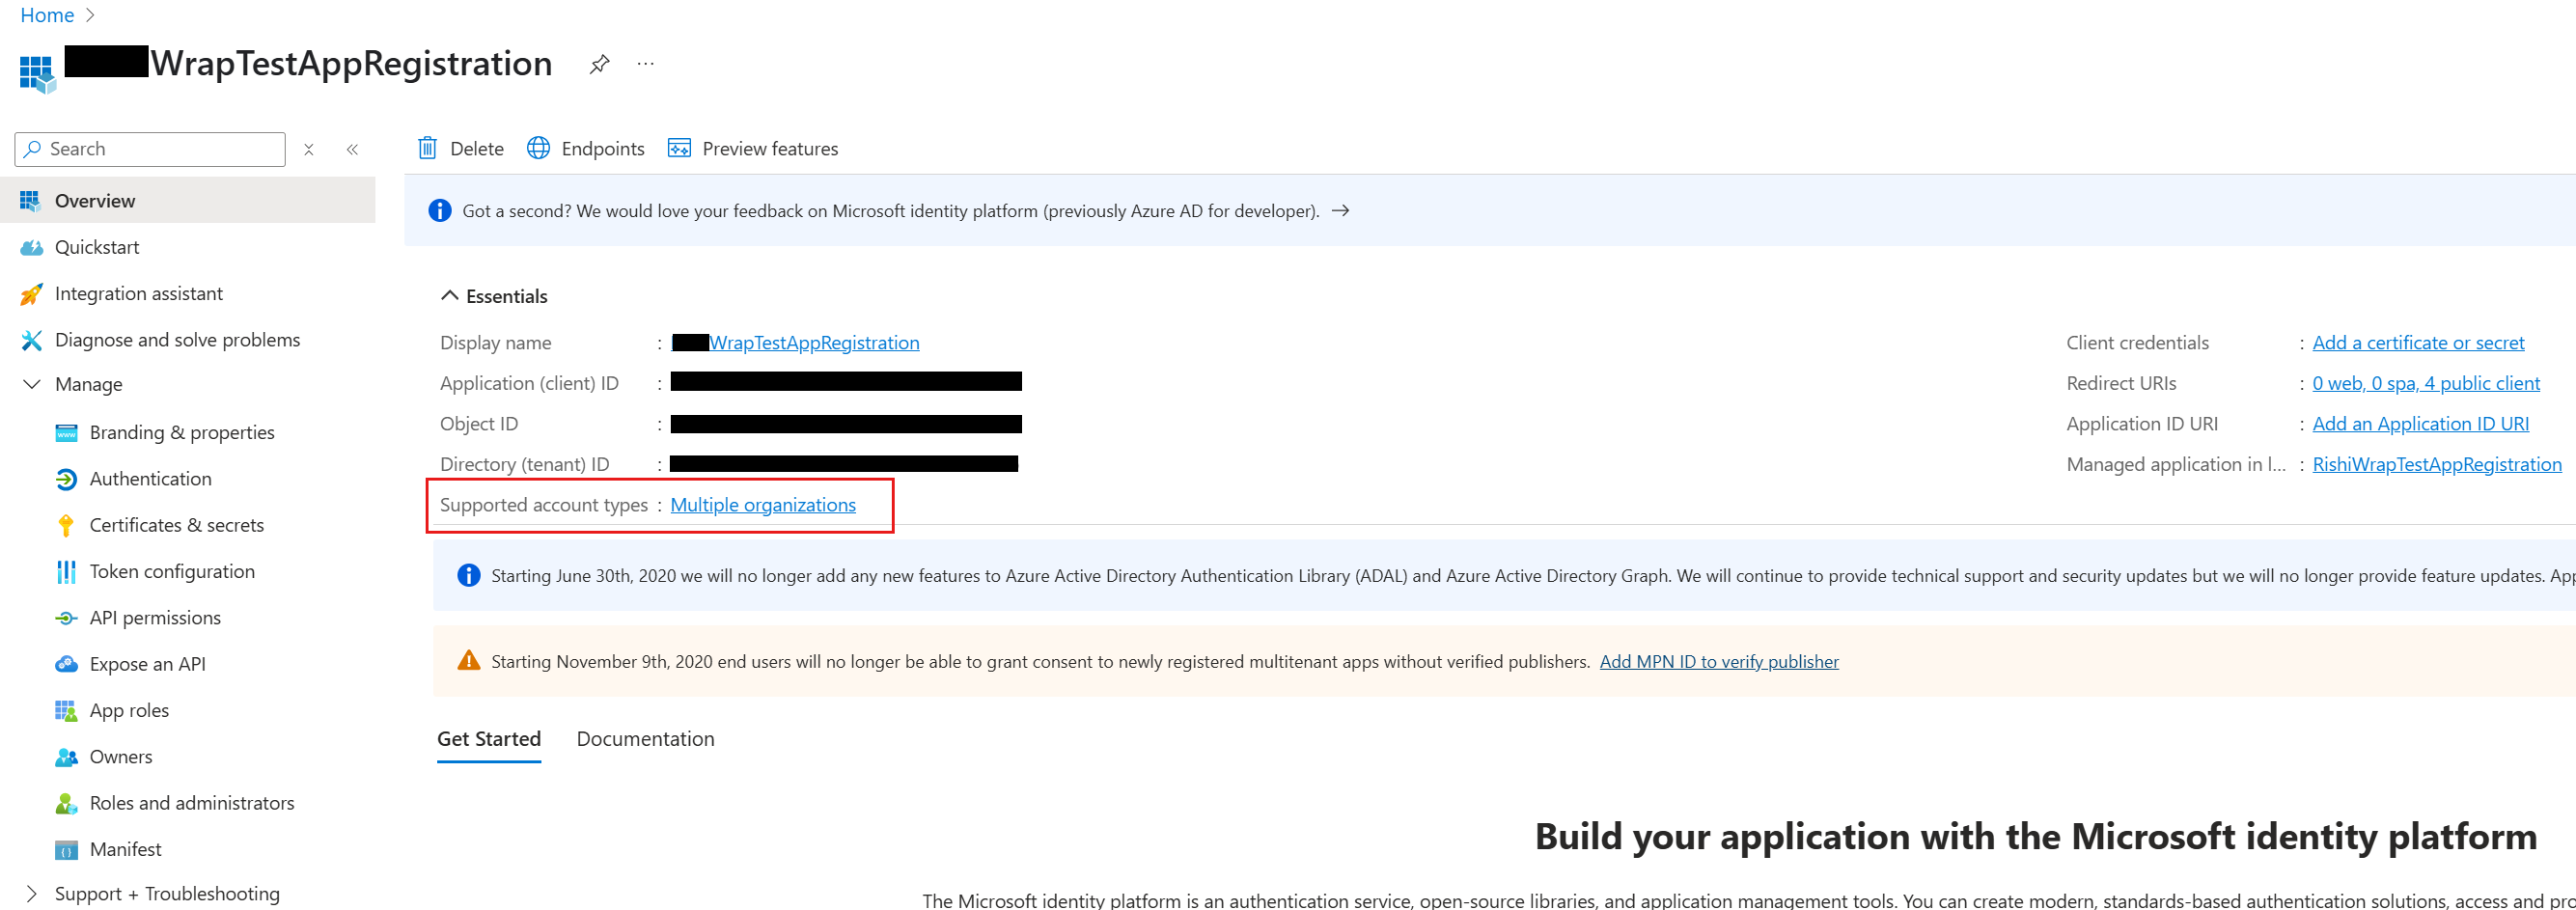
Save your changes.
Note
If the signature hash key already exists, you can reuse it.


Configure admin allowed third-party apps as an azure tenant admin
The wrap wizard configures required API permissions automatically. To grant admin access:
- Open Windows PowerShell as administrator.
- Run these commands:
Install-Module -Name Microsoft.PowerApps.Administration.PowerShell -AllowClobber -Force Set-ExecutionPolicy -ExecutionPolicy RemoteSigned Import-Module -Name Microsoft.PowerApps.Administration.PowerShell Add-AdminAllowedThirdPartyApps Get-AdminAllowedThirdPartyApps - Provide the App ID when prompted.
After completing these steps, the registration screen will look like this:

Grant API permissions as an Azure tenant admin
Azure admin grants API permissions during registration. Make sure DeviceManagementManagedApplication is set to Yes when you grant admin consent for your app. For more information, see Grant tenant-wide admin consent in Enterprise apps pane.

Run these PowerShell commands as an Azure admin If you don't see permissions under APIs my organization uses
Ensure the module Microsoft Graph is available or install it:
Install-Module -Name Microsoft.GraphGrant Azure API Connections permission for the static AppId fe053c5f-3692-4f14-aef2-ee34fc081cae
Connect-MgGraph -TenantId <your tenant ID>
New-MgServicePrincipal -AppId fe053c5f-3692-4f14-aef2-ee34fc081cae -DisplayName "Azure API Connections"
Grant PowerApps Service permission for the static AppId 475226c6-020e-4fb2-8a90-7a972cbfc1d4
Connect-MgGraph -TenantId <your tenant ID>
New-MgServicePrincipal -AppId 475226c6-020e-4fb2-8a90-7a972cbfc1d4 -DisplayName "PowerApps Service"
Note
If only the Application name field is visible, continue to the next steps and select Android as a target platform to display the signature hash field.
Configure API permissions manually (optional)
If you get errors, manually configure API permissions. For more information, see Add and configure.
Required API permissions
| API Type | Specific API | Reason |
|---|---|---|
| Microsoft APIs | Dynamics CRM | The application needs user_impersonation to call Dataverse for the user. |
| APIs my organization uses | Azure API Connections | The application needs Runtime.All to call any connector from Power Platform. |
| APIs my organization uses | PowerApps Service | The application needs the User permission to contact Power Apps backend services from Power Platform. |
| APIs my organization uses | Power BI | The application needs Power BI permissions to access or embed Power BI content. |
| APIs my organization uses | Microsoft Mobile Application Management | The application needs this permission because Power Apps uses Intune SDK internally. |
For detailed steps, see Request the permissions in the app registration portal.
Add Redirect URIs as an app admin
- In Azure Portal, go to your app registration > Authentication.
- Select Add a platform and choose iOS or Android.
- For iOS, enter the Bundle ID.
For Android, enter both the Bundle ID and Signature hash key.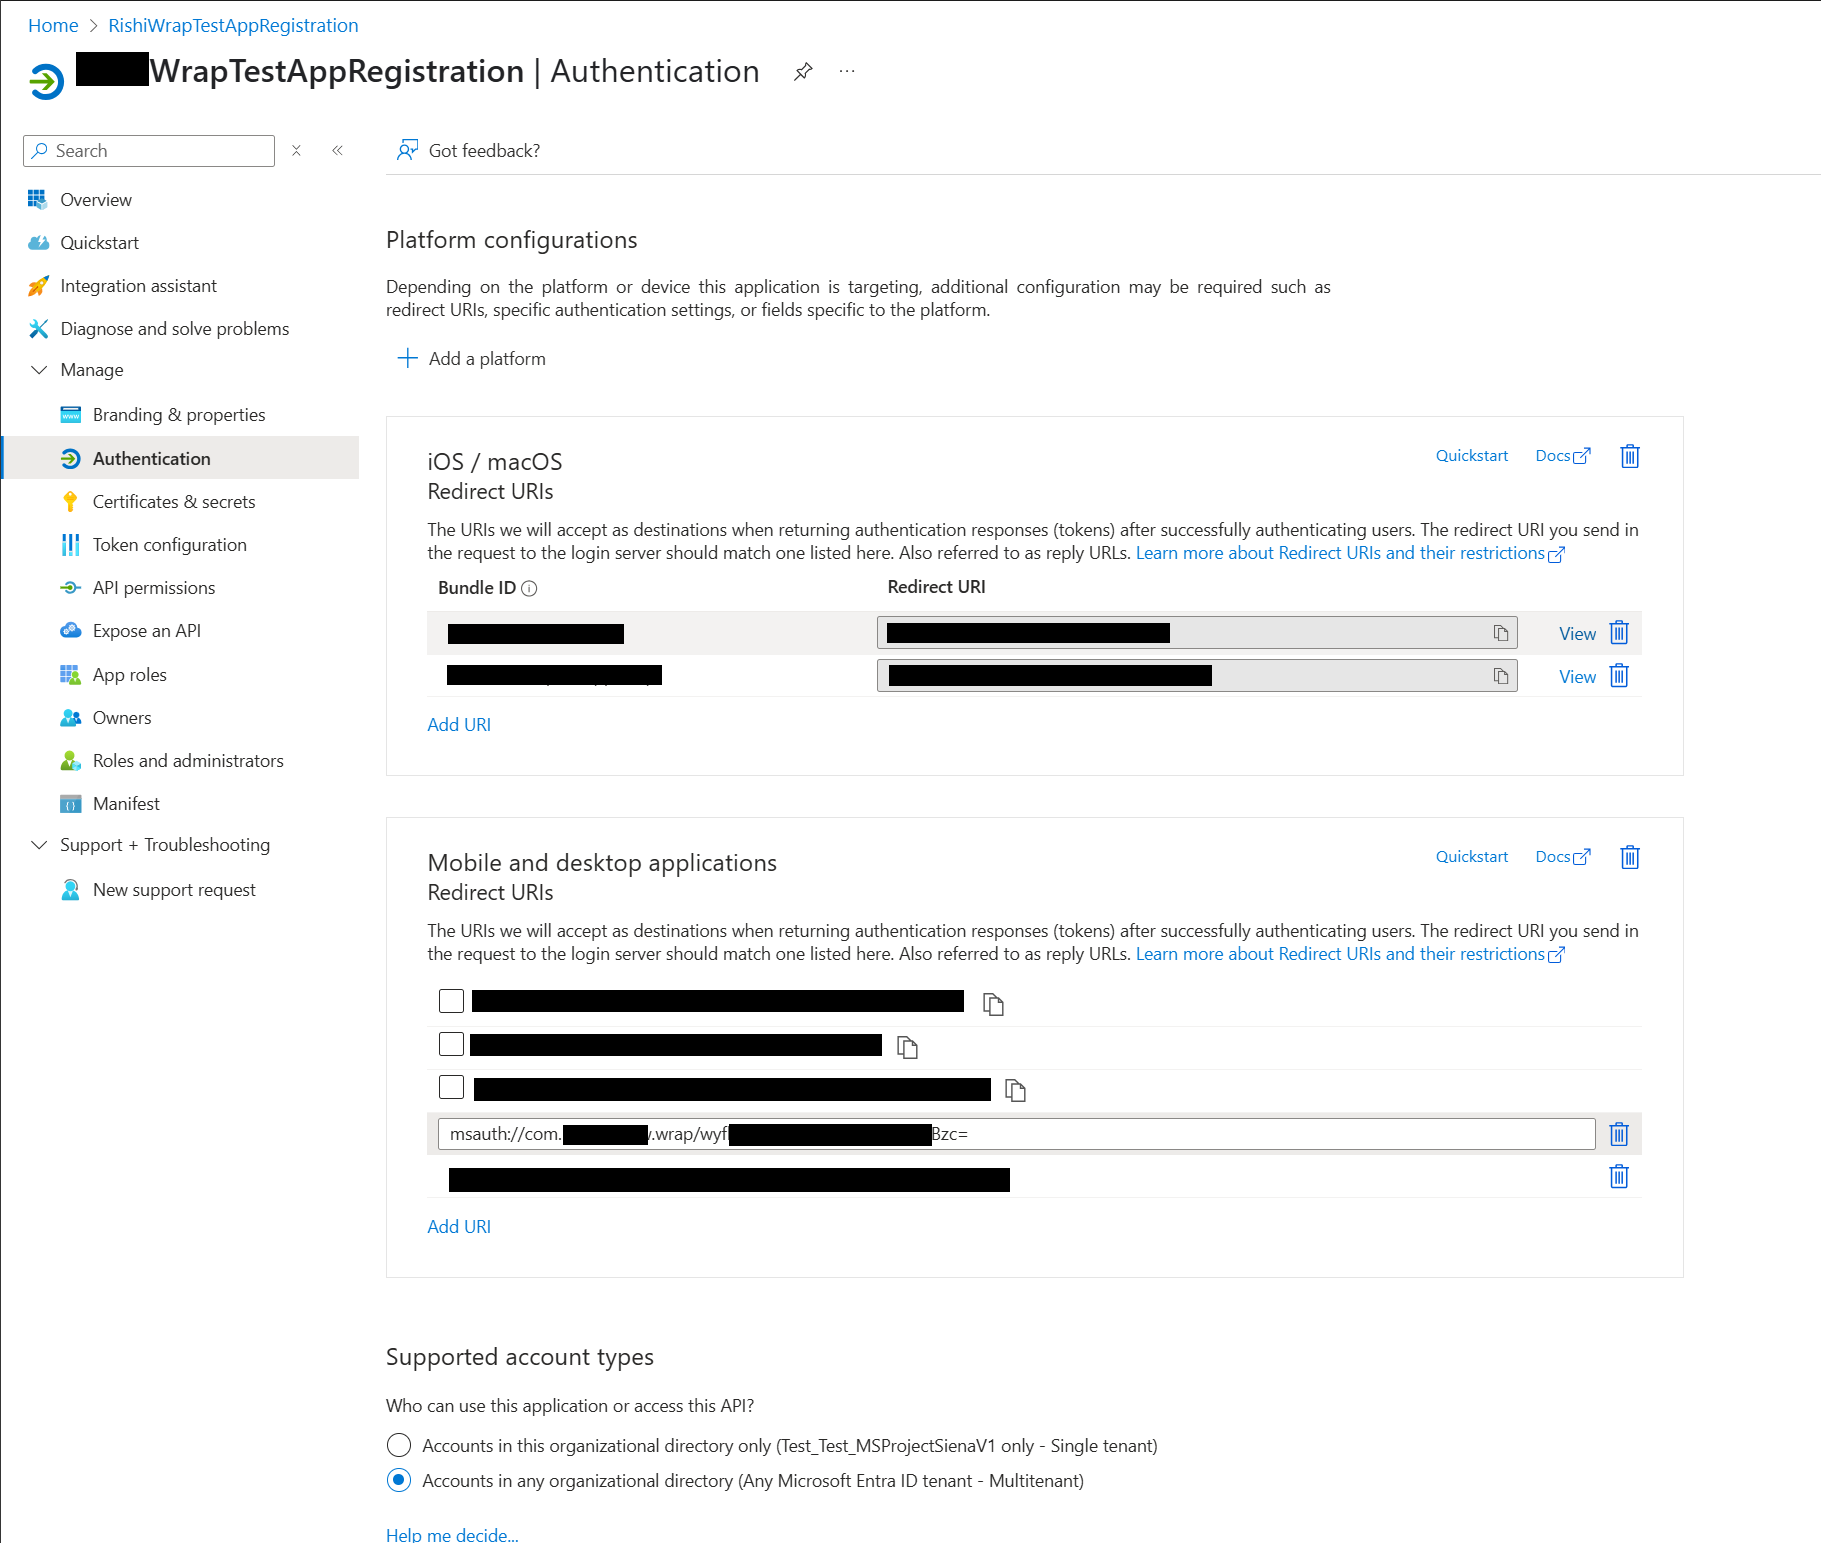

5. Configure branding
- On the Configure Branding step, set the following options for your app:
Note
All images must be in .png format. Default images will be used if no custom images are selected.
| Setting | Description | Requirements |
|---|---|---|
| App icons | Icons for your app | iOS: 1024x1024 px or larger Android: 432x432 px or larger |
| Splash screen image | Image shown while the app loads | .png format |
| Welcome screen image | Image shown on the sign-in screen | .png format |
| Background fill color | Color for welcome screen background | Hexadecimal color code |
| Button fill color | Color for buttons | Hexadecimal color code |
| Status bar text theme | Color for the status bar text | Light or Dark |
- Select Next.
6. Manage output
- Enter your Azure blob storage account name and container name.
- After the build completes, download your APK or IPA from the Azure blob storage location.

7. Wrap up and build
- On the Wrap up screen, review your app details and select Build.
- After a successful build, your app package will be available in the Azure blob storage you specified.
View your build
You can view your build in several ways:
- After building, select View Builds
- Go to Wrap projects in the side pane, hover over the required project, and select it
- Select the View builds option in the top header

Note
To manually code sign an iOS app, unzip the IPA file using a Mac device.
Test and distribute your app
Test your app and distribute it as needed. If you encounter issues, see the troubleshooting page.
Register your app on Azure portal manually (optional)
You can create your app registration automatically in the wizard or manually in Azure. More information: Quickstart: Register an application with the Microsoft identity platform.
Note
Both single tenant and multitenant customers can use wrap to create native mobile apps based on their Power Apps canvas apps.
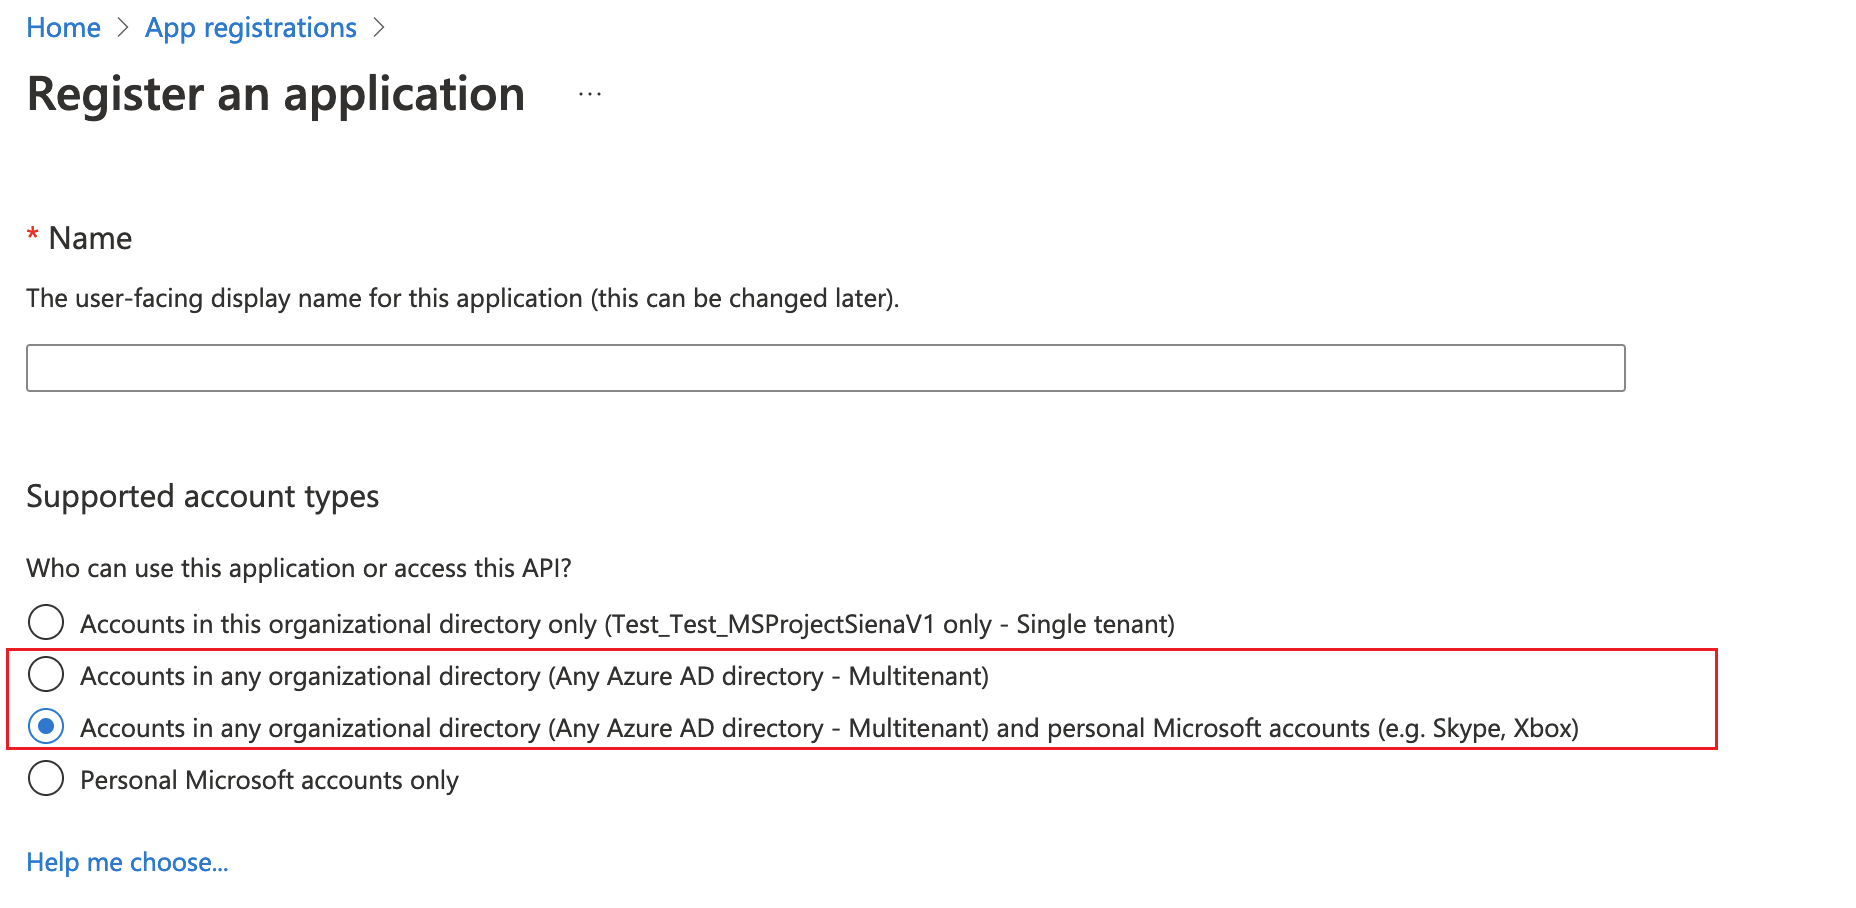
When registering, select an account type containing Any Microsoft Entra directory - Multitenant:
- Accounts in any organizational directory (Any Microsoft Entra directory - Multitenant)
- Accounts in any organizational directory (Any Microsoft Entra directory - Multitenant) and personal Microsoft accounts such as Skype or Xbox
Important
- Wrap only supports Multitenant account types currently. The single tenant account type is not yet supported. More information: Account types in Microsoft identity platform.
- You must create a separate Redirect URI for each platform (iOS, Android).
Sign your mobile app package manually (optional)
You can sign your app automatically in Step 2 or manually after building. Code signing is different for Android and iOS.
Advantages of automatic signing for iOS and Android (APK):
- You don't need to repeat the signing process during rewrapping.
- You don't have to wait for app developers to finish the process.
- You don't need to set up Android Studio or remember passwords.
- You don't need a Mac device for iOS signing.
| Platform | Signing Method |
|---|---|
| iOS | Manual code sign for iOS |
| Android | Manual code sign for Android |
| Google Play Store | Code signing for Google Play Store |