Exercise - Enable and configure Azure VM disk cache with the Azure portal
Suppose you run a photo-sharing site with data stored on Azure virtual machines (VMs) running SQL Server and custom applications. You want to make the following adjustments:
- Change the disk cache settings on a VM.
- Add a new data disk to the VM with caching enabled.
You decide to make these changes through the Azure portal.
In this exercise, we walk through how to make these changes to a VM. First, let's sign in to the Azure portal and create a VM.
Create a virtual machine
In this step, we create a VM.
Sign in to the Azure portal using the same account you used to activate the sandbox.
On the Azure portal menu or from the Home page, select Create a resource under Azure services. The Create a resource pane appears.
Search for and select Windows Server using the Search services and marketplace box on the top of the screen.
Select Windows Server in the search results, then select Windows Server 2019 Datacenter in the Plan drop-down. Select Create. The Create a virtual machine pane appears.
On the Basics tab, enter the following values for each setting.
Setting Value Project details Subscription Concierge Subscription Resource group From the dropdown list, select [sandbox resource group name] Instance details Virtual machine name Enter fotoshareVM Region See the following list. Select a location close to you. Availability options Leave as default Image Select Windows Server 2019 Datacenter VM architecture Select x64 Size Accept the default Standard_DS1-v2, which gives you a single CPU and 3.5 GB of memory. That's fine for this example. Administrator account Username Enter unique username for admin account on the new VM. Password/Confirm password Enter unique password for admin account on the new VM. The free sandbox allows you to create resources in a subset of the Azure global regions. Select a region from the following list when you create resources:
- West US 2
- South Central US
- Central US
- East US
- West Europe
- Southeast Asia
- Japan East
- Brazil South
- Australia Southeast
- Central India
Accept the defaults for the remaining tabs and fields, and select Review + create.
After reviewing your new VM settings, select Create to start the deploying your new VM.
VM creation can take a few minutes because it creates all the various resources (storage, network interface, and so on) to support the VM. Wait until the VM is deployed before continuing with the exercise.
View OS disk cache status in the portal
After our VM is deployed, we can confirm the caching status of the OS disk with the following steps:
Select Go to resource. The fotoshareVM pane for your virtual machine appears, showing the VM details in the portal. Alternatively, you can select All resources and select your VM, fotoshareVM.
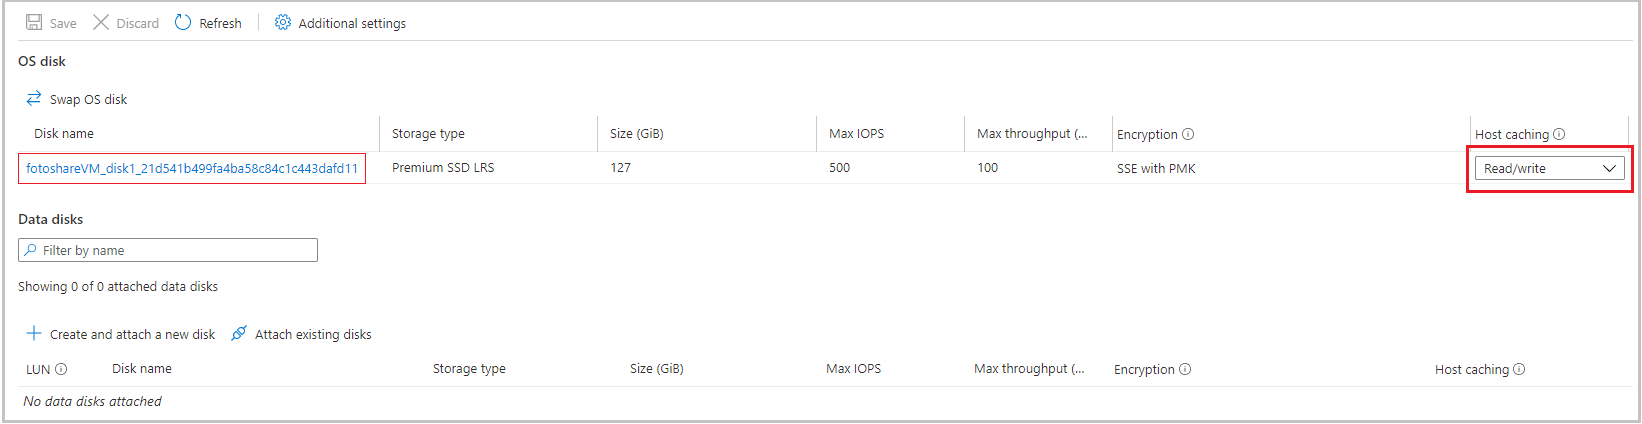
In the left menu pane, under Settings, select Disks. The Disks pane appears for the fotoshareVM virtual machine.
The VM has one disk - the OS disk. Its cache type is currently set to the default value of Read/write.
Change the cache settings of the OS disk in the portal
From the dropdown list, change the Host caching value for the OS disk to Read-only and select Apply at the bottom of the page.
This update can take some time, because changing the cache setting of an Azure disk detaches and reattaches the target disk. If it's the operating system disk, the VM also restarts. When the operation completes, you get a notification saying the VM disks are updated. Check the Notifications icon in the top taskbar of the portal for confirmation.
After completion, the OS disk cache type is set to Read-only.
Let's move on to data disk cache configuration. To configure a disk, we first need to create one.
Add a data disk to the VM and set caching type
Under Data disks, select Create and attach a new disk.
In the Disk name field, enter fotoshareVM-data.
Note the defaults for the remaining fields:
- Storage type: Premium SSD
- Size (GiB): 4
- Max IOPS: 120
- Max throughput MBps): 25
Select Apply at the bottom of the page.
Wait until the disk is created before continuing.
From the dropdown list, change the Host caching value for our new data disk to Read-only. Then, select Apply at the bottom of the page.
Wait for the VM to finish updating the new data disk. After completion, you have a new data disk on your VM.
In this exercise, we used the Azure portal to configure caching on a new VM, change cache settings on an existing disk, and configure caching on a new data disk. The following screenshot shows the final configuration.
