Create and use an Azure Compute Gallery using the portal
An Azure Compute Gallery simplifies sharing resources, like images and application packages, across your organization.
The Azure Compute Gallery lets you share custom VM images and application packages with others in your organization, within or across regions, within a tenant. Choose what you want to share, which regions you want to make them available in, and who you want to share them with. You can create multiple galleries so that you can logically group resources.
The gallery is a top-level resource that can be shared in multiple ways:
| Share with: | Option |
|---|---|
| Specific people, groups, or service principals | Role-based access control (RBAC) lets you share resources to specific people, groups, or service principals on a granular level. |
| Subscriptions or tenants | Direct shared gallery (preview) lets you share to everyone in a subscription or tenant. |
| Everyone | Community gallery (preview) lets you share your entire gallery publicly, to all Azure users. |
Naming
Allowed characters for gallery name are uppercase or lowercase letters, digits, dots, and periods. The gallery name can't contain dashes. Gallery names must be unique within your subscription.
Create a private gallery
- Sign in to the Azure portal at https://portal.azure.com.
- Type Azure Compute Gallery in the search box and select Azure Compute Gallery in the results.
- In the Azure Compute Gallery page, click Add.
- On the Create Azure Compute Gallery page, select the correct subscription.
- In Resource group, select a resource group from the drop-down or select Create new and type a name for the new resource group.
- In Name, type a name for the name of the gallery.
- Select a Region from the drop-down.
- You can type a short description of the gallery, like My gallery for testing. and then click Review + create.
- After validation passes, select Create.
- When the deployment is finished, select Go to resource.
Create a direct shared gallery
Important
Azure Compute Gallery – direct shared gallery is currently in PREVIEW and subject to the Preview Terms for Azure Compute Gallery.
During the preview, you need to create a new gallery, with the property sharingProfile.permissions set to Groups. When using the CLI to create a gallery, use the --permissions groups parameter. You can't use an existing gallery, the property can't currently be updated.
Sign in to the Azure portal at https://portal.azure.com.
Type Azure Compute Gallery in the search box and select Azure Compute Gallery in the results.
In the Azure Compute Gallery page, click Add.
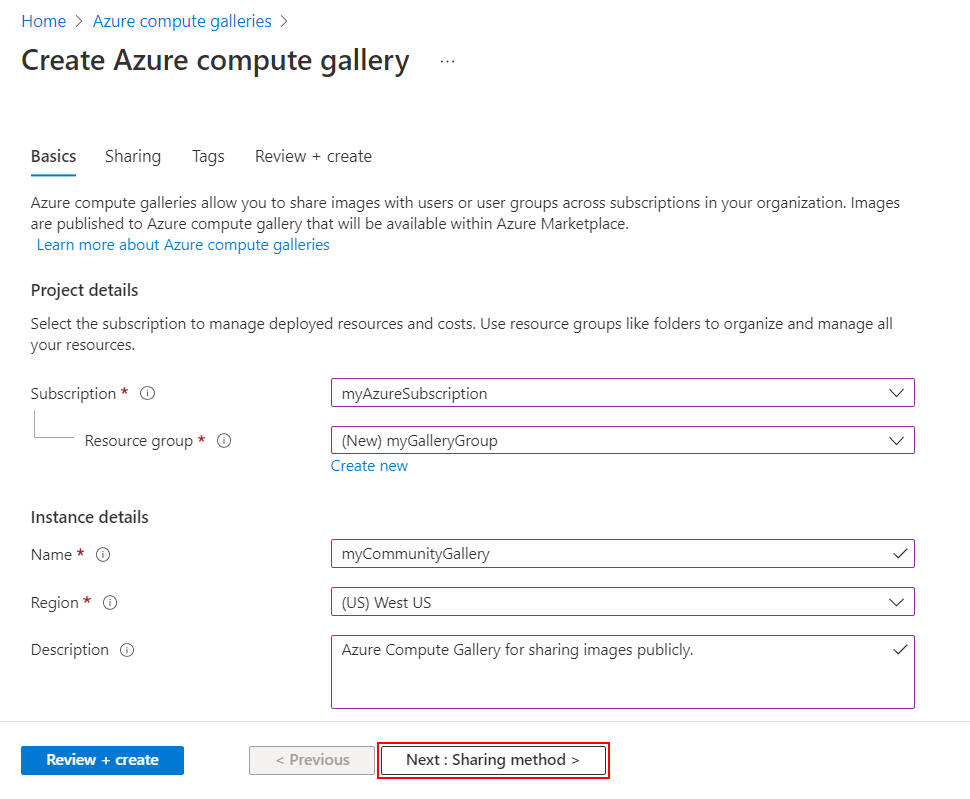
On the Create Azure Compute Gallery page, select the correct subscription.
Complete all of the details on the page.
At the bottom of the page, select Next: Sharing method.

On the Sharing tab, select RBAC + share directly.
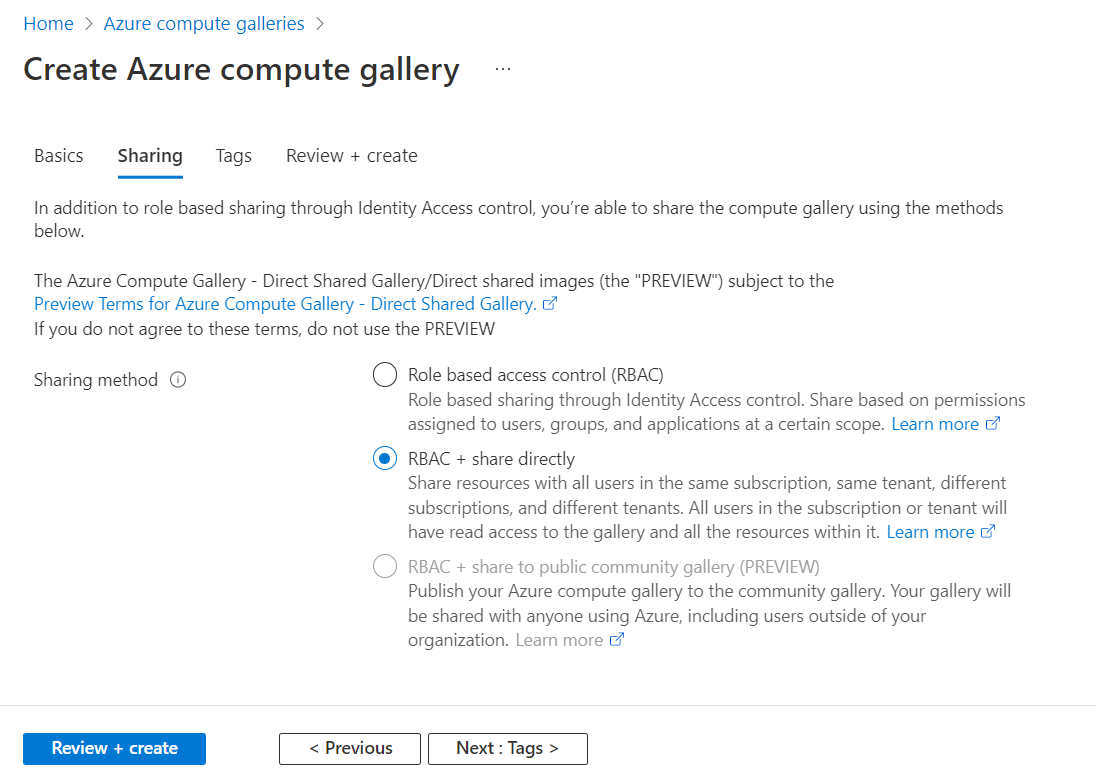
When you're done, select Review + create.
After validation passes, select Create.
When the deployment is finished, select Go to resource.
Create a community gallery
A community gallery is shared publicly with everyone. To create a community gallery, you create the gallery first, then enable it for sharing. The name of public instance of your gallery will be the prefix you provide, plus a unique GUID.
During the preview, make sure that you create your gallery, image definitions, and image versions in the same region in order to share your gallery publicly.
Important
Azure Compute Gallery – community galleries is currently in PREVIEW and subject to the Preview Terms for Azure Compute Gallery - community gallery.
When creating an image to share with the community, you'll need to provide contact information. This information will be shown publicly, so be careful when providing:
- Community gallery prefix
- Publisher support email
- Publisher URL
- Legal agreement URL
Information from your image definitions will also be publicly available, like what you provide for Publisher, Offer, and SKU.
Considerations
The owner of a subscription, or a user or service principal assigned to the Compute Gallery Sharing Admin role at the subscription or gallery level, can enable a gallery to go public to the community.
Making a community gallery available to all Azure users is a two-step process. First you create the gallery with community sharing enabled, when you're ready to make it public, you share the gallery.
Sign in to the Azure portal at https://portal.azure.com.
Type Azure Compute Gallery in the search box and select Azure Compute Gallery in the results.
In the Azure Compute Gallery page, click Add.
On the Create Azure Compute Gallery page, select the correct subscription.
In Resource group, select Create new and type myGalleryRG for the name.
In Name, type myGallery for the name of the gallery.
Leave the default for Region.
You can type a short description of the gallery, like My gallery for testing.
At the bottom of the page, select Next: Sharing method.
On the Sharing tab, select RBAC + share to public community gallery.
For Community gallery prefix type a prefix that will be appended to a GUID to create the unique name for your community gallery.
For Publisher email type a valid e-mail address that can be used to communicate with you about the gallery.
For Publisher URL, type the URL for where users can get more information about the images in your community gallery.
For Legal Agreement URL, type the URL where end users can find legal terms for the image.
When you're done, select Review + create.
After validation passes, select Create.
When the deployment is finished, select Go to resource.
To see the public name of your gallery, select Sharing in the left menu.