Create a workflow manually
In Dynamics 365 Business Central, a workflow consists of three different components:
Workflow event - An event or action that occurs within the system that will trigger a response.
Workflow condition - The condition that moderates the workflow event that you specified in the When Event field. When you select the field, the Event Conditions window opens in which you can specify condition values for predefined lists of relevant fields.
Workflow response - The actions that will be performed by the system when an event occurs that meets the predefined condition.

To create a new workflow from the beginning, you need to create a workflow by listing the involved steps on the Workflow page. Each step consists of a workflow event, which is moderated by event conditions, and a workflow response, which is moderated by response options. You will then define workflow steps by filling in fields on workflow lines from lists of event and response values that represent scenarios that are supported by the system.
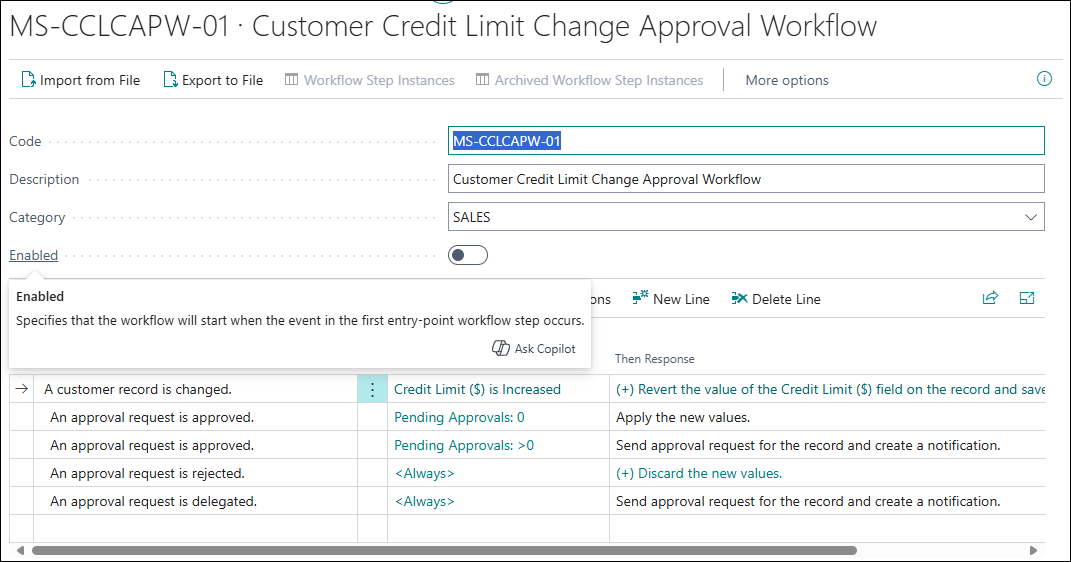
The following procedure shows how to create a workflow to notify a user when a customer credit limit is changed.
Select the search for page icon in the upper-right corner of the page, enter workflows, and then select the related link.
Select New.
In the Code field, enter a maximum of 20 characters to identify the workflow. For this example, you can enter US-CUSTLIM_01.
In the Description field, enter Notify on customer credit limit change.
In the Category field, specify the type of workflow. Select the Look up value to select a category. For this example, select SALES.
In the When Event field, specify the event that must occur to start the workflow step. When you select the field, the Workflow Events page opens, where you can choose from all workflow events that exist. For this example, select A customer record is changed.
In the On Condition field, specify one or more conditions that must be met before the event in the When Event field can occur. When you select the field, the Event Conditions page opens, where you can choose from a list of filter fields that are relevant as conditions for the event in question. You can add new filter fields that you want to use as event conditions. You will set event condition filters as you would set filters on report request pages.
For this example, enter the credit limit condition as follows:
Select the On Condition field.
Select Field, which displays all fields of the customer table. Select the Credit Limit ($) field.
Select the is field and then select Changed.
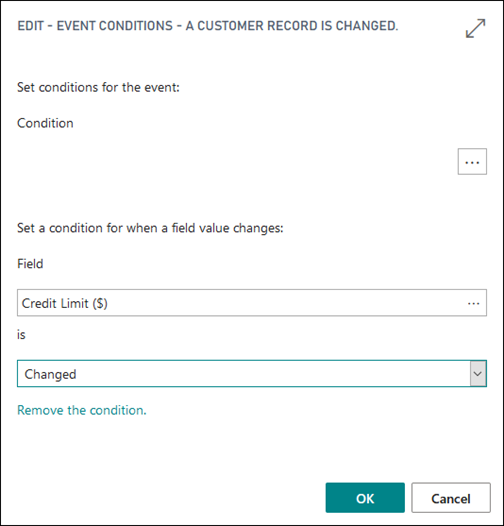
Select OK to return to the Workflow page.
In the Then Response field, specify the response that will follow when the workflow event occurs. When you select the field, the Workflow Responses page opens, where you can choose from all workflow responses that exist and then set response options for the selected response. For this example, select Create a notification for %1.
On the Options for the Selected Response FastTab, specify options for the workflow response.
To specify options for a workflow response that involves sending a notification, fill in the fields as follows:
Notify Sender - Specifies if the approval requestor is notified instead of the approval request recipient. If you select this option, the Recipient User ID field is disabled because the requestor of the approval (the sender) will be notified instead. The name of the workflow response changes accordingly to Create Notification for <Sender>. If the option is not selected, the name of the workflow response is Create Notification for <User>.
Recipient User ID - Specifies the user whom the notification must be sent to. This option is only available for workflow responses with a placeholder for a specific user. For workflow responses without placeholders for users, the notification recipient is typically defined by the approval user setup.
Notification Entry Type - Specifies if the workflow notification is triggered by a record change, an approval request, or a past due date.
Link Target Type - Specifies another page in Business Central where the link in the notification opens instead of the default page. The page must have the same source table as the record that is involved.
Custom Link - Specifies the URL of a link that is added to the notification in addition to the link to page in Business Central.
To specify options for a workflow response that involves creating an approval request, fill in the fields as follows:
Due Date Formula - Specifies in how many days the approval request must be resolved from the date when it was sent.
Delegate After - Specifies if and when an approval request will automatically be delegated to the relevant substitute. You can select to automatically delegate one, two, or five days after the date when the approval was requested.
Approver Type - Specifies who is the approver, according to the setup of approval users and workflow users. The following options exist:
Salesperson/Purchaser - Specifies that the user who is set up in the Salespers./Purch. Code field on the Approval User Setup page determines the approver.
Approver - Specifies that the user who is on the Approval User Setup page determines the approver.
Workflow User Group - Specifies that the approval must be done by a workflow user group. When you select this option, the Workflow User Group Code field appears, in which you can select the workflow user group that you want to use for this workflow.
Approver Limit Type - Specifies how the approver's approval limits will affect when approval request entries are created for them. A qualified approver is one whose approval limit is above the value on the request that's being made. The following options exist:
Approver Chain - Specifies that approval request entries are created for all the requester's approvers up to and including the first qualified approver.
Direct Approver - Specifies that an approval request entry is only created for the requester's immediate approver, regardless of the approver's approval limit.
First Qualified Approver - Specifies that an approval request entry is only created for the requester's first qualified approver.
To specify options for a workflow response that involves creating journal lines, fill in the fields as follows:
General Journal Template Name - Specifies the name of the general journal template that the specified journal lines are created in.
General Journal Batch Name - Specifies the name of the general journal batch that the specified journal lines are created in.
For this example, select your user account in the Recipient User ID field. You first need to set up your user account on the User Setup page.
On the Workflow page, select the Enabled field to start using the workflow.


When you create a workflow with more than one line, select the Increase Indent and Decrease Indent buttons to indent the event name in the When Event field to define the step's position in the workflow.
Indicate that the step is the next in the workflow sequence by indenting the event name under the event name of the previous step.
Indicate that the step is one of more alternative steps that might start, depending on its condition, by placing the event name at the same indentation as the other alternative steps. Order such optional steps according to priority by placing the most important step first.