Create Dynamics 365 leads
An organization can identify leads in many ways. A lead can come from an email or a phone call that was received by someone in the organization. It can come from a list of leads that a vendor bought. It might even come from a customer who was included in a marketing campaign and expressed interest.
Since a lead can come from multiple sources, Microsoft Dynamics 365 Sales provides multiple ways to create lead records. Here are some of the most common ways:
- Manually creating leads
- Converting email activities to leads
- Bulk importing leads
Manually creating leads
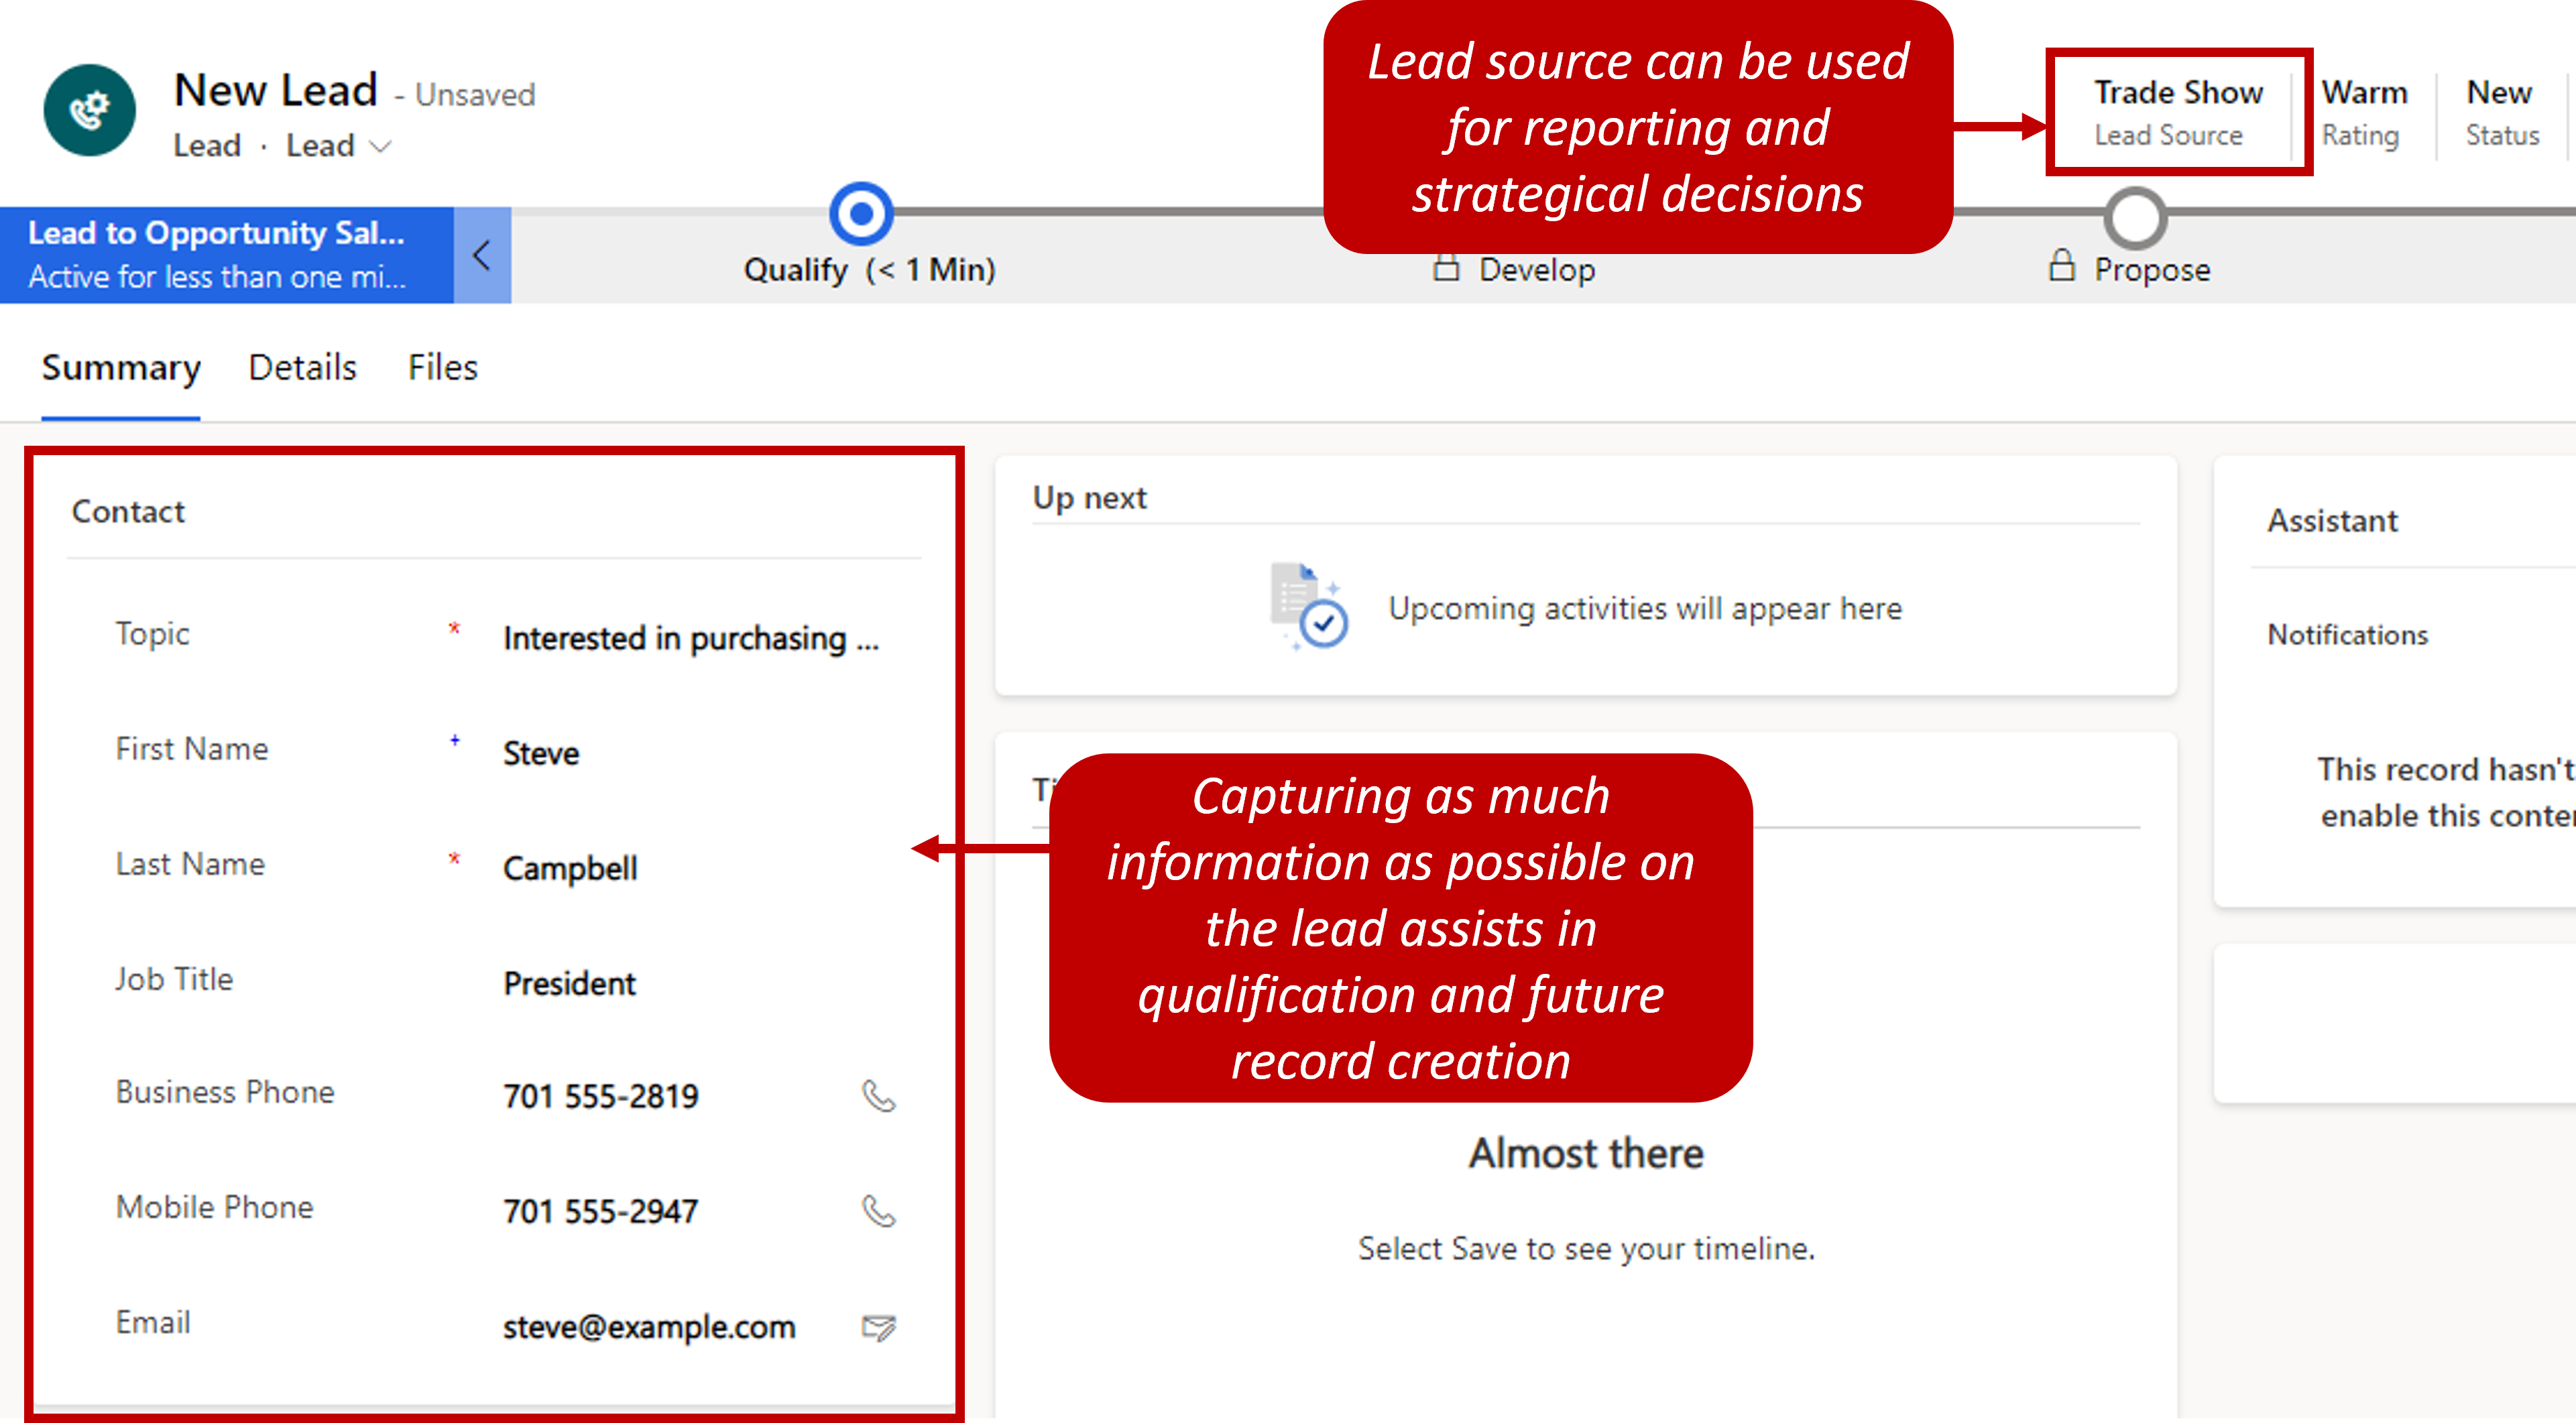
Leads can be manually created in Microsoft Dynamics 365 by using the Sales Hub app. In the app, navigate to Leads > New. The New Lead page appears, where you can enter details like the lead's name, contact information, and company information. When you create a lead, Topic and Last Name are the only required columns. But the more information you can capture in the lead, the easier it will be to research that lead during the qualification process. Additionally, if the lead is qualified, corresponding account and contact records can be created automatically. Therefore, the more information that you enter when you create the lead, the more complete those account and contact records will be.
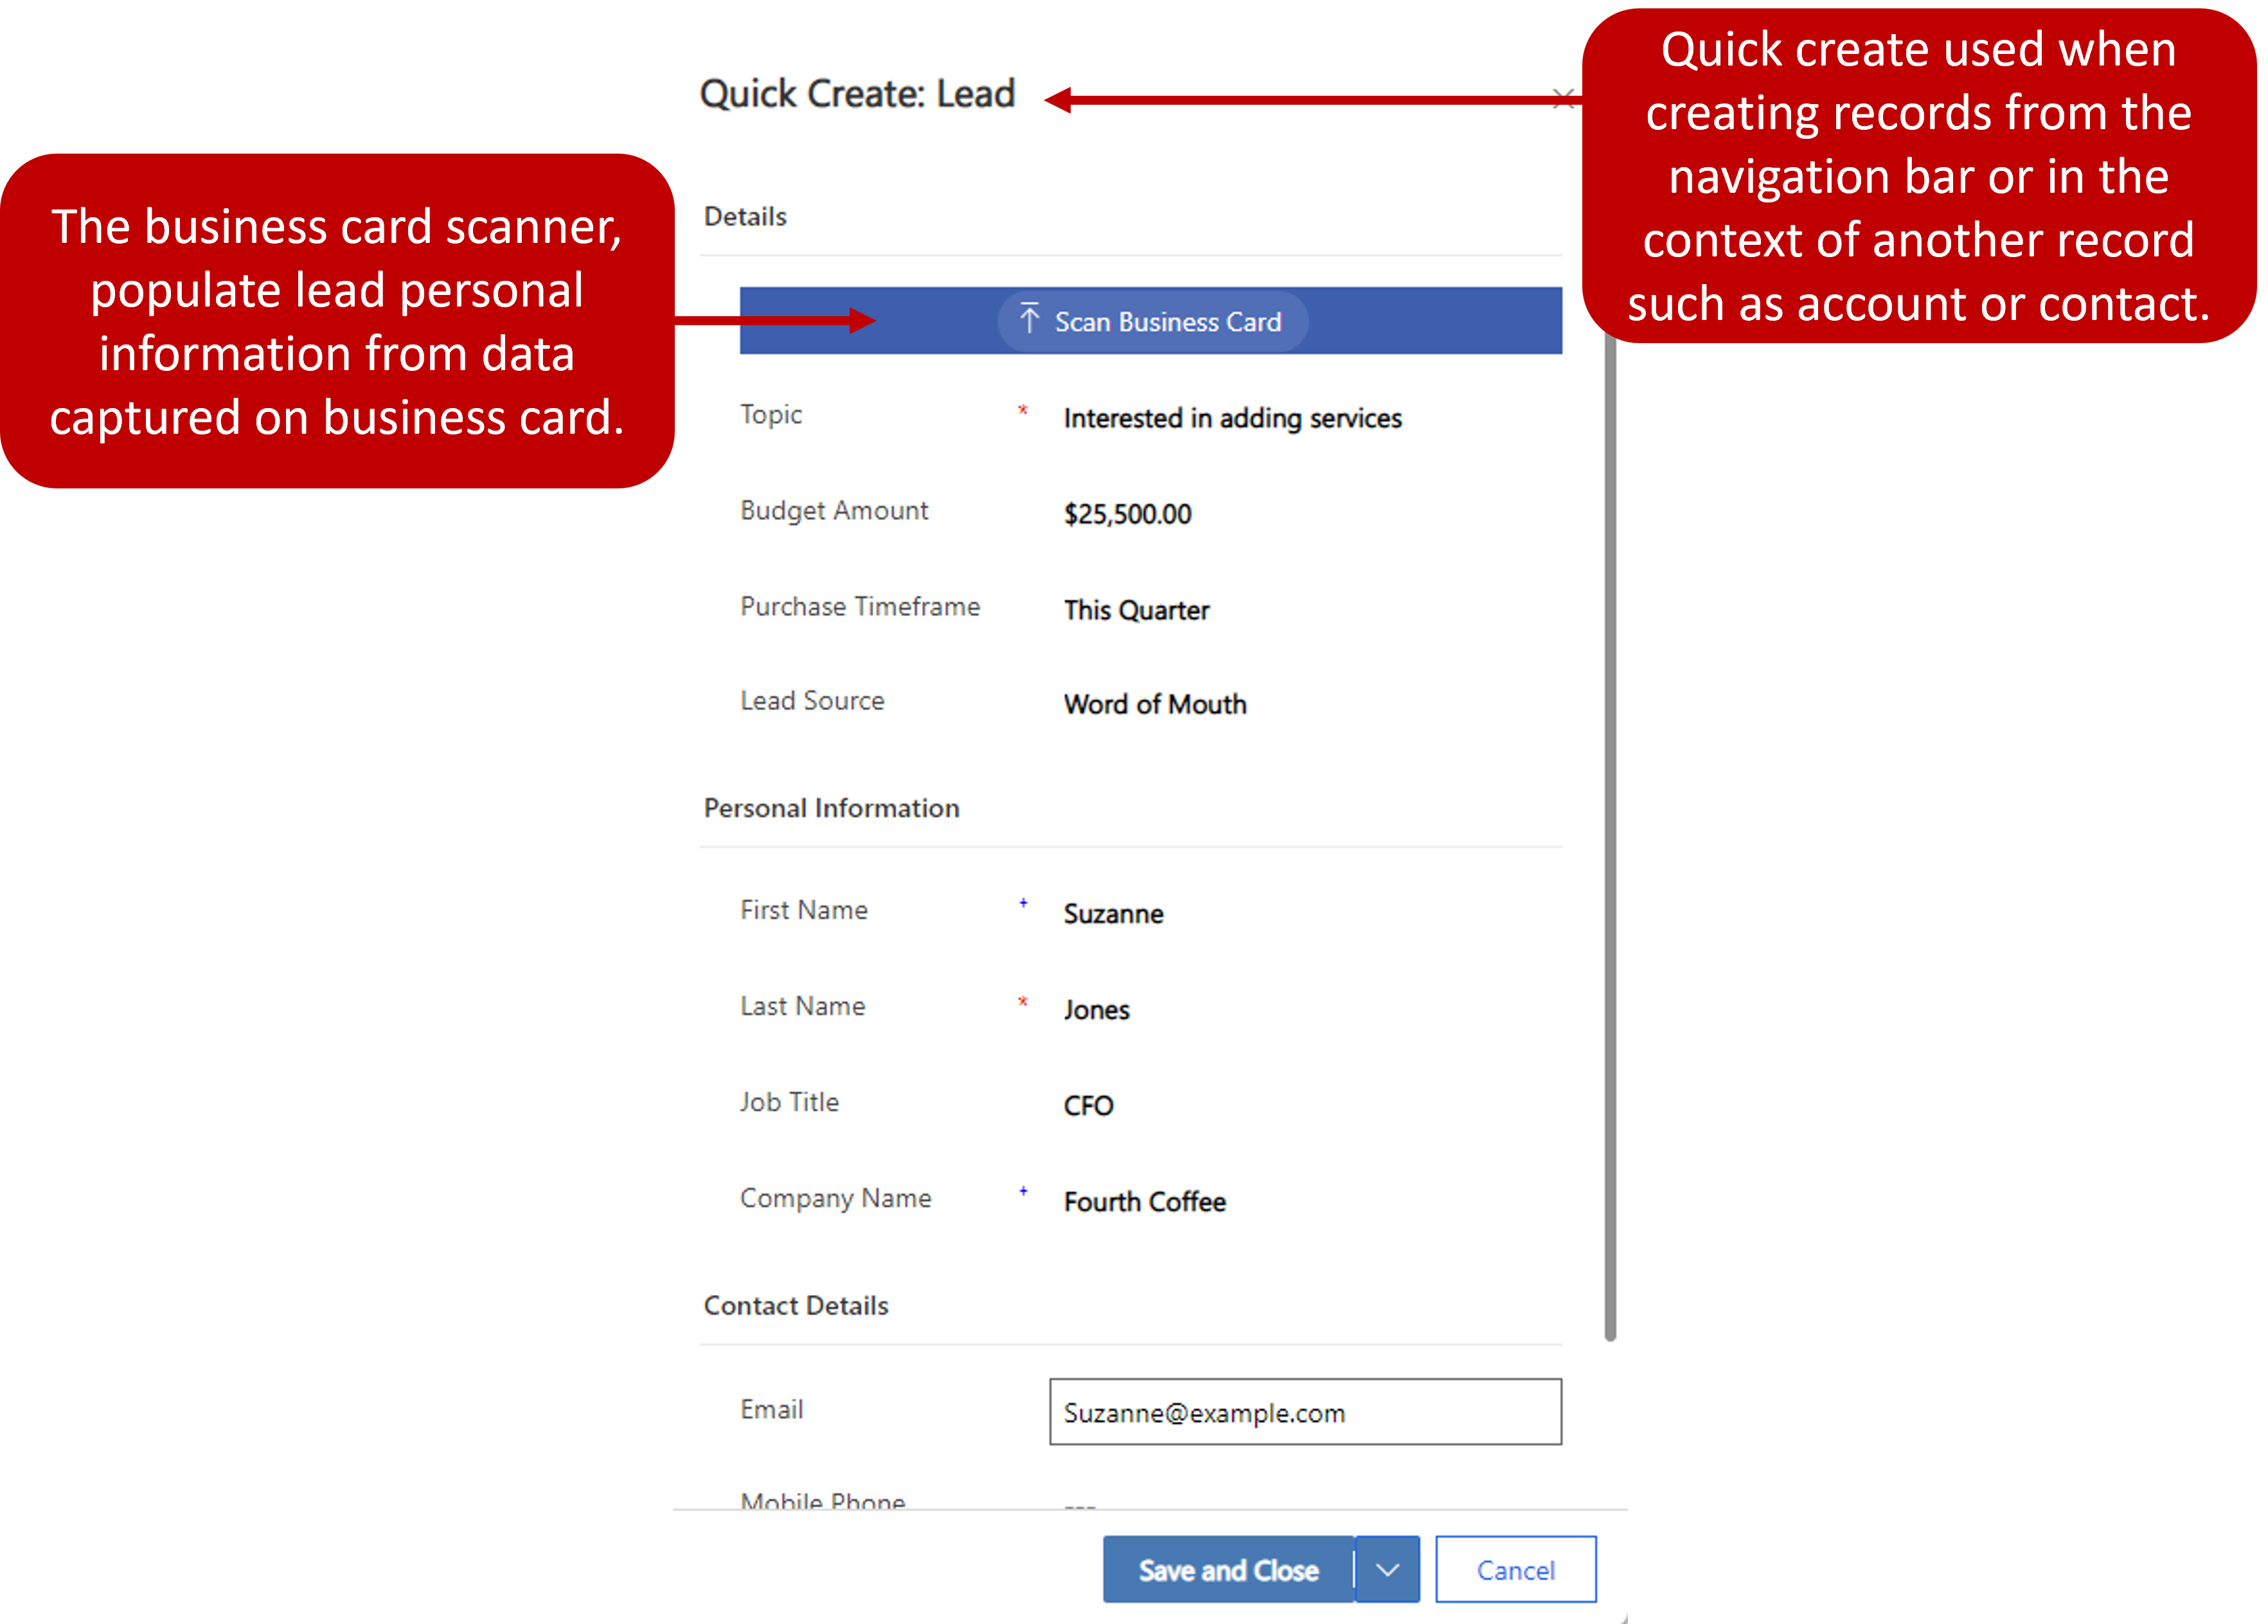
Quick create dialog box
Sometimes, you might quickly capture basic information about a new lead, with the intention of coming back later and filling in the remaining details. In these situations, you can use the Quick Create dialog box for leads. To open the Quick Create: Lead dialog box, select the New button on the navigation bar. You also use this dialog box when you create new leads from the Related tab on account and contact records. The Quick Create: Lead dialog box doesn't include columns for address information. It just includes columns for the most essential details about a lead, like the source of the lead, and the lead's first and last names, company, and email and phone contact information.
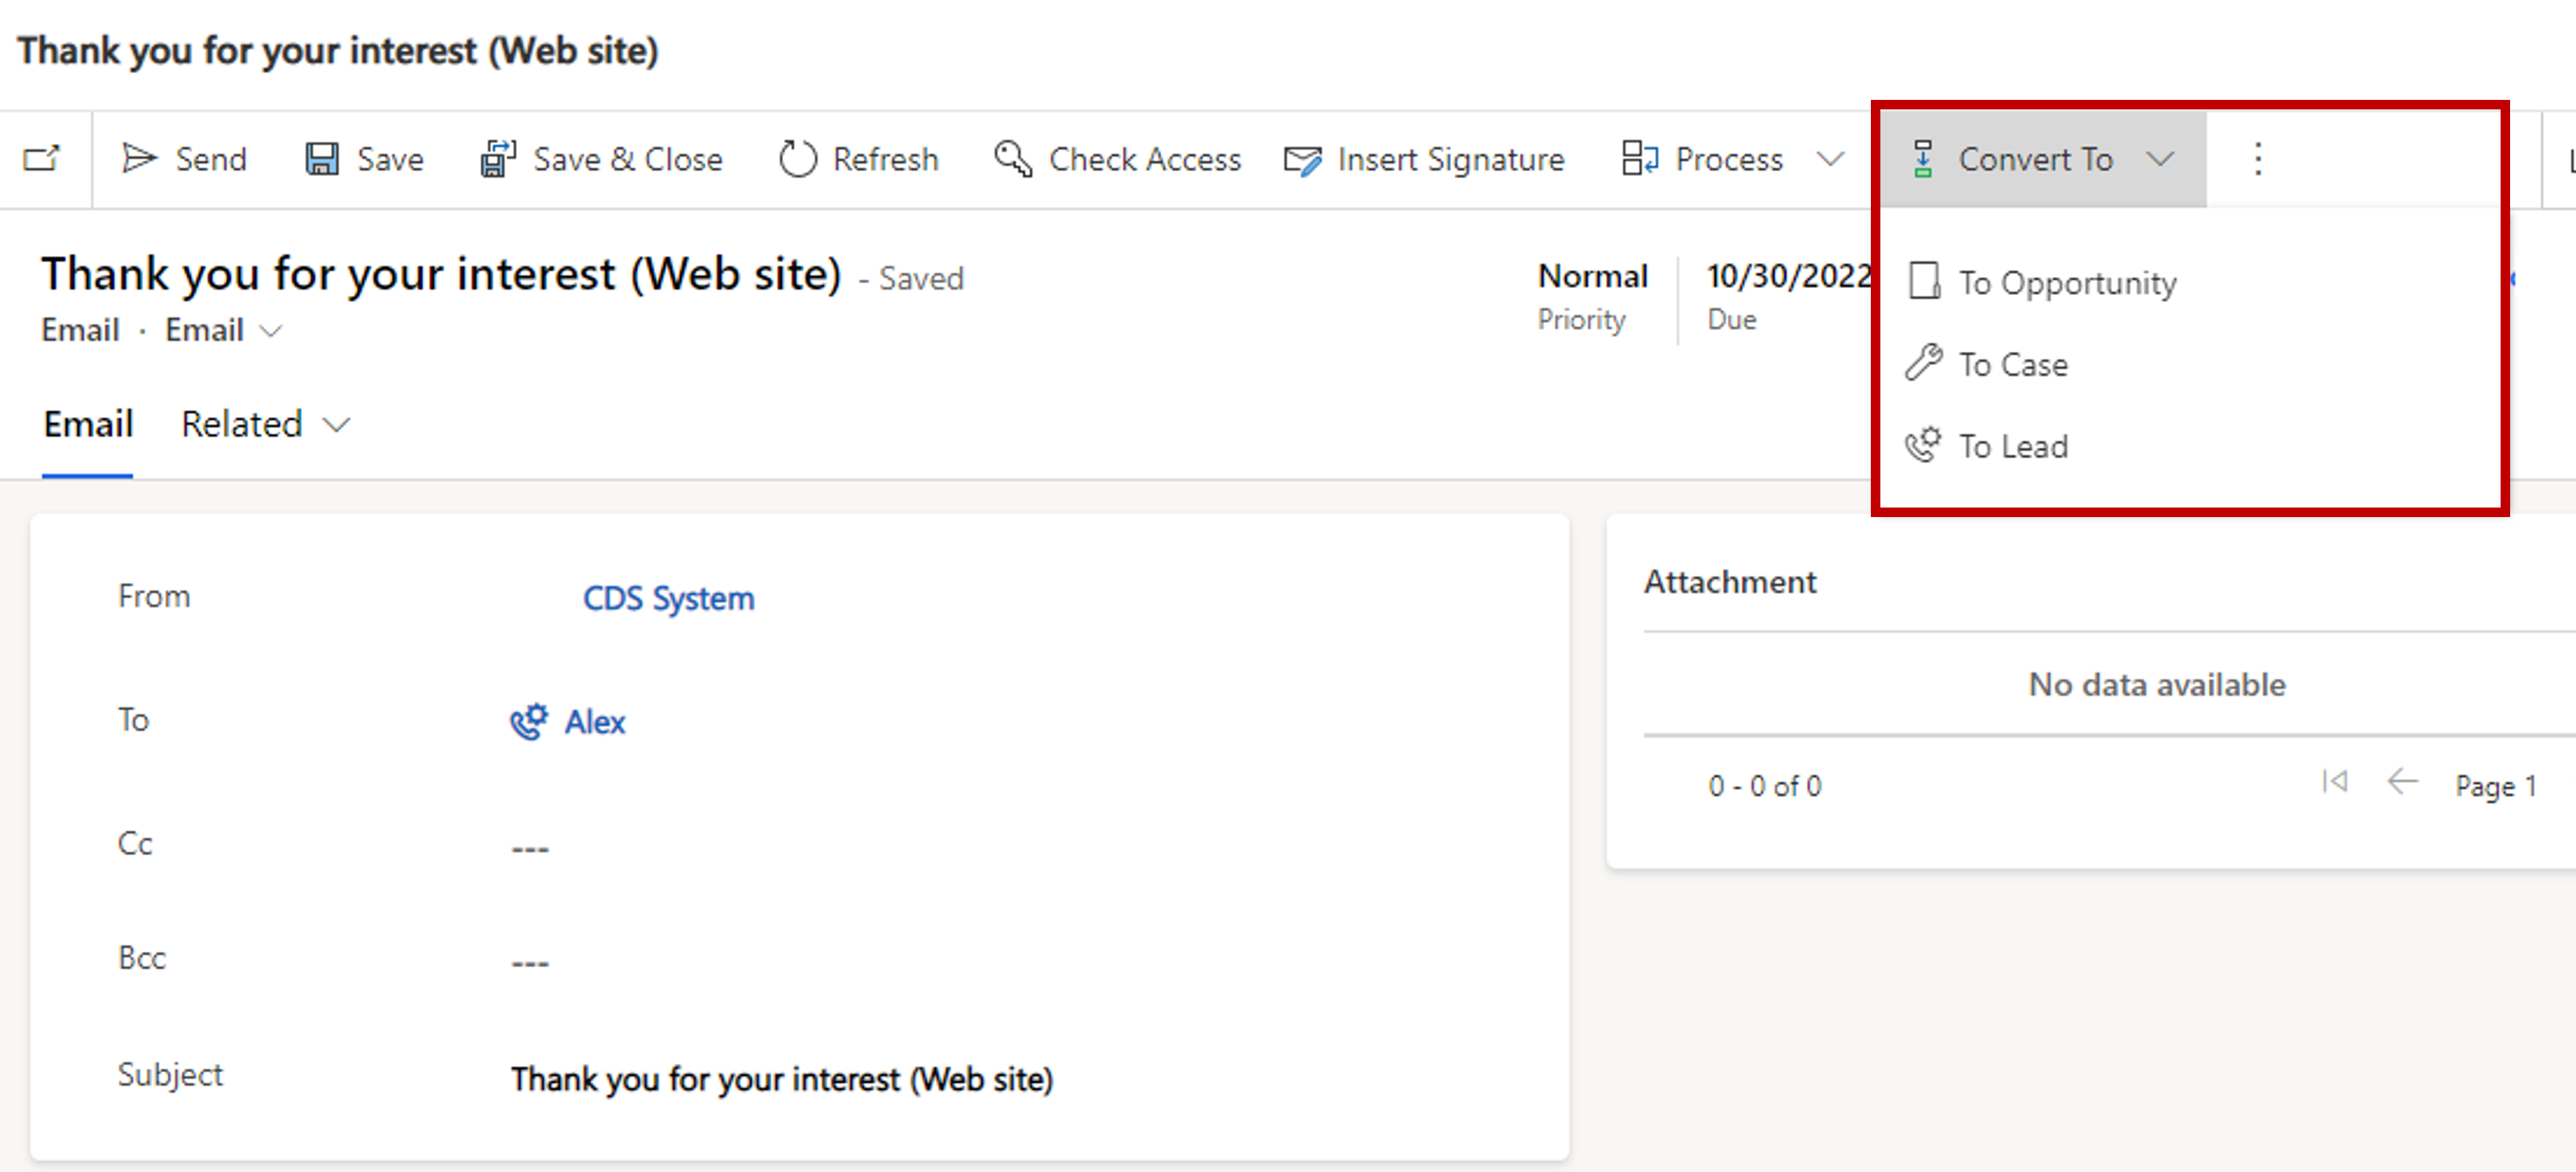
Converting email activities to leads
Another way to create leads in Dynamics 365 Sales is to convert emails to leads. You can convert an email to a lead directly in the sales application.
Bulk importing leads
Many organizations receive lists of leads for external vendors, and then have sales staff cold call those leads to either qualify or disqualify them. In these cases, lead records can be imported into the system in bulk. Each lead record can then be assigned to the account executive who is most qualified to work on it. Typically, marketing managers, sales managers, or individual account executives import leads.
When you're viewing leads, you can import new leads by using the command bar. Leads can be imported in two formats: Microsoft Excel files or comma-separated values (CSV) files.
When you import a file that includes leads, you must make sure that the columns in the file can be mapped to specific columns in Dynamics 365 lead records. After you select the file to import, you'll be asked to review the mappings.
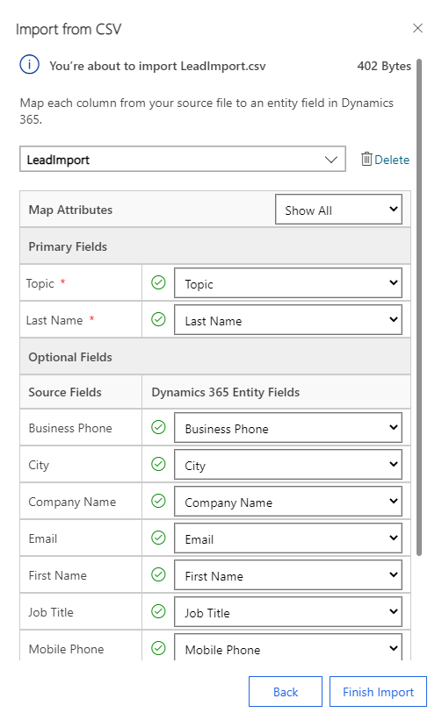
You must make sure that all required columns in Dynamics 365 are mapped to columns in the import file. In addition, any other columns that exist in the import file must be mapped to corresponding columns in Dynamics 365.
During the mapping process, Dynamics 365 tries to identify the most appropriate columns to map to. But there might be cases where it doesn't find a match. For example, if the import file has a column that's named zip, Dynamics 365 might not identify that ZIP/postal code is the most appropriate column to map to. In these cases, you might have to map the columns manually.
If a column in the file that you're importing doesn't have a corresponding column in Dynamics 365, you can leave it unmapped or specify that it should be ignored.
After the mapping settings are defined for every column in the import file, select Finish Import to finish importing the file.
Sometimes, it's easier to export a template that has the Dynamics 365 column labels, add the data that you want to import in the exported template, and then import the template. This approach helps guarantee that all the columns are correctly matched. It also helps save you time.
For more information about how to create Dynamics 365 leads, see Create or edit a lead (Sales and Sales Hub).