Note
Access to this page requires authorization. You can try signing in or changing directories.
Access to this page requires authorization. You can try changing directories.
Microsoft 365 Copilot in Power Apps lets users interact with custom agents that extend what Copilot can do. By customizing an agent, you can create tailored experiences that fit your organization's business processes and data. For more information, see Use agents in Microsoft 365 Copilot.
This article describes the types of agents you can build for Microsoft 365 Copilot in Power Apps and helps you choose the right approach for your scenario.
Choose an agent type
The following table compares the agent types you can build.
| Agent type | Description | Common use cases |
|---|---|---|
| Declarative agent | Built with low-code tools and templates for quick setup of common scenarios in Microsoft 365 Copilot. | Automate routine tasks, answer FAQs, and provide guided workflows. |
| Custom engine agent | Built with custom logic and integrations for advanced capabilities tailored to your business. | Complex business processes, custom data integrations, and specialized automation. |
| Copilot Studio agent | Built and managed in Microsoft Copilot Studio, with integration to Teams and Microsoft 365 for conversational experiences. | Interactive chatbots, team collaboration, and personalized support within Microsoft 365 apps. |
To find the best option for your organization, use these resources:
- Get an overview and guidance on how to choose what type of agent to build in Microsoft 365 Copilot agents overview.
- Build a declarative agent for Microsoft 365 Copilot or a custom engine agent for Microsoft 365.
- Use Microsoft Copilot Studio to connect and set up an agent for Teams and Microsoft 365 so it's available in Microsoft 365 Copilot.
- Review the guidance on how to choose between Microsoft 365 Copilot and Copilot Studio to build your agent.
One way to create a declarative agent for a model-driven app is to turn on Copilot directly in your app. For more information, see Enable your app for Copilot.
Xrm.Copilot APIs
The Xrm.Copilot.* client APIs let developers integrate Microsoft 365 Copilot directly into model-driven app experiences. With these APIs, your app can interact with Copilot and respond to Copilot-driven actions, so you can create richer, end-to-end agentic scenarios.
For the full API surface, see Xrm.Copilot (Client API reference) in model-driven apps.
These APIs let you:
- Send prompts to Copilot. Use
sendPromptToM365Copilotto start a Copilot interaction from your app. - Open and control the Copilot side pane. Use
openM365CopilotPanelto make sure the Copilot pane is visible when needed. - Pass app context to Copilot. Use
updateContext(preview) to send extra grounding signals from your app. - Work with agents. Use
getCurrentAgentto check which agent is active. - Handle Copilot actions in your app. Use
addActionHandlerto register custom handlers that process actions sent from Copilot responses.
Together, these APIs connect Copilot responses back into your app logic, so agents can drive UI updates, trigger workflows, or run custom business logic.
Handle Copilot actions with addActionHandler
Use the addActionHandler API when your app needs to handle structured actions that Copilot emits.
When you build the action payload:
- Set
typeto PowerApps to target the Power Apps host. - Set
action(for example,MyNamespace.MyMessage) to the actionId you register inaddActionHandler. - Use
actionDatafor the payload that your code processes and passes to the Power Apps host.
The following sections show two supported scenarios.
Adaptive Cards
Copilot responses can include Adaptive Cards with Action.Submit buttons that send action messages to the Power Apps host.
Example:
{
  "type": "AdaptiveCard",
  "$schema": "https://adaptivecards.io/schemas/adaptive-card.json",
  "version": "1.5",
  "body": [
    {
      "type": "TextBlock",
      "text": "Click Go and I will send data to the host to process.",
      "wrap": true,
      "id": "txtSendMessage"
    },
    {
      "type": "ActionSet",
      "actions": [
        {
          "type": "Action.Submit",
          "title": "Go",
          "id": "btnGo",
          "data": {
            "type": "PowerApps",
            "action": "MyNamespace.MyMessage",
            "actionData": {
              "foo": "bar"
            }
          }
        }
      ]
    }
  ]
}
MCP apps
Copilot responses can include HTML that sends action messages to the Power Apps host.
Example:
<Button
  appearance="outline"
  icon={<ArrowLeft24Regular />}
  onClick={() => {
    try {
      const message = {
        eventName: 'powerapps.copilot.chat.action',
        action: 'MyNamespace.MyMessage',
        actionData: {
          foo: 'bar'
        },
      };
      window.parent.parent.postMessage(message, '*');
    } catch (error) {
      // eslint-disable-next-line no-console
      console.error('Error posting HOST_ACTION message to parent window:', error);
    }
  }}
>
  Test
</Button>
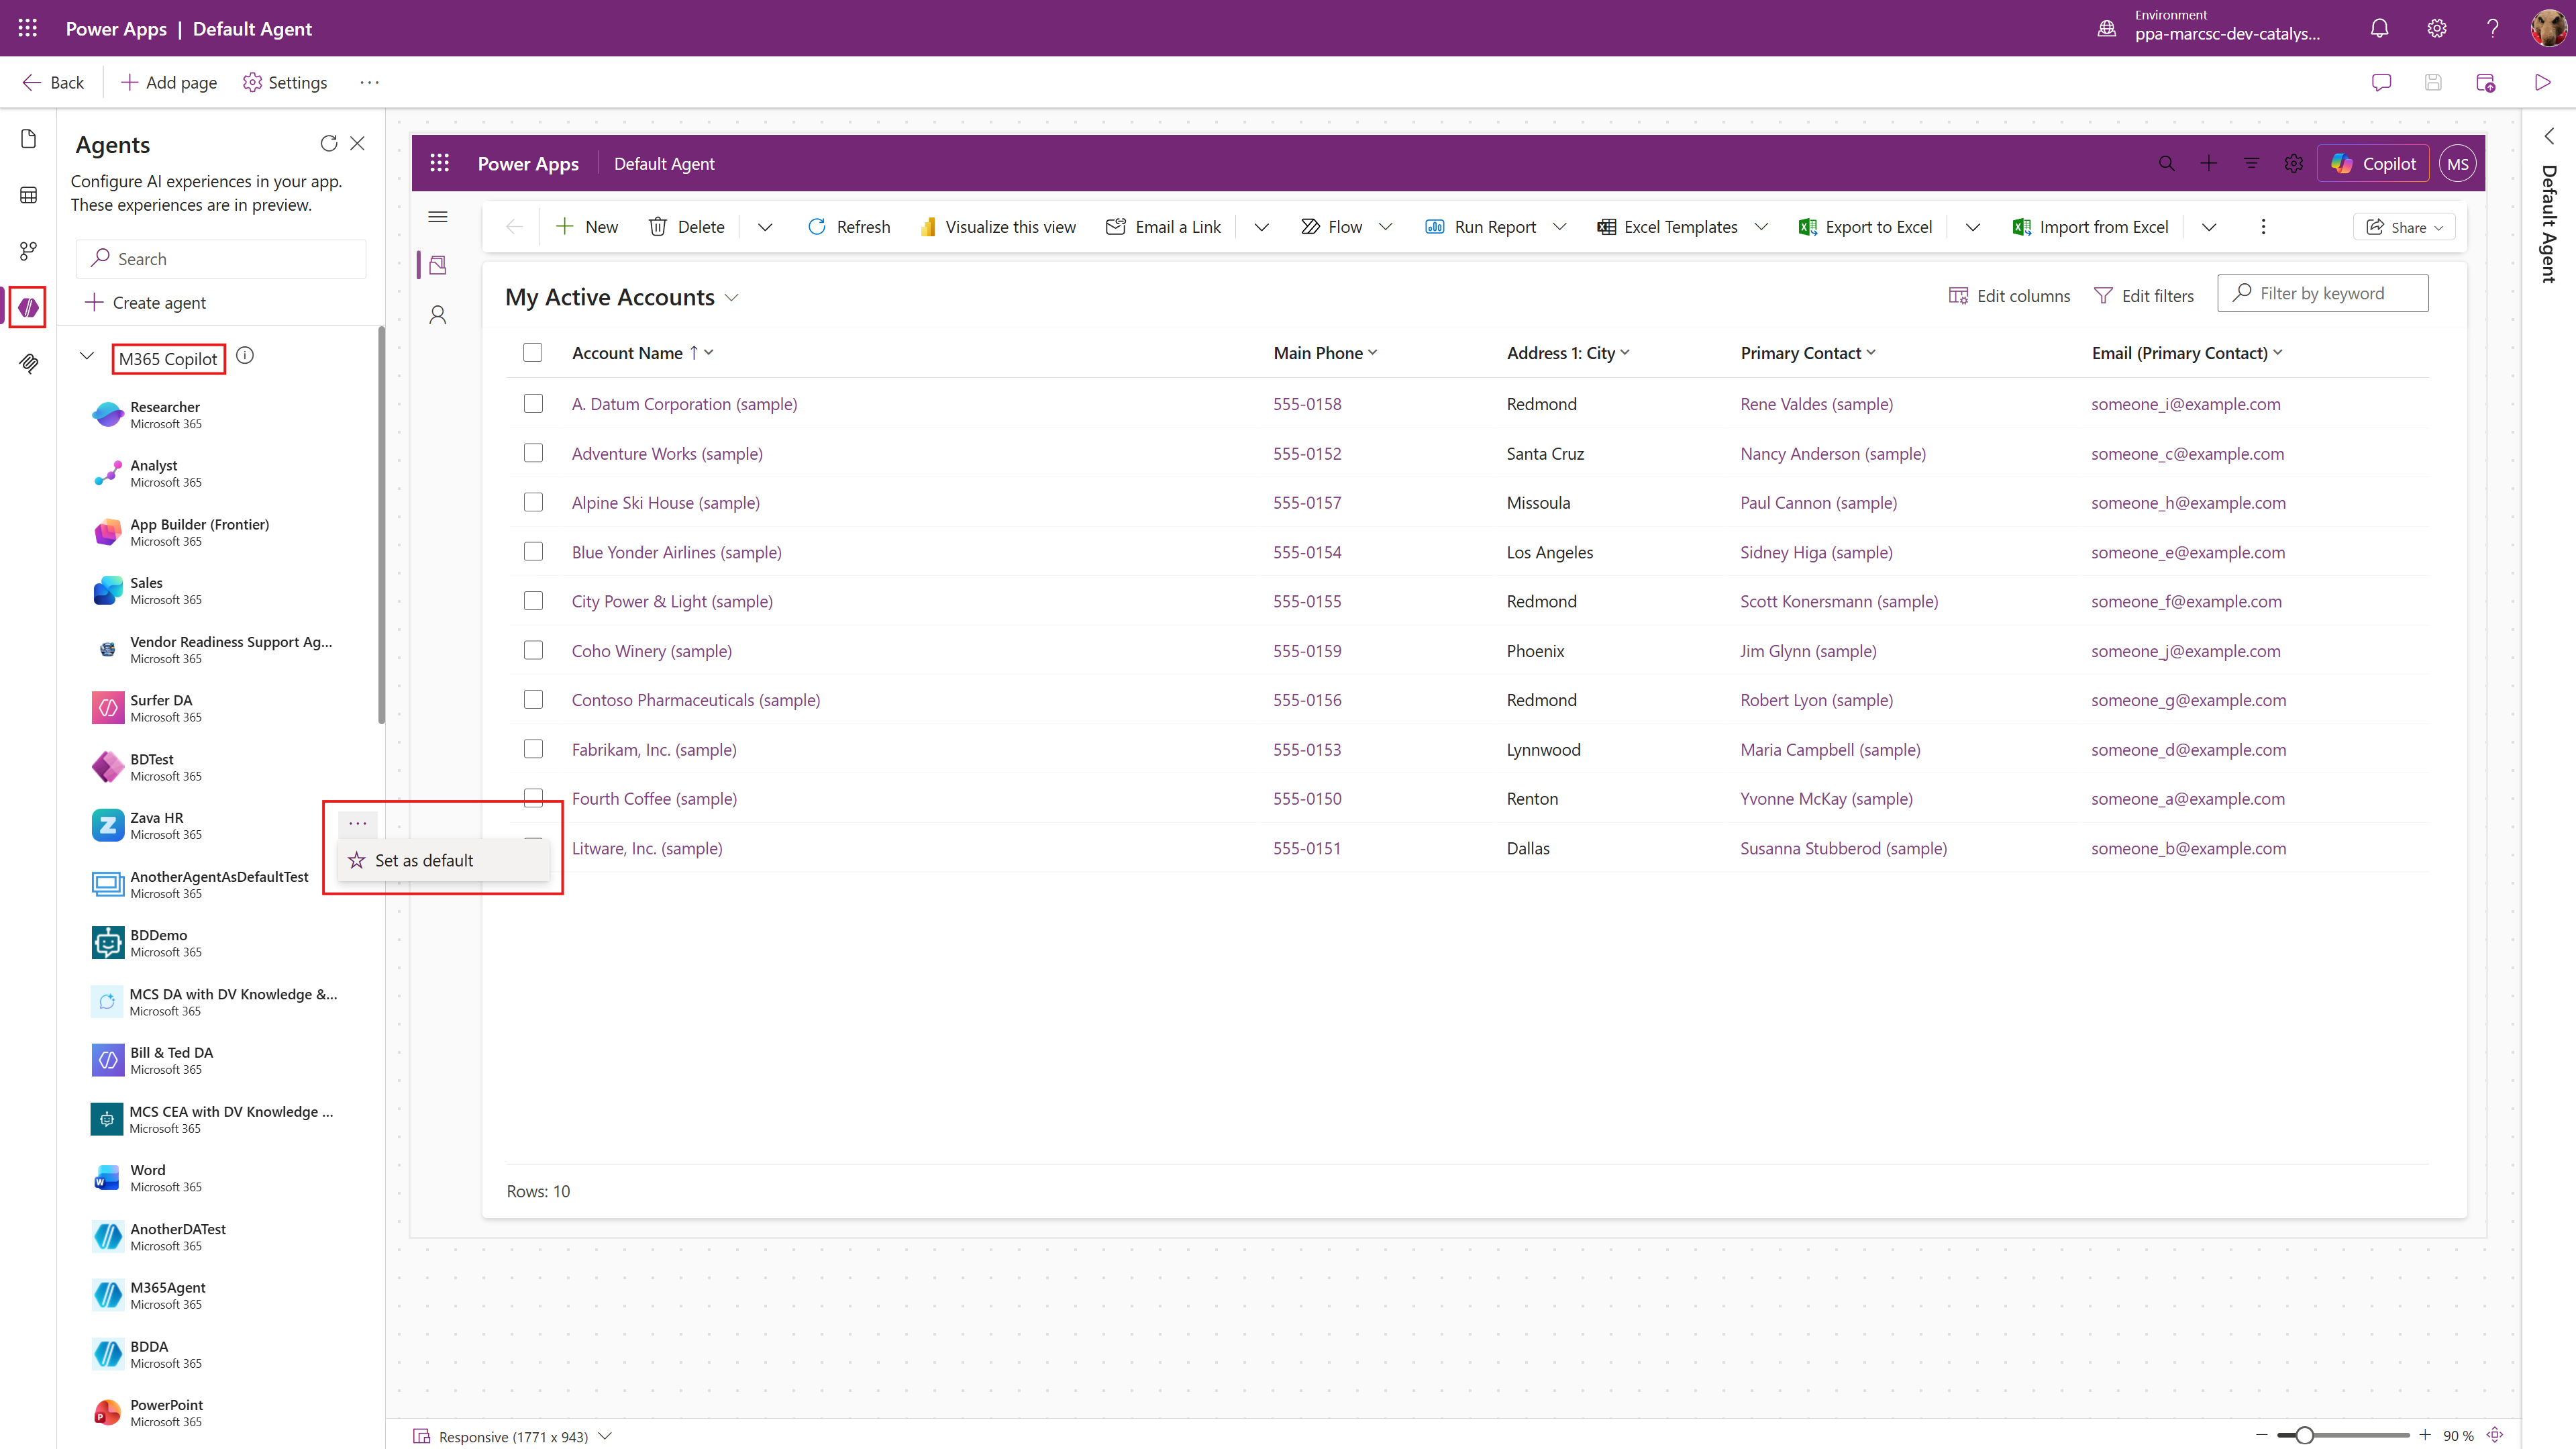
Set a default agent
If you build a custom agent as a companion to your model-driven app, you can set it as the default agent so it loads automatically when the app and the Copilot side pane open.
When you set a default agent:
- Your agent is selected without any action from the user.
- Users go straight to the tailored experience you designed for the app.
- App-specific workflows and guidance are ready as soon as Copilot opens.
A default agent is especially useful for scenario-focused agents that extend the core experience of the app.
Limitations
- Agents you author can't yet use in-app user context to tailor their responses.
- When setting a default agent, the starter prompts from the agent do not render.