Note
Access to this page requires authorization. You can try signing in or changing directories.
Access to this page requires authorization. You can try changing directories.
Azure virtual network support for Power Platform lets you integrate Power Platform and Dataverse components with cloud services or services hosted inside your private enterprise network without exposing them to the public internet. This article explains how to set up virtual network support in your Power Platform environments.
Prerequisites
Note
To enable virtual network support for Power Platform, environments must be Managed Environments.
Review your Power Platform resources: Check your apps, flows, and plug-in code to ensure they connect over your virtual network. They shouldn't call endpoints over the public internet. If your components need to connect to public endpoints, ensure your firewall or network configuration lets such calls. Learn more in Considerations to enable virtual network support for Power Platform environment and in the Frequently asked questions.
Prepare your tenant and set up permissions:
- Azure subscription: Make sure you have an Azure subscription where you create virtual network, subnet, and enterprise policy resources.
- Assign roles: Make sure you have the required roles to create resources and enterprise policy.
- In the Azure portal, assign the Azure network administrator role, such as the network contributor role or an equivalent custom role.
- In the Microsoft Entra admin center, assign the Power Platform administrator role.
Prepare to use PowerShell:
- Use Windows PowerShell or Install PowerShell Core.
- Clone the GitHub repository to get the PowerShell scripts for enterprise policies.
- Run the "install modules and setup subscription" scripts.
The following diagram shows the functions of the roles in the setup process for virtual network support in a Power Platform environment.

Important
Power Platform performs active health checks when set up within the delegated network. As a result, expect periodic requests to verify your connection to the configured DNS server via TCP on port 53. To ensure health reporting is accurate, allowlist this request from the subnet that makes requests. You can validate the functionality of this setting by using the diagnostic tooling with the Test-NetworkConnectivity command. Learn more about this topic in Troubleshoot virtual network issues.
Set up Virtual Network support
- Set up the virtual network and subnets.
- Create the enterprise policy.
- Configure your Power Platform environment.
Set up the virtual network and subnets
Create virtual networks in Azure regions associated with your Power Platform environment. For example, if your Power Platform environment region is United States, create your virtual networks in the eastus and westus Azure regions. For a mapping of environment region to Azure regions, review the list of supported regions.
Important
- If there are two or more supported regions for the geo, such as the United States with eastus and westus, you need two virtual networks in different regions to create the enterprise policy for business continuity and disaster recovery or failover scenarios.
- Make sure that you appropriately size the subnet you create according to Estimating subnet size for Power Platform environments.
You can reuse existing virtual networks, if desired. Subnets can't be reused in multiple enterprise policies.
Create a subnet in each of your virtual networks. Review the number of IP addresses that are allocated to each subnet and consider the load of the environment. Both subnets must have the same number of available IP addresses.
Important
- If you plan to use the same delegated subnet for multiple Power Platform environments, you might need a larger IP address block than /24. Review subnet sizing guidance in Estimating subnet size for Power Platform environments.
- To allow public internet access for Power Platform components, create an Azure NAT gateway for the subnets.
Ensure your Azure subscription is registered for the Microsoft.PowerPlatform resource provider by running the SetupSubscriptionForPowerPlatform.ps1 script.
Ensure your subnets don't have any resources connected to them. Delegate each subnet to Microsoft.PowerPlatform/enterprisePolicies by running the SetupVnetForSubnetDelegation.ps1 script for each subnet. If you don't want to use PowerShell, you can delegate the subnet while creating the virtual network in Azure portal to the service Microsoft.PowerPlatform/enterprisePolicies.
Learn more at Add or remove a subnet delegation.
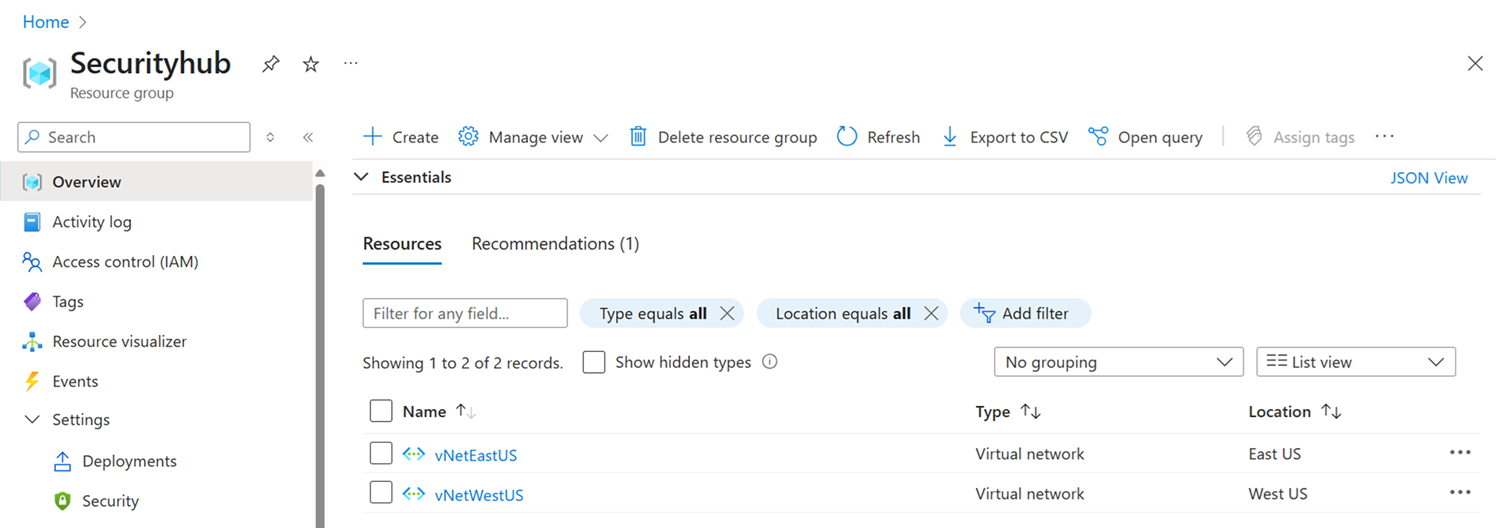
After you create paired virtual networks, you can view them in your Azure resource group, as shown in the following image.

Create the enterprise policy
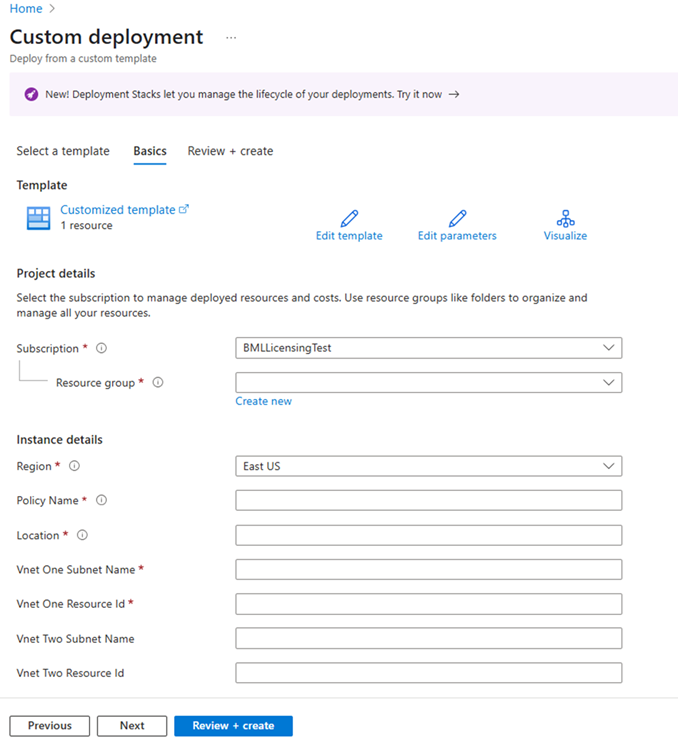
Option 1: Use the Azure ARM template
Make sure you capture the necessary details from the virtual networks you created, such as the following information:
- VnetOneSubnetName
- VnetOneResourceId
- VnetTwoSubnetName
- VnetTwoResourceId
Deploy a custom template in Azure portal. Select the Build your own template in the editor link and copy and paste the following JSON script.
{
    "$schema": "https://schema.management.azure.com/schemas/2019-04-01/deploymentTemplate.json#",
    "contentVersion": "1.0.0.0",
    "parameters": {
        "policyName": {
            "type": "string",
            "metadata": {
                "description": "The name of the Enterprise Policy."
            }
        },
        "powerplatformEnvironmentRegion": {
            "type": "string",
            "metadata": {
                "description": "Geo of the PowerPlatform environment."
            }
        },
        "vNetOneSubnetName": {
            "type": "string"
        },
        "vNetOneResourceId": {
            "type": "string",
                  "metadata": {
                "description": "Fully qualified name, such as /subscription/{subscriptionid}/..."
            }
        },
        "vNetTwoSubnetName": {
            "defaultValue": "",
            "type": "string"
        },
        "vNetTwoResourceId": {
            "defaultValue": "",
            "type": "string",
                  "metadata": {
                "description": "Fully qualified name, such as /subscription/{subscriptionid}/..."
            }
        }
    },
    "variables": {
        "vNetOne": {
            "id": "[parameters('vNetOneResourceId')]",
            "subnet": {
                "name": "[parameters('vNetOneSubnetName')]"
            }
        },
        "vNetTwo": {
            "id": "[parameters('vNetTwoResourceId')]",
            "subnet": {
                "name": "[parameters('vNetTwoSubnetName')]"
            }
        },
        "vNetTwoSupplied": "[and(not(empty(parameters('vNetTwoSubnetName'))), not(empty(parameters('vNetTwoResourceId'))))]"
    },
    "resources": [
        {
            "type": "Microsoft.PowerPlatform/enterprisePolicies",
            "apiVersion": "2020-10-30-preview",
            "name": "[parameters('policyName')]",
            "location": "[parameters('powerplatformEnvironmentRegion')]",
            "kind": "NetworkInjection",
            "properties": {
                "networkInjection": {
                    "virtualNetworks": "[if(variables('vNetTwoSupplied'), concat(array(variables('vNetOne')), array(variables('vNetTwo'))), array(variables('vNetOne')))]"
                }
            }
        }
    ]
}
Save the template and fill in the details to create the enterprise policy, which includes the following information:
- Policy name: Name of the enterprise policy that appears in the Power Platform admin center.
- Location: Select the location of the enterprise policy, corresponding with the Dataverse environment's region:
- unitedstates
- southafrica
- uk
- japan
- india
- france
- europe
- germany
- switzerland
- canada
- brazil
- australia
- asia
- uae
- korea
- norway
- singapore
- sweden
- usgov
- VnetOneSubnetName: Enter the name of the subnet from the first virtual network.
- VnetOneResourceId: Enter the resource ID from the first virtual network.
- VnetTwoSubnetName: Enter the name of the subnet from the second virtual network.
- VnetTwoResourceId: Enter the resource ID from the second virtual network. It should match the strings from JSON script, for example: vNetOneResourceId, vNetOneSubnetName
Select Review + create to finalize the enterprise policy.

Option 2: Use PowerShell
Run the CreateSubnetInjectionEnterprisePolicy.ps1 script, using the virtual networks and subnets you delegated. Remember two virtual networks in different regions are required for geos that support two or more regions.
Important
If you want to delete the virtual network or subnet, or if you're getting errors like
InUseSubnetCannotBeDeletedandSubnetMissingRequiredDelegation, you must delete the enterprise policy if it exists. You can delete the enterprise policy by using the following command.Remove-AzResource -ResourceId $policyArmId -ForceVarious PowerShell scripts are available to get the enterprise policy for the ARM resource ID.
Grant read access for the enterprise policy to users with the Power Platform administrator role.
Configure your Power Platform environment
Prerequisites
In the following procedures, you assign your environment to an enterprise policy. Your environment must be a managed environment to assign an enterprise policy to it.
Option 1: Use the Power Platform admin center
- Sign in to the Power Platform admin center.
- In the navigation pane, select Security.
- In the Security pane, select Data and privacy.
- In the Data protection and privacy page, select Azure Virtual Network policies. The Virtual Network policies pane is displayed.
- Select the environment you want to assign to the enterprise policy, select the policy, and select Save. Now the enterprise policy is linked to the environment.
Option 2: Use PowerShell
- Run the NewSubnetInjection.ps1 script to apply the enterprise policy to your environment.
- To remove the enterprise policy from the environment, run the RevertSubnetInjection.ps1 script.
Validate the connection
- Sign in to the Power Platform admin center.
- In the navigation pane, select Manage.
- In the Manage pane, select Environments.
- On the Environments page, select an environment.
- In the command bar, select History.
- Verify that the Status shows Succeeded.
Best practices
Choose the subnet size that fits your requirements. After you delegate the subnet to Power Platform, you need to contact Microsoft Support to change the subnet range.