Make more accessible content with less effort
In this section, we demonstrate how to use Accessibility Checker and Accessibility Assistant to review and edit documents to make them more accessible for people with disabilities.
Exercise – Check and edit documents with Accessibility Checker
The Accessibility Checker in Microsoft 365 is a tool that helps you create and edit documents, presentations, emails, and websites that are accessible to people with disabilities. It provides suggestions on how to fix issues and improve the accessibility of your content.
Accessibility Checker can automatically identify any issues that might make your content difficult or impossible to access, such as missing alt text for images, missing slide titles, or poor color contrast.
Follow these steps to use the Accessibility Checker in Word, PowerPoint, and Outlook:
Open the document, presentation, or email that you want to check for accessibility issues, and in the Review tab, select Check Accessibility. The Accessibility Checker pane will open.
Review the list of issues and warnings that the Accessibility Checker has found.
- Issues are more severe and should be fixed as soon as possible.
- Warnings are less critical but will still affect some users.
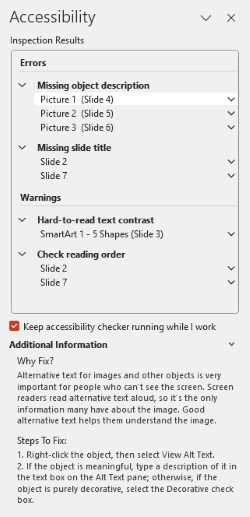
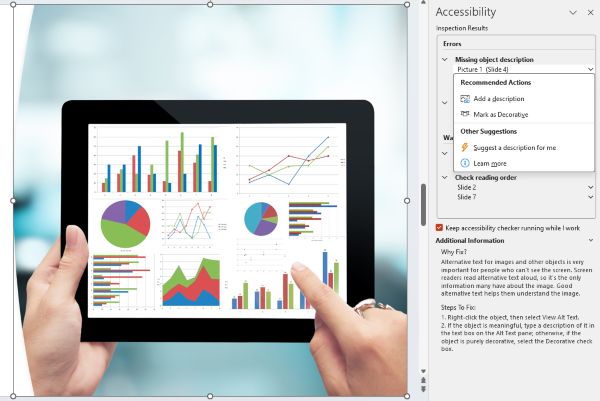
Select an issue or warning to see more details and suggestions on how to fix it.
Handle accessibility 'as you go' with Accessibility Assistant
The Accessibility Assistant in Microsoft 365 is a powerful set of tools that will help creators produce more accessible content with less effort—within your natural flow of work – flagging issues as they occur and providing simple fixes 'in the moment.' This workflow helps creators avoid getting to the end of a project only to find a huge list of issues that'll take time and energy to fix.
Expanding on the existing Accessibility Checker (which we already reviewed in this unit), the Accessibility Assistant introduces three key innovations:
Better defaults to prevent issues before they occur.
Real-time and in-context remediation to correct issues as they arise.
Clear, simple guidance that appears in the flow of work.
When using the Accessibility Assistant pane, the following five major categories of issues are checked and flagged:
Color and contrast
Media and illustrations
Tables
Document structure
Document access
By flagging any issues that could prevent your documents from being accessible, Accessibility Assistant helps ensure your readers can understand and use the content as you intended.
Exercise – How to use Accessibility Assistant (Public Preview) in Microsoft 365:
As you create your document, if you put something in your document that Accessibility Assistant recognizes as an accessibility issue, an icon in the shape of a person appears on screen in the margin.
Select the icon next to the flagged text to review open Accessibility Assistant. To check for accessibility issues manually at any time, select Review > Check Accessibility or Accessibility: Investigate in the status bar at the bottom of the Word app window.

To fix the issue, select an action from the suggested options.
