Note
Access to this page requires authorization. You can try signing in or changing directories.
Access to this page requires authorization. You can try changing directories.
The Microsoft Sentinel connector builder agent builds data connectors in minutes using the AI‑assisted workflow in the Microsoft Sentinel extension for Visual Studio Code (VS Code) with GitHub Copilot. This low‑code experience guides developers and Independent Software Vendors (ISVs) end‑to‑end by autonomously generating schemas, deployment assets, connector UI, secure secret handling, and polling logic. Built‑in validation surfaces any polling issues early, so you can validate event logs before deploying and ingesting data.
The Sentinel connector builder agent helps you:
Reduce manual time and effort in authoring Codeless Connector Framework (CCF)–based connectors
Scaffold connector definitions using simple prompts
Iterate on connector logic using natural language
Validate connector artifacts before deployment
Prerequisites
Before you begin, ensure that you meet the following requirements:
An active Microsoft Sentinel workspace
Access to Visual Studio Code with GitHub Copilot
The Microsoft Sentinel VS Code extension installed
Microsoft Sentinel Contributor role to create or modify Sentinel data connectors
Benefits of connectors with agentic experience
The Sentinel connector builder agent can reduce connector development time from weeks to hours for many common scenarios. Tasks that previously required multiple tools, manual handoffs, and repeated validation cycles can now be completed inline, enabling faster iteration and quicker readiness for deployment.
| Area | Non-AI connector development process | VS Code extension with Connector Builder Agent |
|---|---|---|
| Authoring experience | Connector definitions, schemas, and configuration items are often authored across multiple tools, including the Azure portal, editors, and JSON templates. Context switching is common. | Connector authoring happens directly in VS Code, alongside other development assets, using a single, developer‑focused environment. |
| Iteration speed | Making changes typically require navigating between tools, updating items, and revalidating manually, which slows down iteration. | Developers can iteratively refine connectors using the agent within VS Code, reducing friction between design, update, and review. |
| Validation and feedback | Validation steps are often performed later in the workflow, increasing the risk of discovering schema or configuration issues late. | Validation happens closer to the authoring experience, helping identify issues earlier and improving overall quality before deployment. |
| Developer productivity | Developers spend time managing tooling and navigation rather than focusing on connector logic and correctness. | Developers can focus on reviewing code and structuring schema using the low-code agent driven connector buildout. |
Create a custom connector using Sentinel connector builder agent
The following steps show how to create, validate, and deploy a custom Microsoft Sentinel connector using the Sentinel connector builder agent in VS Code.
Install and open the Sentinel extension for VS Code
To set up your development environment, follow these steps:
Install Microsoft Sentinel extension for Visual Studio Code and reload VS Code if prompted.
Create and open an empty folder in File explorer. All agent-generated files are locally saved in this folder.
Prompt the Sentinel connector builder agent
To create a connector with the agent, follow these steps:
Open the VS Code chat and set the chat to Agent mode.
Prompt the agent using
@sentinel. When prompted, select/create-connectorand select any supported API.For example, enter the prompt as follows:
@sentinel /create-connector Create a connector for Contoso. Here are the API docs: https://contoso-security-api.azurewebsites.net/v0101/api-doc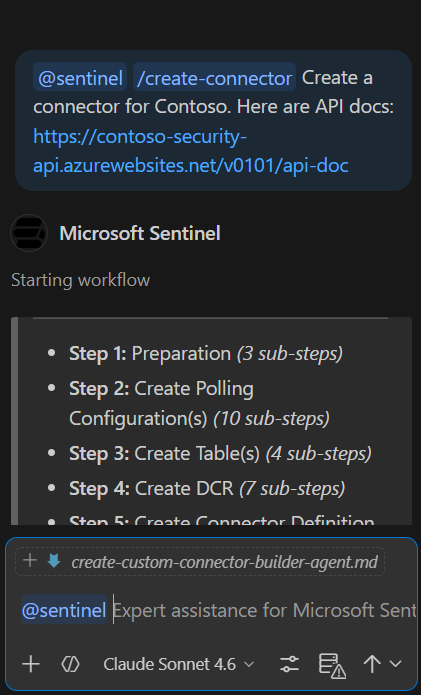
Provide the source API information and authentication methods to generate the appropriate connector pattern.
Generate or update connector artifacts
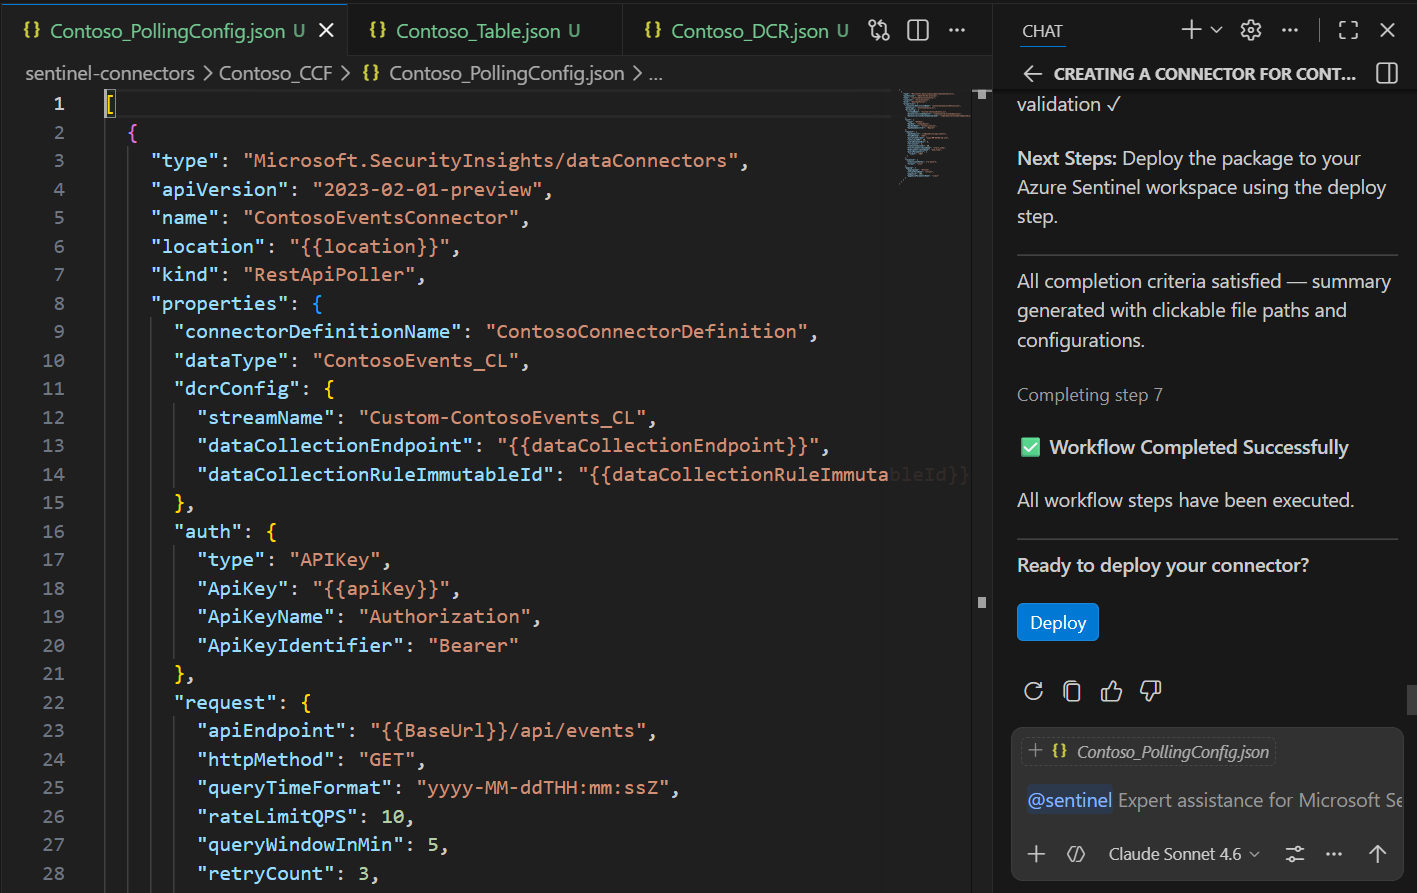
Based on your input, the agent generates the following four files:
Polling configuration
Data collection rules (DCR) mappings
Connector definition
Schema and table references aligned with Sentinel requirements
The following screenshot shows the four JSON connector files the agent generated.
Note
During agent evaluation, select Allow responses once to approve changes, or select the option Bypass Approvals in the chat. It might take up to several minutes for the evaluations to finish.
Refine the connector using the agent or by editing the generated JSON files directly. For example:
Ask the agent to modify the description, author name, or other fields
Update ingestion logic for table name
Adjust authentication or polling parameters; for example, polling frequency, timeout window, and others
Important
Do not edit or modify the file while it is building. If a field on the file shows an error, it means the build is still in progress.
Validate the connector configuration
To confirm the connector can reach your data source API and retrieve events, follow these steps:
To validate the API for data source events, right click on the folder that contains the ARM template and select Microsoft Sentinel > Test Connector.
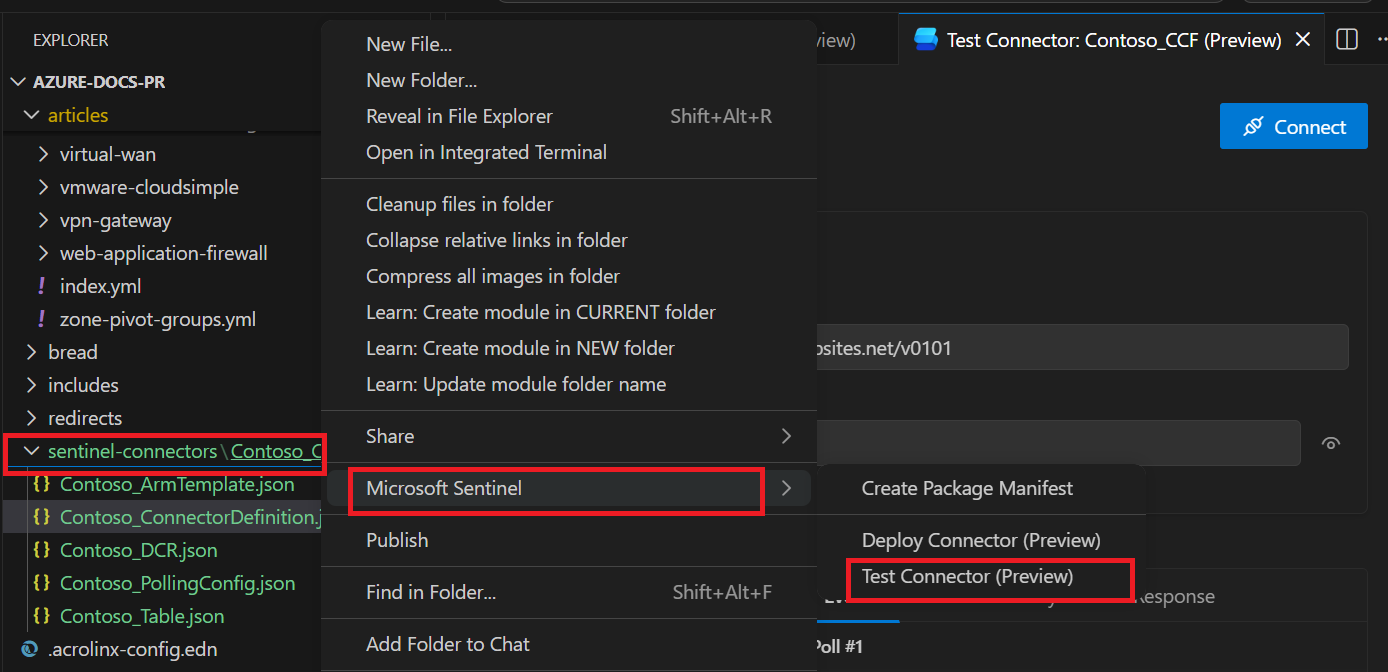
In the Test Connector pane, enter the authentication details for your data source API, and then select Connect.
Polling starts based on the settings in your polling configuration JSON file.
On the Events tab, review the request headers and the events returned by the API.
Note
This test confirms that the API call succeeded and returns events. It doesn't confirm that events are being written to your Microsoft Sentinel table. Table ingestion is validated when you finish setting up the connector in the Data connectors page in Microsoft Sentinel.
After you validate the connection, select Disconnect to stop the polling session.
Deploy the connector
To deploy the connector to a Microsoft Sentinel workspace, follow these steps:
After the validation test succeeds, select Deploy in the chat window to start deploying the connector.
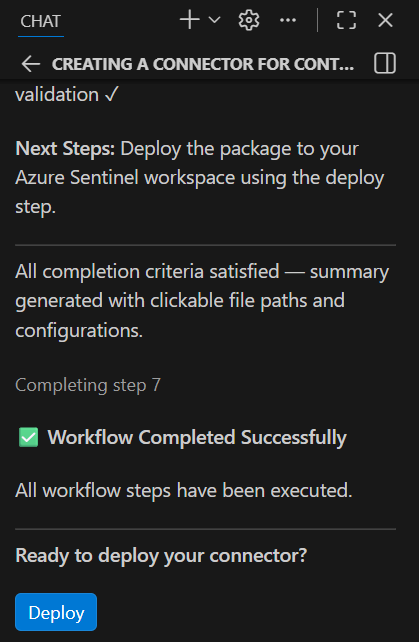
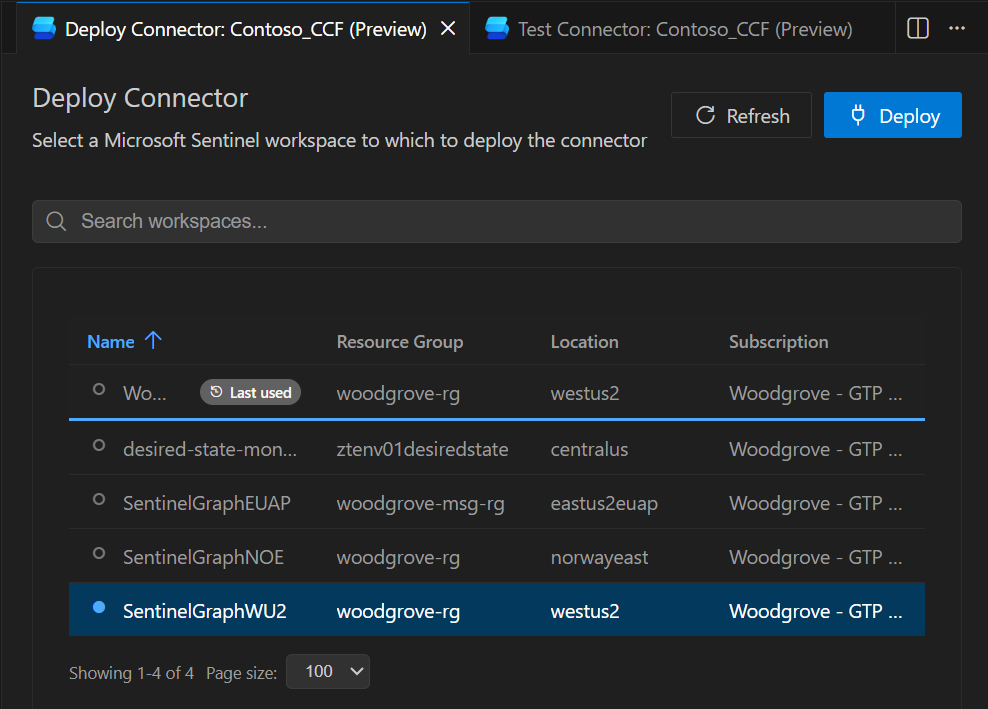
The extension opens a panel where you can choose from your available Microsoft Sentinel workspaces.
Select a workspace, then select Deploy to deploy the connector to that workspace.
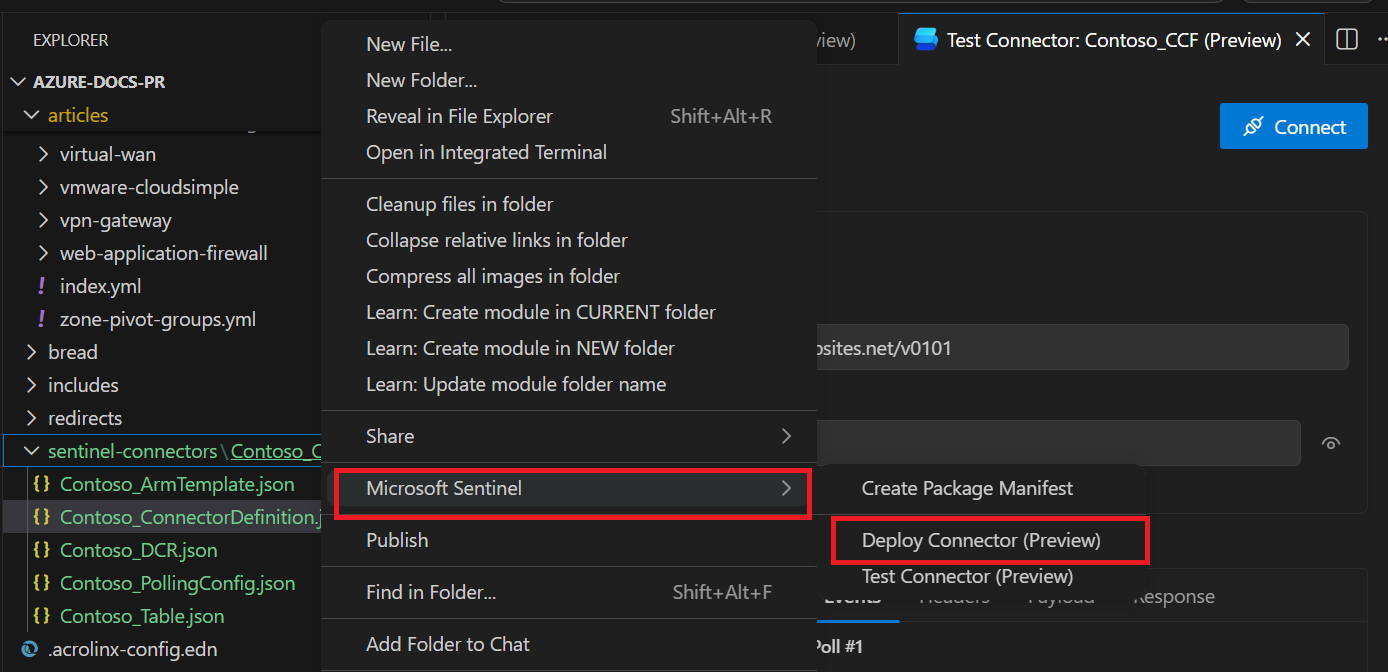
Alternatively, right-click the folder that contains the generated files, select Microsoft Sentinel > Deploy Connector.
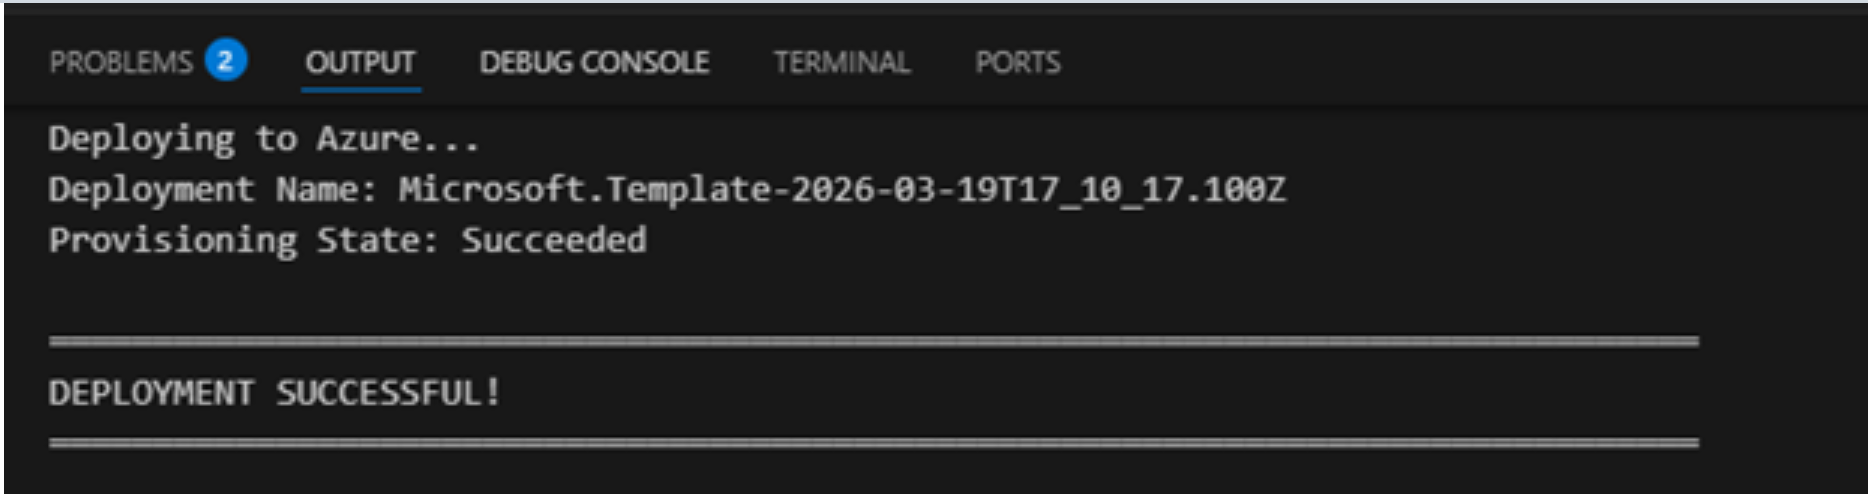
When deployment completes, a success message appears in the Output window.
Note
After deployment into a Sentinel workspace, this connector focuses on ingesting data into Microsoft Sentinel tables. It doesn’t include a complete solution package or prebuilt end-to-end SOAR workflows for security coverage. If you need automation, create the required playbooks and workflows for your scenario.
Get help
- For ISV partners building integrations, contact: azuresentinelpartner@microsoft.com
- For technical questions, use Microsoft Q&A with the tag 'azure-sentinel'