Build custom virtual machine images with GitHub Actions and Azure
Get started with the GitHub Actions by creating a workflow to build a virtual machine image.
With GitHub Actions, you can speed up your CI/CD process by creating custom virtual machine images with artifacts from your workflows. You can both build images and distribute them to a Shared Image Gallery.
You can then use these images to create virtual machines and virtual machine scale sets.
The build virtual machine image action uses the Azure Image Builder service.
Prerequisites
- An Azure account with an active subscription. Create an account for free.
- A GitHub account with an active repository. If you don't have one, sign up for free.
- This example uses the Java Spring PetClinic Sample Application.
- An Azure Compute Gallery with an image.
Workflow file overview
A workflow is defined by a YAML (.yml) file in the /.github/workflows/ path in your repository. This definition contains the various steps and parameters that make up the workflow.
The file has three sections:
| Section | Tasks |
|---|---|
| Authentication | 1. Add a user-managed identity. 2. Set up a service principal or Open ID Connect. 3. Create a GitHub secret. |
| Build | 1. Set up the environment. 2. Build the app. |
| Image | 1. Create a VM Image. 2. Create a virtual machine. |
Create a user-managed identity
You'll need a user-managed identity for Azure Image Builder(AIB) to distribute images. Your Azure user-assigned managed identity will be used during the image build to read and write images to a Shared Image Gallery.
Create a user-managed identity with Azure CLI or the Azure portal. Write down the name of your managed identity.
Customize this JSON code. Replace the placeholders for
{subscriptionID}and{rgName}with your subscription ID and resource group name.{ "properties": { "roleName": "Image Creation Role", "IsCustom": true, "description": "Azure Image Builder access to create resources for the image build", "assignableScopes": [ "/subscriptions/{subscriptionID}/resourceGroups/{rgName}" ], "permissions": [ { "actions": [ "Microsoft.Compute/galleries/read", "Microsoft.Compute/galleries/images/read", "Microsoft.Compute/galleries/images/versions/read", "Microsoft.Compute/galleries/images/versions/write", "Microsoft.Compute/images/write", "Microsoft.Compute/images/read", "Microsoft.Compute/images/delete" ], "notActions": [], "dataActions": [], "notDataActions": [] } ] } }Use this JSON code to create a new custom role with JSON.
In Azure portal, open your Azure Compute Gallery and go to Access control (IAM).
Select Add role assignment and assign the Image Creation Role to your user-managed identity.
Generate deployment credentials
Create a service principal with the az ad sp create-for-rbac command in the Azure CLI. Run this command with Azure Cloud Shell in the Azure portal or by selecting the Try it button.
az ad sp create-for-rbac --name "myML" --role contributor \
                            --scopes /subscriptions/<subscription-id>/resourceGroups/<group-name> \
                            --json-auth
The parameter --json-auth is available in Azure CLI versions >= 2.51.0. Versions prior to this use --sdk-auth with a deprecation warning.
In the example above, replace the placeholders with your subscription ID, resource group name, and app name. The output is a JSON object with the role assignment credentials that provide access to your App Service app similar to below. Copy this JSON object for later.
  {
    "clientId": "<GUID>",
    "clientSecret": "<GUID>",
    "subscriptionId": "<GUID>",
    "tenantId": "<GUID>",
    (...)
  }
Create GitHub secrets
In GitHub, go to your repository.
Go to Settings in the navigation menu.
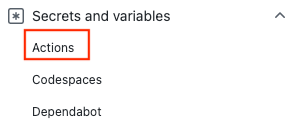
Select Security > Secrets and variables > Actions.
Select New repository secret.
Paste the entire JSON output from the Azure CLI command into the secret's value field. Give the secret the name
AZURE_CREDENTIALS.Select Add secret.
Use the Azure login action
Use your GitHub secret with the Azure Login action to authenticate to Azure.
In this workflow, you authenticate using the Azure login action with the service principal details stored in secrets.AZURE_CREDENTIALS. Then, you run an Azure CLI action. For more information about referencing GitHub secrets in a workflow file, see Using encrypted secrets in a workflow in GitHub Docs.
on: [push]

name: Create Custom VM Image

jobs:
  build-image:
    runs-on: ubuntu-latest
    steps:
      - name: Log in with Azure
        uses: azure/login@v1
        with:
          creds: '${{ secrets.AZURE_CREDENTIALS }}'
Configure Java
Set up the Java environment with the Java Setup SDK action. For this example, you'll set up the environment, build with Maven, and then output an artifact.
GitHub artifacts are a way to share files in a workflow between jobs. You'll create an artifact to hold the JAR file and then add it to the virtual machine image.
on: [push]

name: Create Custom VM Image

jobs:
  build-image:
    runs-on: ubuntu-latest
    strategy:
      matrix:
        java: [ '17' ]

    steps:
    - name: Checkout
      uses: actions/checkout@v3

    - name: Login via Az module
      uses: azure/login@v1
      with:
        creds: ${{secrets.AZURE_CREDENTIALS}}

    - name: Set up JDK ${{matrix.java}}
      uses: actions/setup-java@v2
      with:
        java-version: ${{matrix.java}}
        distribution: 'adopt'
        cache: maven
    - name: Build with Maven Wrapper
      run: ./mvnw -B package

    - name: Build Java
      run: mvn --batch-mode --update-snapshots verify

    - run: mkdir staging && cp target/*.jar staging
    - uses: actions/upload-artifact@v2
      with:
        name: Package
        path: staging
Build your image
Use the Build Azure Virtual Machine Image action to create a custom virtual machine image.
Replace the placeholders for {subscriptionID}, {rgName}and {Identity} with your subscription ID, resource group name, and managed identity name. Replace the values of {galleryName} and {imageName} with your image gallery name and your image name.
Note
If the Create App Baked Image action fails with a permission error, verify that you have assigned the Image Creation Role to your user-managed identity.
    - name: Create App Baked Image
      id: imageBuilder
      uses: azure/build-vm-image@v0
      with:
        location: 'eastus2'
        resource-group-name: '{rgName}'
        managed-identity: '{Identity}' # Managed identity
        source-os-type: 'windows'
        source-image-type: 'platformImage'
        source-image: MicrosoftWindowsServer:WindowsServer:2019-Datacenter:latest #unique identifier of source image
        dist-type: 'SharedImageGallery'
        dist-resource-id: '/subscriptions/{subscriptionID}/resourceGroups/{rgName}/providers/Microsoft.Compute/galleries/{galleryName}/images/{imageName}/versions/0.1.${{ GITHUB.RUN_ID }}' #Replace with the resource id of your shared image  gallery's image definition
        dist-location: 'eastus2'
Virtual Machine action arguments
| Input | Required | Description |
|---|---|---|
resource-group-name |
Yes | The resource group used for storage and saving artifacts during the build process. |
image-builder-template-name |
No | The name of the image builder template resource used. |
location |
Yes | The location where Azure Image Builder will run. See supported locations. |
build-timeout-in-minutes |
No | Time after which the build is canceled. Defaults to 240. |
vm-size |
Optional | By default, Standard_D1_v2 will be used. See virtual machine sizes. |
managed-identity |
Yes | The user-managed identity you created earlier. Use the full identifier if your identity is in a different resources group. Use the name if it is in the same resource group. |
source-os |
Yes | The OS type of the base image (Linux or Windows) |
source-image-type |
Yes | The base image type that will be used for creating the custom image. |
source-image |
Yes | The resource identifier for base image. A source image should be present in the same Azure region set in the input value of location. |
customizer-source |
No | The directory where you can keep all the artifacts that need to be added to the base image for customization. By default, the value is ${{ GITHUB.WORKSPACE }}/workflow-artifacts. |
customizer-destination |
No | This is the directory in the customized image where artifacts are copied to. |
customizer-windows-update |
No | For Windows only. Boolean value. If true, the image builder will run Windows update at the end of the customizations. |
dist-location |
No | For SharedImageGallery, this is the dist-type. |
dist-image-tags |
No | These are user-defined tags that are added to the custom image created (example: version:beta). |
Create your virtual machine
As a last step, create a virtual machine from your image.
Replace the placeholders for
{rgName}with your resource group name.Add a GitHub secret with the virtual machine password (
VM_PWD). Be sure to write down the password because you will not be able to see it again. The username ismyuser.
    - name: CREATE VM
      uses: azure/CLI@v1
      with:
        azcliversion: 2.0.72
        inlineScript: |
        az vm create --resource-group ghactions-vMimage  --name "app-vm-${{ GITHUB.RUN_NUMBER }}"  --admin-username myuser --admin-password "${{ secrets.VM_PWD }}" --location  eastus2 \
            --image "${{ steps.imageBuilder.outputs.custom-image-uri }}"
Complete YAML
  on: [push]

  name: Create Custom VM Image

  jobs:
    build-image:
      runs-on: ubuntu-latest
      steps:
      - name: Checkout
        uses: actions/checkout@v2

      - name: Login via Az module
        uses: azure/login@v1
        with:
          creds: ${{secrets.AZURE_CREDENTIALS}}

      - name: Setup Java 1.8.x
        uses: actions/setup-java@v1
        with:
          java-version: '1.8.x'

      - name: Build Java
        run: mvn --batch-mode --update-snapshots verify

      - run: mkdir staging && cp target/*.jar staging
      - uses: actions/upload-artifact@v2
        with:
          name: Package
          path: staging

      - name: Create App Baked Image
        id: imageBuilder
        uses: azure/build-vm-image@v0
        with:
          location: 'eastus2'
          resource-group-name: '{rgName}'
          managed-identity: '{Identity}' # Managed identity
          source-os-type: 'windows'
          source-image-type: 'platformImage'
          source-image: MicrosoftWindowsServer:WindowsServer:2019-Datacenter:latest #unique identifier of source image
          dist-type: 'SharedImageGallery'
          dist-resource-id: '/subscriptions/{subscriptionID}/resourceGroups/{rgName}/providers/Microsoft.Compute/galleries/{galleryName}/images/{imageName}/versions/0.1.${{ GITHUB.RUN_ID }}' #Replace with the resource id of your shared image  gallery's image definition
          dist-location: 'eastus2'

      - name: CREATE VM
        uses: azure/CLI@v1
        with:
          azcliversion: 2.0.72
          inlineScript: |
          az vm create --resource-group ghactions-vMimage  --name "app-vm-${{ GITHUB.RUN_NUMBER }}"  --admin-username myuser --admin-password "${{ secrets.VM_PWD }}" --location  eastus2 \
              --image "${{ steps.imageBuilder.outputs.custom-image-uri }}"
Next steps
- Learn how to deploy to Azure.
Feedback
Coming soon: Throughout 2024 we will be phasing out GitHub Issues as the feedback mechanism for content and replacing it with a new feedback system. For more information see: https://aka.ms/ContentUserFeedback.
Submit and view feedback for