Note
Access to this page requires authorization. You can try signing in or changing directories.
Access to this page requires authorization. You can try changing directories.
You can use private endpoints to allow ingress of events directly from your virtual network to entities in your Event Grid namespaces securely over a private link without going through the public internet. The private endpoint uses an IP address from the virtual network address space for your namespace. When an MQTT client on a private network connects to the MQTT broker on a private link, the client can publish and subscribe to MQTT messages. For more conceptual information, see Network security.
This article shows you how to enable private network access for an Event Grid namespace. For complete steps for creating a namespace, see Create and manage namespaces.
Create a private endpoint
Sign-in to the Azure portal.
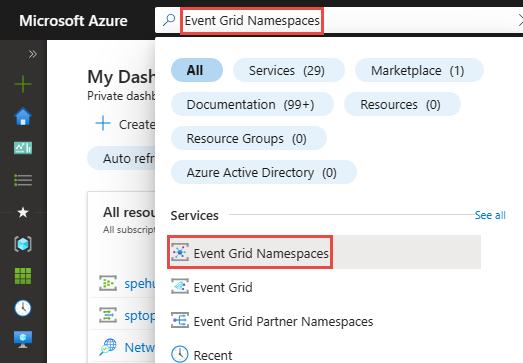
In the search box, enter Event Grid Namespaces and select Event Grid Namespaces from the results.
Select your Event Grid namespace in the list to open the Event Grid Namespace page for your namespace.
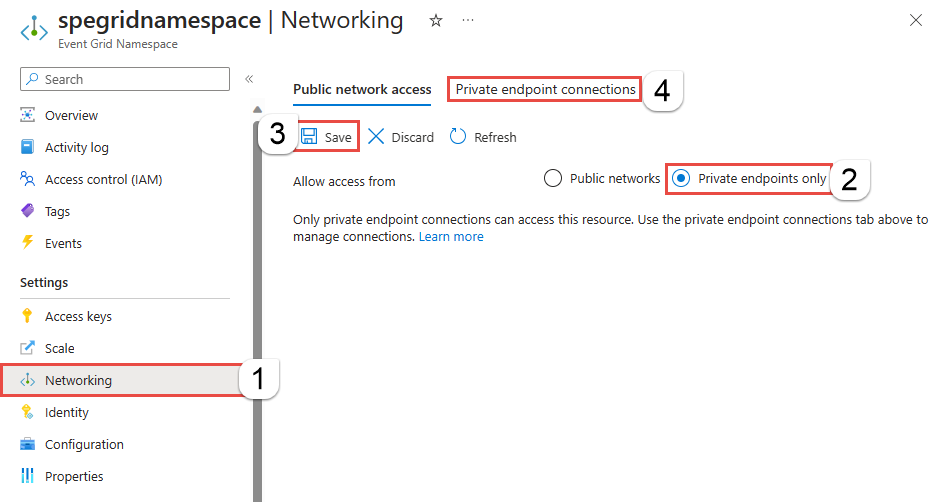
On the Event Grid Namespace page, select Networking on the left menu.
In the Public network access tab, select Private endpoints only if you want the namespace to be accessed only via private endpoints.
Note
Disabling public network access on the namespace will cause the MQTT routing to fail.
Select Save on the toolbar.
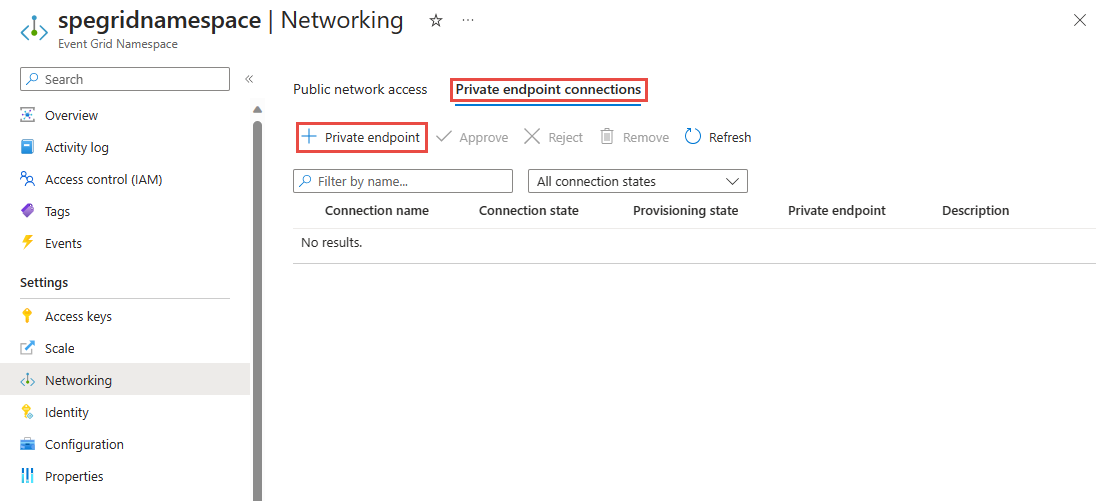
Then, switch to the Private endpoint connections tab.
In the Private endpoint connections tab, select + Private endpoint.
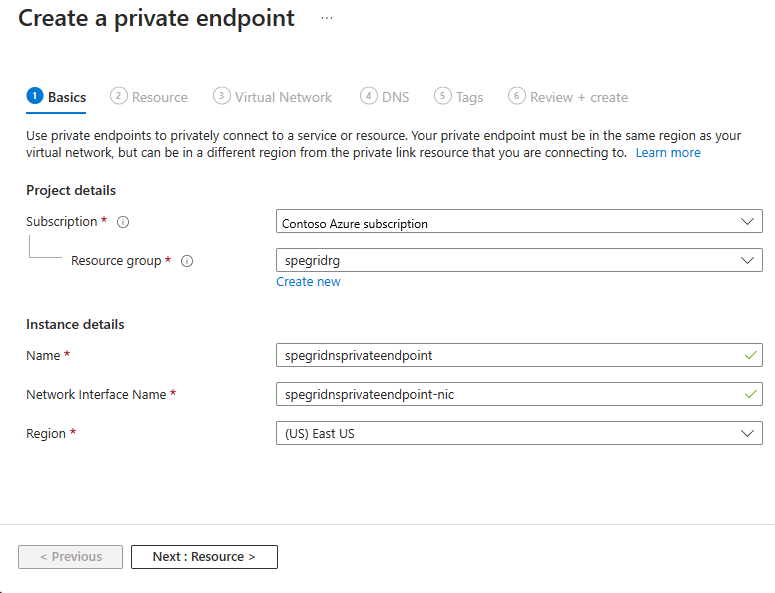
On the Basics page, follow these steps:
Select an Azure subscription in which you want to create the private endpoint.
Select an Azure resource group for the private endpoint.
Enter a name for the endpoint.
Update the name for the network interface if needed.
Select the region for the endpoint. Your private endpoint must be in the same region as your virtual network, but can in a different region from the private link resource (in this example, an Event Grid namespace).
Then, select Next: Resource > button at the bottom of the page.
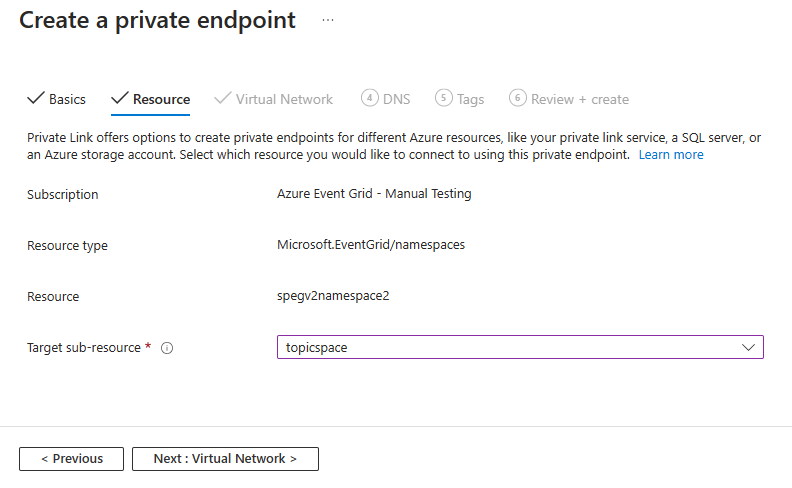
On the Resource page, follow these steps.
Confirm that the Azure subscription, Resource type, and Resource (that is, your Event Grid namespace) looks correct
Select a Target sub-resource. For example:
topicspace. You seetopicspaceonly if you have MQTT enabled on the namespace.Select Next: Virtual Network > button at the bottom of the page.
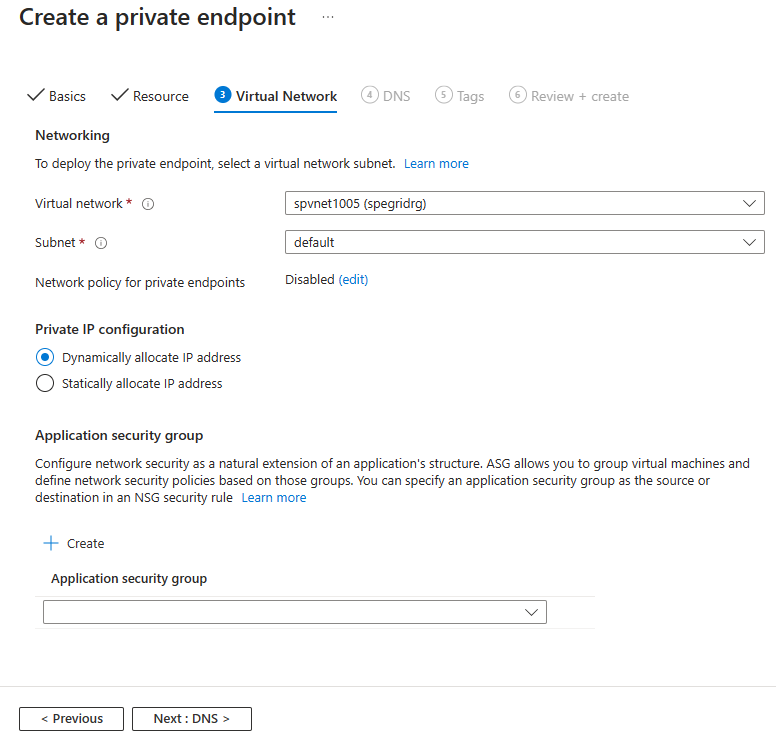
On the Virtual Network page, you select the subnet in a virtual network to where you want to deploy the private endpoint.
Select a virtual network. Only virtual networks in the currently selected subscription and location are listed in the drop-down list.
Select a subnet in the virtual network you selected.
Specify whether you want the IP address to be allocated statically or dynamically.
Select an existing application security group or create one and then associate with the private endpoint.
Select Next: DNS > button at the bottom of the page.
On the DNS page, select whether you want the private endpoint to be integrated with a private DNS zone, and then select Next: Tags at the bottom of the page.
On the Tags page, create any tags (names and values) that you want to associate with the private endpoint resource. Then, select Review + create button at the bottom of the page.
On the Review + create, review all the settings, and select Create to create the private endpoint.
Manage private link connection
When you create a private endpoint, the connection must be approved. If the resource for which you're creating a private endpoint is in your directory, you can approve the connection request provided you have sufficient permissions. If you're connecting to an Azure resource in another directory, you must wait for the owner of that resource to approve your connection request.
There are four provisioning states:
| Service action | Service consumer private endpoint state | Description |
|---|---|---|
| None | Pending | Connection is created manually and is pending approval from the private Link resource owner. |
| Approve | Approved | Connection was automatically or manually approved and is ready to be used. |
| Reject | Rejected | Connection was rejected by the private link resource owner. |
| Remove | Disconnected | Connection was removed by the private link resource owner. The private endpoint becomes informative and should be deleted for cleanup. |
The following sections show you how to approve or reject a private endpoint connection.
- Sign in to the Azure portal.
- In the search bar, type in Event Grid Namespaces, and select it to see the list of namespaces.
- Select the namespace that you want to manage.
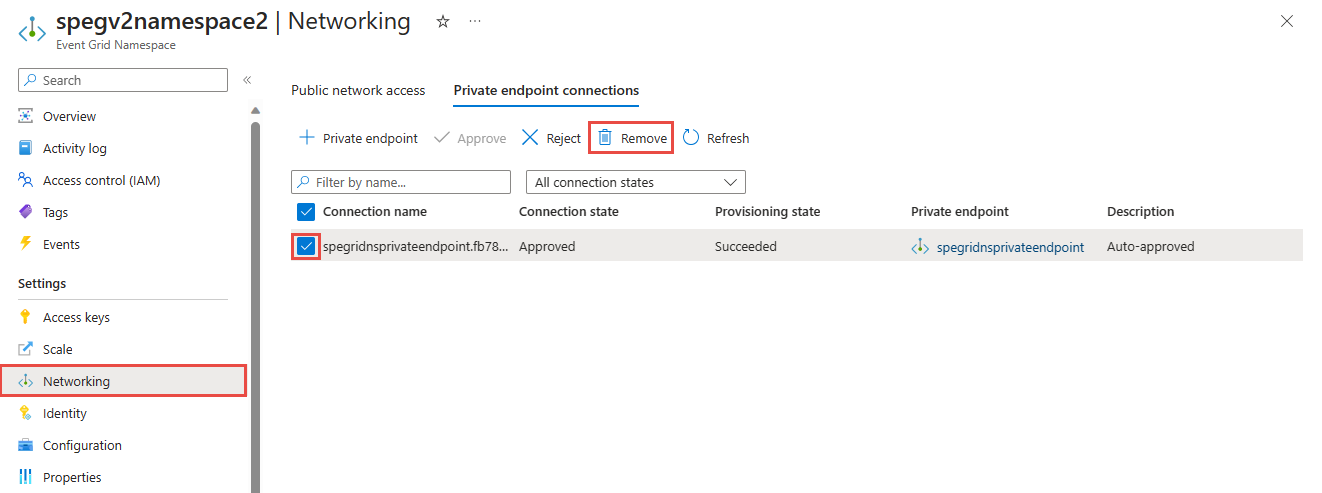
- Select the Networking tab.
- If there are any connections that are pending, you see a connection listed with Pending in the provisioning state.
Approve a private endpoint
You can approve a private endpoint that's in the pending state. To approve, follow these steps:
- Select the private endpoint you wish to approve, and select Approve on the toolbar.
- On the Approve connection dialog box, enter a comment (optional), and select Yes.
- Confirm that you see the status of the endpoint as Approved.
Reject a private endpoint
You can reject a private endpoint that's in the pending state or approved state. To reject, follow these steps:
Select the private endpoint you wish to reject, and select Reject on the toolbar.
On the Reject connection dialog box, enter a comment (optional), and select Yes.
Confirm that you see the status of the endpoint as Rejected.

Note
You can't approve a private endpoint in the Azure portal once it's rejected.
Remove a private endpoint
To delete a private endpoint, follow these steps:
Select the private endpoint you wish to delete, and select Remove on the toolbar.
On the Delete connection dialog box, select Yes to delete the private endpoint.
Next steps
To learn about how to configure IP firewall settings, see Configure IP firewall for Azure Event Grid namespaces.