Note
Access to this page requires authorization. You can try signing in or changing directories.
Access to this page requires authorization. You can try changing directories.
In this tutorial, you ingest more dimensional and fact tables from the Wide World Importers (WWI) into the lakehouse.
Prerequisites
- If you don't have a lakehouse, you must create a lakehouse.
Ingest data
In this section, you use the Copy data activity of the Data Factory pipeline to ingest sample data from an Azure storage account to the Files section of the lakehouse you created earlier.
Select Workspaces in the left navigation pane, and then select your new workspace from the Workspaces menu. The items view of your workspace appears.
From the New item option in the workspace ribbon, select Pipeline.
In the New pipeline dialog box, specify the name as IngestDataFromSourceToLakehouse and select Create.
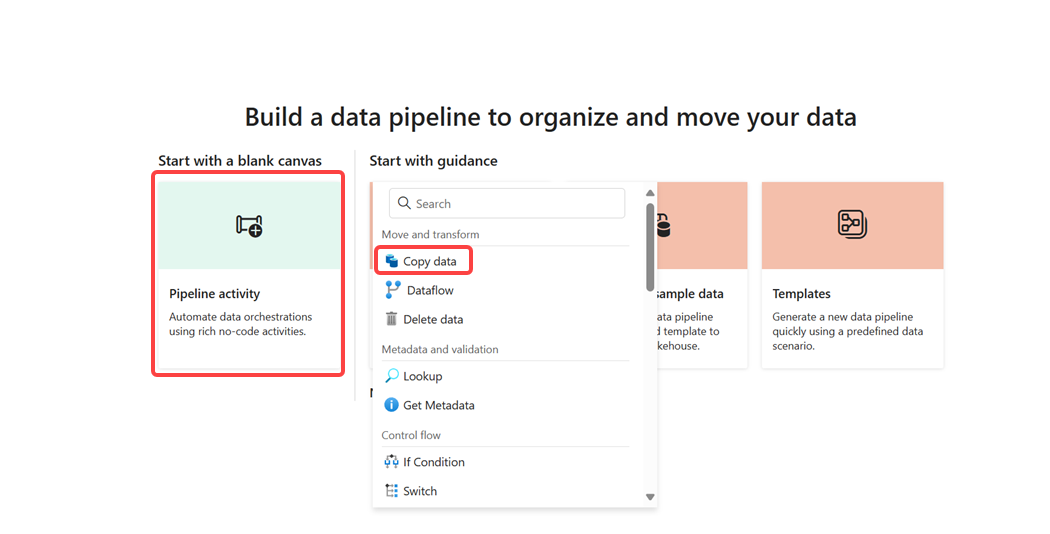
From your newly created pipeline, select Pipeline activity to add an activity to the pipeline and select Copy data. This action adds copy data activity to the pipeline canvas.
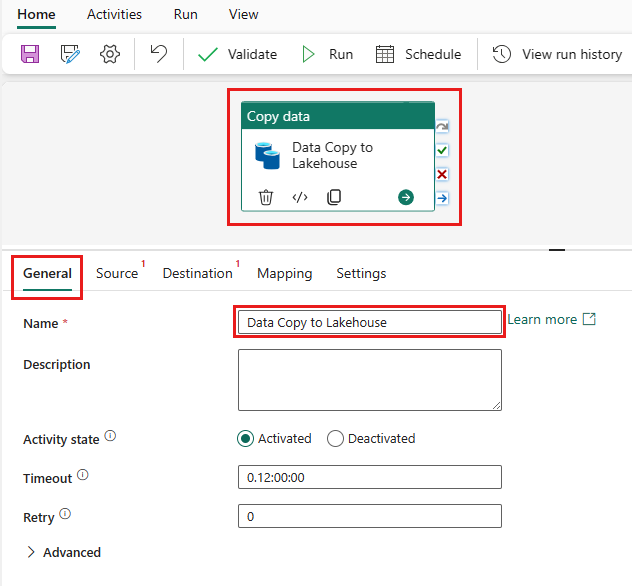
Select the newly added copy data activity from the canvas. Activity properties appear in a pane below the canvas (you might need to expand the pane upwards by dragging the top edge). From the General tab in the properties pane, type Data Copy to Lakehouse in the Name field. Leave remaining properties to their default values.
From the Source tab of the selected copy data activity, open the Connection field and select Browse all. Choose data source window pops up, search and select Azure blobs. For this tutorial, all the sample data is available in a public container of Azure blob storage. You connect to this container to copy data from it.
Enter the following details in the Connection settings window, and select Connect to create the connection to the data source.
Property Value Account name or URL https://fabrictutorialdata.blob.core.windows.net/sampledata/Connection Create new connection Connection name wwisampledata Authentication kind Anonymous 
Once the new connection is created, return to the Source tab of the copy data activity, and the newly created connection is selected by default. Specify the following properties before moving to the destination settings.
Property Value Connection wwisampledata File path type File path File path Container name (first text box): sampledata
Directory name (second text box): WideWorldImportersDW/parquetRecursively Checked File format Binary 
From the Destination tab of the selected copy data activity, specify the following properties:
Property Value Connection wwilakehouse (choose your lakehouse if you named it differently) Root folder Files File path Directory name (first text box): wwi-raw-data File format Binary 
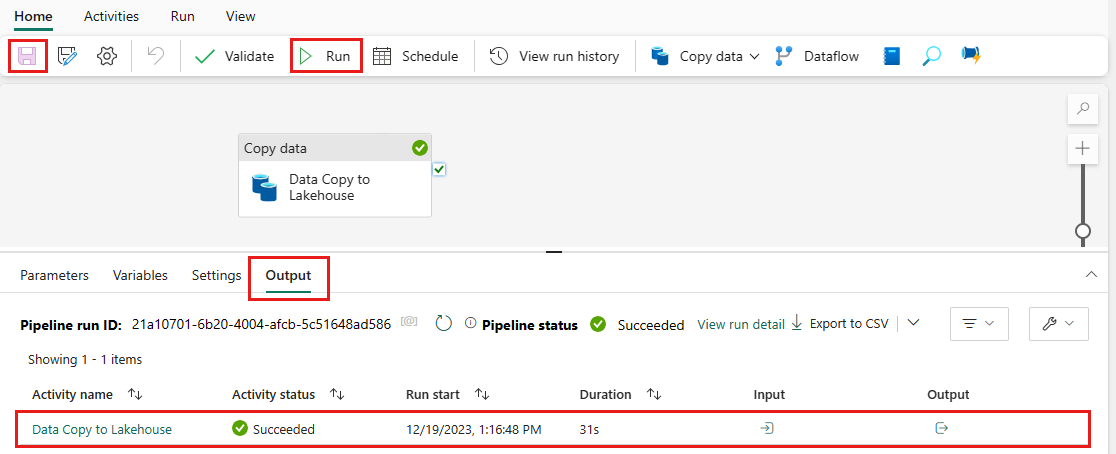
You have configured the copy data activity. Select the Save icon on the top ribbon (below Home) to save your changes, and select Run to execute your pipeline and its activity. You can also schedule pipelines to refresh data at defined intervals to meet your business requirements. For this tutorial, we run the pipeline only once by selecting Run.
This action triggers data copy from the underlying data source to the specified lakehouse and might take up to a minute to complete. You can monitor the execution of the pipeline and its activity under the Output tab. The activity status changes from Queued > In progress > Succeeded.
After the copy activity is successful, open your lakehouse (wwilakehouse) to view the data. Refresh the Files section to see the ingested data. A new folder wwi-raw-data appears in the files section, and data from Azure Blob tables is copied there.


