Exercise - Deploy a Docker image to an Azure Container Instance
Azure Container Instance enables you to run a Docker image in Azure.
In the previous exercise, you packaged and tested your web app as a local Docker image. Now, you want to use the output of that exercise, and make the web application available globally. To accomplish this availability, you run the image as an Azure Container Instance.
In this exercise, you'll learn how to rebuild the image for the web app and upload it to Azure Container Registry. You'll use the Azure Container Instance service to run the image.
Important
You need your own Azure subscription to run this exercise, and you might incur charges. If you don't already have an Azure subscription, create a free account before you begin.
Create a container registry
Sign in to the Azure portal with your Azure subscription.
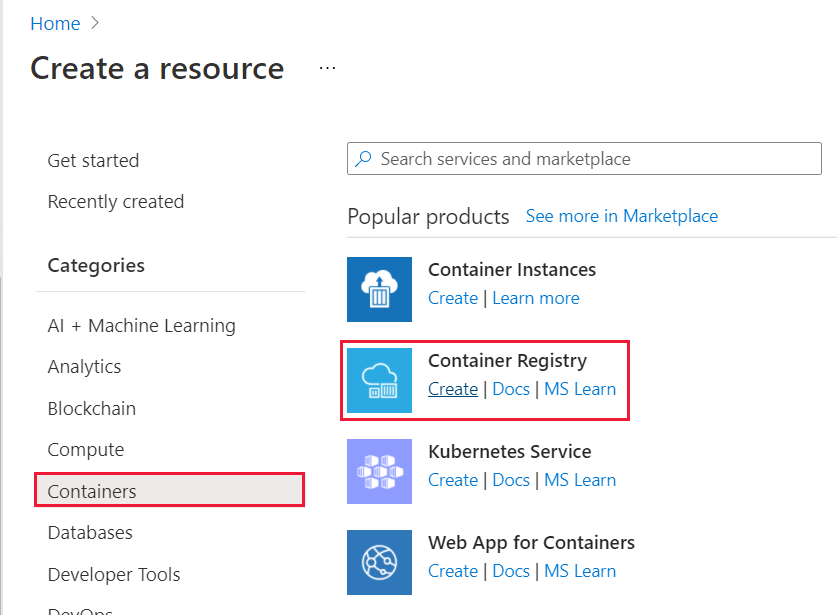
On the resource menu or from the Home page, select Create a resource. The Create a resource pane appears.
In the menu, select Containers, and then select Container Registry.
The Create container registry pane appears.
On the Basics tab, enter the following values for each setting.
Setting Value Project details Subscription Select your Azure subscription in which you're allowed to create and manage resources. Resource group Select Create a new resource group with the name learn-deploy-container-aci-rg. Remember the name you select; you'll be using it in the rest of the exercises in this module. Also, remember to clean up this resource when you're finished with the module. Instance details Registry name Select a name of your choice. The registry name must be unique within Azure, and contain 5-50 alphanumeric characters. Location Select a location that is close to you. SKU Standard Select Review + create. When the Validation passed notification appears, select Create. Wait until the container registry has been deployed before continuing.
Select Go to resource. The Container registry pane displays essentials about your container registry.
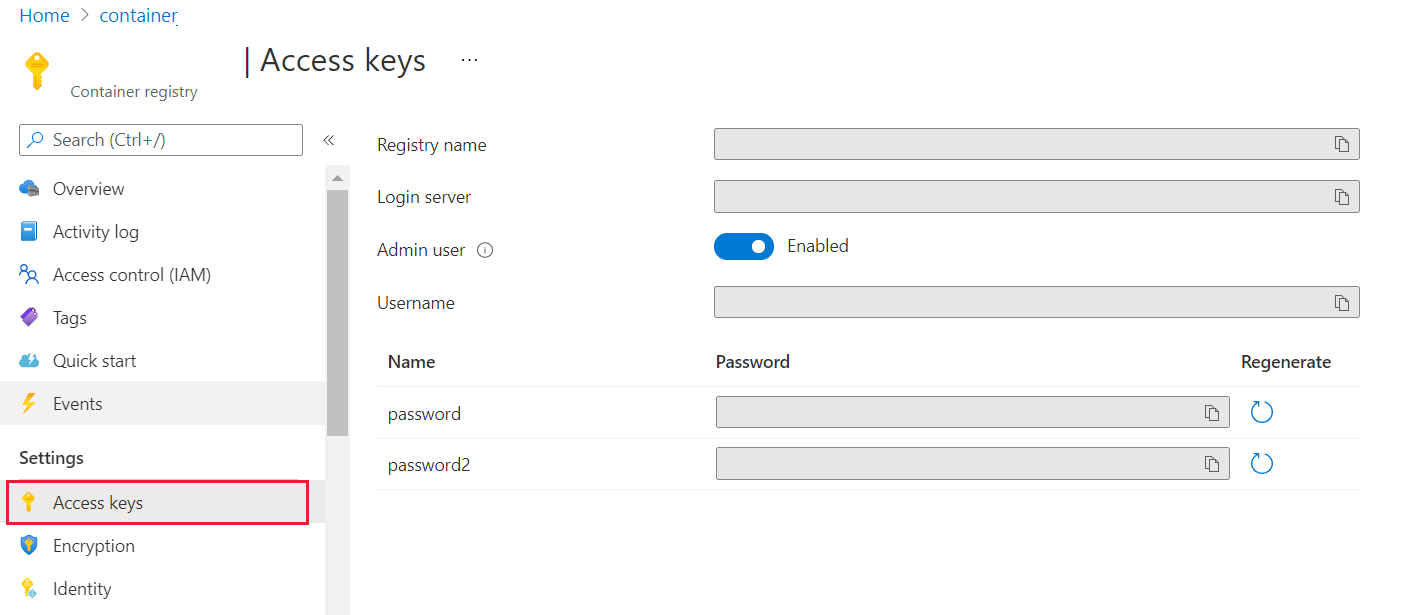
In the resource menu, under Settings, select Access keys. The Access keys pane for your container registry appears.
If the Admin user setting is disabled, select the slider to enable the Admin user access key. The Username and passwords appear for your container registry.
Make a note of the Registry name, Login server, Username, and passwords for your container registry.
Note
In this exercise, we enable the admin account access so that we can upload images and test the registry. In a production environment, it's important to disable the Admin user account access and use Microsoft Entra ID Protection as soon as you're satisfied that the registry is operating as expected.
Upload the image for the hotel reservation system app to Azure Container Registry
In your local command prompt, run the following command, replacing
<registry-name>with the name of your container registry to tag the currentreservationsystemimage with the name of your registry:docker tag reservationsystem:latest <registry-name>.azurecr.io/reservationsystem:latestRun the
docker image lscommand to verify that the image has been tagged correctly:docker image lsYou should see something similar to the following output:
REPOSITORY                                    TAG                 IMAGE ID            CREATED             SIZE
reservationsystem                             latest              a56281e7038f        4 minutes ago       1.76GB
<registry-name>.azurecr.io/reservationsystem  latest              a56281e7038f        4 minutes ago       1.76GB
In the command prompt, sign in to your Azure Container Registry. Use the
docker logincommand and specify the login server for the registry that you noted earlier. Enter the username and password from your access keys when prompted.docker login <login-server>Note
You might receive an error response from a daemon that your application is not registered with Microsoft Entra ID. As noted earlier in this exercise, you've enabled Admin user access key to test our deployment.
Enter the following command, replacing
<registry-name>with your own registry name to upload the image to your registry in Azure Container Registry:docker push <registry-name>.azurecr.io/reservationsystem:latestWait until the upload completes. This process will take several minutes to push all the objects of the image to your repository. You're able to observe the progress as each object advances from Waiting to Preparing to Pushing to Pushed.
Verify the contents of the registry
For the remainder of the exercise, you'll return to the Azure portal.
In the Azure portal, return to your container registry.
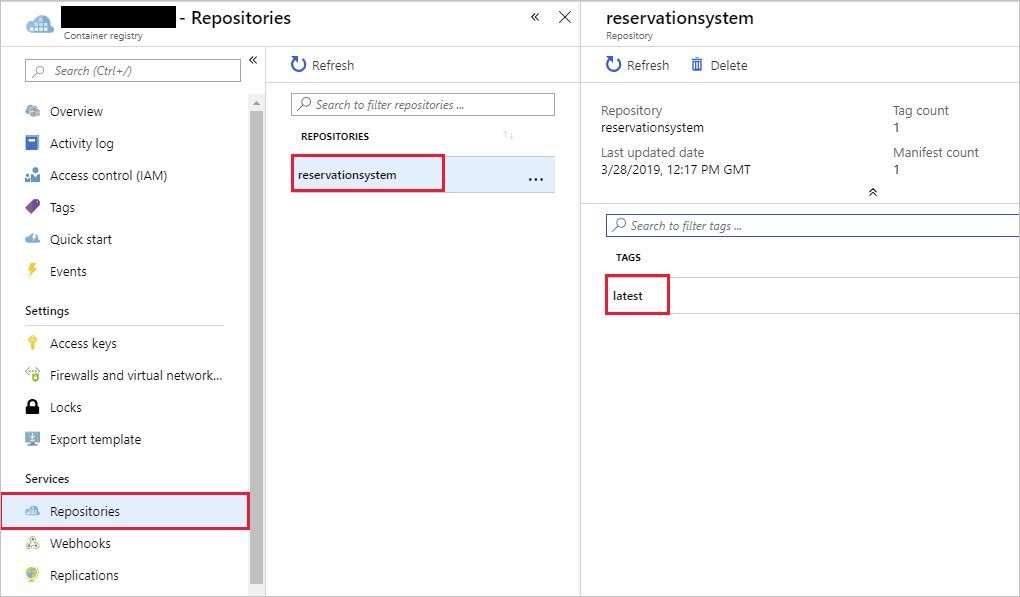
In the resource menu, under Services, select Repositories. The Repositories pane for your container registry appears.
Verify that the reservationsystem repository appears. Select the reservationsystem repository, and verify that the repository contains an image with the tag latest.
Load and run an image using Azure Container Instance
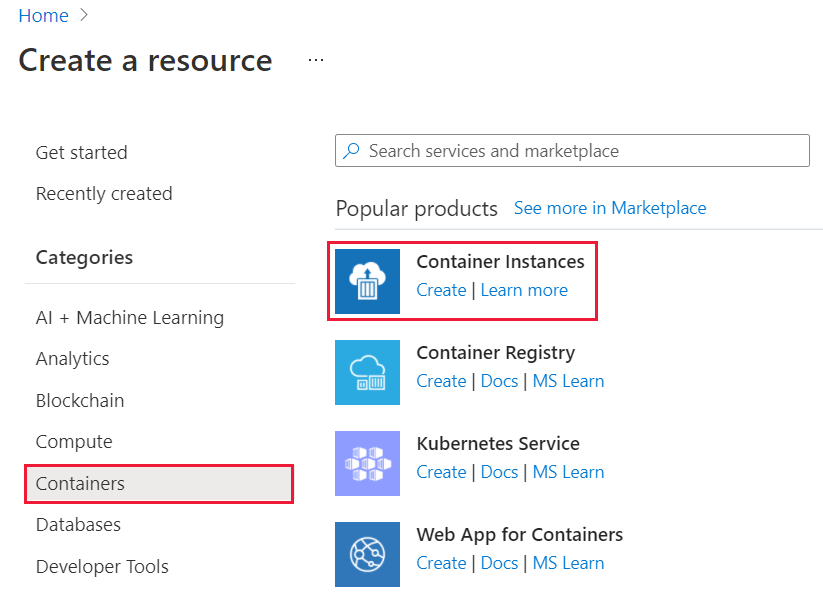
In the Azure portal, select Create a resource. The Create a resource pane appears.
In the resource menu, select Containers, and then select Container Instances.
The Create container instance pane appears.
There are several steps to configure a Container Instance. Start by setting the resource group information and container details. Next, configure the container's network options, and restart the policy.
On the Basics tab, enter the following values for each setting.
Setting Value Project details Subscription Select your default Azure subscription in which you're allowed to create and manage resources Resource group Reuse the existing resource group learn-deploy-container-aci-rg Container details Container name hotelsysteminstance Region Use the default location Image source Docker Hub or other registry Image type Private Image <registry-name>.azurecr.io/reservationsystem:latest Image registry login server Enter the login server name for your registry Image registry username Enter the username for your registry Image registry password Enter the password for your registry OS Type Linux Size Leave the default Size set to 1 vcpu, 1.5 GiB memory, 0 gpus Select Next: Networking.
On the Networking tab, enter the following values for each setting.
Setting Value Networking type Public DNS name label Choose a unique name, which will be used as part of the container's URL. Ports Ports 80 Ports protocol TCP Select Next: Advanced.
On the Advanced tab, enter the following values for each setting.
Setting Value Restart policy Always Environment variables leave all settings blank Command override leave blank Select Review + create. Wait for validation to complete, and correct any errors, if necessary.
Select Create.
When the container instance has been created, select Go to resource. Your container instance pane appears.
On the Overview pane, find the fully qualified domain name (FQDN) of the container instance.
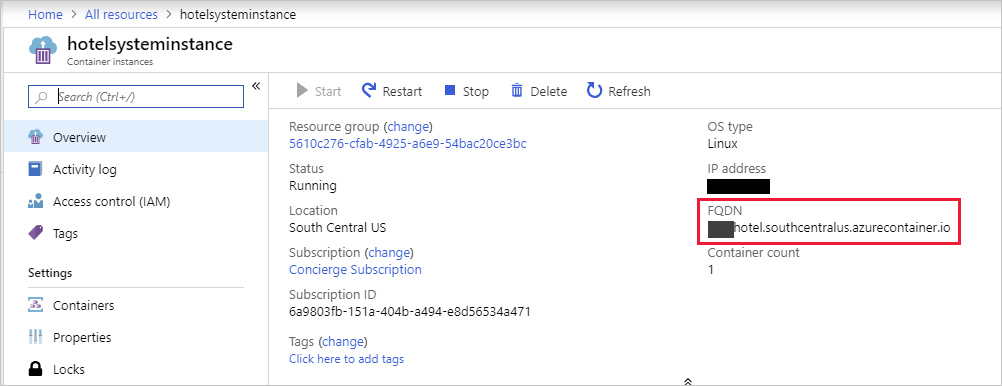
Using a web browser, navigate to the URL
http://FQDN/api/reservations/1, replacing FQDN with the fully qualified domain name of your container instance. For example, using the visible FQDN in the screenshot above would look like:http://hotel.southcentralus.azurecontainer.io/api/reservations/1The web app should respond with a JSON object containing the details for reservation 1.
Congratulations! You uploaded the Docker image to Azure Container Registry, and you ran the image using the Azure Container Instance service.