Note
Access to this page requires authorization. You can try signing in or changing directories.
Access to this page requires authorization. You can try changing directories.
This article provides an overview of synced passkeys in Microsoft Entra ID, including how they work and how to get started. Synced passkeys allow the private key to be created, encrypted, and synced to a cloud passkey provider so it can be used across multiple devices.
Overview
Synced passkeys are passkeys where the private key is created by the hardware security module (HSM) and encrypted on the local device. The encrypted key is then synced and stored in the cloud passkey provider. Other devices authenticated with the same passkey provider can then use the passkey. Examples of passkey providers include Apple iCloud Keychain and Google Password Manager.
Synced passkeys solve many of the issuance and management challenges associated with device-bound passkeys:
- Recovery: Because synced passkeys are backed up to the cloud, users don't lose access if they lose a single device.
- Ease of use: Users don't need to register a separate passkey on each device. The passkey syncs automatically.
- Reduced cost: Organizations don't need to issue and manage separate physical authenticators.
Based on learnings from hundreds of millions of consumer users of Microsoft accounts:
- 99% of users successfully register synced passkeys.
- Synced passkeys are 14x faster compared to a password and traditional MFA combination: 3 seconds instead of 69 seconds.
- Users are 3x more successful signing in with a synced passkey than with legacy authentication methods (95% vs 30%).
Synced passkeys don't support attestation. For most users outside highly regulated environments or without access to sensitive systems, synced passkeys offer a convenient, low-cost alternative to traditional MFA. For admins and highly privileged users, consider device-bound passkeys such as FIDO2 security keys or passkeys in Microsoft Authenticator.
For a comparison of passkey types, see Passkeys (FIDO2) authentication method in Microsoft Entra ID.
Prerequisites for synced passkey
An account with at least Authentication Policy Administrator permissions to configure authentication methods.
You need to enable passkey sign-in in the Passkey (FIDO2) policy in Authentication methods in the Microsoft Entra admin center.
The following table outlines the minimum device requirements for using synced passkeys. The columns represent the device platform where the user signs in.
Passkey provider Windows macOS iOS Android Apple Passwords (also called iCloud Keychain) N/A Natively built in.
macOS 13+Natively built in.
iOS 16+N/A Google Password Manager Built into Chrome Built into Chrome Built into Chrome.
iOS 17+Natively built in (excluding Samsung devices).
Android 9+Other passkey providers (such as 1Password, Bitwarden) Check for a browser extension Check for a browser extension Check for an app.
iOS 17+Check for an app.
Android 14+
Configure a profile for synced passkeys
Sign in to the Microsoft Entra admin center as at least an Authentication Policy Administrator.
Browse to Entra ID > Authentication methods.
On the Authentication methods | Policies page, select Passkey (FIDO2) > Configure.
Make sure Allow self-service setup is selected.
Select + Add profile.
Provide a name and for Passkey types, select Synced and Save.
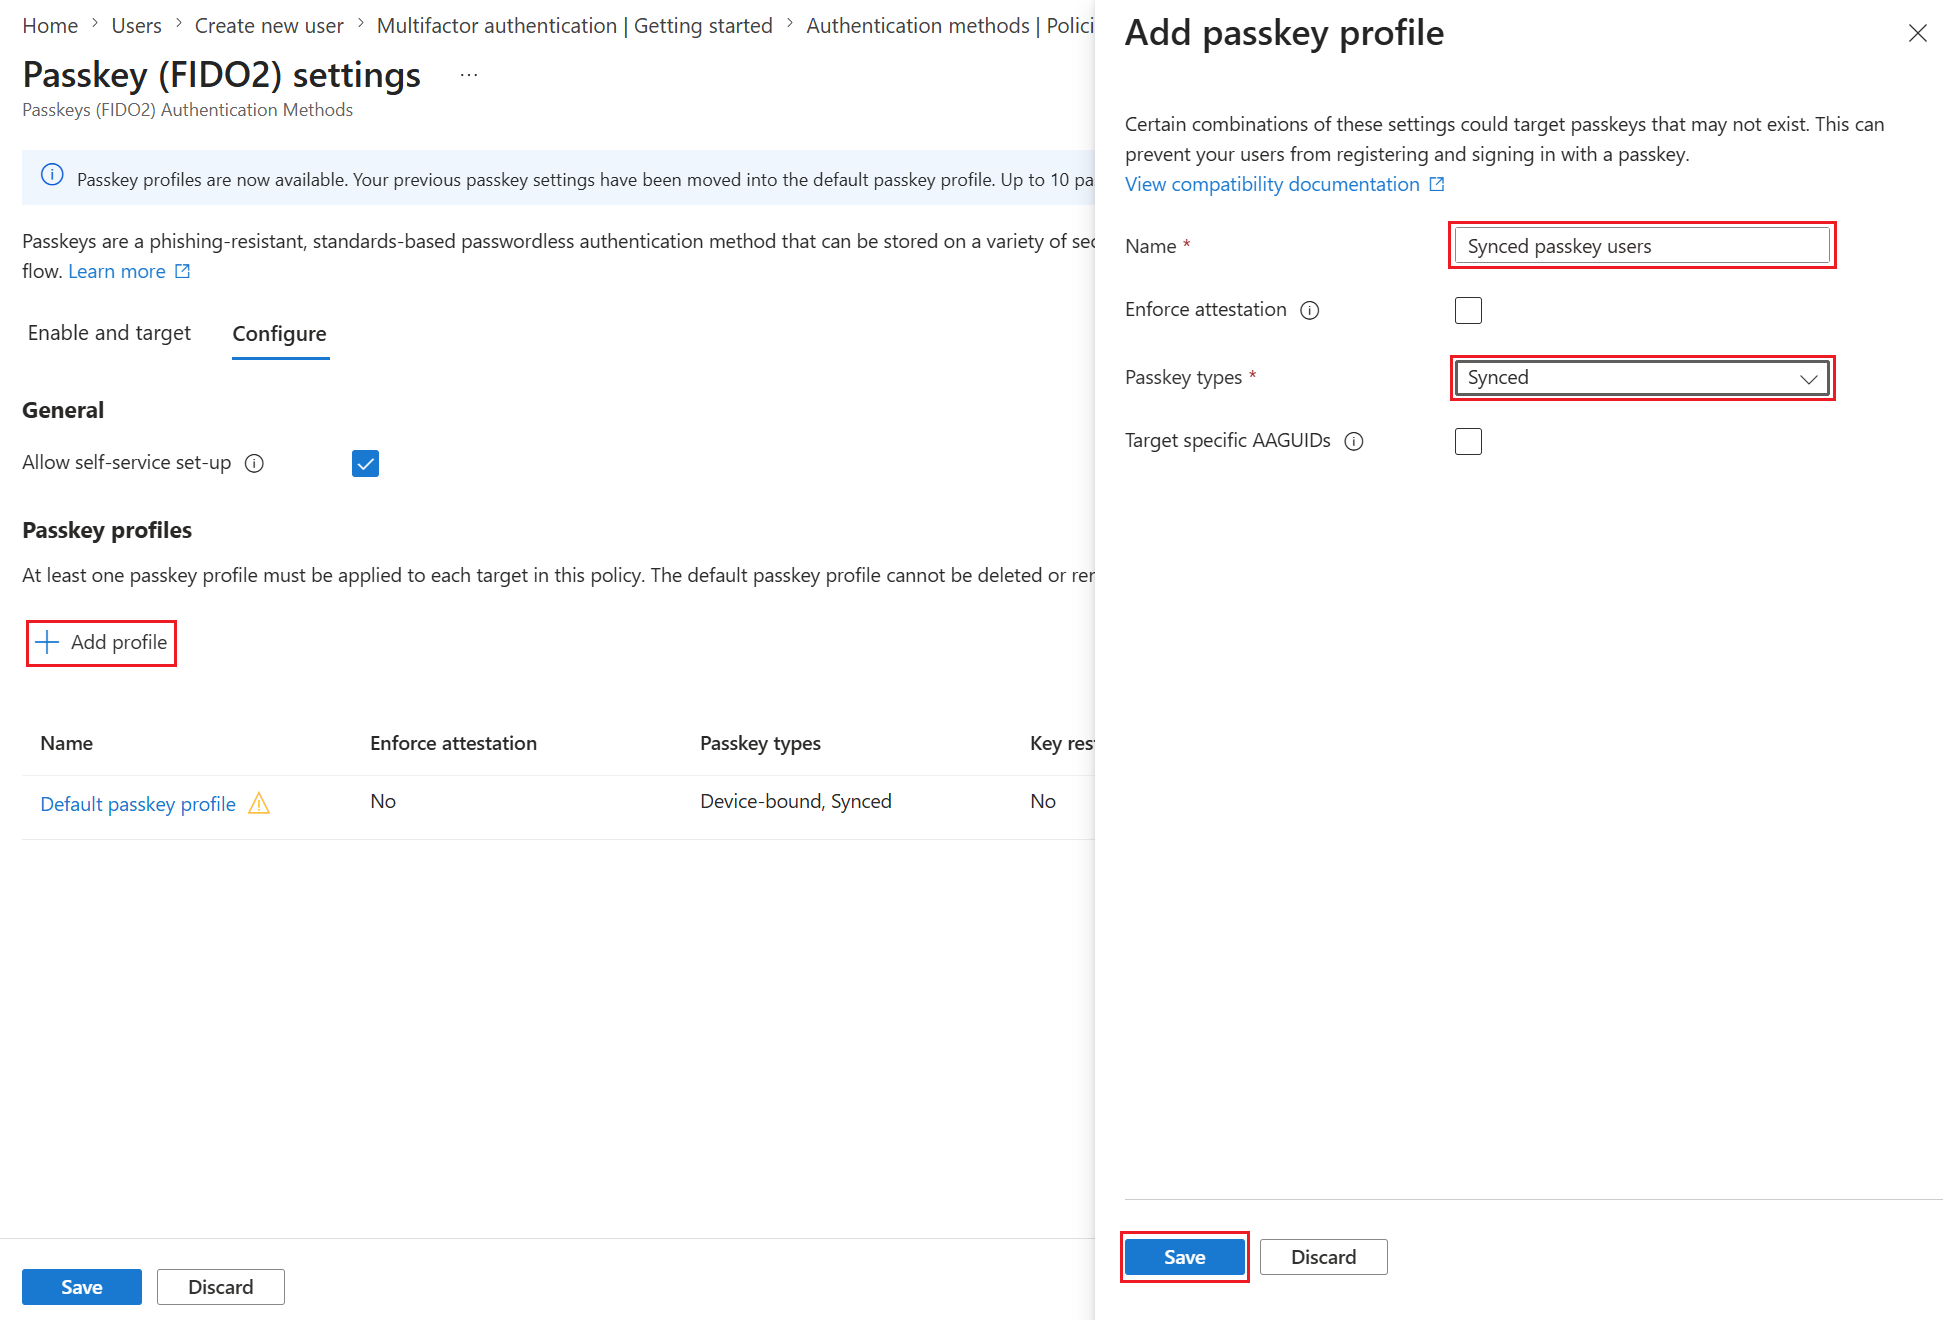
Note
If you disable synced passkeys for a given passkey profile, targeted users can't sign in with a synced passkey even if they already registered one.
Enable and target groups for a profile for synced passkeys
Sign in to the Microsoft Entra admin center as at least an Authentication Policy Administrator.
Browse to Entra ID > Authentication methods.
On the Authentication methods | Policies page, select Passkey (FIDO2) > Enable and target.
On the Enable and Target tab, make sure Enable is On.
Select Add target, and choose All users or Select targets to choose specific groups.
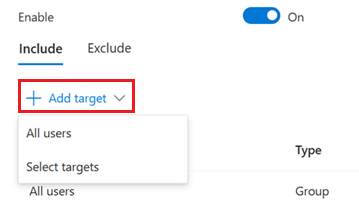
Select the profile for synced passkeys, and select Save.
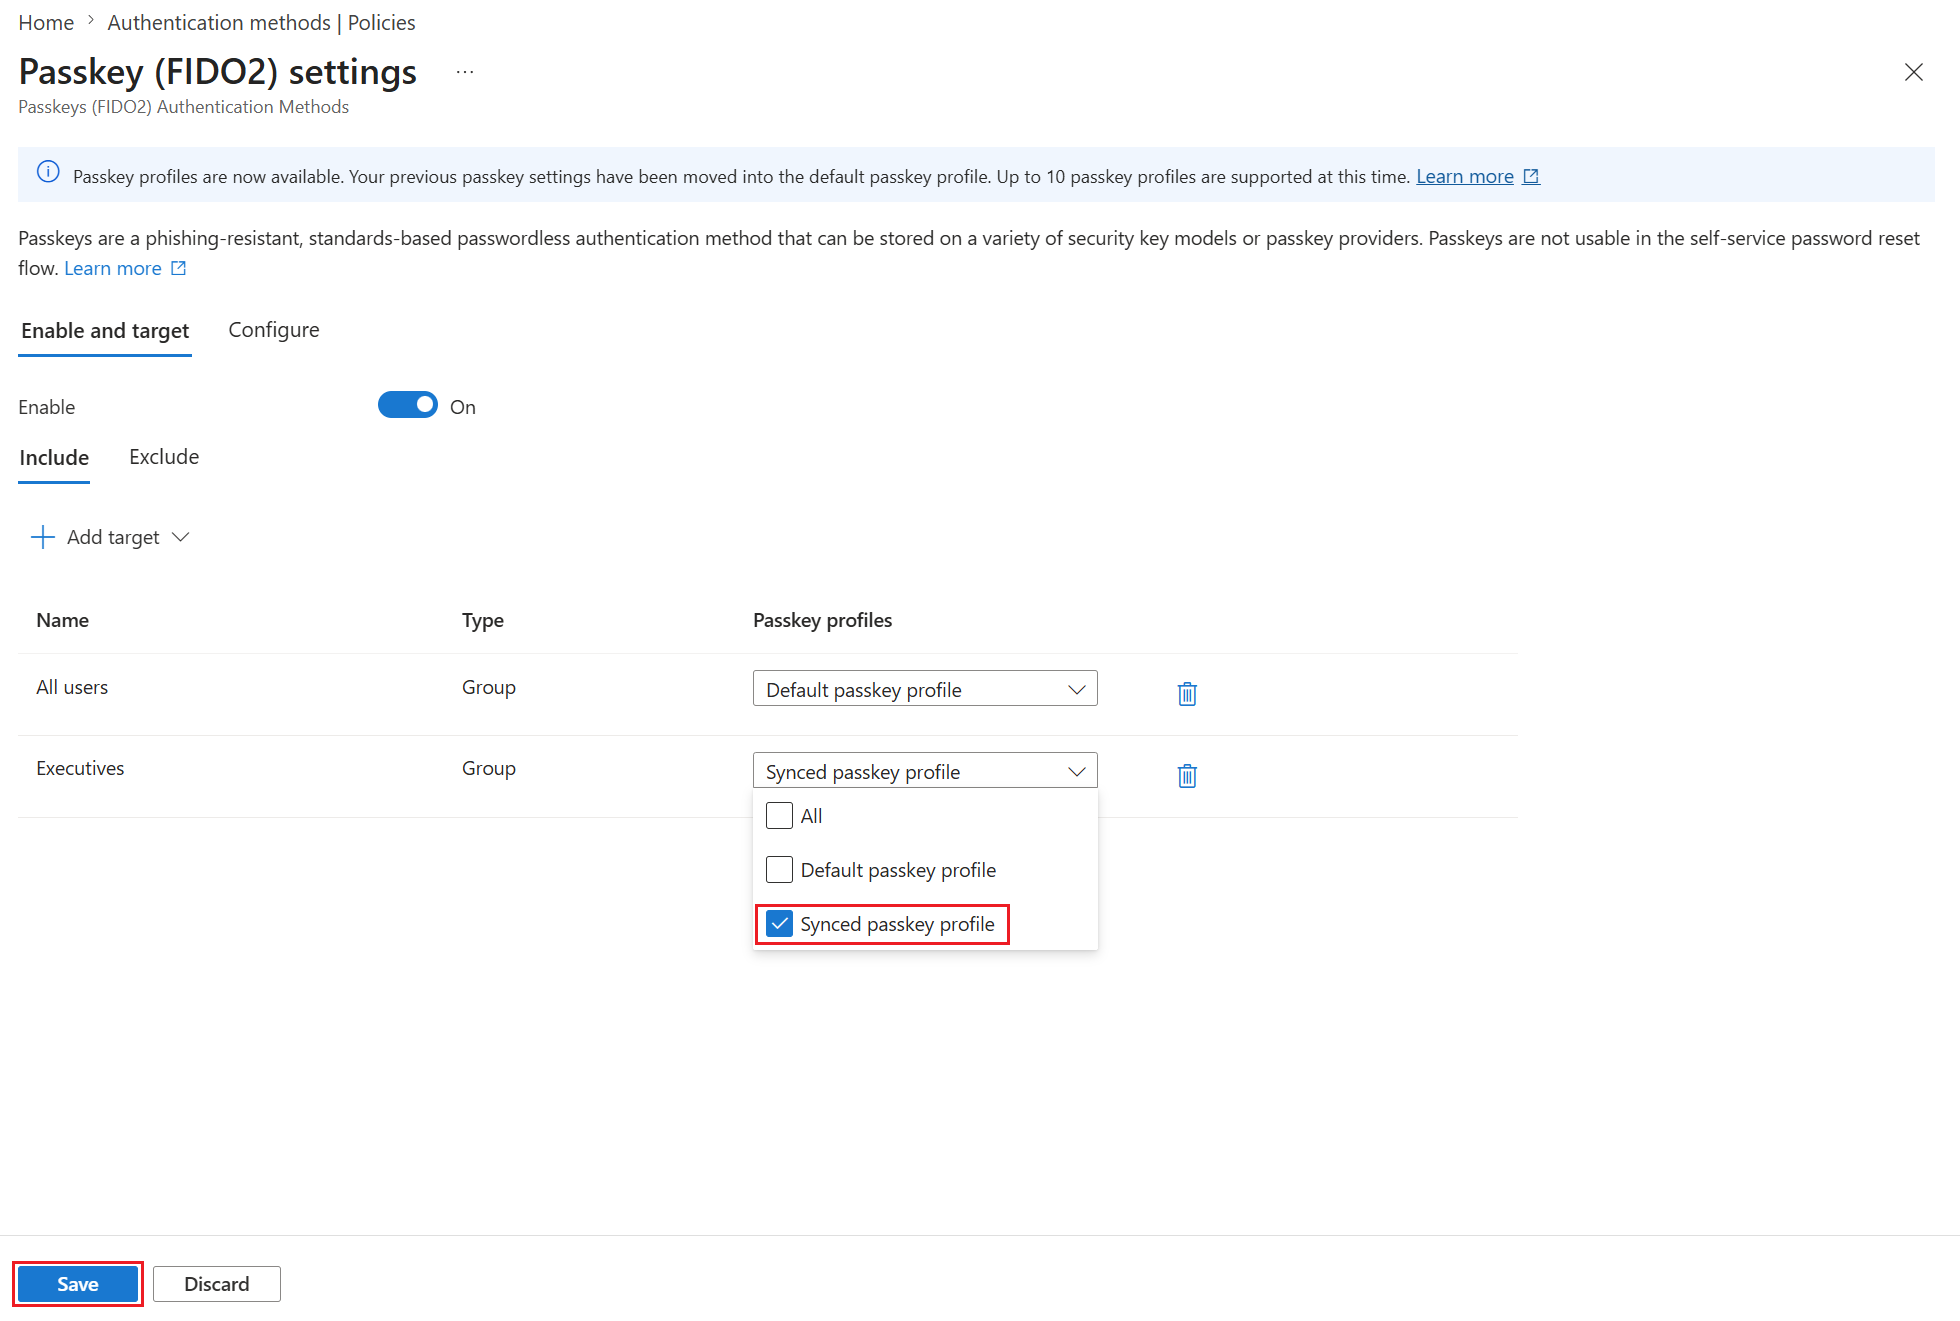
Note
A target group (for example, Engineering) can be scoped for multiple passkey profiles. When a user is scoped for multiple passkey profiles, registration and authentication with a passkey are allowed if the passkey fully satisfies the requirements of at least one of the scoped passkey profiles. There's no particular order to the check. If a user is a member of an excluded group in the Passkey (FIDO2) policy, they're blocked from passkey (FIDO2) registration or sign-in entirely. The block takes precedence over membership in any included groups.
Select Save to enable synced passkeys for the selected users.
Register a synced passkey
After an admin enables synced passkeys, users can register a passkey on their device. The passkey syncs to other devices through the user's passkey provider (such as iCloud Keychain, Google Password Manager, or a third-party provider).
For registration steps, see Register a synced passkey (FIDO2).
Sign in with a synced passkey
After registration, users can sign in to Microsoft Entra ID by using the synced passkey on any device where the passkey is available.
For sign-in steps, see Sign in with a synced passkey (FIDO2).