Note
Access to this page requires authorization. You can try signing in or changing directories.
Access to this page requires authorization. You can try changing directories.
Tenant groups in Microsoft Defender multitenant management let you organize the tenants you manage into named collections and switch the multitenant view between them. Use tenant groups to focus on a specific set of tenants, such as those that belong to a single customer, business unit, or geographic region, instead of viewing every tenant you have access to at once.
Note
The previous use of tenant groups for content distribution is now called distribution profiles. The name tenant groups now refers to the groups of tenants you create to switch the multitenant view, as described in this article.
Prerequisites
Before you can create tenant groups, onboard your tenants to the Microsoft Defender multitenant portal. Only tenants that are already onboarded appear when you create or edit a tenant group. For more information, see Set up Microsoft Defender multitenant management and Manage tenants with Microsoft Defender multitenant management.
Permissions
To access tenant groups, you need the following permissions.
Microsoft Entra ID roles
Product-specific RBAC (for example, Microsoft Defender for Endpoint or Microsoft Defender for Identity)
- Security Administrator
- Custom RBAC roles that grant visibility across products. See Custom roles for role-based access control.
Unified role-based access control (URBAC)
- Security / read to view tenant groups
- Security / manage to create tenant groups
For more information about URBAC permissions in the multitenant portal, see Manage unified role-based access control (URBAC) for multitenant management.
Users only see the tenants they have permission to see through B2B or granular delegated admin privileges (GDAP), even when a tenant group contains more tenants than the user can access.
Access tenant groups
- Sign in to the Microsoft Defender portal with appropriate administrative credentials.
- Go to Multi-tenant management > Tenant groups.
The first time you open the page, you see My private group, which contains all tenants from your previous multitenant settings. You can add or remove tenants from My private group, but you can't delete it.
Create a tenant group
- On the Tenant groups page, select + Create tenant group.
- Enter a descriptive name for the tenant group.
- Optionally, enter a description.
- Select the tenants you want to add to the group.
- Select Create.
Switch the view between tenant groups
In the top-left corner of the multitenant portal, select Open multitenant management.
Select the tenant group you want to view.


After you switch groups, browse the different views in the multitenant portal and confirm that the data shown comes only from the tenants in the selected group.
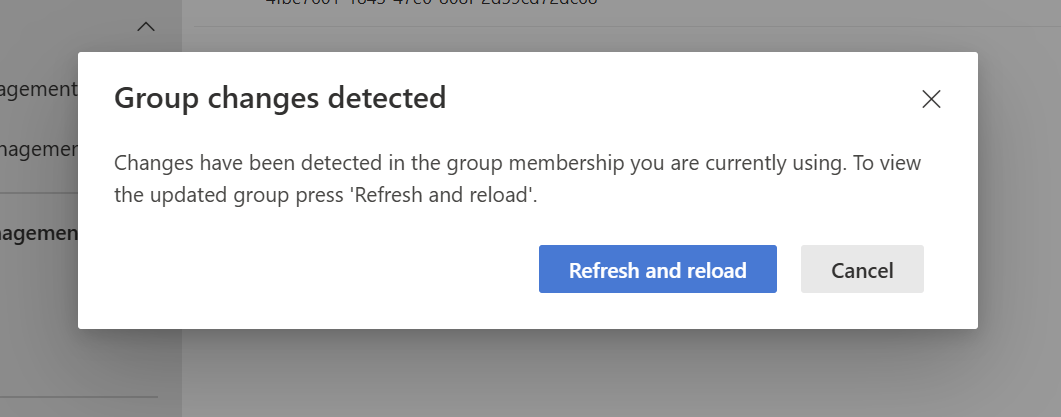
If someone edits a tenant group (by adding or removing tenants) while you have a view open for that group, the portal shows a notification that a change was detected. Refresh the view to load data for the updated set of tenants.
Edit a tenant group
- Go to Multi-tenant management > Tenant groups.
- Select the tenant group you want to change, and then select Edit.
- Add or remove tenants as needed, and then save your changes.
- Switch the view to the edited tenant group to confirm the data reflects the updated membership.