Note
Access to this page requires authorization. You can try signing in or changing directories.
Access to this page requires authorization. You can try changing directories.
To create a table app using PowerTable, use one of these four approaches:
- Upload Excel or CSV file to import data
- Connect to an existing database table
- Enter data directly into the table app
- Connect to a semantic model
In this article, you learn how to create a table app by importing an Excel or CSV file.
Important
This feature is in preview.
Prerequisites
Before you begin, make sure that you have the following prerequisites in place:
- Connections established to the Fabric SQL database and/or semantic model that contain the data for your PowerTable.
- A plan item created in your Fabric workspace.
Create a PowerTable sheet
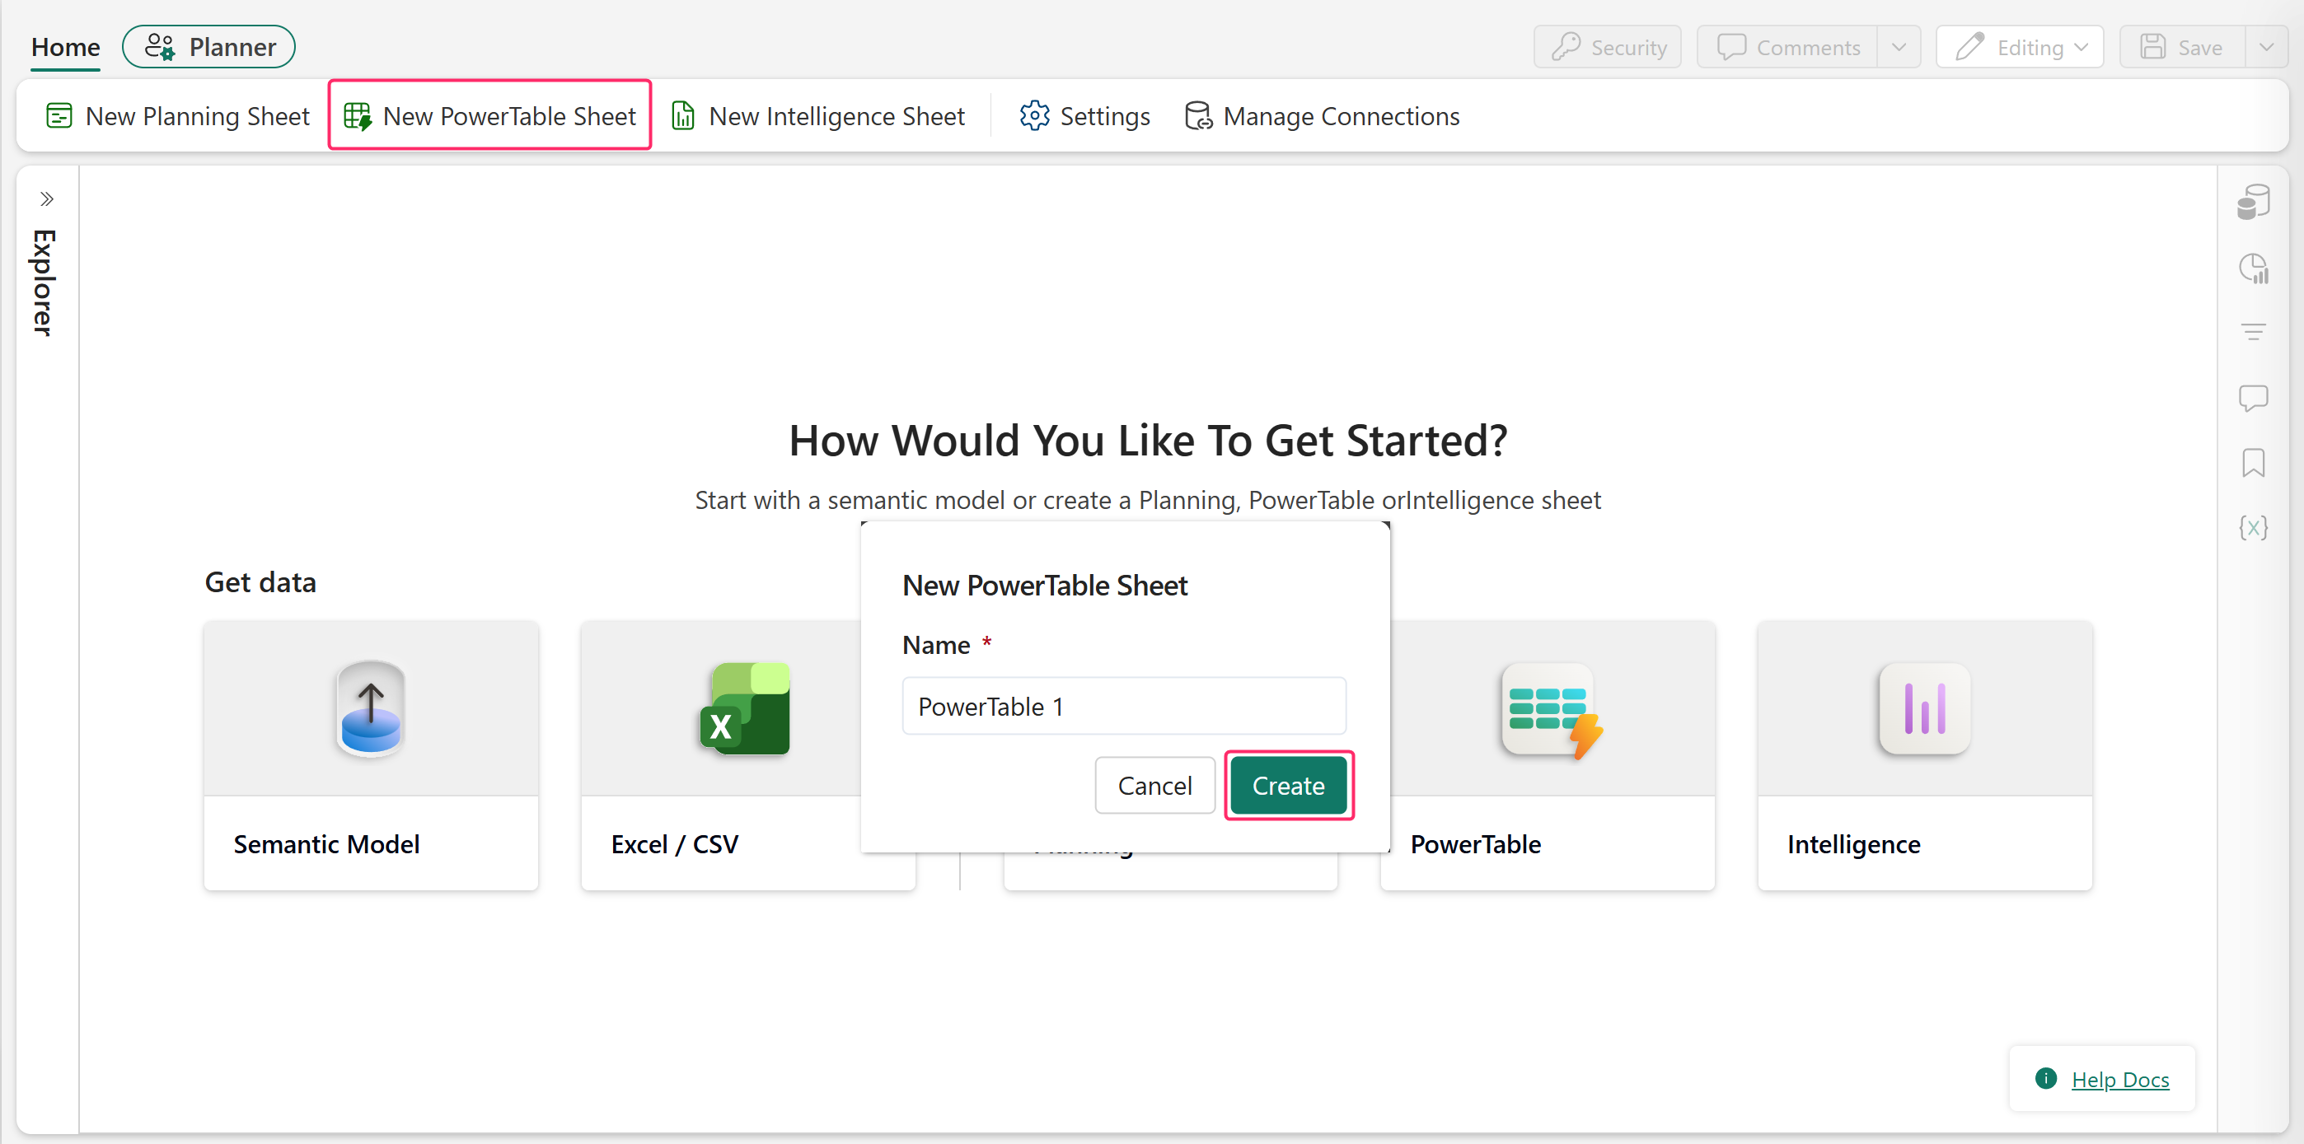
In your plan, select New PowerTable Sheet or select the PowerTable icon on the landing page. Enter a name for the sheet and select Create.
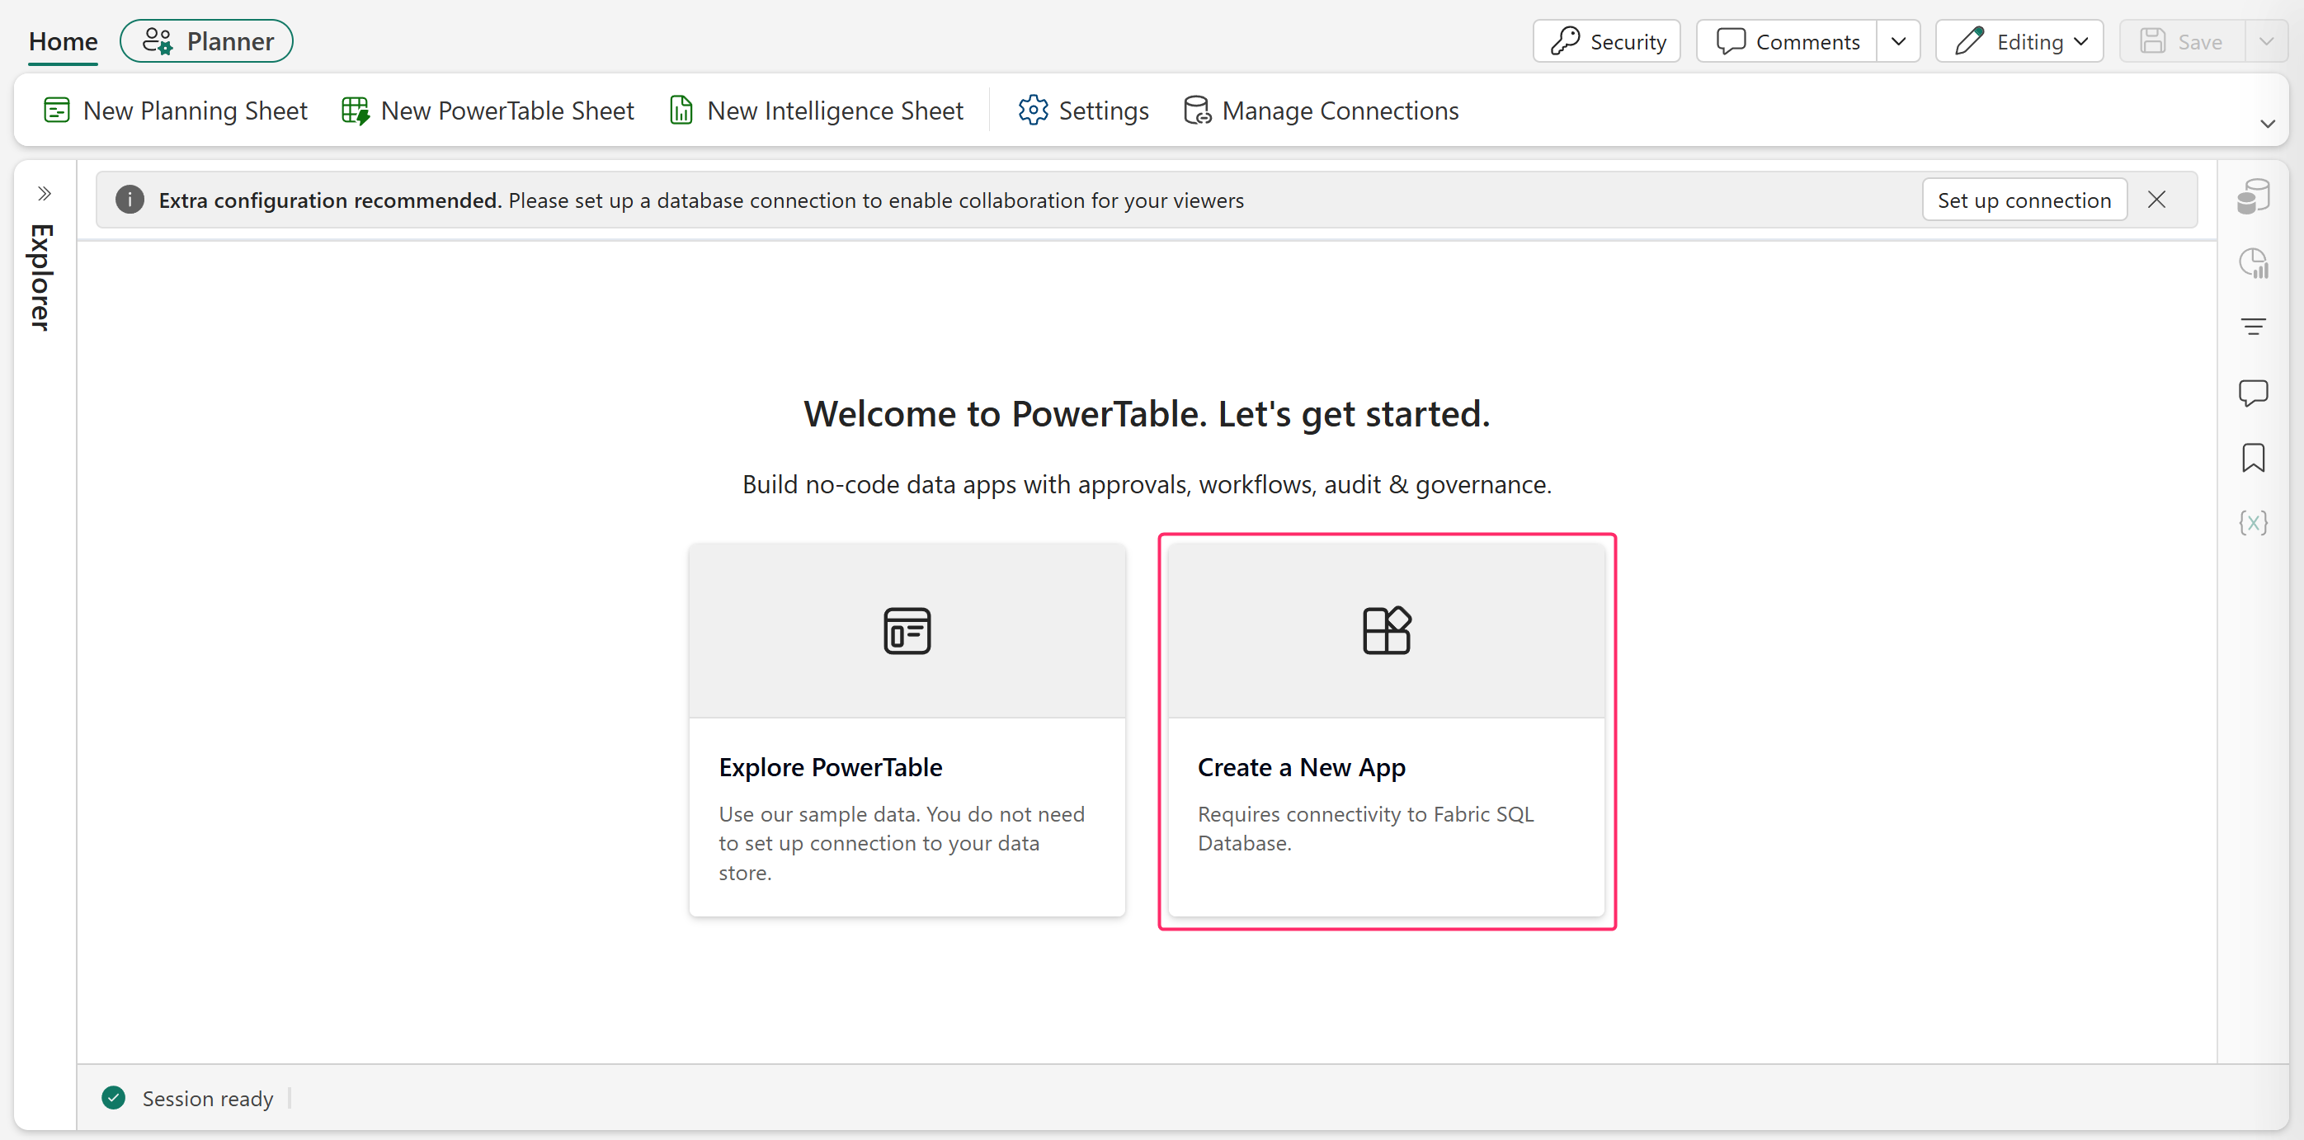
Select Create a New App to create your app. You can also select Explore PowerTable to experience a sample PowerTable app.
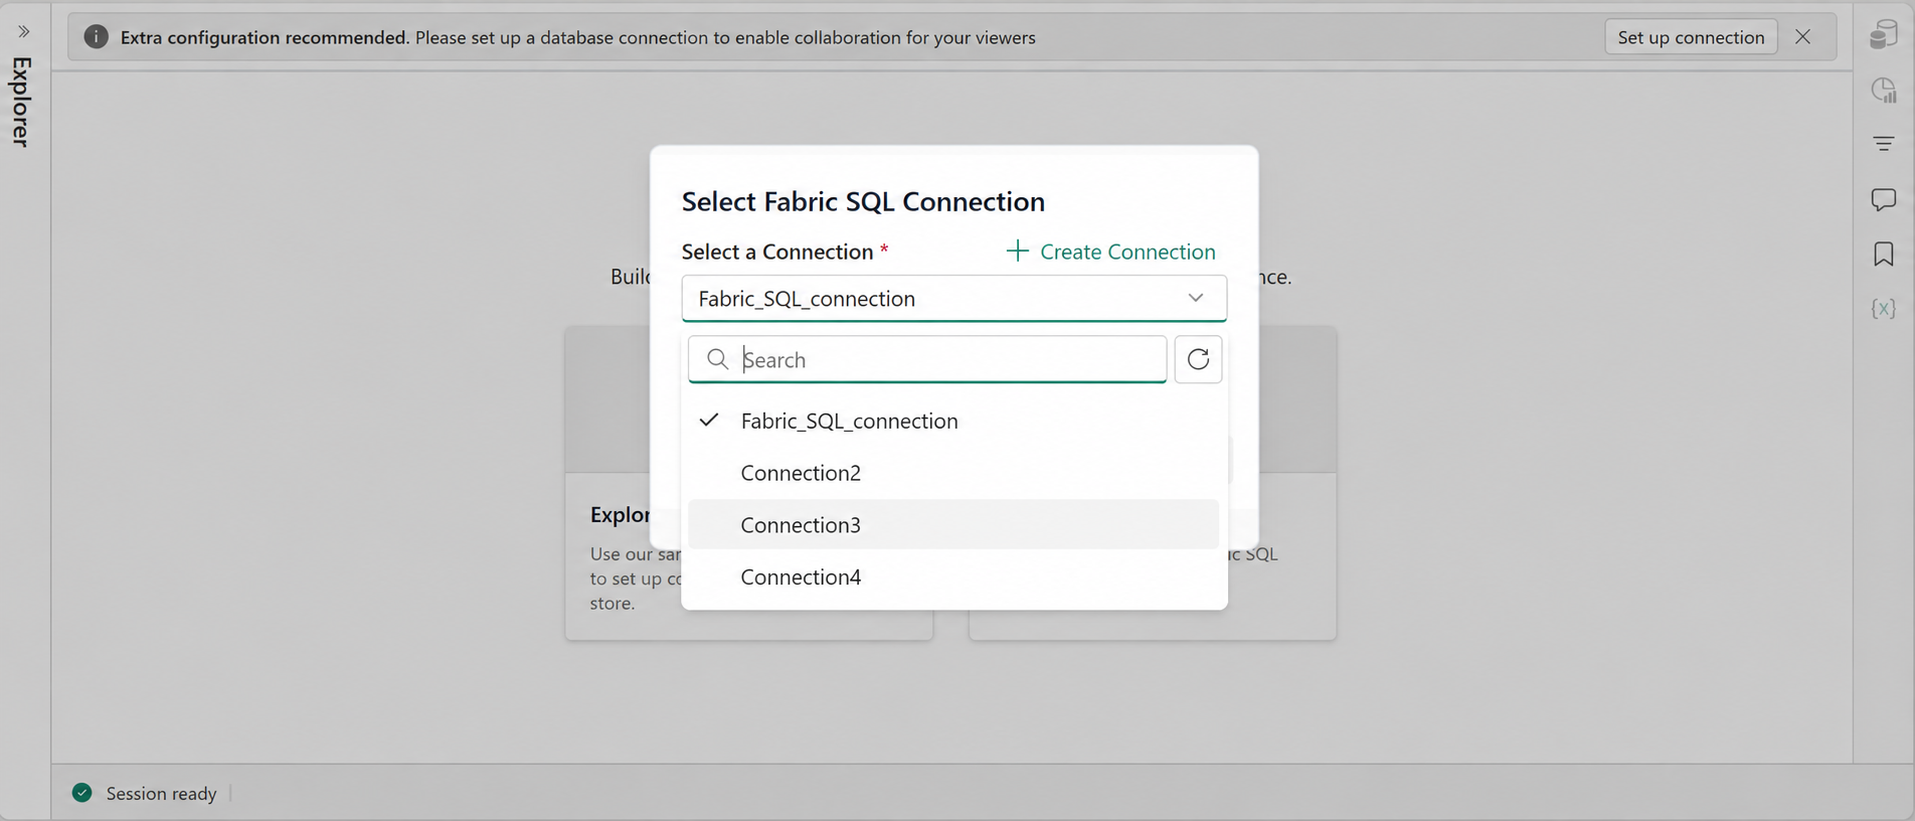
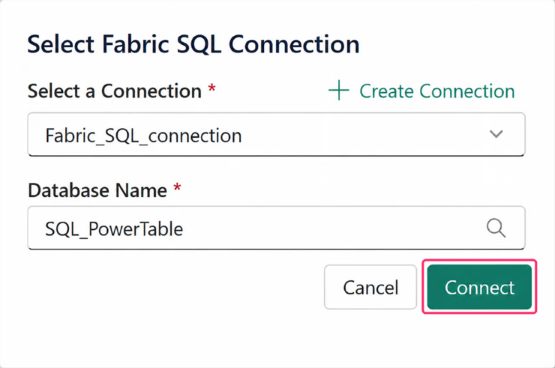
Select a Connection: Choose a Fabric SQL connection if available. If there are no connections, create one by selecting Create Connection.
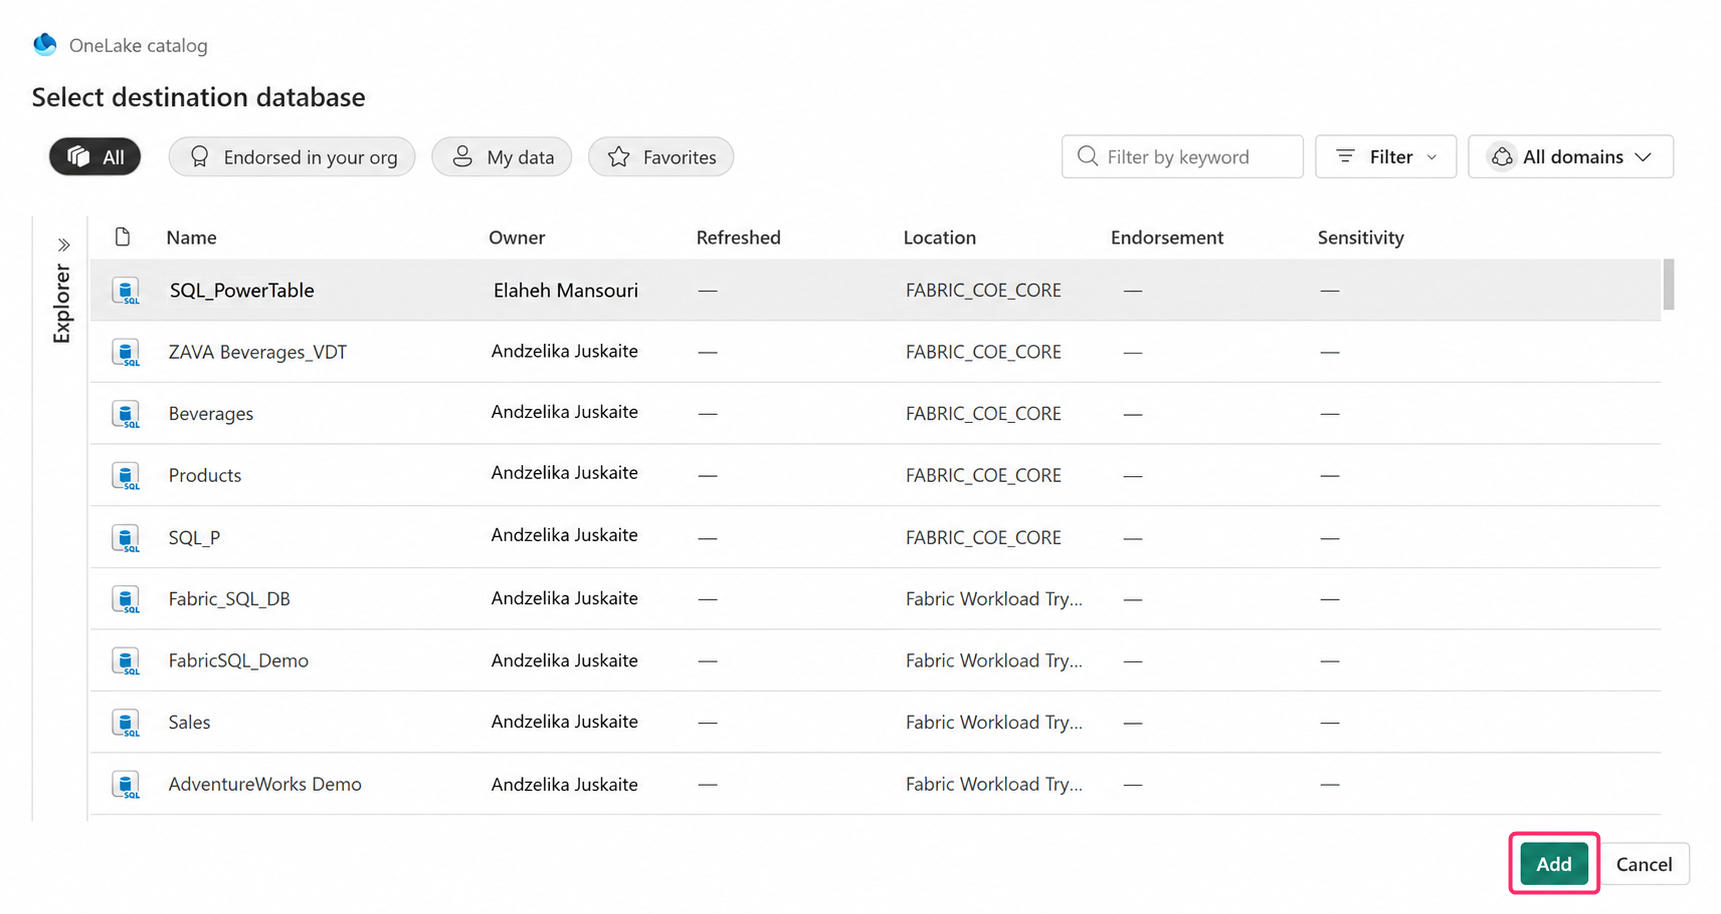
Database Name: Select the destination Fabric SQL database to store the table data. Select Add.
Select Connect.
Create a table
Select a table for the data to be stored in. There are two options:
- Select Existing Table to connect to an existing table in the Fabric SQL database, OR
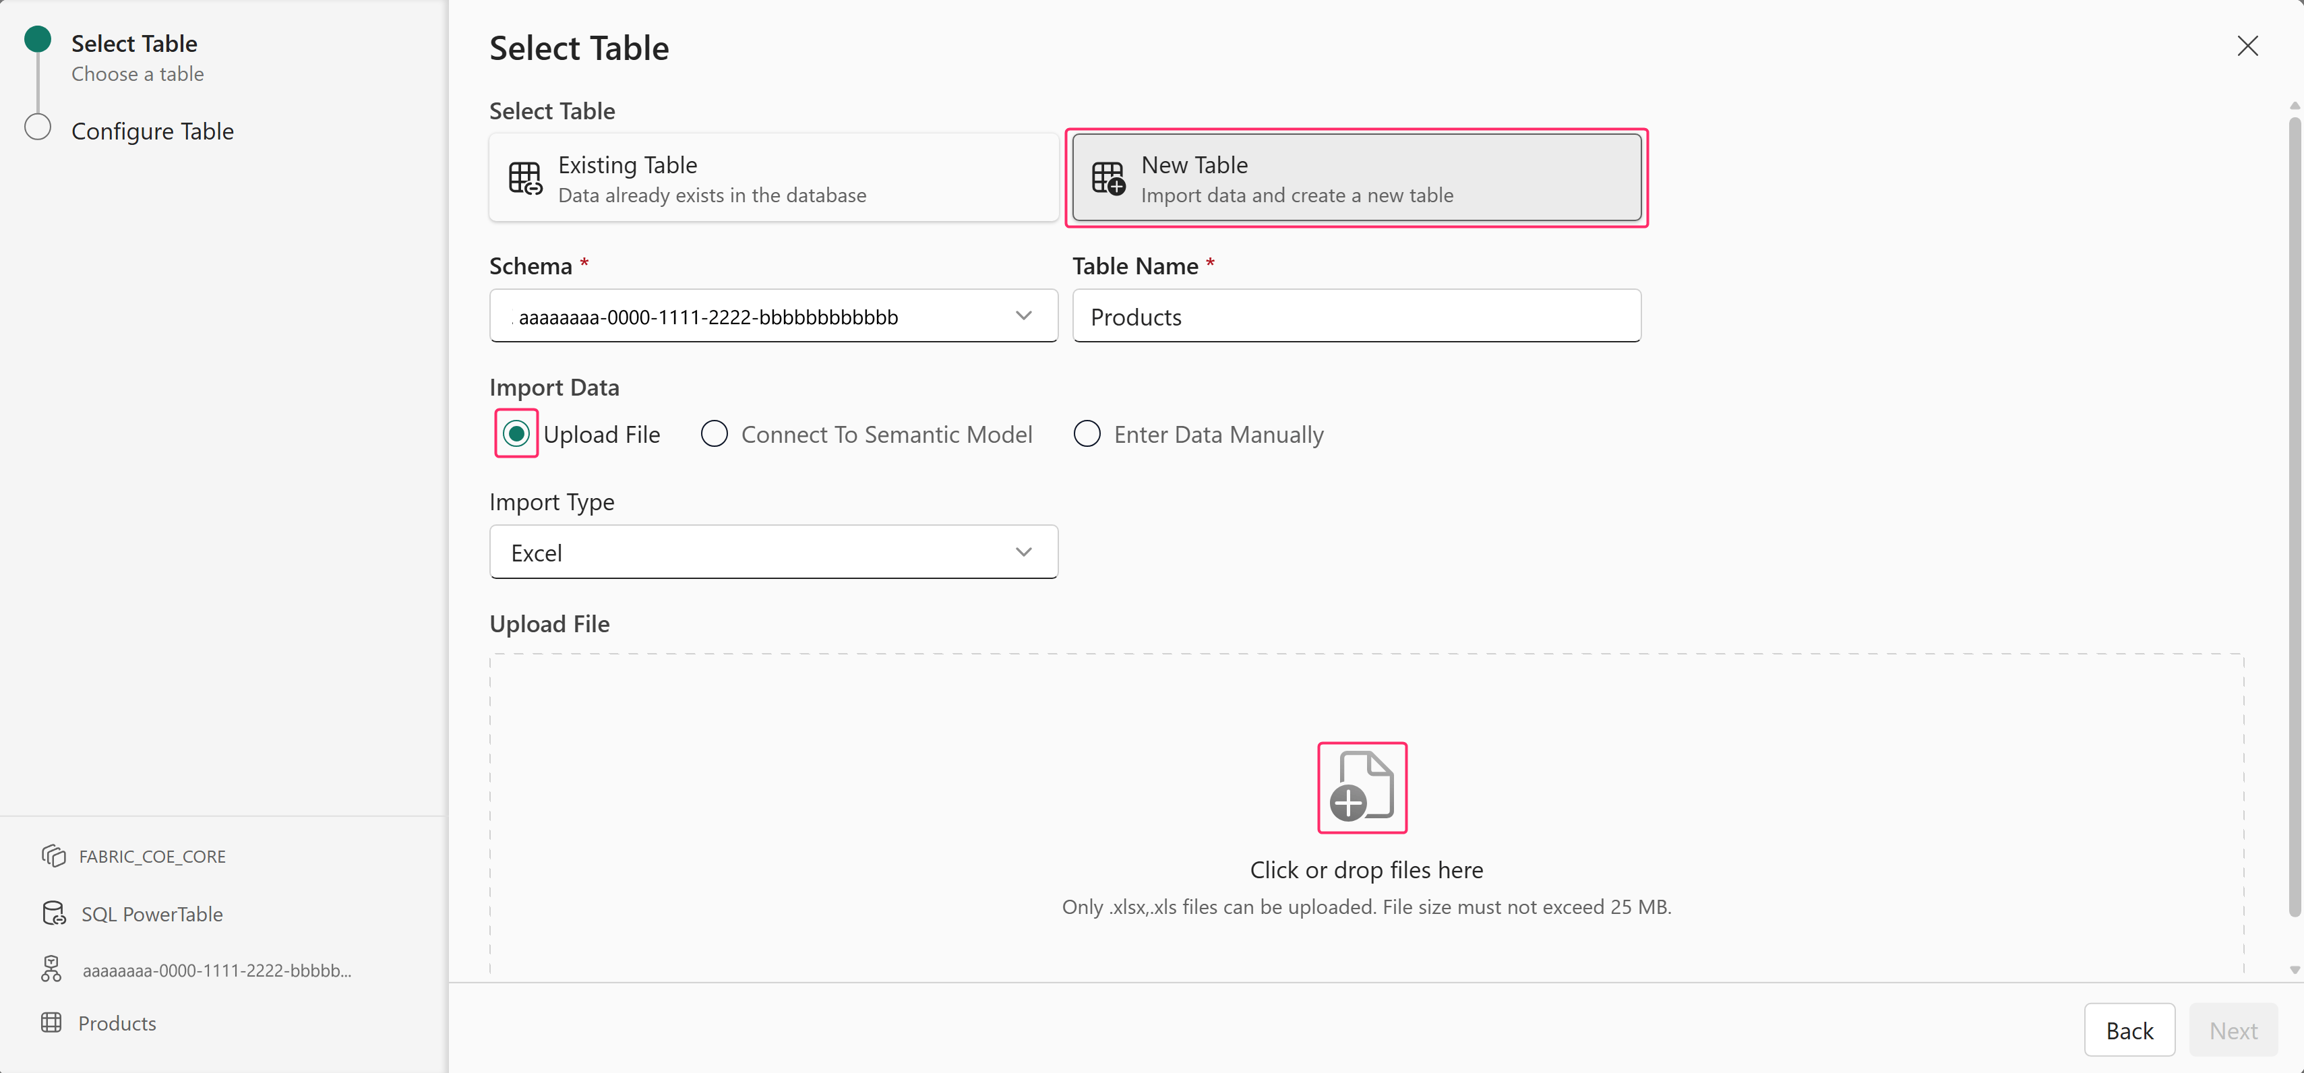
- Select New Table to create a new table in the database. This option is shown in the next steps.
To create a new table and import the Excel or CSV data, follow these steps:
Select New Table.
Choose the database schema.
Enter a Table Name.
Select Upload File in the Import Data section.
Select the space to upload the CSV or Excel file from your local system.
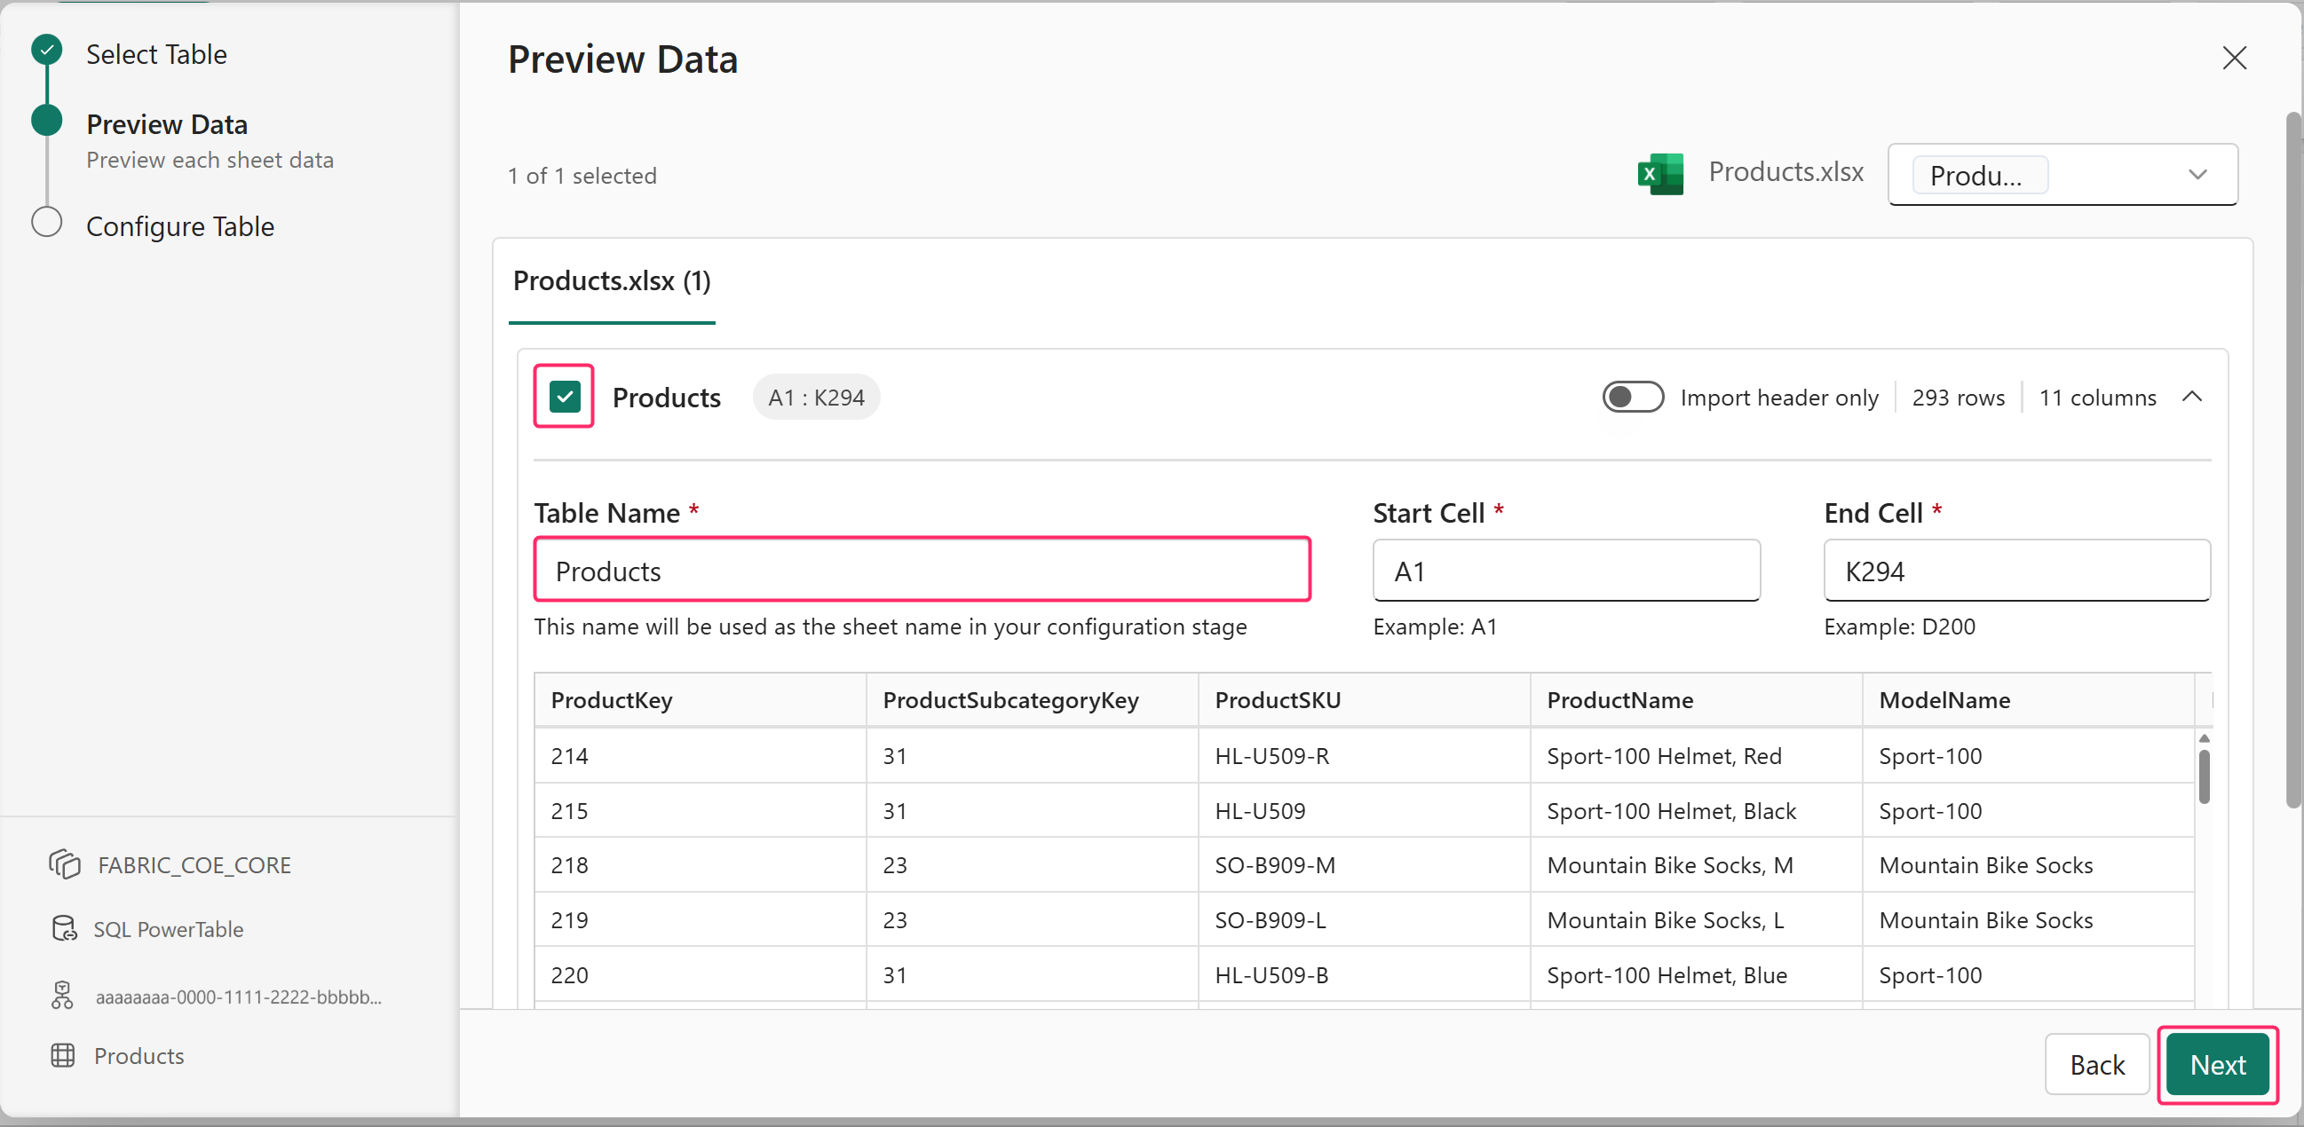
Select the sheet that contains the data you want to import.
- Enter a name for the table.
- Review and, if necessary, modify the start and end cell ranges that contain the data to import.
- Preview the imported data, and then select Next.
Note
To import only the headers, toggle on Import header only.
Configure table
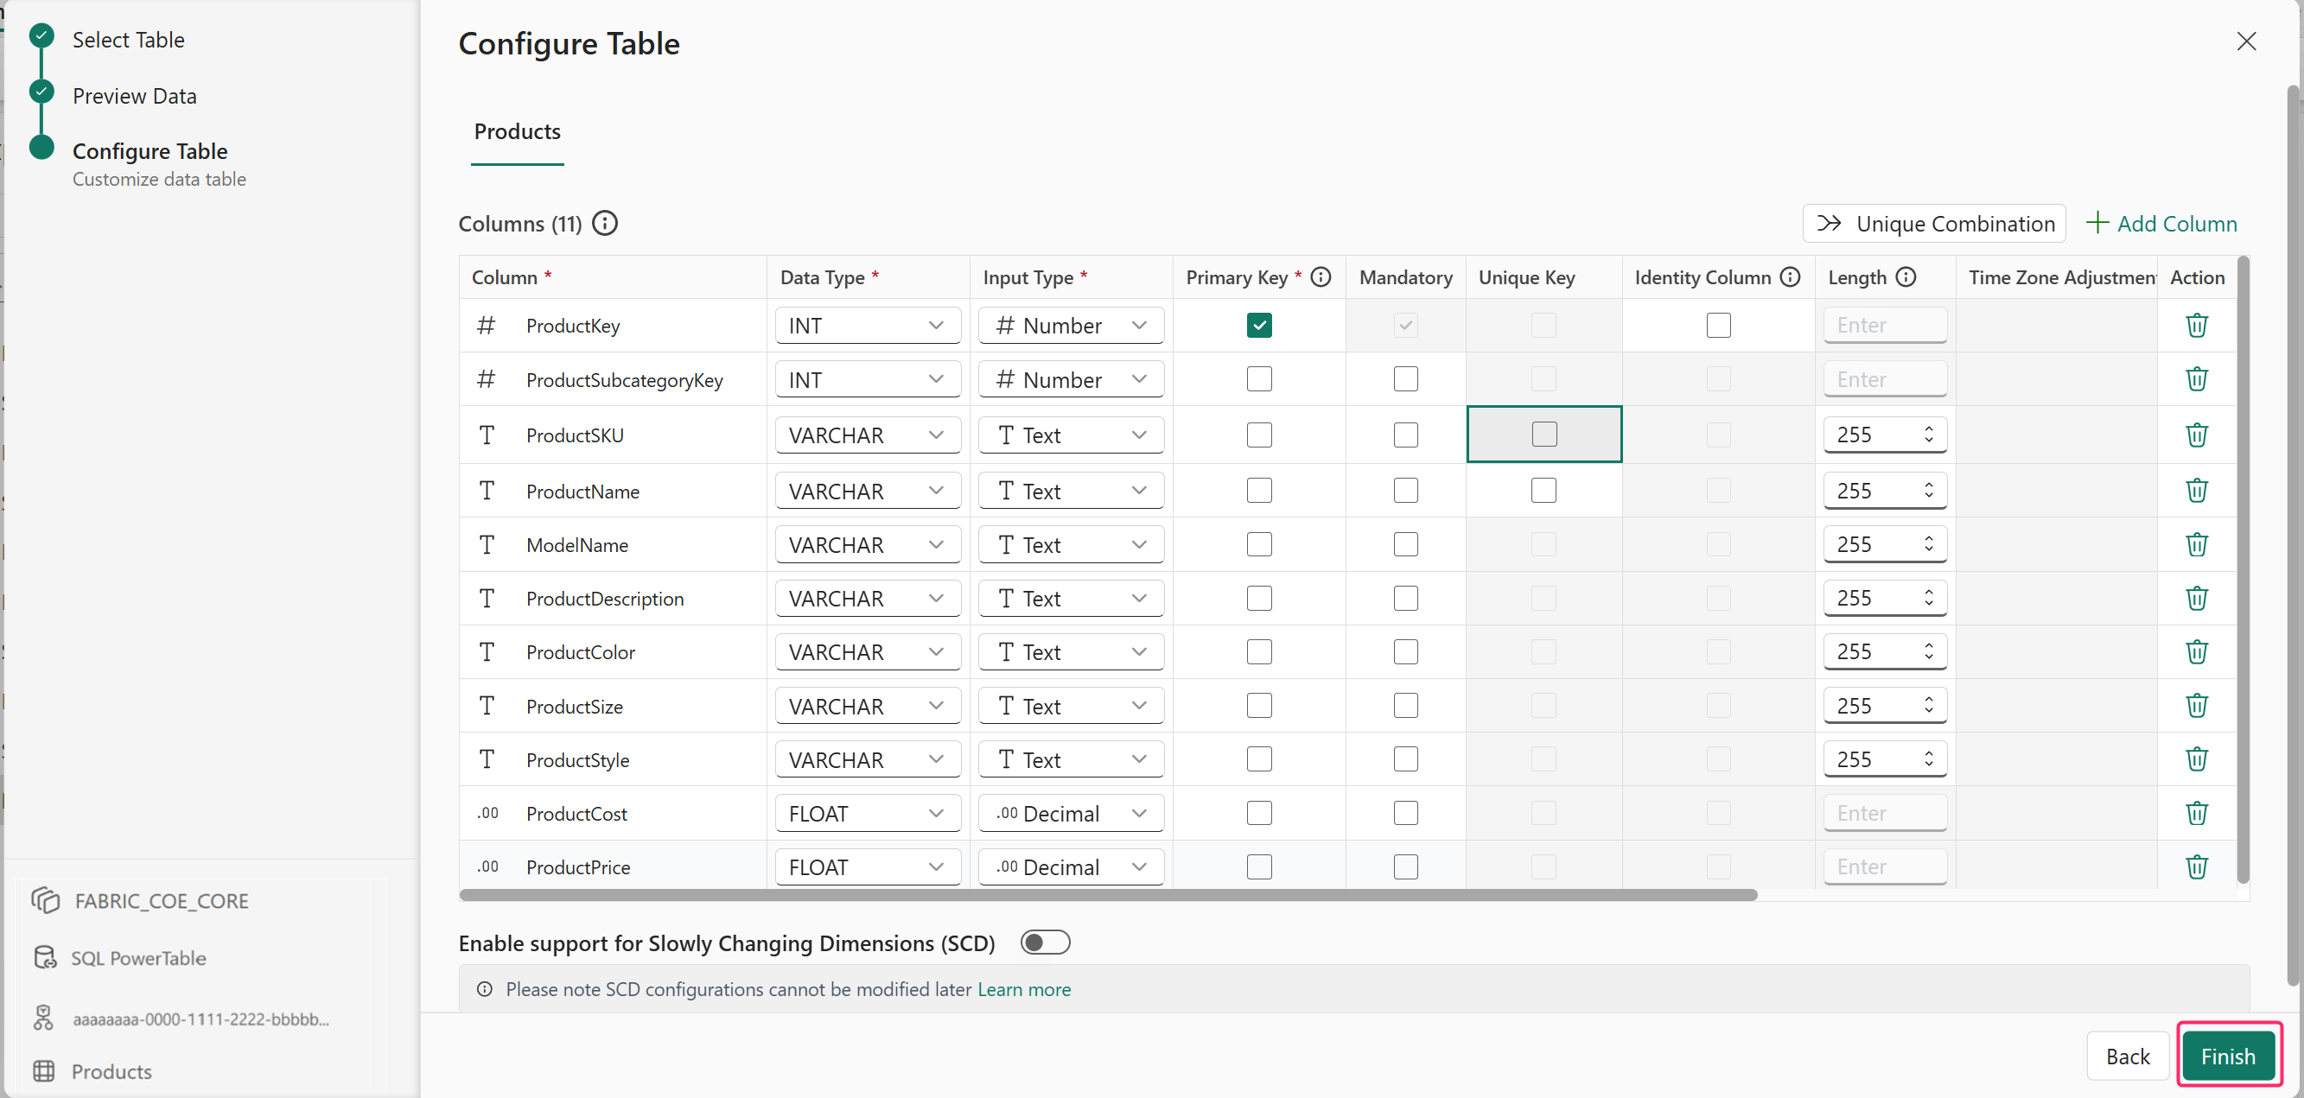
PowerTable sheets automatically detect column properties and rename any unsupported column names to match the supported format. You can review and modify them as needed.
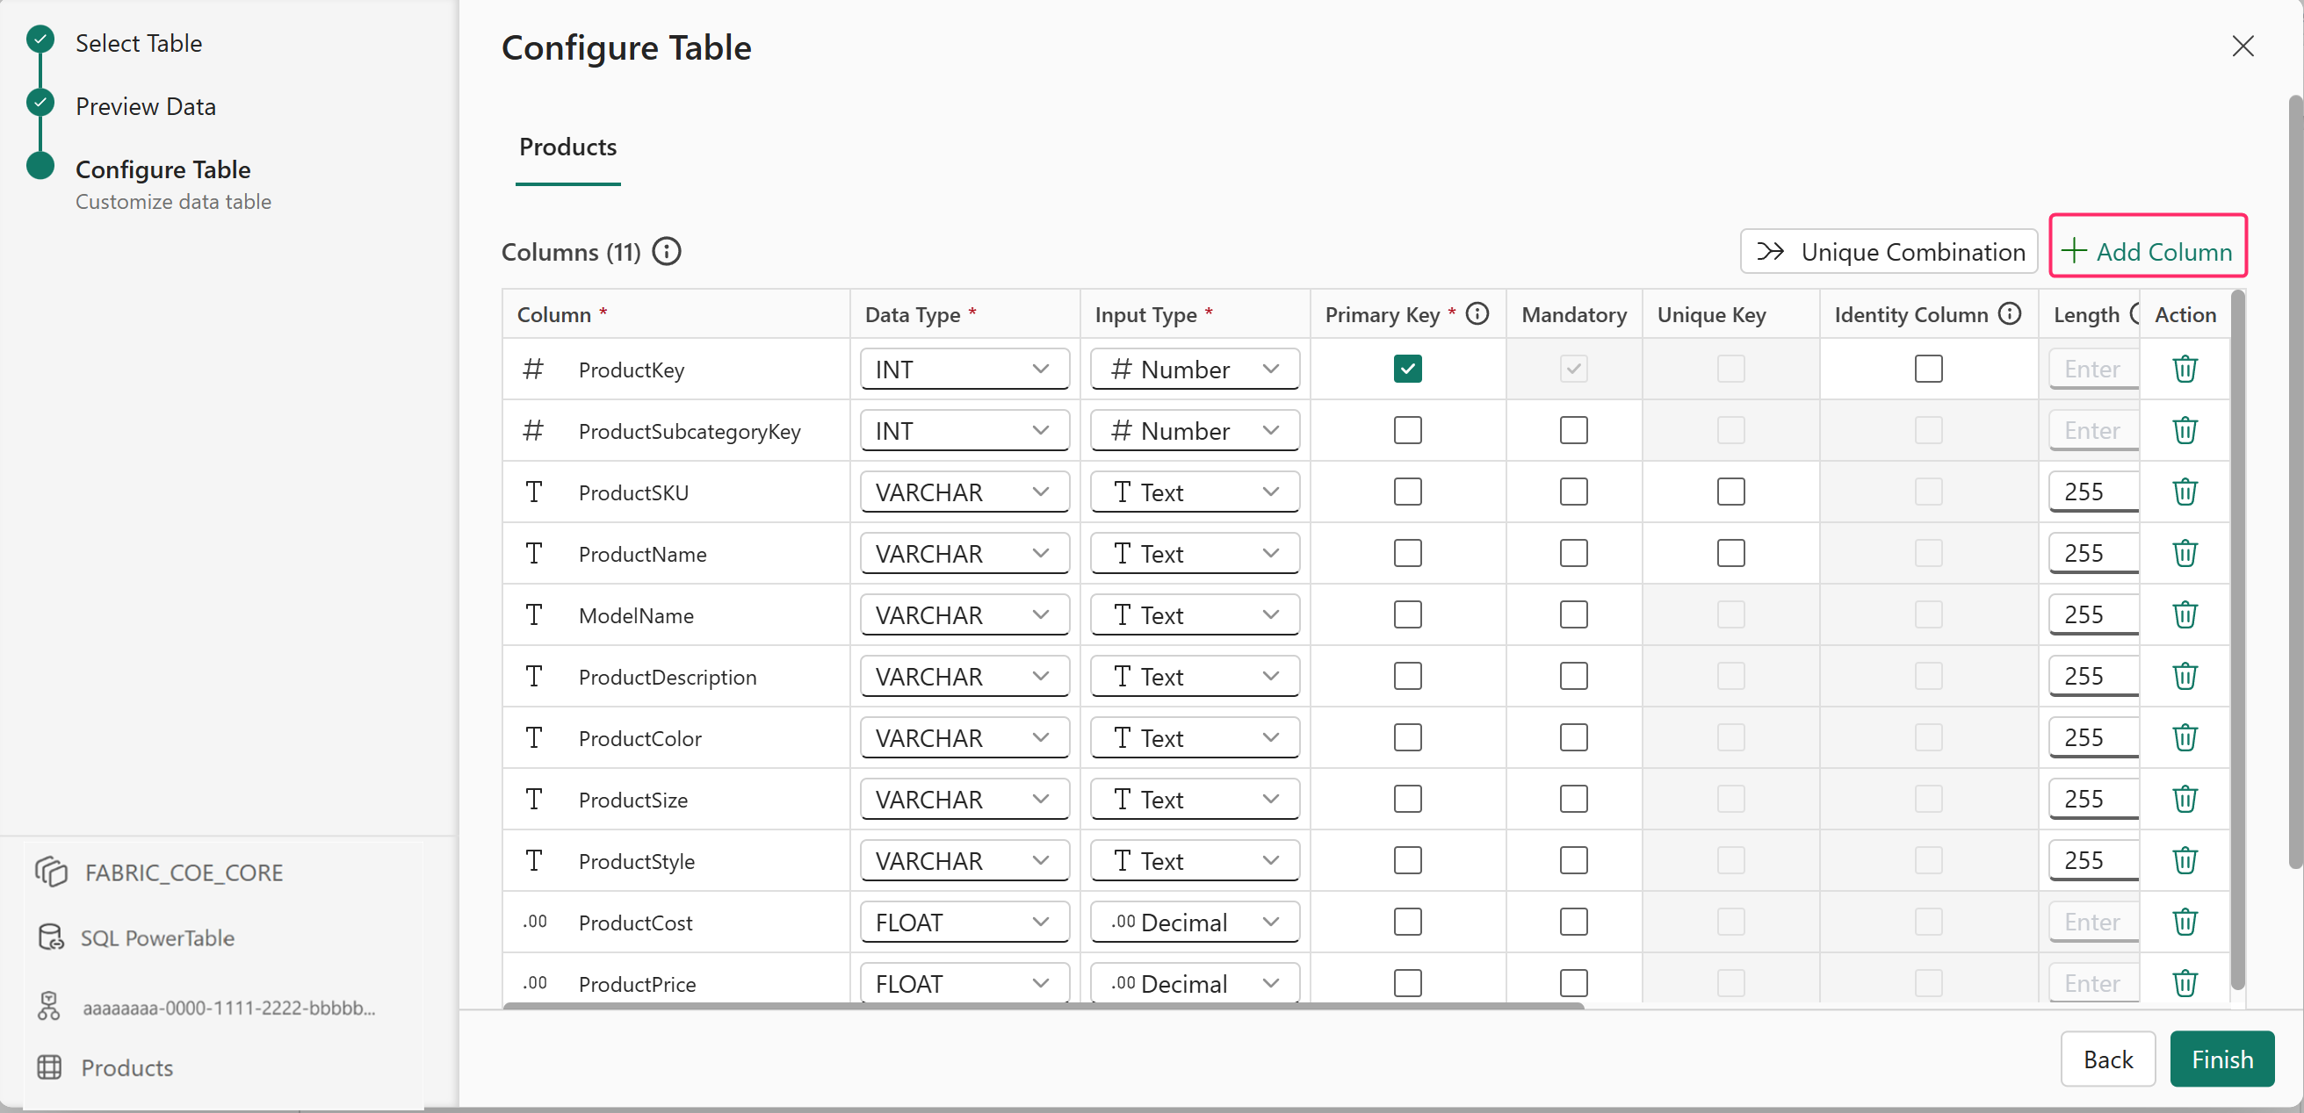
- Review the detected column settings.
- If the primary key isn't selected, select the appropriate column as the primary key.
- Configure columns as required:
- Mark fields as Mandatory if they must contain values.
- Set fields with distinct values as Unique Key to allow unique values.
- Set a column as an Identity Column when you need PowerTable to generate unique, sequential values automatically. Only numeric columns and primary key columns can be configured as identity columns.
- Modify column properties, including:
- Length
- Data type
- Input type
- Display name
- Enter default values for columns, if required.
- Optionally, select Add Column to create additional columns.
- To create a composite primary key, select Unique Combination, and then select two or more columns to define a unique combination key.
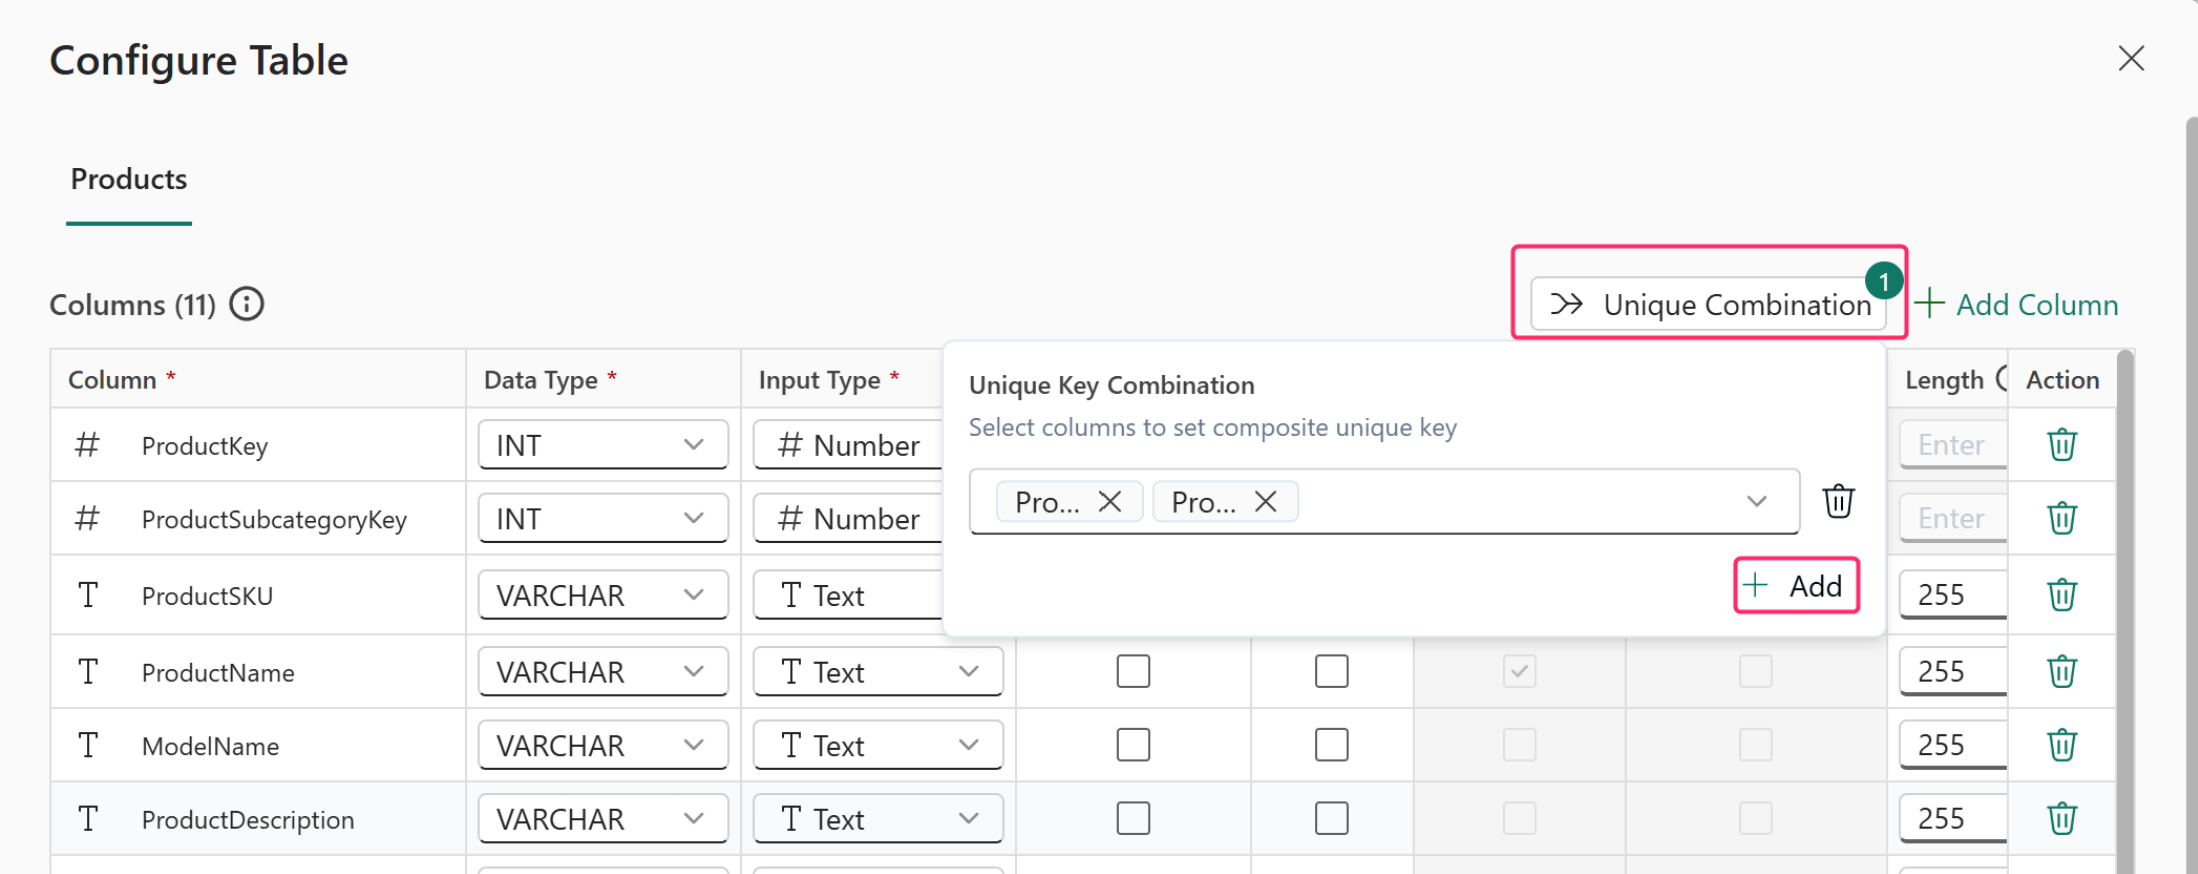
Note
In this step, you can enable Slowly Changing Dimensions (SCDs) by turning the toggle. For a table, this setting is a one-time configuration that you can't change later.
Select Finish.
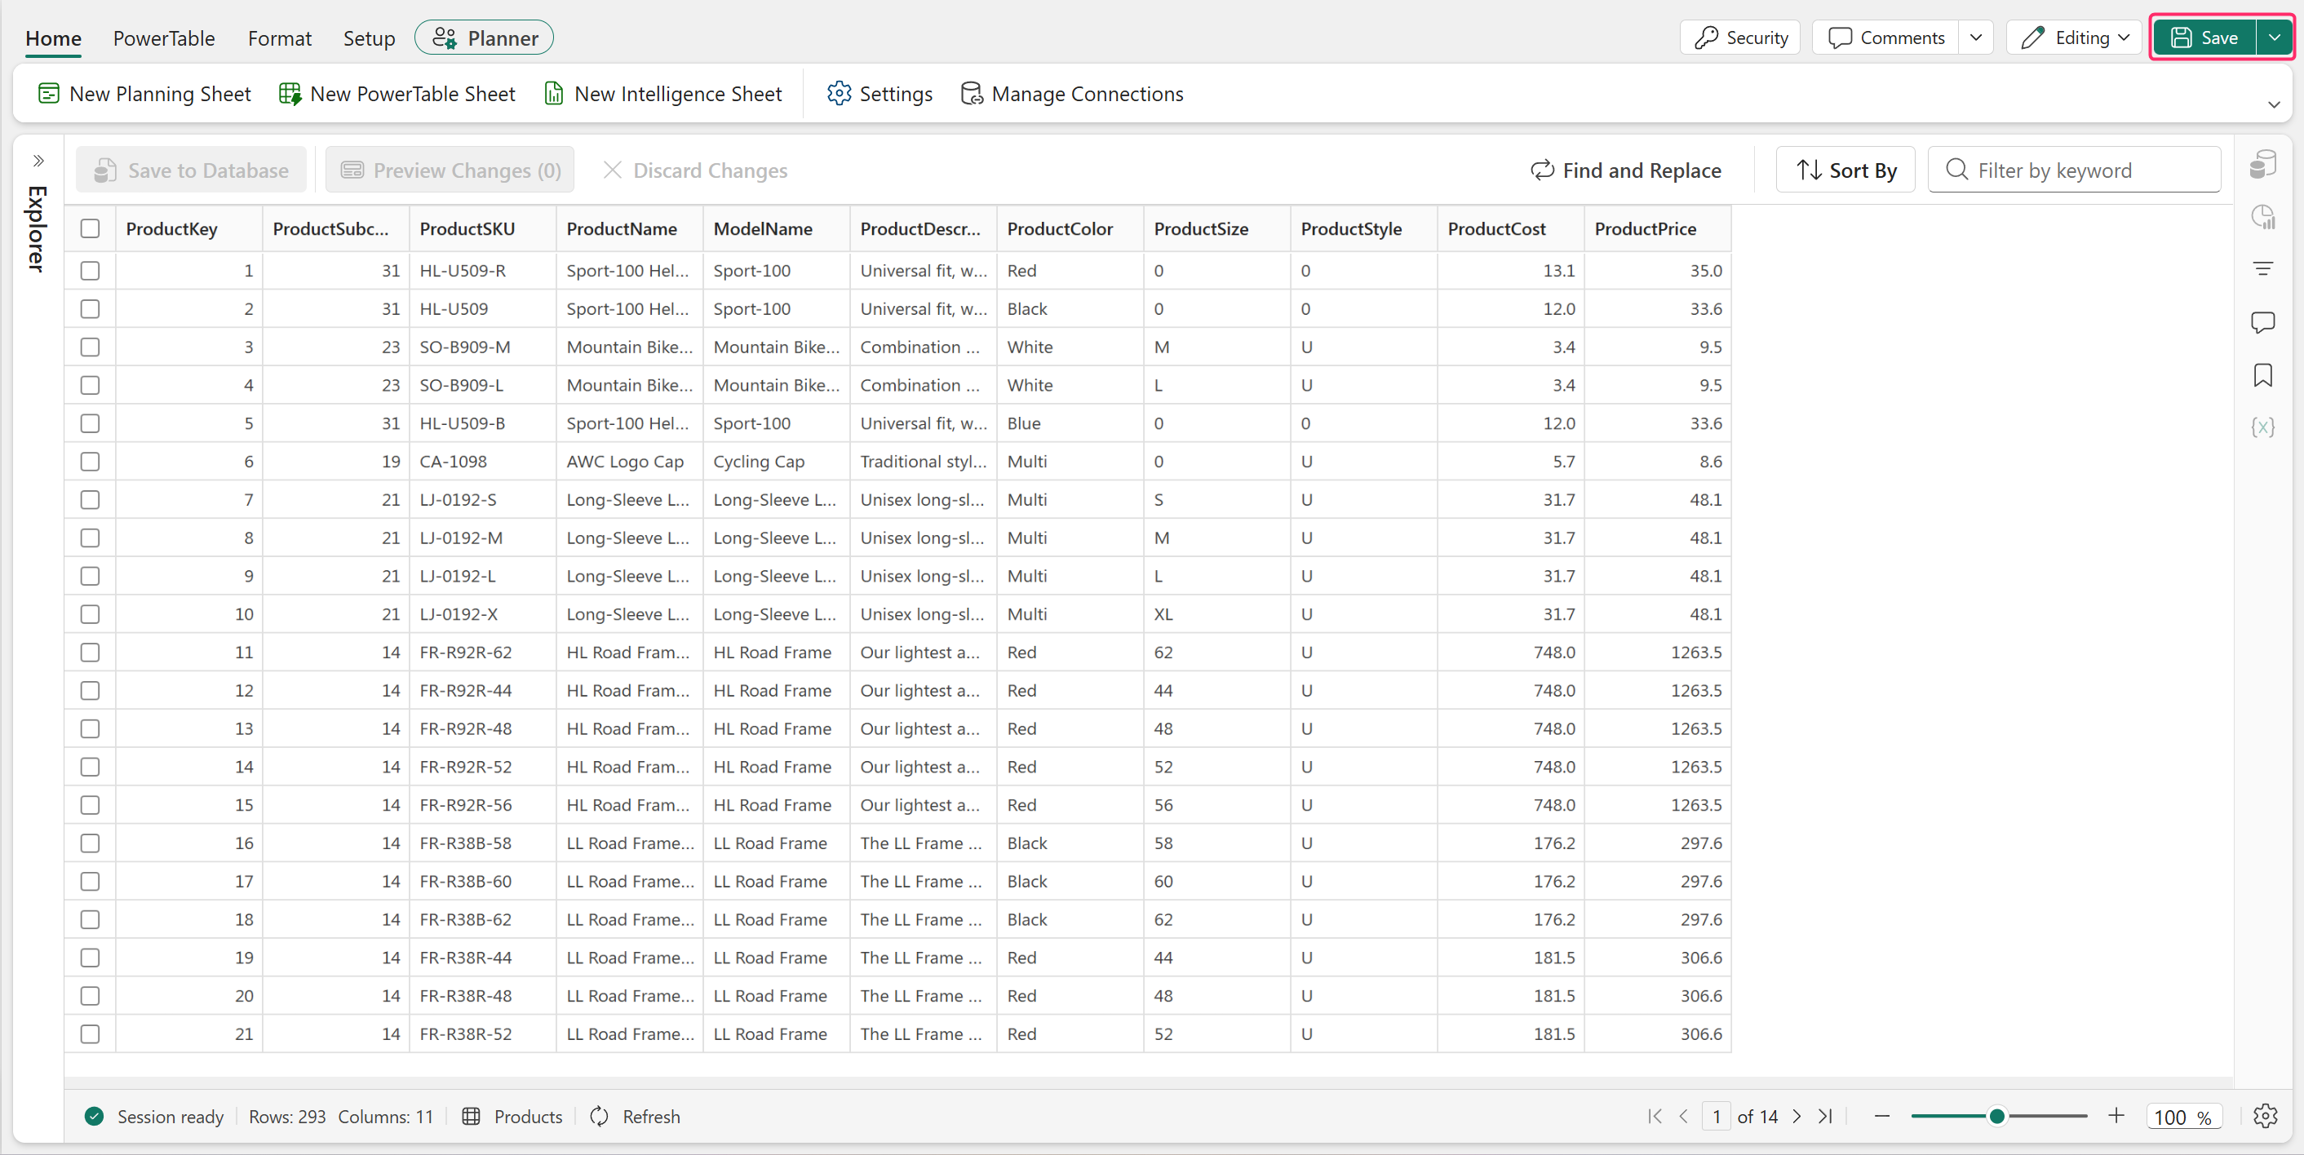
The table app is created successfully in PowerTable with the configured columns and values. Select Save to save your table.
Write back changes to source
You can update your data table and sync changes with the source database.
To edit a cell in the table, double-click it, enter the value, and select Enter.
With Preview Changes, you can preview the changes.
Select Save to Database, then Proceed to save the changes instantly (unless an approval workflow is enabled).
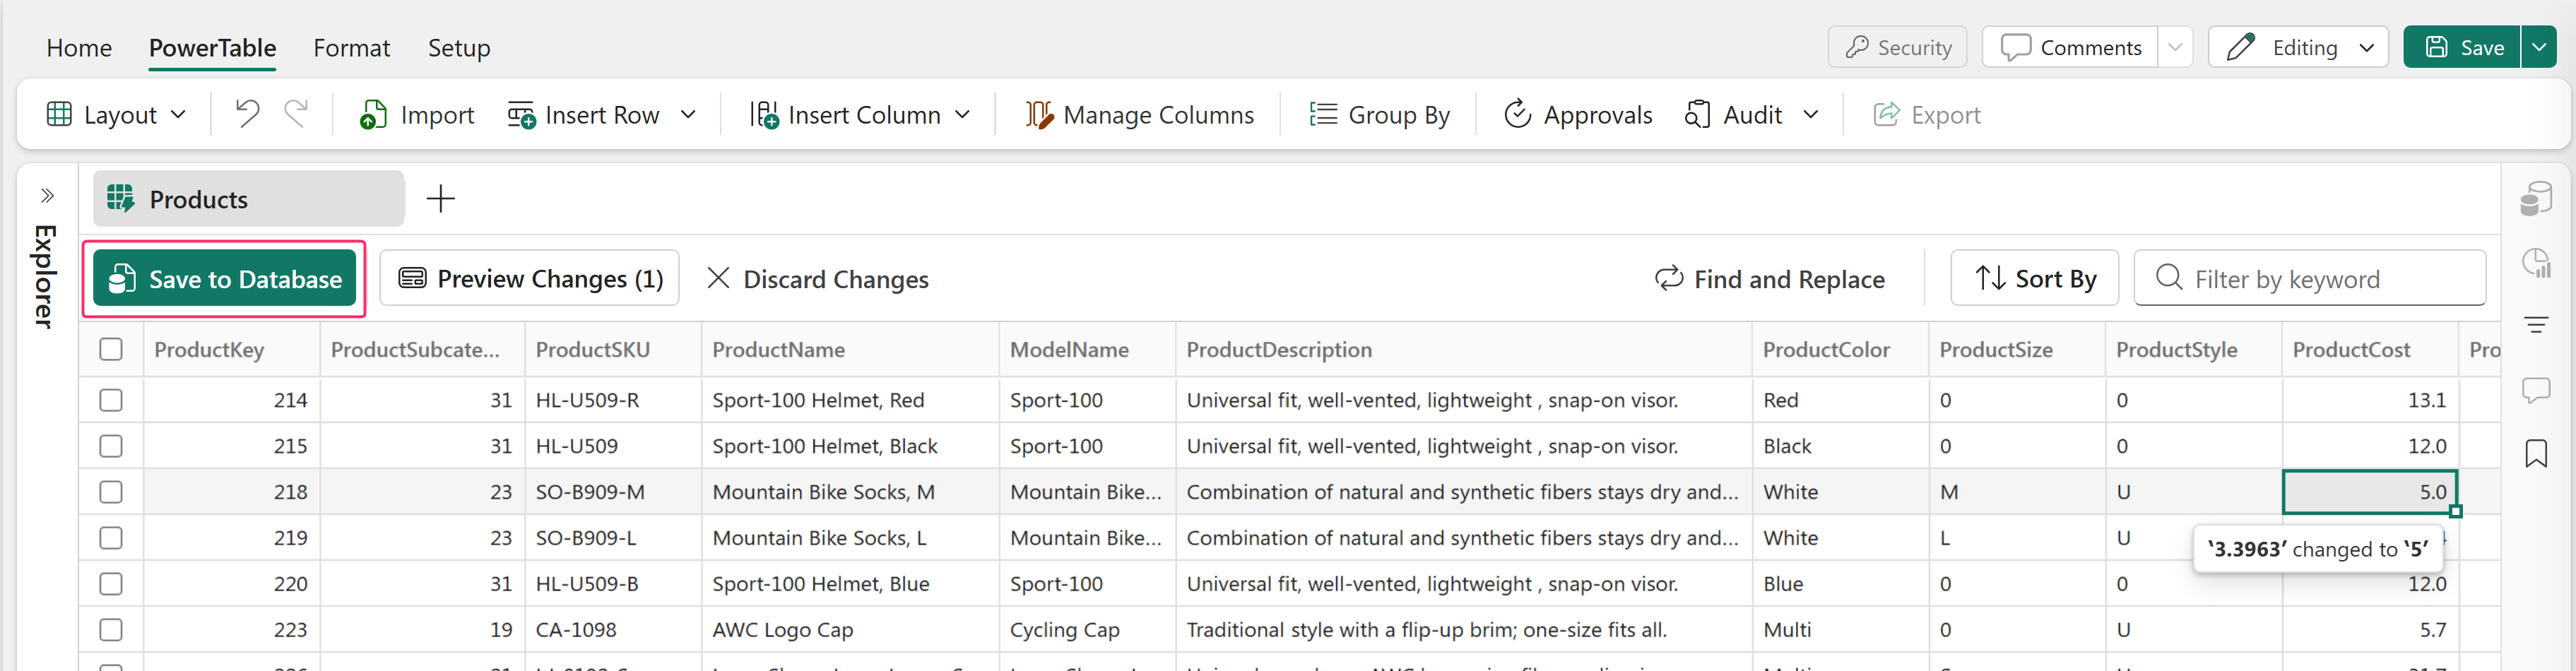
The source database is updated.
Select PowerTable > Audit. The audit trail records all changes in detail, including the Row ID, action type, modified columns, previous values, new values, user name, and timestamp.

Next steps
After creating your first PowerTable application, explore these other features:
- Reference data management: Manage master and reference data centrally while maintaining synchronization with enterprise data platforms. PowerTable sheets provide support for bulk insert/update, lookups, formulas, cascading updates, audit tracking, CRUD permissions, SCD support, and native Microsoft Fabric SQL DB integration.
- Project management: PowerTable sheets provide Gantt layouts and timeline views to manage project schedules, track progress, and monitor dependencies.
- Workflow management: Approval workflows enable governance over sensitive data updates by routing change requests through designated approvers.
- Operational automation: Event‑driven automation enables teams to automate repetitive processes such as record updates and notify them via email/Teams notifications.
- Collaborative data management: Comments, threaded discussions, mentions, and notifications allow teams to collaborate directly within the data application.
- Productivity: Use forms for structured data collection and insertion without coding. Use the master-detail view, cross-tab view, and resource layout for time management, task management, tracking, and resource planning.
- Connected planning: Link PowerTable tables to plans so updates in PowerTable sheets become inputs for a plan. This process allows a change in your revenue forecast to automatically flow into headcount, cash flow, and operational plans.
Related content
Other ways to create a table: